
Anaconda is an open-source platform for data scientists working with python or R programming languages. It works as both a package manager and an environment manager, and you can create virtual environments and install packages very easily using it.
Introduction
Anaconda is one of the best open-source distribution for python and R programmers to work with data science, AI, Scientific computing, and many more exciting tasks. It has a built-in package manager named conda, which can be used by us to install packages easily. It has a collection of over 7,500+ open-source packages, which includes everything we will need for Data Science.
Today this software is used by many Data Scientists, IT professionals, and business leaders who work to develop the future of Data Science and AI. Anaconda includes the conda command-line tool and also a desktop graphical user interface called Anaconda Navigator, hence it is useful for command-line lovers and GUI users well. Let us see some of the best features of Anaconda, which make it popular in the community and also how to install it and how it can be used to install packages.
Features of Anaconda
Anaconda comes with lot of excellent features.
- On installing Anaconda, more than 250 Useful packages are automatically installed with it. So you will get the crucial packages pre-installed, and you don’t have to install them manually.
- Several additional open-source packages (including R) can be individually installed from the Anaconda repository with the command. There are also thousands of other packages available at the Anaconda Cloud.
- You can download other packages that are not available at conda but available at the PyPI repository using the
pip installcommand. Pip comes pre-installed with Anaconda, so you don’t have to install it manually. Pip packages provide tons of features of conda packages, and in some cases, they can work together. However, you should use the conda packages if they are available instead of using pip. - You can also make your custom packages using the command. You can then share it by uploading them to Anaconda Cloud, PyPI, or other repositories, allowing other users to install the package and use it.
- Anaconda also comes with its own version control system, so if you want to work with different versions of python, then you can do it using simple commands.
Now, as we know what Anaconda is and its features, let’s try to understand how we can install Anaconda and set up an environment to work on our favorite Linux Operating System.
Installation and Configuration
Anaconda is open-source software, and it is also easy to install in any Linux distros. To install Anaconda, you need to perform the following steps.
Step 1: Updating the Local Package Manager
To start the installation process of Anaconda on Linux. First, Update your local package manager. Open the terminal window and enter the following command.
sudo apt-get updateThis will update your local package manager. The output of the above command will be something like in the below image.
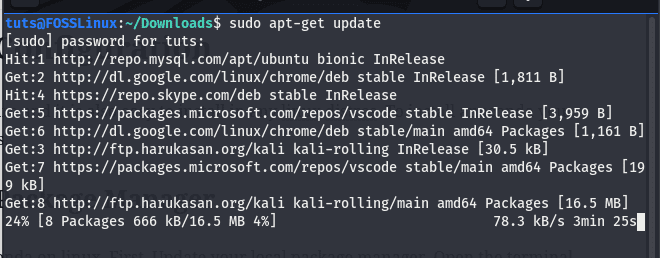
Updating the local packages
Step 2: Downloading the Latest Version of Anaconda
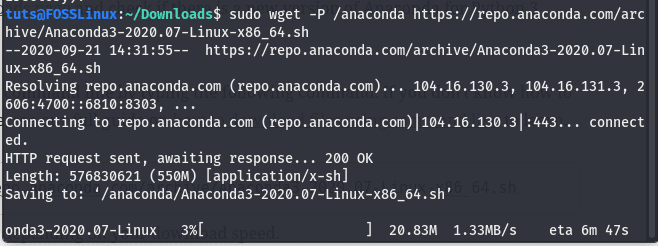
The latest stable version of Anaconda is version 2020.07, as of when this article was written. Before proceeding further, go to the Downloads page and see a newer version available for download.
Download the installer script using the command line by typing the following command. If you don’t know how to download files using the command line, see our full guide on downloading files using the command line to learn.
sudo wget -P /anaconda https://repo.anaconda.com/archive/Anaconda3-2020.07-Linux-x86_64.shIf everything is OK, then the download should start, as you can see in the below image. After completion, you should have the installer script of Anaconda in a folder named Anaconda in your current working directory.
Step 3: Verifying The Checksum
This step is optional, but is recommended. A checksum is a security tool used to verify the authenticity and integrity of the downloaded script. We can use the sha256sum command to display the script checksum. Type the following command in your terminal.
sha256sum anaconda/Anaconda3-2020.07-Linux-x86_64.shThis command will output an SHA-256 hash, as shown in the below image.

Checksum
We need to compare it with the hash given in the anaconda website for our installer. If the hash is not similar, then the file may be damaged or changed by someone, so for security reasons, we must always check the hash of the downloaded file, especially when stakes are high.
Step 4: Running the script to start the installation
Till now, we have downloaded the installer file of Anaconda and also checked its security. Let us run the installation file and install Anaconda. To run the installer, type the following command in the terminal.
bash /anaconda/Anaconda3-2020.07-Linux-x86_64.sh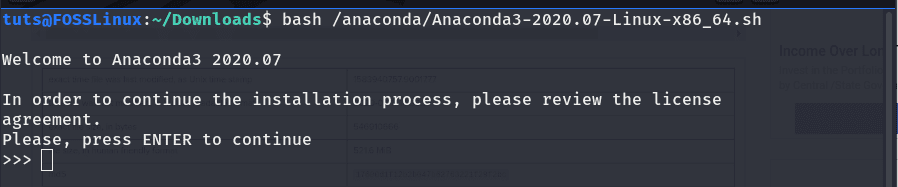
installing anaconda in Linux
Press Enter to continue to scroll down to read the License Agreement, then approve the license terms.
Do you accept the license terms? [yes|no]If you have no problems with the license terms and conditions, then type yes to approve the license. Then it will ask you to choose the location where Anaconda should be installed in your system.
Anaconda3 will now be installed into this location:
/tuts/anaconda3

  - Press ENTER to confirm the location
  - Press CTRL-C to abort the installation
  - Or specify a different location below
If you are satisfied with the default location, then press the Enter key else you can also specify another path. Now Anaconda will be installed in your system; this may take some time. After the installation is completed, it will ask you whether to run conda init or not.

Type yes to add the conda command line tool to your system path. Now open a new terminal and type the following command to verify if the installation is successful.
conda --versionIf the command is successfully executed and returns the version of conda as the output, you have installed and set up the conda path successfully in your system. Now you can start using it to install python libraries.
Installing Python Libraries on Anaconda
Anaconda comes with its package manager named conda, which can install a wide range of packages. You can install any of the 7500+ packages present at anaconda package repo. You can also install thousands of other packages available at the anaconda cloud. If you don’t find any packages in the conda repository, then try using pip install package_name to install that package using the pip packed manager, but it is a good practice if you install the packages using the conda package manager.
Here’s how to install python libraries using the conda package manager. To install a package using conda, you need to type the command following the below syntax.
conda install package_nameHere package_name is the package you want to install. You can also specify the version of a package by using the following syntax.
conda install package-name=package_versionHere you need to put the version of the package you want to install instead or package_version.
To see a practical demo let us install the numpy version 1.19.1 package using conda. You need to type the following command in your terminal.
conda install numpy=1.19.1This will install the numpy version 1.19.1 in your system.
We can also install multiple packages by giving them as arguments to the conda install command. Just run the following command for illustration.
conda install numpy opencv
This will install both numpy and OpenCV in your system.
Updating an Anaconda package
We can also easily update a package using Anaconda. We need to use the update command with conda to update a package below the syntax to update an anaconda package.
conda update numpy This command will update the numpy package that we have installed earlier.
Removing an Anaconda package
Removing an anaconda package is as easy as updating or installing it. We need to use the conda with the uninstall parameter to uninstall a package; you need to follow the below syntax.
conda uninstall numpyList all packages present in Anaconda
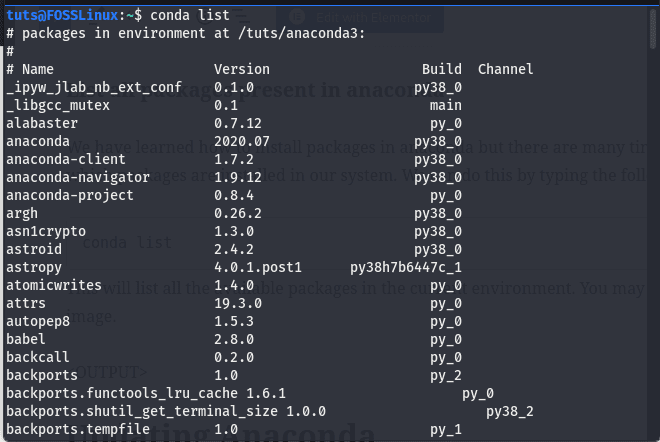
We have learned how to install packages in Anaconda, but there are many times when we must know which packages are installed in our system. We can do this by typing the following command.
conda listThis will list all the available packages in the current environment. You may see the output as in the below image.
Updating Anaconda
Updating Anaconda is a pretty and easy task; type the following command in the terminal and all your job done.
conda update --allBy typing the above command, we can easily update the Anaconda and its packages. It’s a good practice to update the Anaconda regularly.
Uninstalling Anaconda
There are many times when you may need to remove the anaconda software from your system; there are two ways to remove Anaconda from your system.
Type A
You can uninstall Anaconda from your system by just removing the installation directory and all other files that have been created during installation. Just type the following command in the installation directory.
rm -rf ~/anaconda3 ~/.condarc ~/.conda ~/.continuumThis will remove all the anaconda files and packages. After performing this command, you must also need to remove the anaconda path from the ~/.bashrc file.
Type B
You can also uninstall Anaconda by using the anaconda-clean package available in the anaconda cloud. You must need to install anaconda-clean using the command.
conda install anaconda-cleanThen type the command anaconda-clean in the terminal, and Anaconda will be removed from your system.
Conclusion
In this tutorial, we have learned how to install Anaconda on Linux and use Anaconda to install, update, and remove packages. Anaconda is a beneficial tool for Data Science. You may also want to see our step by step guide on working with SQLite in Python, a useful tool for Data Science.
1 comment
please do not assume everyone has sudo. I’ll have to keep looking to figure out how to install locally