
As of Windows 10 version 1709, Microsoft has introduced a new feature called WSL – Windows Subsystem for Linux. It provides a compatibility layer so you can natively run Linux binary executables on devices running Windows 10, as well as Windows Server 2019.
If this sounds interesting and you want to try it out for yourself, then you have come to the right place. Here we have put together an in-depth guide on how to install the Linux subsystem on Windows 10. But first, let’s get a bit more comprehensive understanding of the Windows Subsystem for Linux (WSL) and what it has to offer.
Windows Subsystem for Linux (WSL): A Comprehensive Overview
What is WSL?
WSL is a lightweight feature that enables a Linux kernel interface on top of the Windows kernel. As a result, Linux apps get their kernel calls seamlessly translated to Windows calls, allowing you to run Linux commands natively from your Windows system.
It offers one of the simplest ways for you to start experiencing Linux on your Windows 10 PC. Even though installing WSL does require some technical know-how, it isn’t as complicated as setting up a virtual machine or creating a dual-boot system.
Pros of Using WSL: Things You Can Do With It
WSL gives you access to the Bash shell – a popular text-based shell that comes included with macOS, Ubuntu, and other Linux distros. With WSL, you can use Bash to run command-line Linux tools and applications straight from your Windows 10 PC. It is perfect if you use or intend to use the various command-line tools and apps available for Linux.
WSL also allows you to install a whole variety of Linux distros. This includes Ubuntu, Debian, Kali, OpenSUSE, and SLES. What’s even more impressive is that you can have all these different distros installed and running side-by-side at the same time.
However, the key benefit of WSL is that it allows you a seamless transition between Linux and Windows. Also, you will get access to your Windows files and programs directly from the Linux shell.
Cons of Using WSL: Things You Can’t Do With It
WSL doesn’t come with GUI support, nor will it be incorporated in the future. It is a command-line only tool that brings you the Bash shell so that you can run core Linux commands and some command-line apps. You should also note that not all Linux features have been implemented into WSL.
For example, at the time of writing, the udev device manager isn’t supported by WSL. As such, it won’t be able to run apps that use the device manager. Also, if any apps use GUI, then that too will not work.
Also, WSL is capable of running popular server applications like Redis. However, Microsoft doesn’t recommend users to use WSL for hosting production services. Since it is such a lightweight application, it won’t be able to take the load. In these types of work scenarios, you are better off using a VM, or a dedicated system running on Linux.
Who Should Use WSL?
WSL will prove most useful for web developers that engage with open source projects. With WSL, the developers can seamlessly get access to the Bash shell and start using common Linux commands, and even Linux-first tools like Ruby and Python. It is the perfect tool for developers to use as a part of their inner development loop.
Other than this, WSL is also recommended for anyone who wants to explore and experiment with the Linux command-line tools. If you have never used Linux, WSL offers an uncomplicated and hassle-free starting point.
Using WSL vs. Running Linux in a VM
WSL is much more lightweight and resource-efficient compared to a full-fledged virtual machine. As such, if you have limited resources to work with, then WSL is the way to go!
Furthermore, getting access to your Windows files system from your virtual machine can be a bit of a headache. However, with WSL, you get to run your Linux command-line side by side with your Windows command-line, with full access to your files, desktop tools, and all the Windows store apps. As such, if you wish to run Linux commands on the data stored on your Windows system, WSL is perfect for the job.
Installing the Windows Subsystem for Linux
Now that you have a basic understanding of WSL and its features let’s dive into the installation procedure. Here we have set up a step-by-step guide to ensure you face no problem. We will also show you how to install different Linux distributions and set up a new UNIX user account on WSL.
Step 1: Enabling the Windows Subsystem for Linux
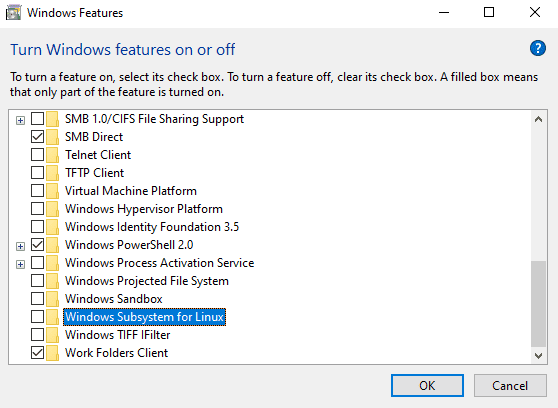
First, you will need to enable the WSL feature on your Windows 10 system. To do this, head on over to the search box in the Windows taskbar, type in “Turn Windows Features On or Off,” and press ‘Enter.’ In case you have the search box disabled, then just press “Windows + S” to open it.
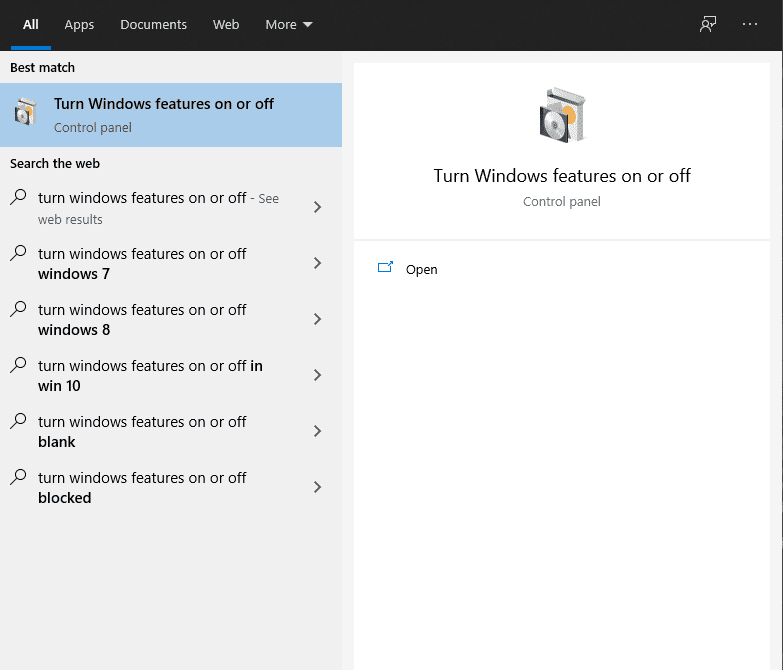
Searching for Windows Features Section
This is going to open the following window.
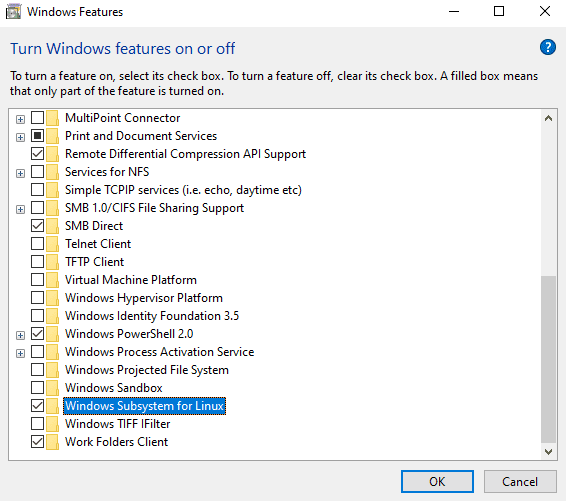
Windows Subsystem for Linux
From here, scroll down till you find the option “Windows Subsystem for Linux.” Check the box beside it and click on the OK button. This is going to download a few Windows updates and prompt a dialogue box asking you to Reboot your PC.
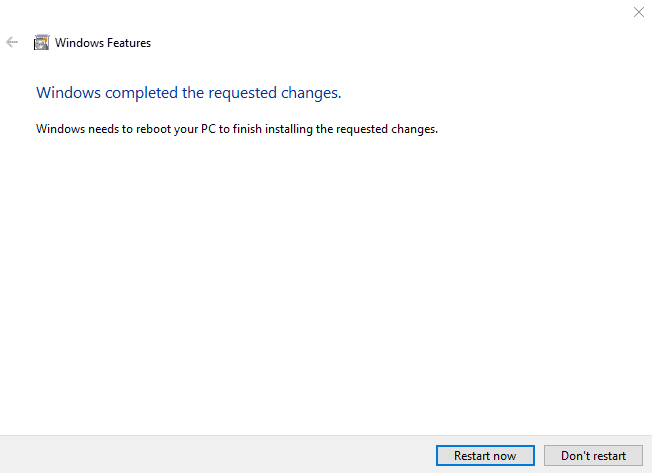
Restart your System
You can either click on “Restart Now.” Or if you have some unsaved work running on your system, then quickly save them and restart your computer.
Restarting your PC is going to kill this browser tab – the one from which you are reading this article. As such, you can either bookmark it or relaunch it from your browser’s history to following the upcoming steps.
Once your system reboots, WSL will be enabled on your Windows 10 PC. You can now download and run different Linux distros.
Step 2: Downloading Linux Distros
The various Linux distros supported by WSL can be easily downloaded from the Microsoft Store.
All you need to do is open the Microsoft Store and search for “Linux” in the search bar. It is going to bring up a list of all available Linux distros that you can now install on your Windows 10 PC.
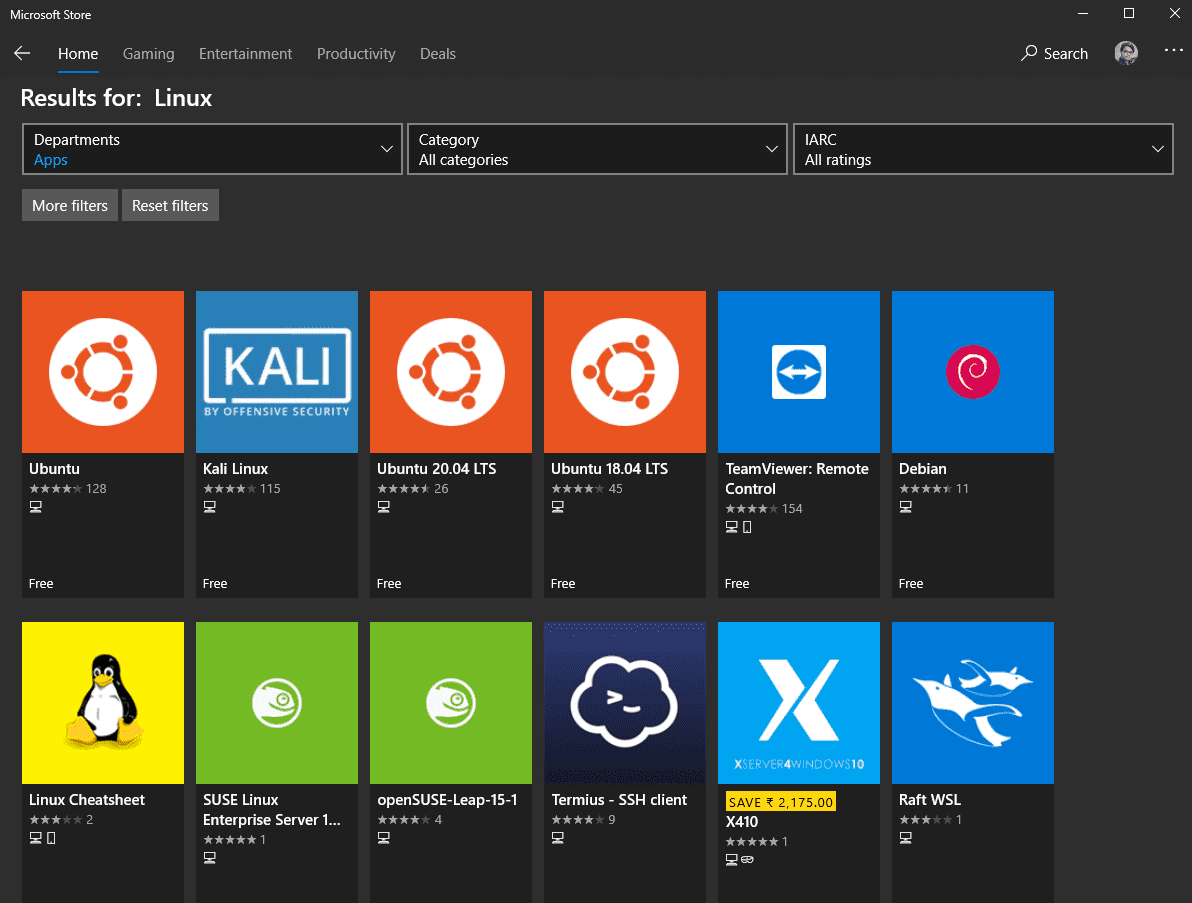
Linux distros available for WSL
As you can see, WSL supports a wide variety of Linux distributions. You are free to install and try out any one of them. To install your preferred Linux distro, click on it, and it will take you to the download screen.

Installing Ubuntu
For the sake of this tutorial, we will be installing Ubuntu – which is the first Linux distro on the list. To install it, click on “Get” followed by the “Install” button.
Step 3: Using Linux via WSL
The installation is going to take a couple of seconds. Once Ubuntu has been successfully installed, click on the “Launch” button to open it using WSL. Alternatively, you can also find and launch it from the Windows search bar.
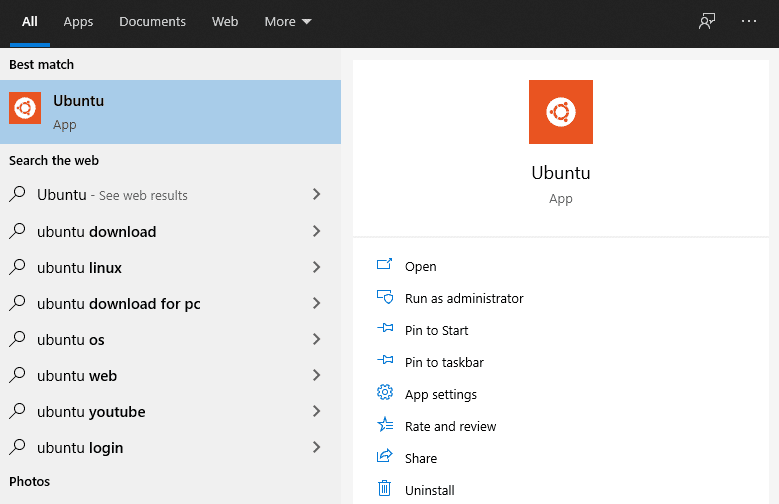
Launch Ubuntu
As you can see, you will also find the options to pin it to the taskbar as well as the start menu so you can launch it much more quickly. If it’s the first time you are going to launch a newly downloaded Linux distro, it is going to download some additional files which can take a couple of minutes.
Once done, you will see a message on screen asking you to create a new UNIX user account. Enter a UNIX username along with a new password, and your new user account is ready.
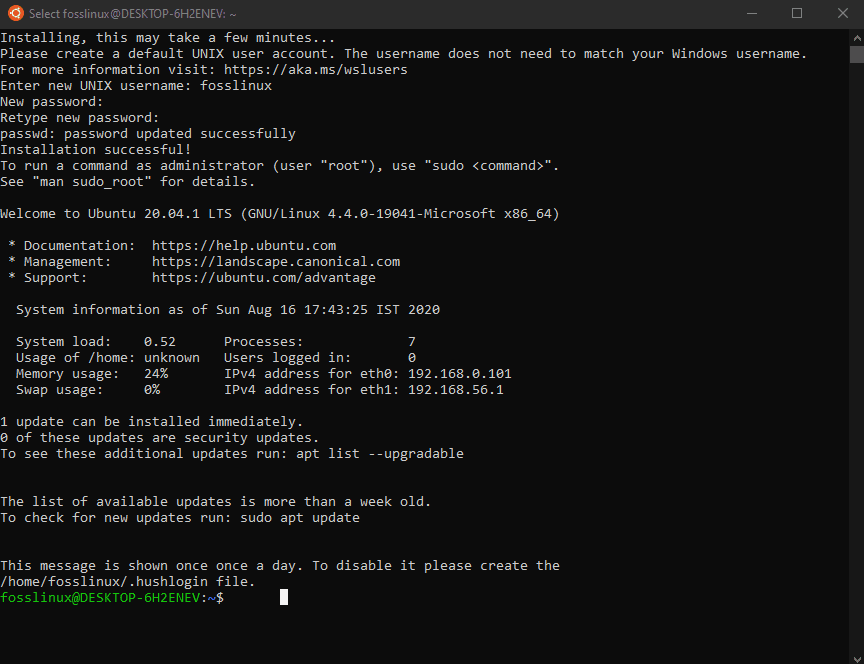
Running Ubuntu using WSL
You can now use any Ubuntu tools and run other Linux commands from the WSL Bash shell natively from your Windows 10 PC.
Uninstalling Linux from Windows 10
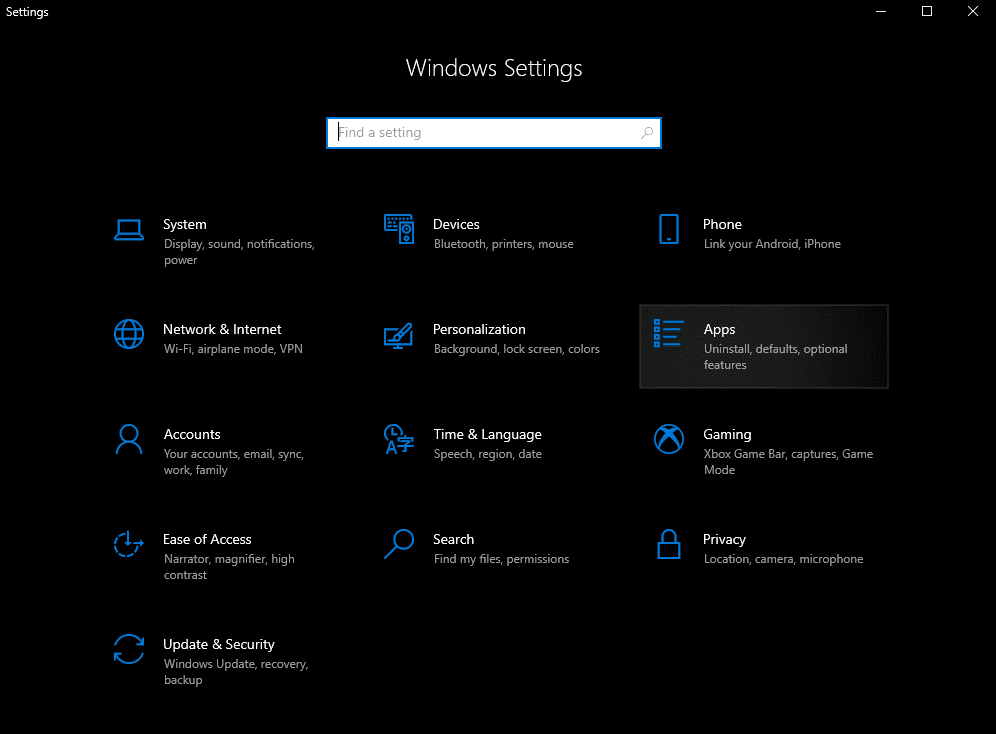
Uninstalling the different Linux distros, you are using with WSL is pretty straight forward. All you need to do is open the Windows Settings app and, from there, go to the Apps settings.
Under the “Apps & features” section, you have the option to search for all the various apps installed on your system, including the different Linux distros downloaded from the Microsoft store. Just search and select the Linux distro you wish to uninstall. In our case, it’s Ubuntu.
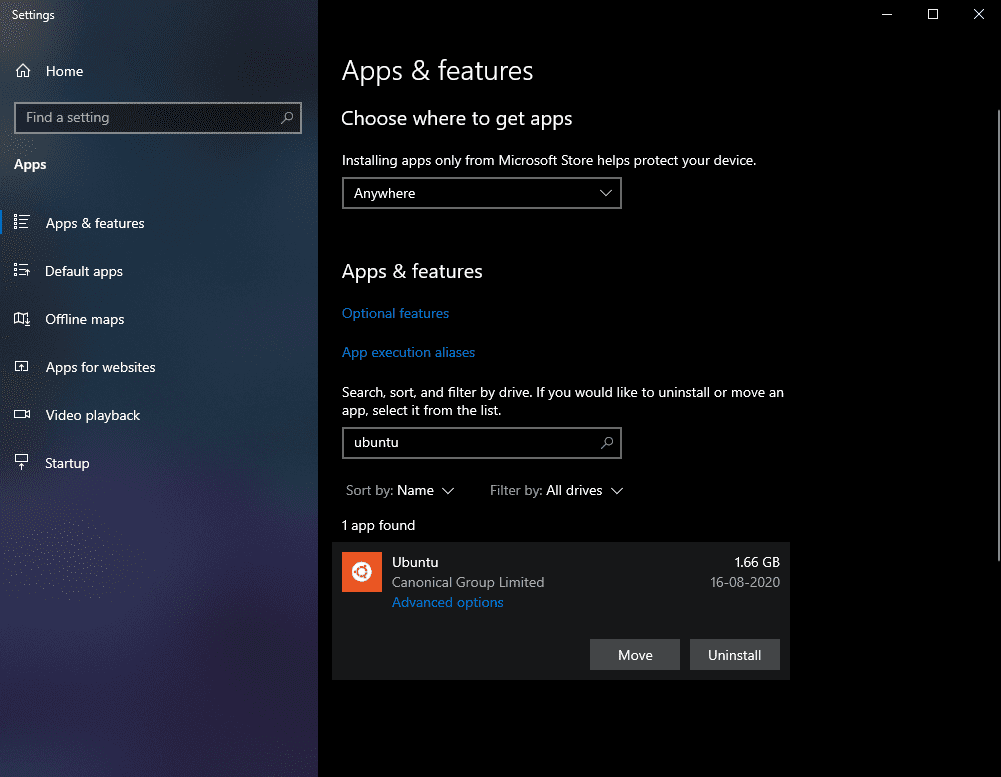
Uninstall Ubuntu
Click on the “Uninstall” button, and the Linux distro will be removed from your Windows 10 PC.
Disable Windows Subsystem for Linux (WSL)
To complete the tutorial, let’s discuss how to disable the WSL feature. For whatever reason, if you don’t want to use WSL and wish to disable it on your Windows 10 system, you can follow the same steps you took to enable it in the first place.
First, open “Windows Feature” by going to the search bar and typing in “Turn Windows Features on or off.” Scroll down the list of features until you find the “Windows Subsystem for Linux.”
Disable WSL
Uncheck it and click on the “OK” button.
Similar to before, a new dialog box will pop-up asking you to reboot your system. Once your system restarts, WSL will be disabled.
Wrapping Up
So this was our comprehensive guide on how to install Linux Subsystem on Windows 10. We hope you found this useful and that it helped you in running Linux commands natively on your Windows PC. If you wish to learn the various Linux commands that you can use on WSL, then click here and become an expert in Linux.