
Dropbox can be termed as cloud-based file storage that makes your files available at any given time as long as you are connected to the internet. A local user accesses files by syncing to Dropbox. This aids to automatically update all removed and added files to your cloud-based storage. Most people are curious to know how the headless Dropbox can be installed on an Ubuntu Server. To learn more, follow the article below for detailed information, including screenshots of how the installation process is done.
A frequently asked question by most Linux users is why the term Headless? A headless computer/device/server is simply a system that has been configured to run and operate without a monitor, mouse, and keyboard. In simpler terms, one can refer to a headless system as a controlled system over an active network connection, thus the absence of a monitor, keyboard, and mouse.
This article tutorial will provide you with a go-ahead on installing Headless Dropbox on Ubuntu Server to enable you to sync, update, backup, and store your files. This article tutorial also has detailed procedures on how the headless Dropbox can auto-start during the boot-up process. Don’t worry about the Ubuntu Servers that will work using this tutorial since it works with all Ubuntu servers, including the latest Ubuntu servers.
Follow the tutorial keenly to avoid running into errors during the installation process. We recommend that you copy-paste the commands instead of writing them to avoid misspelling and writing the wrong commands. Please note that wrong commands might damage your Ubuntu server, thus the need to copy and paste all the commands in this tutorial.
Installing Headless Dropbox on Ubuntu Server
Installation of the headless Dropbox can be done via command line install. There are different types of Ubuntu Servers:
- 32-bit servers
- 64-bit servers
Installation or commands used in the installation are different for each of the servers mentioned above. It is essential to note that the appropriate packages should be used during installation, failure to which the installation will fail, or you will run into errors during the installation process.
Before commencing with the installation process, check your system to know if you are using a 32-bit server or a 64-bit server. After knowing your server type, then you should look for the latest application because the Dropbox application changes frequently. However, you need not worry about looking for the newest application unless you update your existing Dropbox version because the installation process installs the latest version to your headless server.
Downloading and Installing Dropbox
First, download the official Dropbox client via terminal. Then navigate to your terminal and copy-paste or write the following command (ensure you are at your user’s home directory, and you can check this by issuing the command pwd on your terminal window):
curl -Lo dropbox-linux-x86_64.tar.gz https://www.dropbox.com/download?plat=lnx.x86_64
This command will download the official Dropbox client to your home directory. Now navigate to your home directory and unpack the downloaded file. You can do this easily using the command line below. Ensure you are at your Home directory before using the command line below to avoid running into errors.
tar xvzf dropbox-linux-x86_64.tar.gz.
After unpacking the downloaded file, it is now time to link your Dropbox account. This process can be done by simply issuing the following command to your terminal window:
~/.dropbox-dist/dropboxd.
Using the command dropboxd shows your Dropbox account’s contents synced to the Home directory.
NOTE: You should remember that because you are running Dropbox with an absence of a Graphical User Interface (GUI), a link will be provided the first time you run the ~/.dropbox-dist/dropboxd. Command.
All that is needed is to copy and paste the provided link to your browser and then log in to your account. If you are new to Dropbox, you will be required to create a new account. This will happen after being prompted by the browser to add your server. Dropbox will automatically create a home directory on the server after completing the process.
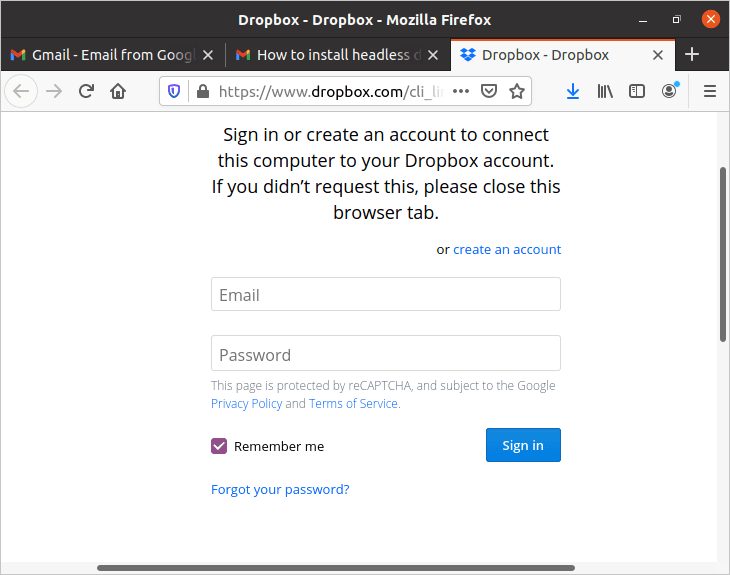
sign in to connect the host computer to Dropbox account
After connecting to the server, make sure you return to the terminal window and stop the Dropbox daemon from running. By default, the Dropbox daemon runs in the foreground, making it hard for other commands to run after connecting to the server.
In the terminal window, press Ctrl + C to temporarily stop the Dropbox daemon from running. After issuing the command, the synced Dropbox folder will appear in your home directory.
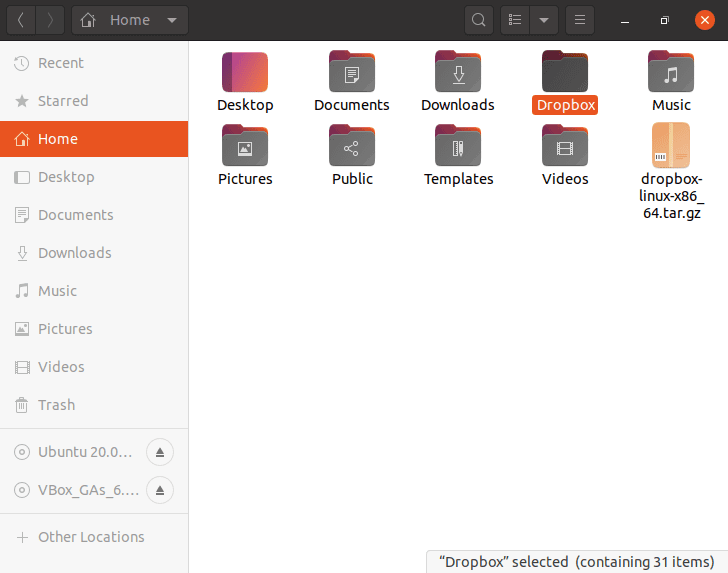
Dropbox folder in your home directory
Besides, a point to note is that if you are running a 32-bit server, use the following command:
cd ~ && wget -O - "https://www.dropbox.com/download?plat=lnx.x86" | tar xzf –
On the other hand, use this command when running a 64-bit server is the link above fails:
cd ~ && wget -O - "https://www.dropbox.com/download?plat=lnx.x86_64" | tar xzf -
With this command lines provided above, one does not need to extract but to run the client downloaded using the Dropbox dist command (~/.dropbox-dist/dropboxd)
Creating a system service for Dropbox
Because the downloaded and installed Dropbox client cannot be controlled, a few more tricks have to be performed as shown below:
A Dropbox service should be set up using the following steps:
- First, create a script named dropbox.service
- Using the command sudo mv dropbox.service /etc/systemd/system/ move the file
- Third, create a script named dropbox
- Using the command sudo mv dropbox /etc/init.d move the file
- Using the command sudo chmod +x /etc/systemd/system/dropbox.service /etc/init.d/dropbox make the files executable.
After finishing the steps mentioned above, you are expected to create a new file using this command:
nano /etc/sysconfig/dropbox
The following contents should be used after creating the new file DROPBOX_USERS= “USER” then save and close the file.
Managing Command-line headless Dropbox using Python Script
A python script is necessary and vital in managing the Dropbox commands on the server after the services have started. To get the python scripts, run the following commands:
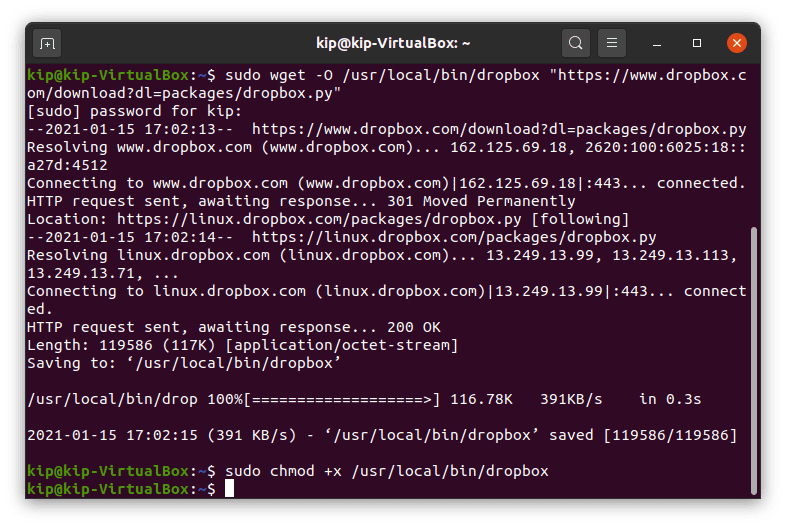
sudo wget -O /usr/local/bin/dropbox "https://www.dropbox.com/download?dl=packages/dropbox.py"
Then run this command to make it executable:
sudo chmod +x /usr/local/bin/Dropbox
Managing Command-line headless Dropbox using Python Script
To use the python script from anywhere, regardless of the directory, we have to create a symbolic link from the downloaded python script. To do that, follow the steps below:
Dropbox
After running the dropbox command, you will see all the helpful commands mentioned at the end of this article.
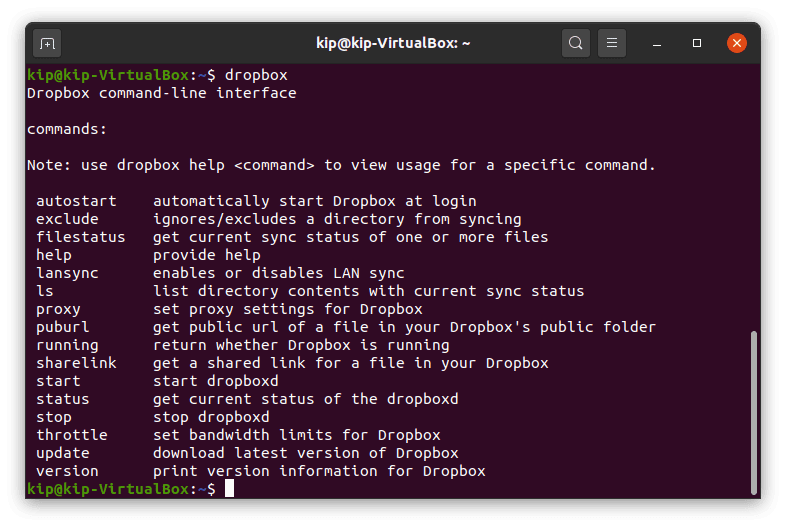
Dropbox command-line interface
To use any of the mentioned Dropbox commands, you will write down dropbox (followed by the command you wish to execute). For instance, checking our headless Dropbox status, you will run the following command:
dropbox status
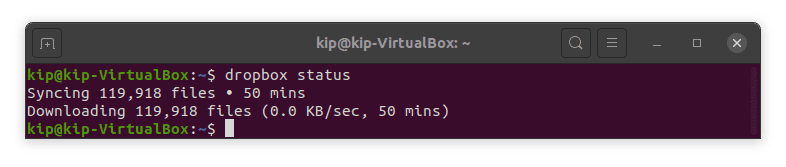
checking dropbox status
Below are some useful commands to use when using your newly installed Dropbox:
- To reload the Systemd, use the command sudo systemctl daemon-reload
- To start Dropbox, use the command sudo systemctl start dropbox
- To AutoStart Dropbox when booting up, use the command: sudo systemctl enable dropbox
- To see the service status, use the following command line: sudo systemctl status dropbox
- To stop the service, use the command: sudo systemctl stop dropbox
- To restart the service, use the command: sudo systemctl restart dropbox
NOTE: a USER is the system user’s real name but not the Dropbox user.
Another short method is downloading and copying the service file in the Systemd directory is:
sudo wget -O /etc/systemd/system/dropbox@.service
https://raw.githubusercontent.com/joeroback/dropbox/master/dropbox%40.service
The following commands are useful when using Dropbox:
status – aids in getting the current status of Dropbox

puburl – used to get a public URL of a file in your Dropbox public folder

throttle – used in setting Dropbox bandwidth limits

start - this command starts Dropbox

proxy – this command aids in setting proxy settings for your Dropbox account

filestatus – this command gives the user the current status of synced files

lansync- this command is used to either enable or disable LAN syncing

ls – this command lists items in the current directory

stop – this command stops Dropbox from running

autostart – this command AutoStart's Dropbox

exclude- this command excludes the highlighted folder from syncing

sharelink – this command is used to get a shareable link for files in your Dropbox account

help – if you need assistance, this command will be of great aid
To quickly access your files, drop them into your Dropbox account, and they will automatically sync to your headless server. Your headless server is now syncing to your Dropbox.
After creating a system service unit, always ensure you run Dropbox as a standard user but not as root. To do this, ensure you replace the username with your real user name. Files may fail to sync appropriately if Dropbox is run as a root user. For example, change the user with your actual username:
[Unit]

Description=Dropbox Daemon

After=network.target

[Service]

Type=simple

User=(input your real username)

ExecStart=/opt/dropbox/dropboxd

ExecStop=/bin/kill -HUP $MAINPID

Restart=always

[Install]

WantedBy=multi-user.target
By doing this, you will be running your headless Dropbox as a standard user but not as a root user, which is the recommended way of running Dropbox. After changing the username, save the file, then close it and start the service using the start command:
sudo systemctl start dropbox
Follow the article tutorial step by step to get a working headless dropbox on your ubuntu server.
2 comments
there should be no full stop after this line…
“tar xvzf dropbox-linux-x86_64.tar.gz.”
Thanks for the article
Two notes:
1. When download/using sudo wget -O /usr/local/bin/dropbox “https://www.dropbox.com/download?dl=packages/dropbox.py” you start new install of Dropbox, overwriting existing.
2. sudo chmod +x /usr/local/bin/Dropbox should be not capital letter sudo chmod +x /usr/local/bin/dropbox