
Lubuntu is an open-source Linux distribution based on Ubuntu. The OS is super light, has fewer resource requirements, and uses the LXQT modern desktop environment. Before you initiate the installation process of Lubuntu, you need to download the correct Iso image that matches your computer’s specs.
Lubuntu supports 64-bit operating systems with an up-to-date release every six months for short-term support versions and a long-term version release every 2 years. It is unfortunate for 32-bit system users since they dropped releasing new versions for Operating systems below 18.04LTS. However, the 18.04LTS for the 32-bit system is supported until 2021.
As discussed earlier, you realized that Lubuntu offers two types of releases. The Long-Term Support (LTS) is recommended to many because its image is fully supported to function well with updates via the kernel and short-term support, which is less supported than the long-term support. LTS is generally supported for as long as three years.
A reminder: All Lubuntu versions below version 18.10 used the LXDE. However, from then on, they switched to the LxQT desktop environment. In that case, you have to opt for a higher version of Lubuntu let’s say Lubuntu 20.04.
Creating a Lubuntu Installer USB drive
Downloading Lubuntu’s ISO image
Here, we will break down for you what it takes to download the iso image. There are approximately three ways to get this done.
The first method is the HTTP download which, downloads from your browser or terminal.
Secondly, the BitTorrent download method is recommended for mac and Windows users.
Lastly is the zsync, a terminal method recommended for Linux users. However, we will suggest using either HTTP or BitTorrent downloads since they are user-friendly and available on Lubuntu’s official download page.
Booting the Image
For the purpose of the demonstration, we will install Lubuntu 20.04 OS on the VMware workstation. However, you can install it as a standalone operating system or dual booting it with another Operating system on your PC.
After downloading the ISO file, you need to create a bootable device by putting the iso image on a media device and use the disk writer to create the bootable device for installation. This is not hard as it seems, all you have to do is follow the guide below, and you are all done.
A DVD, USB drive are the two available media installation devices. However, this article is going to cover installation through a USB drive.
There are two options that we recommend for your users to create a bootable USB drive. The first is mkusb, a tool developed by one of Lubuntu’s team members. Secondly, use Lubuntu Startup Disk Creator or GNOME’s Disk tool, which is shipped with Lubuntu. Here, we will show how to use the startup Creator to create a bootable USB.
To do this, plug in the USB thumb drive to your laptop or personal computer (PC). The USB would automatically be detected, as seen in the image below.
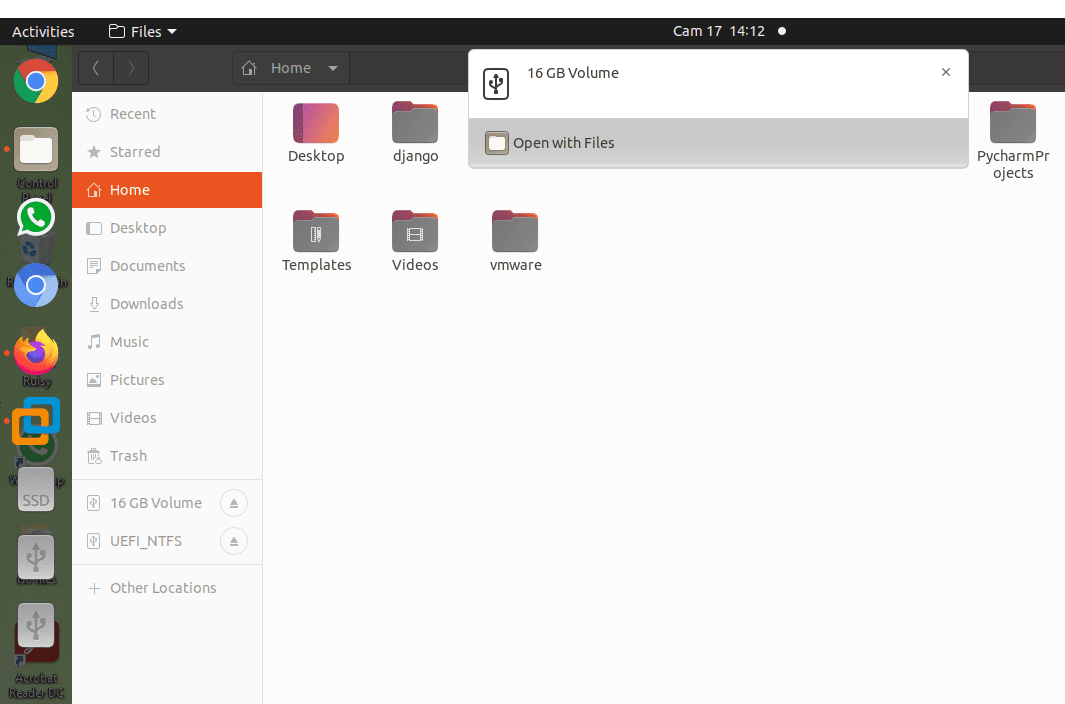
Flash Drive
Go to the storage location where you have downloaded your Iso file to. After that, right-click the image and select
“Open with –disk image writer.”
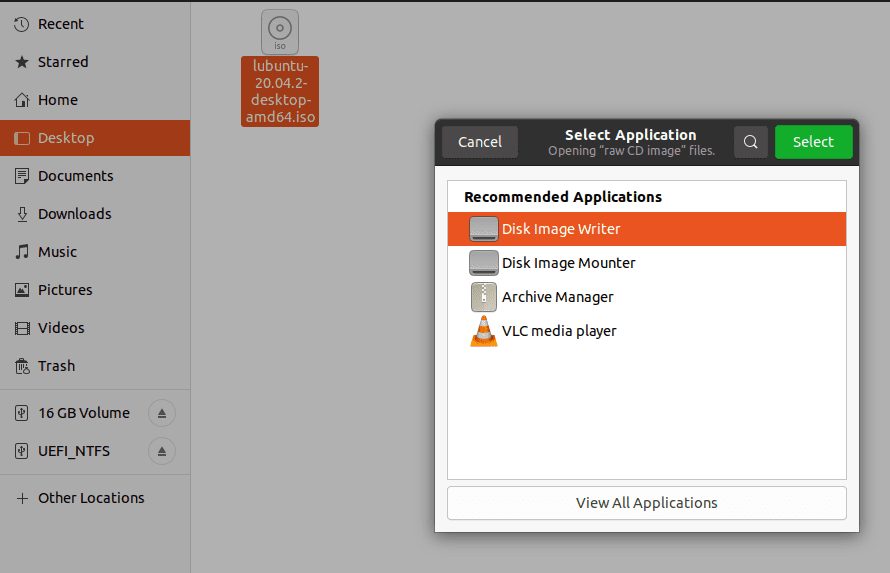
Disk Image Writer
The next displayed window allows you to choose the destination, which is the USB drive in this case. Use the dropdown menu options to select it (the USB drive). After that, click start restoring.
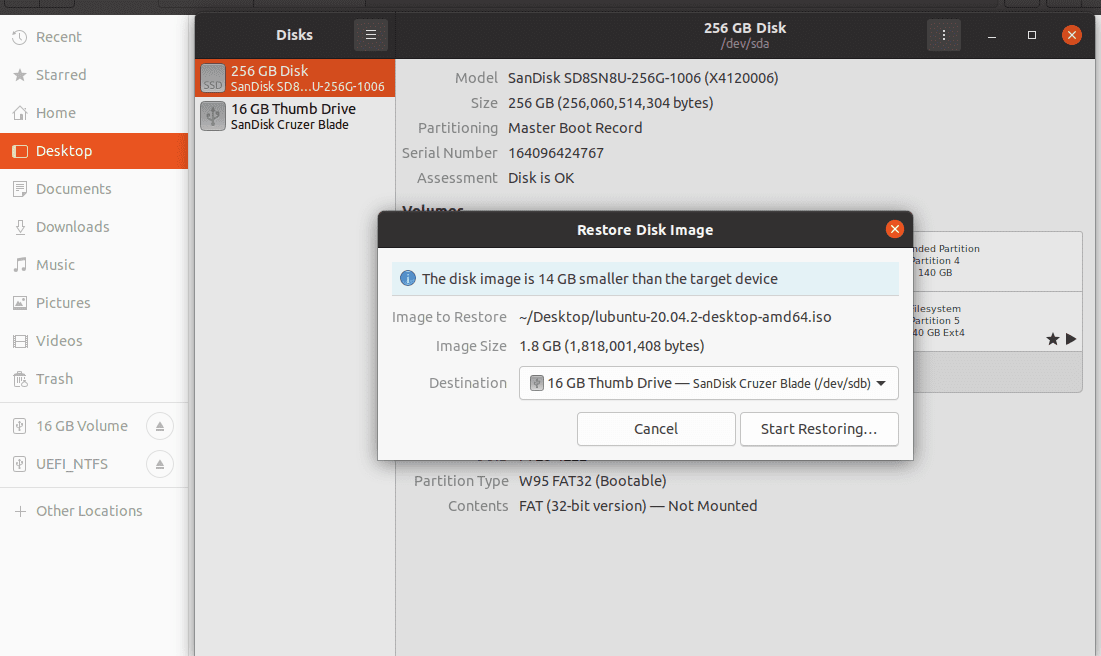
USB Drive Destination
And provide the root password for your computer to initiate the process. Wait till the restoration process is complete.
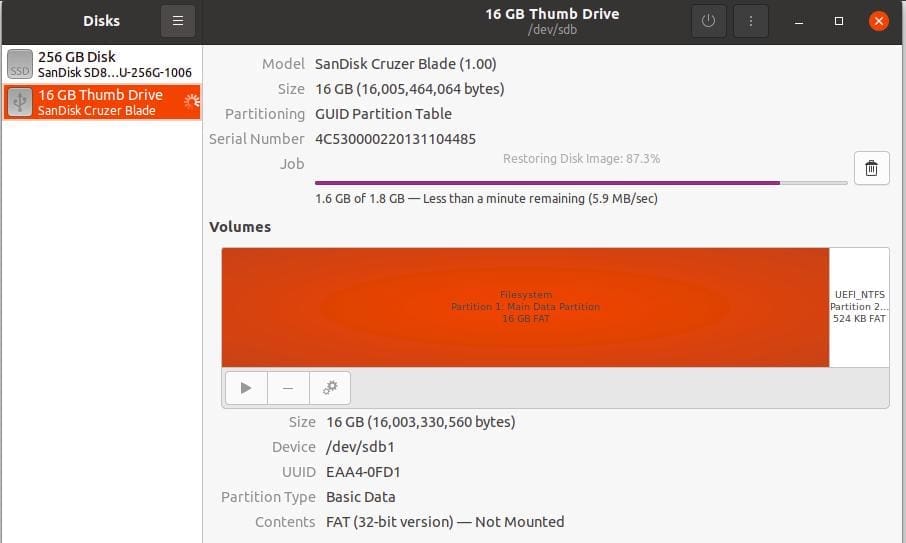
Restore Image
After it is over, you would have successfully created a bootable USB drive using the GNOME’s Disk tool.
Installing Lubuntu from the USB drive
Step 1: Starting the installer
Upon booting the drive, you will be prompted with several options. Choose “Start Lubuntu.” After that, click on the “next” button, which will initiate the start of the following task: the disk checking process.
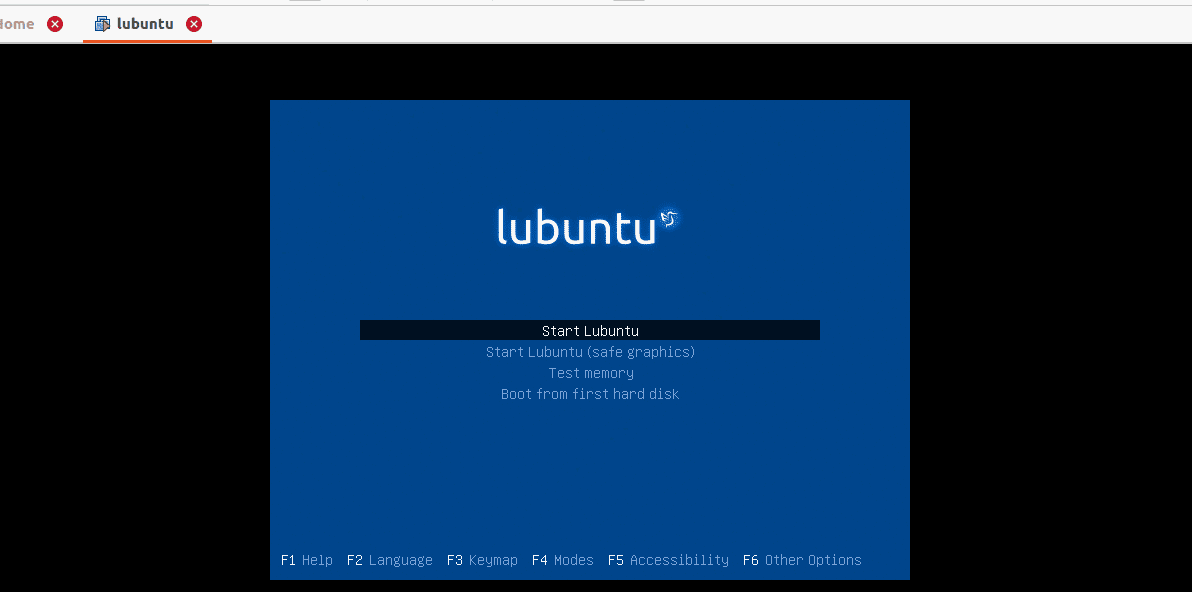
Starting the installer
Step 2: Disk checking process
Here, the installer will run through your file system on the disk to check for errors. However, you can stop this by pressing “CTRL+C” or letting it run. Disadvantageously, if you cancel the disk checking process, the process will take longer before proceeding.
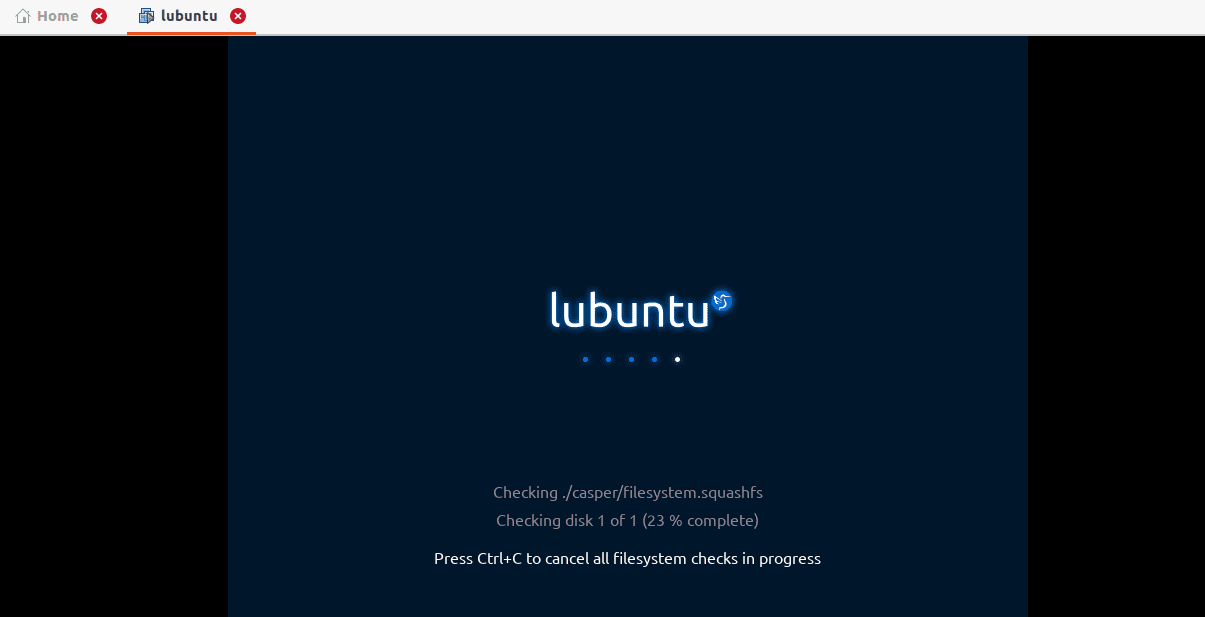
Disk checking process
Step 3: Installation process selection
After disk checking is over. Click “install Lubuntu 20.04 LTS” from your desktop to start the installation process. While performing this, you are free to interact with your desktop.
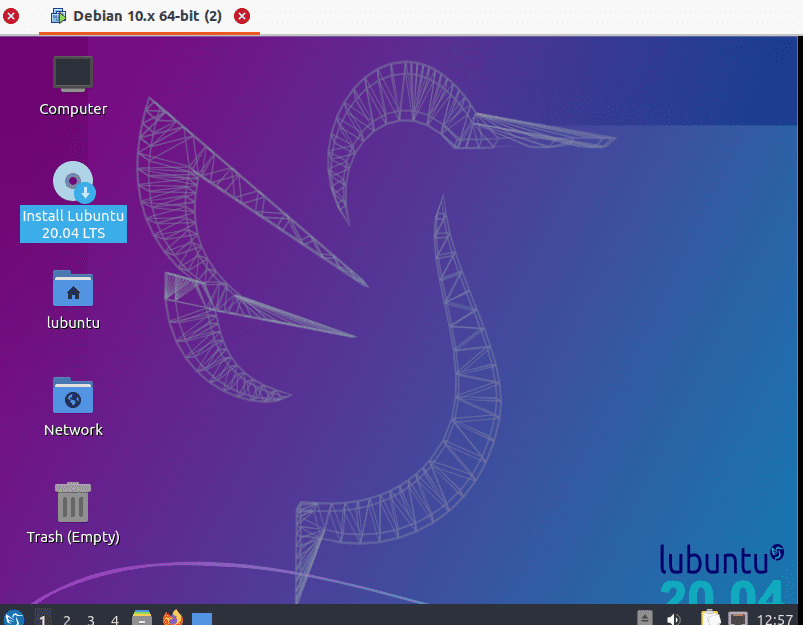
Lubuntu Live Desktop
Step 4: Language selection
The next step is the Lubuntu installer picking up and giving you language options to select your preferred language. In this section, you will be taken to the Lubuntu installer welcome screen, where you have the option of changing the installer language or use default. In this case, we will go with “American English.”
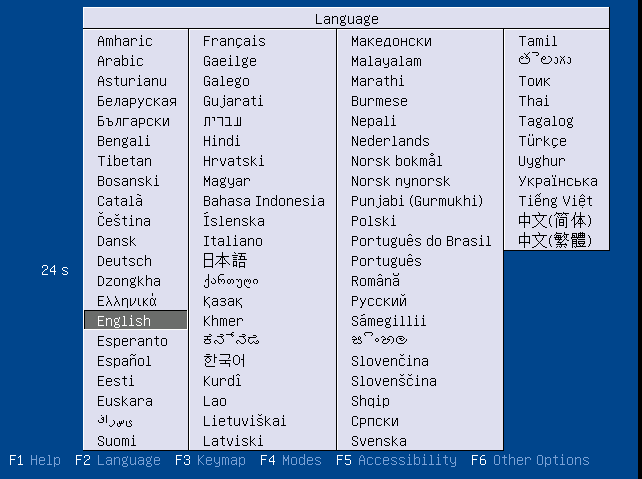
Language selection
Step 5: Selecting your location
The next screen to be displayed will be the world map where you can choose your location. The importance of selecting your place is that it will be used to set both your time zone and the download server.
If you want to see the region you have selected, use the dropdown “region” menu. The “zone” field contains major cities, and once you have chosen a region you are in, then the zone field should allocate you with the same time zone as the major city you selected.
If you keenly look at the bottom, there is a “change” button that helps you to change the system language to any language of your liking. Move to the next step of installation by clicking the “Next” button.
Nonetheless, you can also go back if you didn’t have a selection, you wished, or whenever you want to change a setting, you made before by clicking the “back” button next to the “Next” button.
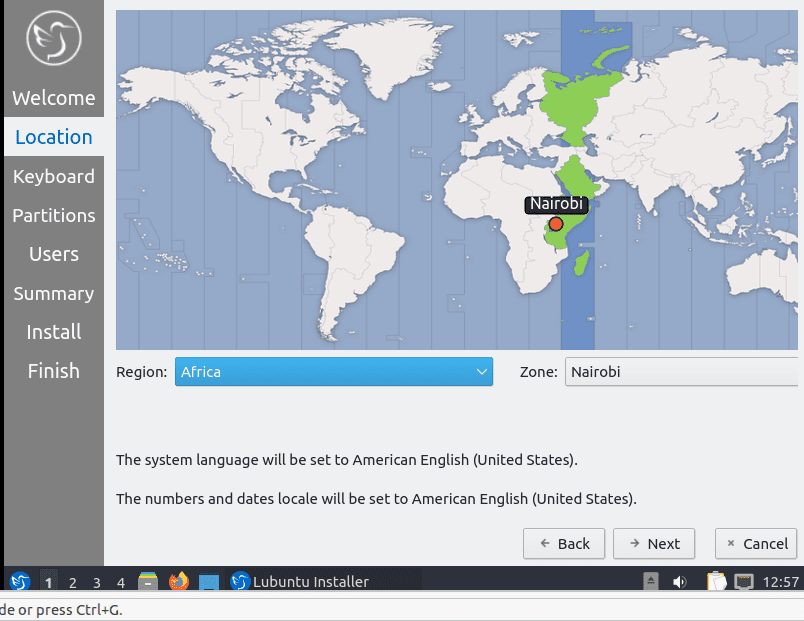
Location Selection
Step 6: Keyboard layout selection
The keyboard model menu lets you choose different variations of keyboards. It additionally has two fundamental columns. The left column allows you to change the language, while the right column contains the different types and keyboard layouts. In this step, you are allowed to select your preferred keyboard layout.
To do this, you can click on any keyboard and see if it matches what you wanted. Furthermore, there is a place at the bottom written “Type here to test your keyboard” where you can test your keyboard to see if it appeals to what you were looking for. Upon selection of your keyboard layout, click the “Next” button to continue.
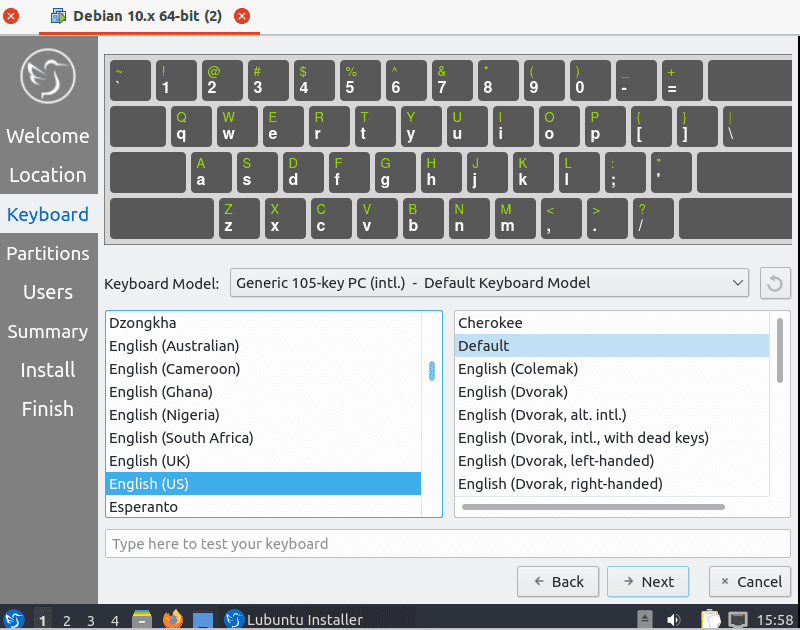
Keyboard layout selection
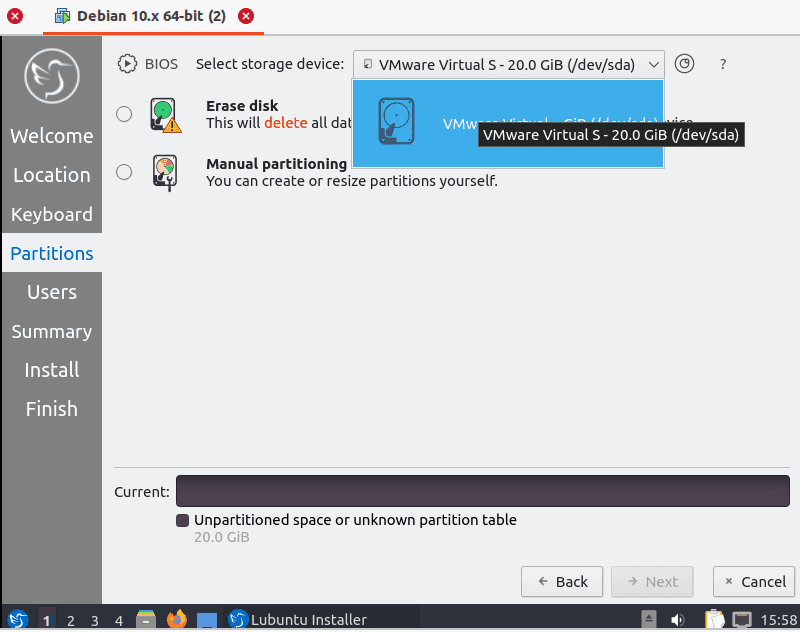
Step 7: Partition setup
First, “Erase disk” is an option that is ideal to recommend for users who want only to have Lubuntu as their primary Operating system. This option will format and clear all data in the disk, which is why having your data backed up on a different location would be vital in this situation. For those who choose this, then you can continue to the user setup.

Partition setup
However, there is an important step to note here, the “select storage device” has a dropdown menu that will help you change your computer’s storage location. To do this, click on the dropdown icon and select your preferred location.
Erase disk
Furthermore, if you want to encrypt your disk, press the “encrypt system” checkbox to prompt you to enter the encryption passphrase twice to avoid mistyping. It is highly recommended that you write down the passphrase and store it safely for security purposes.
Secondly, we have manual partitioning that allows you to select a free partition on your hard disk. This option gives you the flexibility to make various variations on the disk sizes, the kind of disk and to also have a custom swap disk. The latter is very important when handling tasks that are highly memory intensive. Thus, creating a swap area with a capacity that is twice your memory size gives you extra memory just in case your RAM is fully utilized. As a result, your computer will continue to function normally as though the RAM was still available. Rarely do you notice the difference.
However, in this case, we will proceed with the option “erase the disk”.
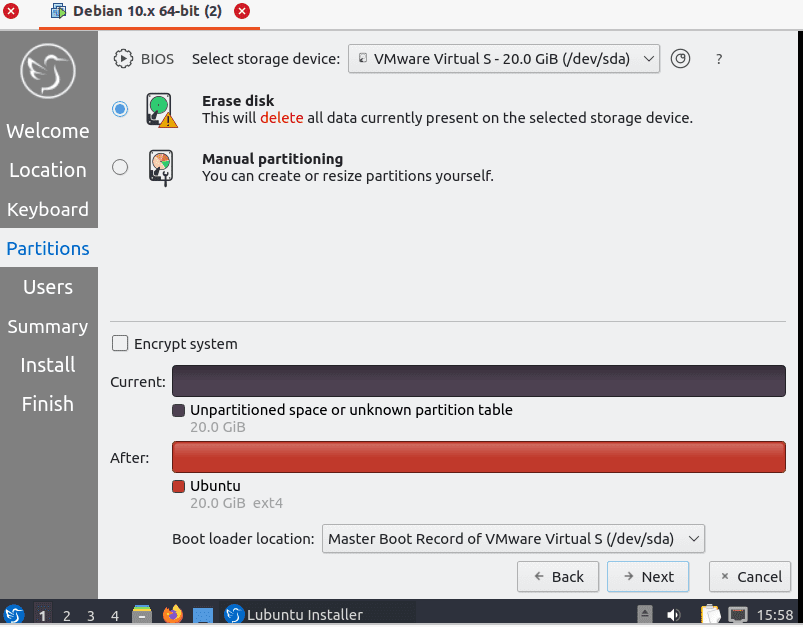
encrypt system
Step 8: User Setup
You are now in the final stages of the installation process. Here, you will do a system account Setup. To set up your account, you need to create your profile.
To do this, there are several questions you need to answer. For instance, consider typing your name into the “What is your name?”. Next, type in your username in the “What name do you want to use to log in?”. Put a name to represent your computer’s hostname in the “what is the name of this computer?”.
The last thing to do is enter your password in the “choose a password to keep your account safe.” You will enter the password twice to ensure you have no typographical or mistyping errors.
Thereafter, click the “next” button, which will give you the summary screen, which contains the settings before the installation began. Once you are through with the summary, click the “install” button to start the installation.
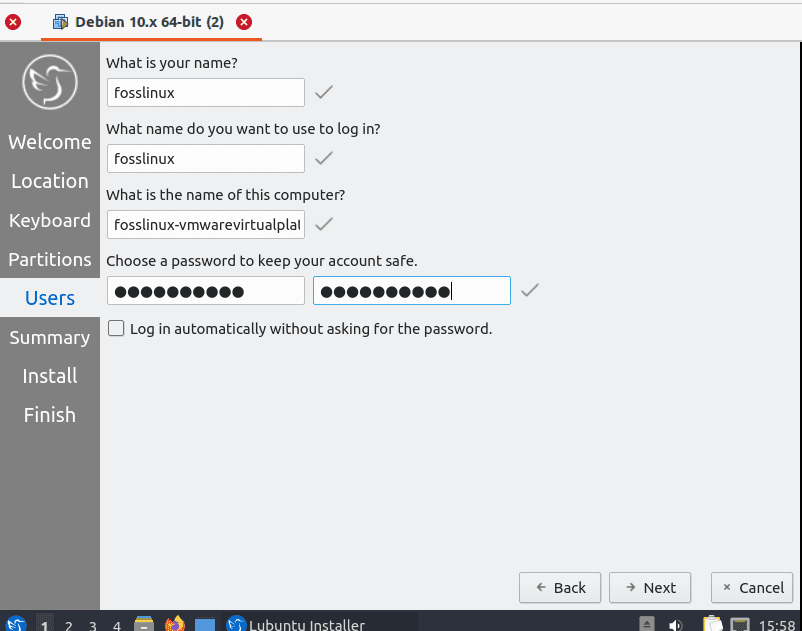
User Setup
Upon pressing the “install” button, a dialogue box to confirm the installation will pop up. To confirm or continue with the process, click the “install now” button. To stop installing, click “Go back.”
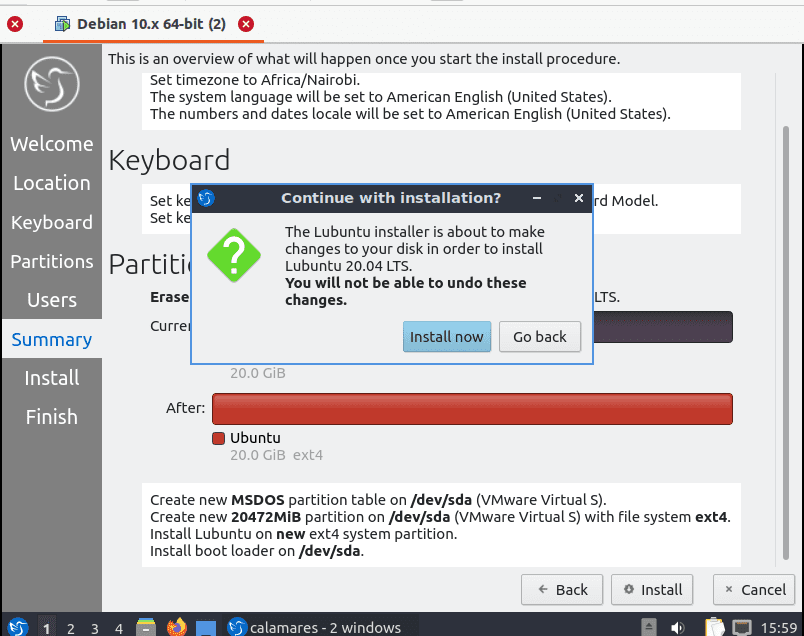
Install Now
Step 9: Install
In this state, the installation process should have begun. Compared to other Ubuntu-based distros, Lubuntu’s installation procedure is much quicker and fascinating. Lubuntu progress bar is situated at the bottom. The latter gives some vital information while the installer is running. For instance, it highlights the stage of the installation process like “Filling up filesystems” as in the case below.
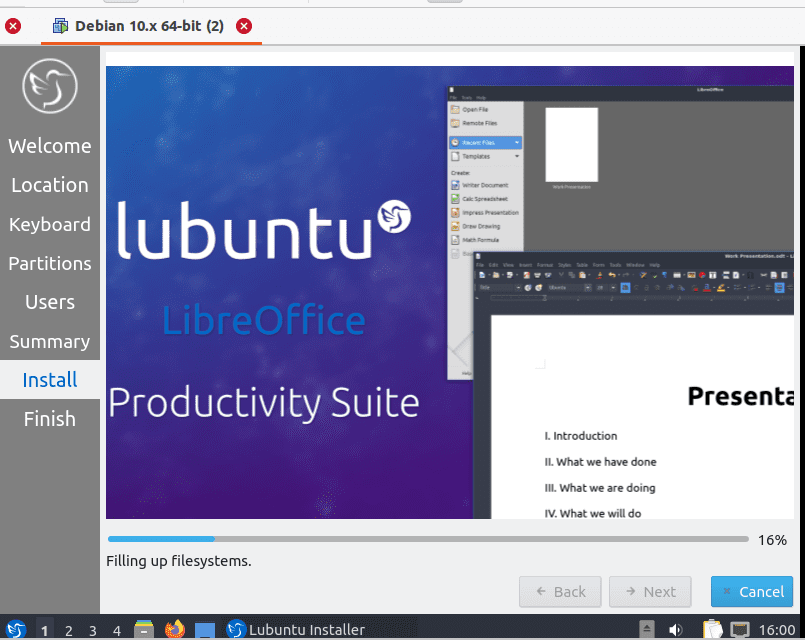
installation process
Step 10: After the installation is complete, go and restart your computer for proper environment configuration. You can also make use of the Lubuntu live environment in case you need it. To reboot your computer, remove the installation medium or the USB device before clicking the “restart now” button.
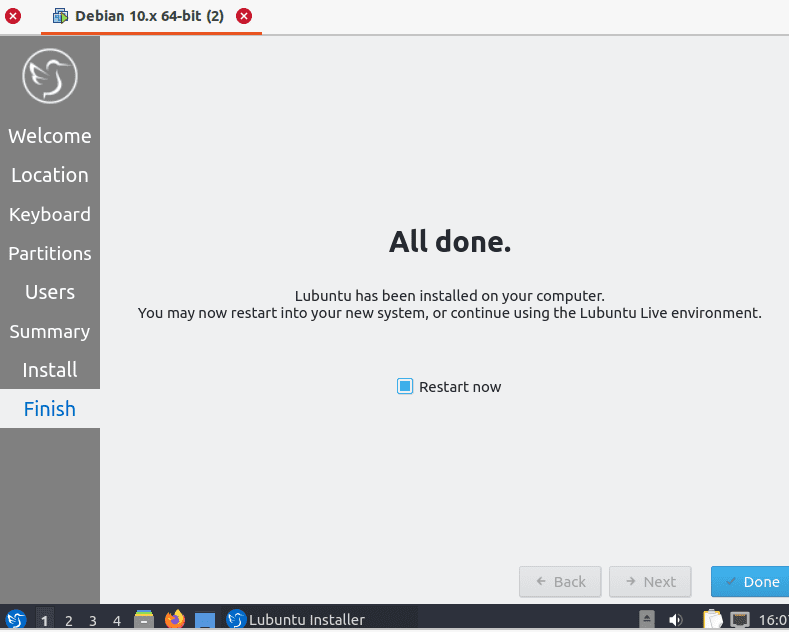
Installation is complete
Step 11: After the computer reboots, you will be prompted with a login screen. All you have to do is enter the username and password you created during the installation process. After that, a newly installed copy of Lubuntu is now ready for use. Here you are free to explore the OS in, and out.
You have successfully installed Lubuntu. However, you can change all your previous state by clicking the “Revert All Changes” button. Alternatively, you can choose what device can boot your computer off by using the “install boot loader on” dropdown menu.
Conclusion
Have you ever tried Lubuntu? Why? And if yes, how do you feel about this lightweight system? Please share your views and comments with us in the comment section. Nonetheless, up to this point, I am pretty sure that you have all it takes for you to complete your installation without hitches on the road.
To sum it up, the first step is to download the image file. Preferably, in the .iso format. After that, create a bootable USB drive using the two processes (GNOME’s Disk tool or mkusb). Upon completion, start the installer, which will initiate the process. The next step is disk checking, where you will either cancel or allow. After that, select your preferred language, then head to the location selection, where you will choose the region and city to aid in giving you the correct time and date. Next is the keyboard layout, where you will select your favorite style of keyboard. Continue the process by choosing to go with “erase disk” or manual partition” to set up the OS allocation in your disk. After that, set up your user profile, and finally click the install button, and you are done.
2 comments
A lot more user friendly installs now than even 5 years ago. No reason really to use MSFT anymore, save $150 or more and use Linux on that old laptop. Or your new one….
I planned on installing lubuntu OS on an old Toshiba L300 series laptop since Ubuntu 18.04 is giving me series of problems ranging from screen flickering on boot to automatic boot up on Ubuntu when other OSes are present ( Windows 7 professional and openSUSE).
So right now I planned on using lubuntu OS in the full hard drive partition.
Which version you think would install successfully on the laptop?