
By default, your system relies on DHCP, a dynamic host control protocol whose purpose is to assign you an IP address automatically. As a result, each device is assigned a unique number that enables it to communicate with other networks using DHCP, and as an outcome, your device’s IP address may change from time to time.
However, there are situations when a static IP address is required, and it is essential to maintain a similar IP address for an extended time. For instance, if you set up your system as a server, static IP addresses are required for communication. If you want users to download files from your computer, you must ensure that your machine’s IP address never changes. Additionally, a static IP address is required if you wish to connect to any external shared device, such as a printer.
Configuring static IP address on Linux Mint
Three methods are available for configuring a static IP address:
- Configuration via a graphical user interface
- Configuration through the use of a terminal
- Configuration via modifying a network configuration file
Configuring static IP address using GUI
Static IP configuration on your Linux mint OS is pretty straightforward using this technique. First, pick network settings from the menu and click on the network icon, as seen below.
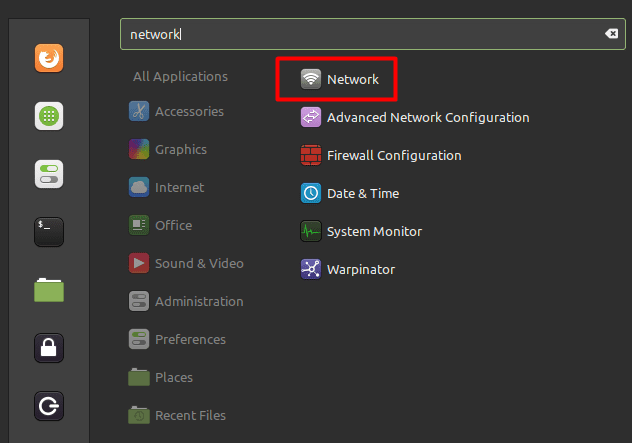
Network
After navigating to the network settings, you’ll notice the basic information about your currently created network and the IP address issued via DHCP. Thus, by clicking on the settings tab on the bottom, you can modify that to a static IP address.
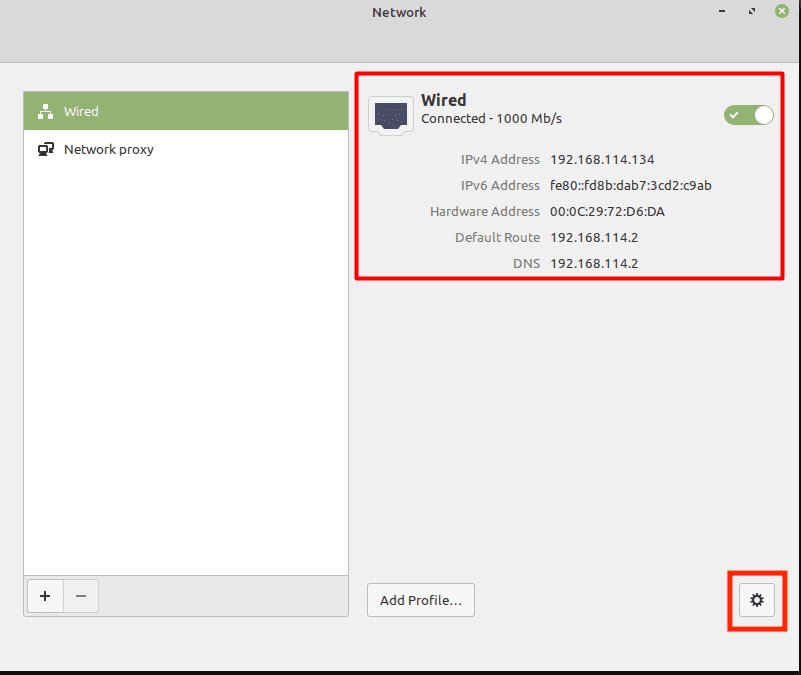
Static IP configuration
Now you must change the address from “automatic (DHCP)” to “Manual.”
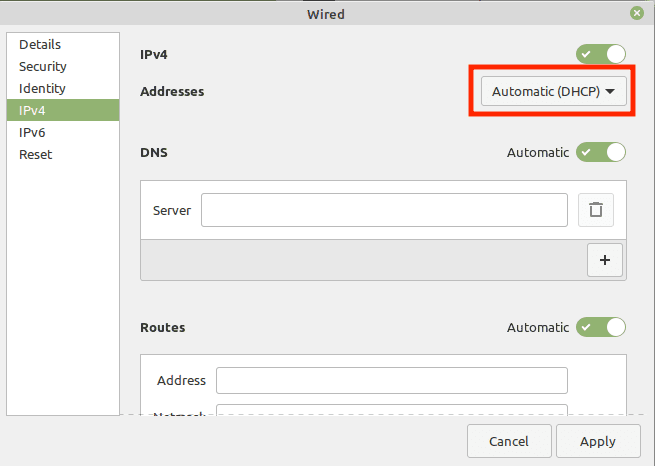
Automatic DHCP
After choosing the manual option, you will be prompted to enter the desired network settings, as illustrated below. You must enter the values and click the apply button afterward to save the changes. The static IP address would be 192.168.114.100; the gateway and network mask would be configured.
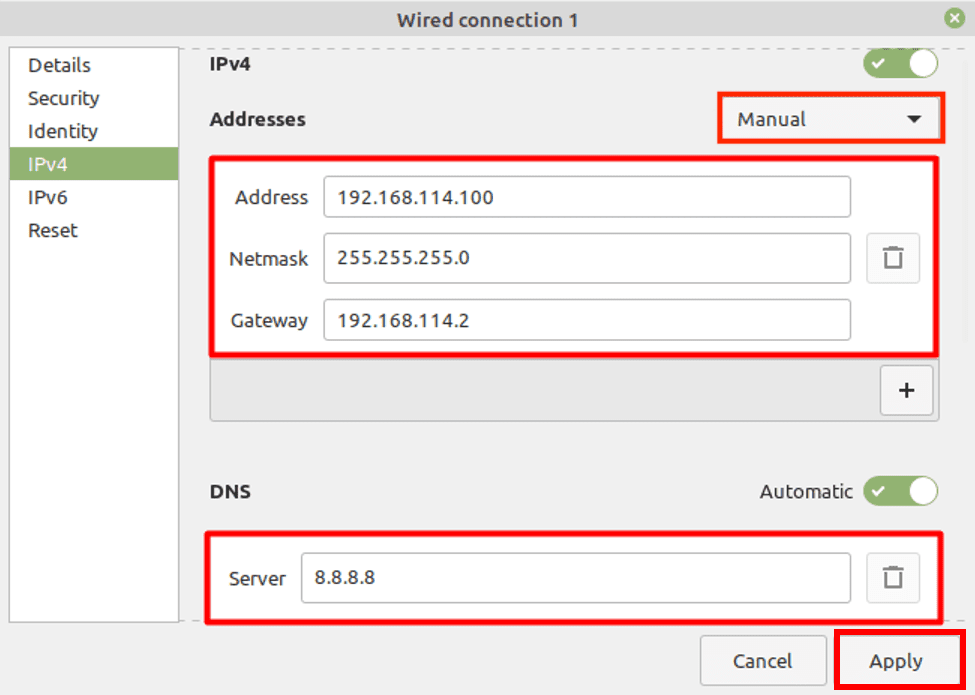
IPv4 Manual configuration
You must return to the network settings’ main window to view the freshly implemented settings.
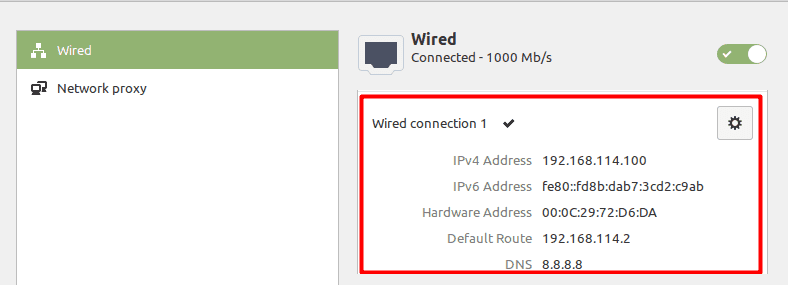
Network configuration
Configuring static IP address using the terminal
You can configure static IP addresses via the command-line interface (CLI). To do so, execute the following command:
nmtui
This will open up a new window with various options; you must click the first one, “Edit a Connection,” to implement the new settings shown below.
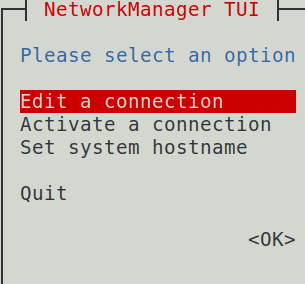
Edit a connection
The following step is to change the “IPv4 CONFIGURATION” setting from automatic to manual and enter the essential info to make it work.
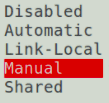
Manual
We used the identical network variables as in our first example.
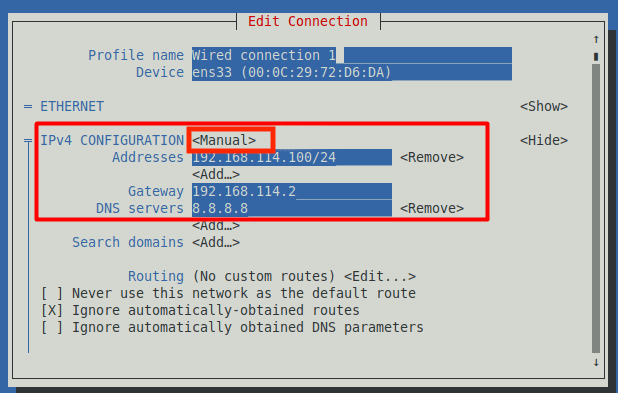
Edit connection
Now, save these changes, return to the main screen, and choose the second option from the list below.
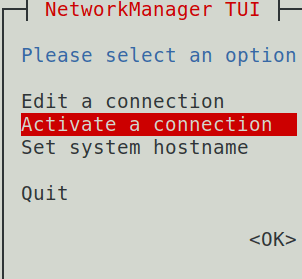
Activate a connection
The first option allows you to modify your network settings, while the second option, “Activate the connection,” applies those modifications. You must open it, click the “Deactivate” button, and click “Activate” again to restart your network and apply the new settings.

Deactivate
Therefore, if you want to verify that the updated network parameters have been applied, you can run the following command in the terminal.
ip a
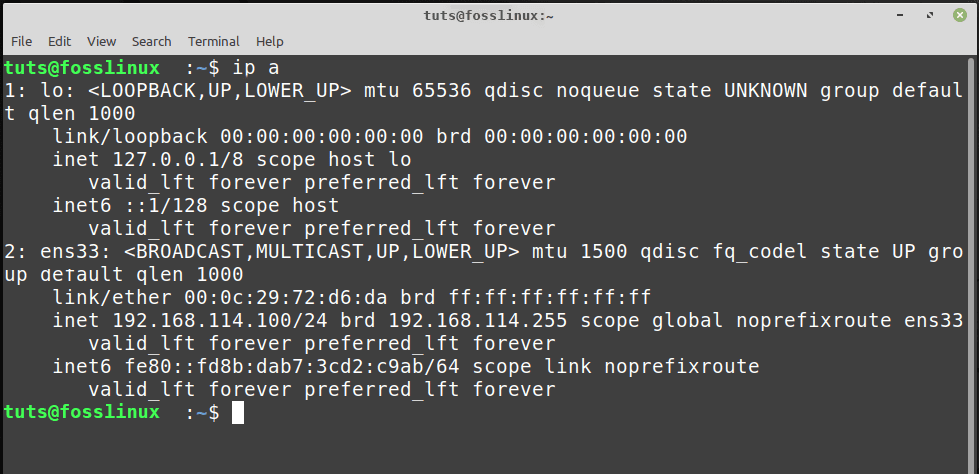
Verify network settings
As you can see in the above screenshot, the freshly assigned IP address is currently live and functional, as indicated by the “ens33” field, a network interface containing IPv4 information.
Configuring static IP address on Linux Mint via a network configuration file
You can also set static IP addresses by making changes to the network configuration file; to do so, open the file with your preferred editor:
sudo nano etc/network/interfaces
We’re using a nano editor in the above command, and after loading this file, you’ll need to enter a few lines specified below and then save the file.
auto enp0s3

iface enp0s3 static

address: 192.168.114.100

netmask: 255.255.255.0

gateway: 192.168.114.2

dns-nameservers 8.8.8.8
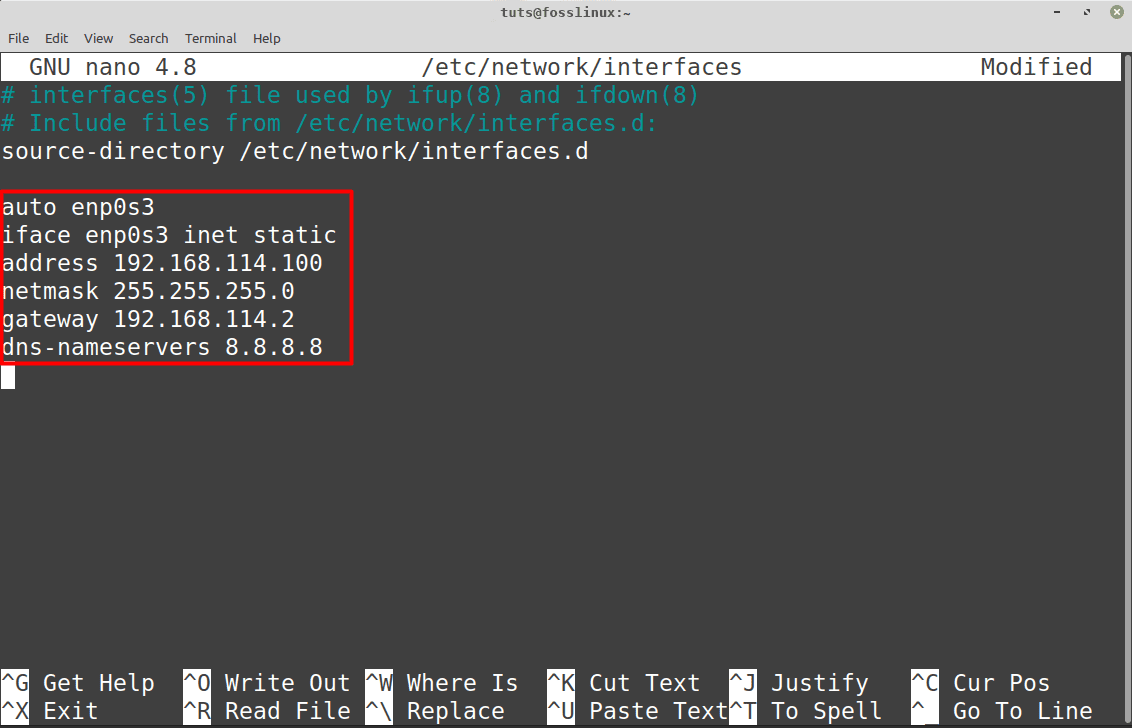
Nano add commands
You should now be able to view your newly configured network settings, which you can confirm by typing this command again:
ip a
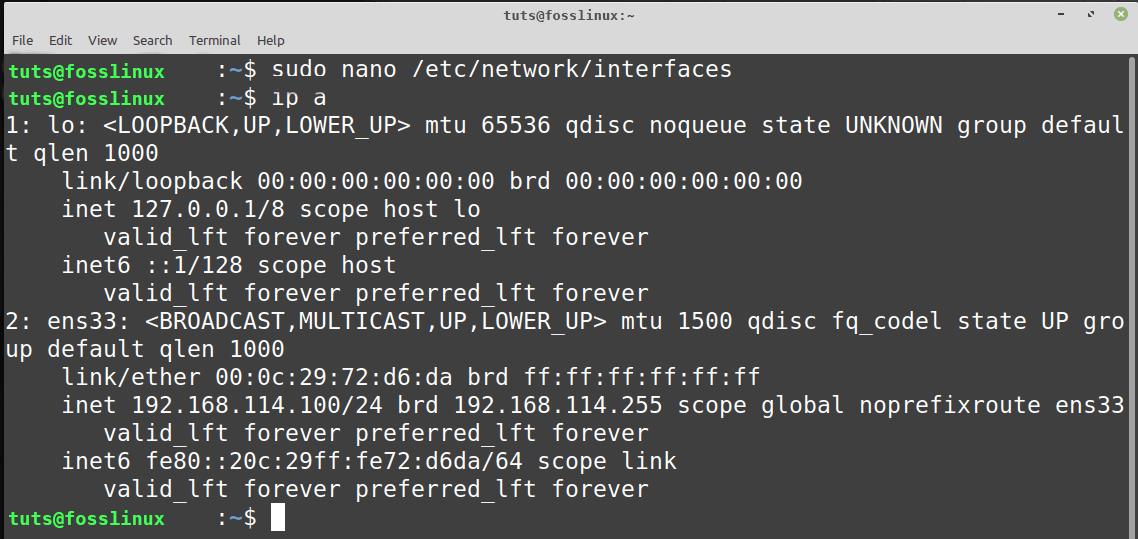
Configuration file
Additionally, you can verify whether or not the new route parameters have been implemented by typing:
route -n
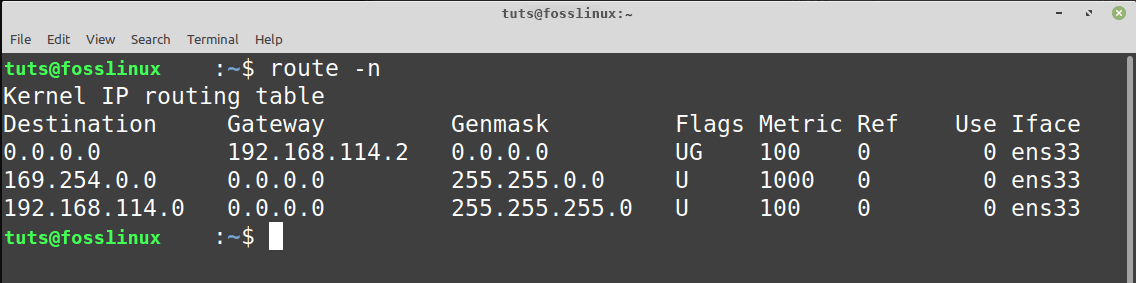
New route
Conclusion
By default, your Linux Mint OS is configured to use DHCP, which means that the IP address assigned to your machine may change dynamically to a different available IP address. However, there are situations when a static IP address is required, such as connecting with a server. This is where static IP comes into play; it prevents your IP address from changing frequently and will remain the same unless it is changed by another party or restored to DHCP. I hope this article was helpful. If yes, please leave a remark below. Thanks for reading.
1 comment
nice job – helped me a lot