
You can use various methods to connect to a remote system from your local machine. One of the most popular methods today used to connect to remote machines is Secure Shell (SSH). SSH came to replace the insecure rlogin and rsh that could send users’ passwords over a network ‘unencrypted.’ The daemon program responsible for running the SSH client is called OpenSSH.
The Ubuntu desktop and Ubuntu server minimal do not come with OpenSSH installed by default. However, you can easily install this utility from the command line. This post will provide a comprehensive guide on installing and enabling OpenSSH on Ubuntu 22.04.1 LTS.
Installing OpenSSH on Ubuntu
You will need access to the Terminal and root privileges for this particular step. Follow the steps below.
- Launch the Terminal from the applications menu or use the keyboard shortcut (Ctrl + Alt + T).
- Execute the commands below to update the system and install the OpenSSH daemon.
sudo apt update
You will notice that we are installing two packages with the commands above –
sudo apt install openssh-server
sudo apt install openssh-clientopenssh-serverandopenssh-client. What’s the difference between the two?
openssh-server: This module enables your PC to listen for any incoming connection requests from other remote systems.
openssh-client: This module enables your system to make connection requests to other remote systems.
Although you can decide to install one of the packages depending on your needs, installing the two packages would be great if you find yourself in a situation where you want to establish or listen to connection requests. - After completing the installation, execute the command below to verify that SSH is installed and running on your system.
sudo systemctl status ssh
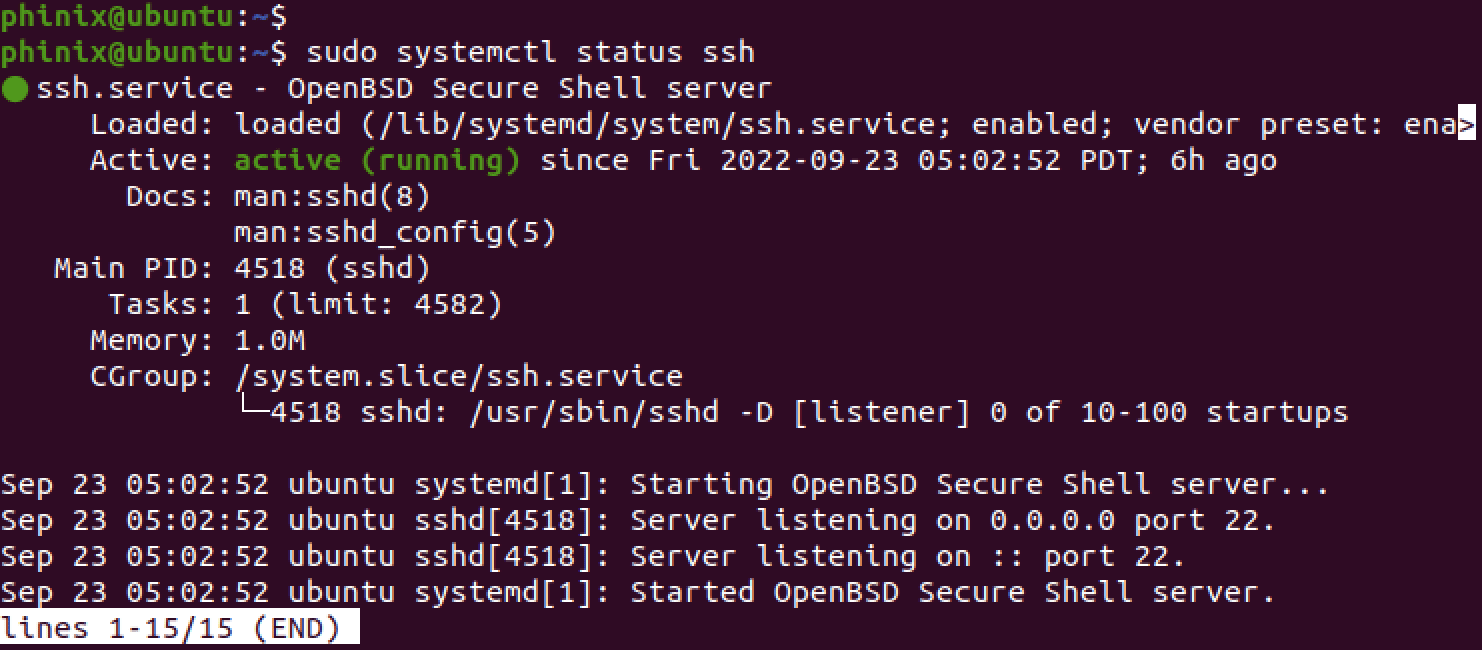
SSH status
From the image above, you can see that the SSH service is up and running. However, if its “inactive,” use the commands below to enable and start SSH.
sudo systemctl enable ssh
sudo systemctl start ssh
Configuring Firewall
Firewalls in computer systems monitor incoming and outgoing traffic against a set of rules. To enable your PC to connect to other machines over SSH, you need to enable the SSH service or port 22.
You can use the UFW (Uncomplicated FireWall) to configure the firewall on Ubuntu. To allow SSH connections, execute the command below.
sudo ufw allow ssh
After allowing SSH through the firewall, enable the firewall if it was not enabled before using the command below.
sudo ufw enable
Use the command below to check the firewall status.
sudo ufw status
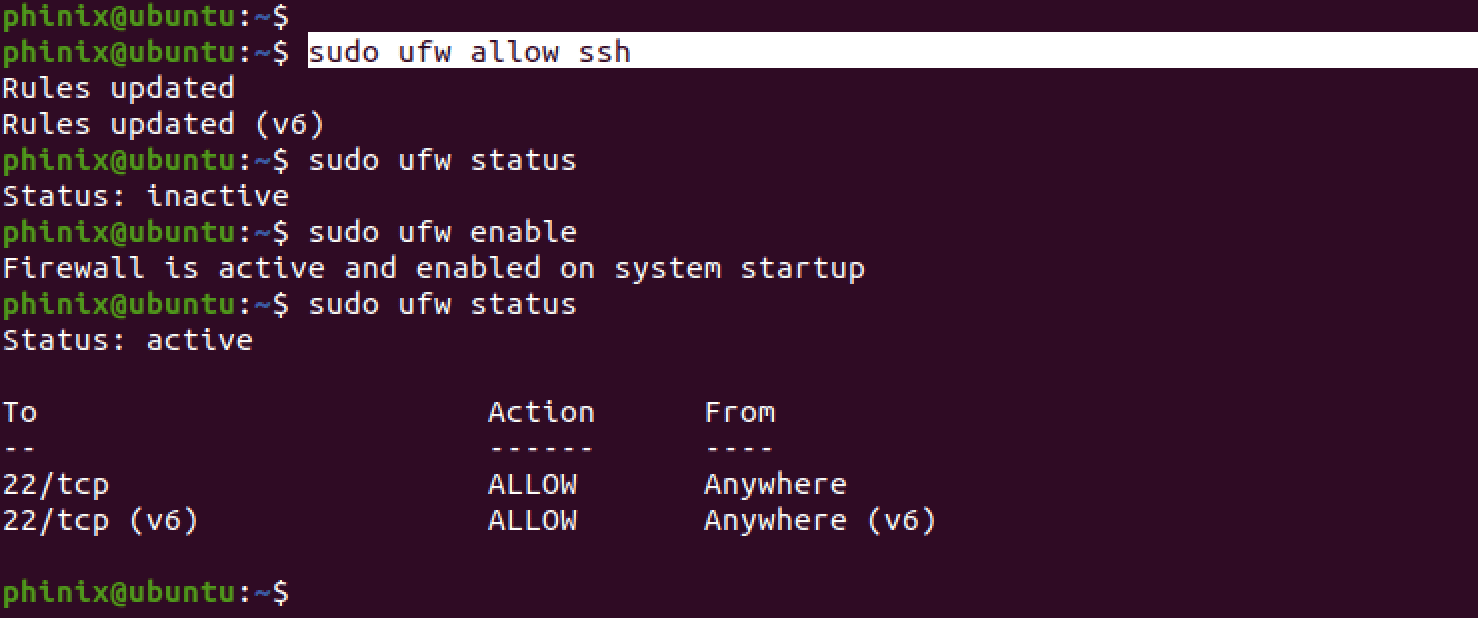
Enable SSH through the firewall
Up to this point, you can now use your PC to connect to other remote machines via SSH.
Connect to Remote PC via SSH
Tip: The machine you are trying to connect to should also have SSH installed and running.
For this post, we will try to connect to a Linux Mint, which is also connected to my local network. Below is the syntax for establishing an SSH connection.
ssh [remote-system-username] [ip-address]
e.g
ssh caren@192.168.1.43
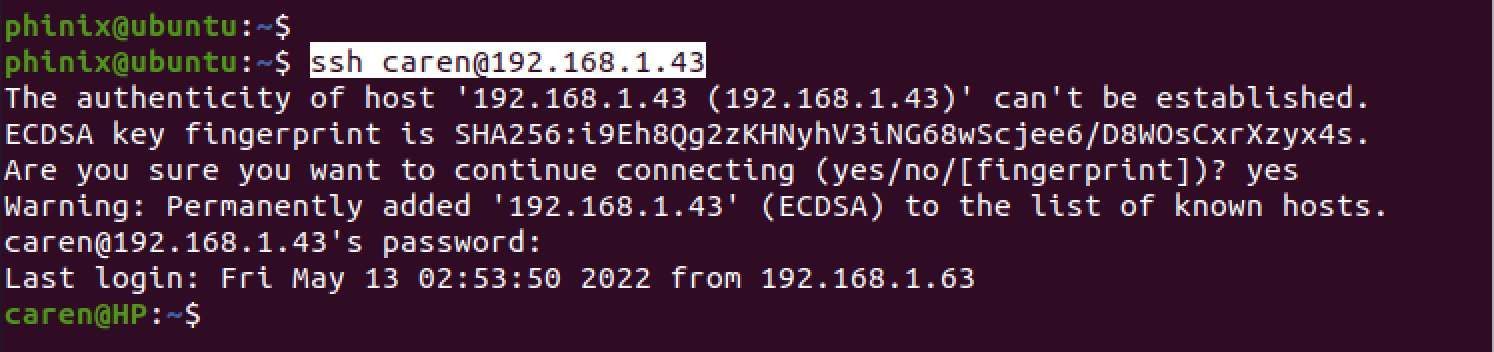
Connect to remote systems
From the image above, you can see we have successfully established a connection to the remote system. You can also see that the terminal prompt has changed to the “remote username.”
Note: If you are connecting to a remote system for the first time, you will see the message below on your Terminal.
The authenticity of host '192.168.1.43 (192.168.1.43)' can't be established.
ECDSA key fingerprint is SHA256:i9Eh8Qg2zKHNyhV3iNG68wScjee6/D8WOsCxrXzyx4s.
Are you sure you want to continue connecting (yes/no/[fingerprint])?
Type “Yes” to continue.
Disabling SSH on Ubuntu
To disable SSH on your system, execute the command below on your system.
sudo systemctl disable --now ssh
If you wish to re-enable it in the future, you will use the command below.
sudo systemctl enable --now ssh
Uninstall OpenSSH
To uninstall OpenSSH from your Ubuntu system, execute the commands below on your system.
sudo apt remove openssh-server
sudo apt remove openssh-client
Conclusion
This post has given you a step-by-step guide on installing and enabling OpenSSH on Ubuntu 22.04.1 LTS. It has also shown you how to connect to remote systems using SSH. Do you have any comments or suggestions regarding this post? Please let us know in the comments below.
1 comment
This was useful! Thanks a lot!