
MongoDB Compass is an excellent tool for anyone who does not know how to analyze and alter data using command-line queries. MongoDB Compass is simple to download and install on major operating systems. It is a simple procedure that takes little time.
This article will explain how to install and use MongoDB Compass and discuss its essential features. Furthermore, it will walk you through the MongoDB Compass Windows, Linux, and macOS installation processes. To effectively utilize MongoDB Compass on your desktop environment, follow the simple and quick procedures provided in this article. Continue reading to learn about the functions and benefits of installing MongoDB Compass on your OS.
MongoDB Compass and its features
The MongoDB Compass is a robust graphical user interface that allows you to interact easily with the MongoDB database engine. It is advantageous because it does not necessitate any technical background or prior understanding of MongoDB query syntax. MongoDB Compass, on the other hand, may be used for more than simply data visualization; it can also be utilized for index management, query optimization, and document validation.
MongoDB Compass Features
MongoDB Compass is well-known for the following distinguishing features:
- Index Visualization: It enables you to get a unified view of all indexes in MongoDB.
- Simple Querying: Because no prior knowledge of MongoDB queries is required, querying on the MongoDB Database is relatively simple.
- Schemas and Structure Analysis: Schemas are an excellent approach to structure data in JSON format since they give a variety of techniques to apply to the data and generate concrete results.
- Aggregation Pipeline Builder: This tool allows you to aggregate data in sets by processing a group of documents or views at many levels.
- Effective Rulemaking: Users completely control schema validation criteria when creating documents.
Installing MongoDB Compass
In this article, we shall be illustrating how to install MongoDB Compass on our three central operating systems:
- Linux
- Windows
- macOS
Installing MongoDB Compass on Linux
Before installing any Linux operating system, it is always recommended first to update the system resources. Therefore, to update our system resources, execute the following line of code:
sudo apt-get update
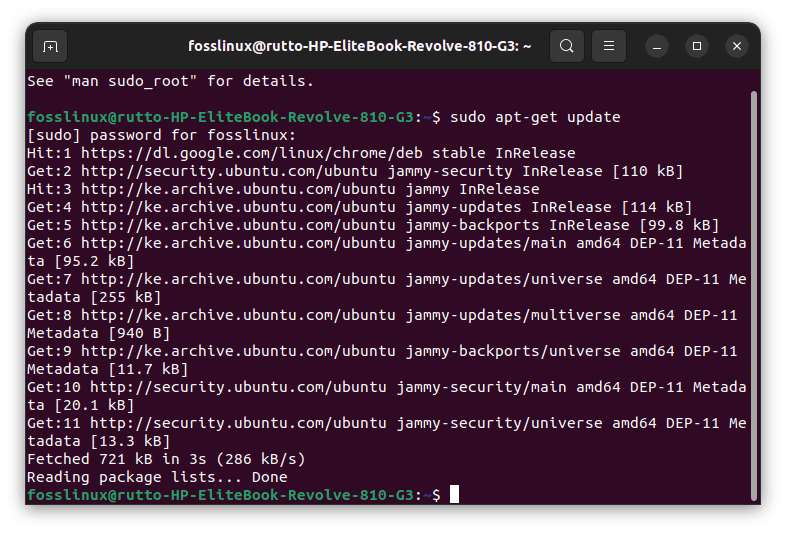
update system resources
Once you are done updating resources, follow the steps provided herein to complete the installation process:
Step 1: Download MongoDB Compass
After successfully updating your system resources, you need to download the MongoDB Compass “.deb” file. You can do so via the terminal by executing this line of code:
wget https://downloads.mongodb.com/compass/mongodb-compass_1.15.1_amd64.deb
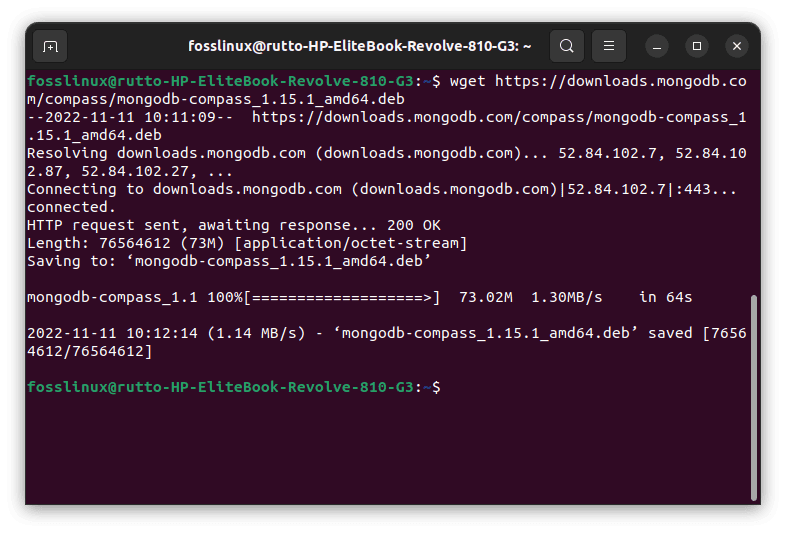
Download MongoDB Compass
Alternatively, you can manually download it by visiting the MongoDB official website.
Be patient as the MongoDB Compass “.deb” file is downloaded from the internet as it might take quite a while to complete depending on your system specifications and internet speed.
Step 2: Install MongoDB Compass
Now that we have the installer file on our Linux OS, we can proceed and install it. To do so, you can use two methods:
- You can execute the following line of code to install it via the terminal:
sudo dpkg -i mongodb-compass_1.15.1_amd64.deb
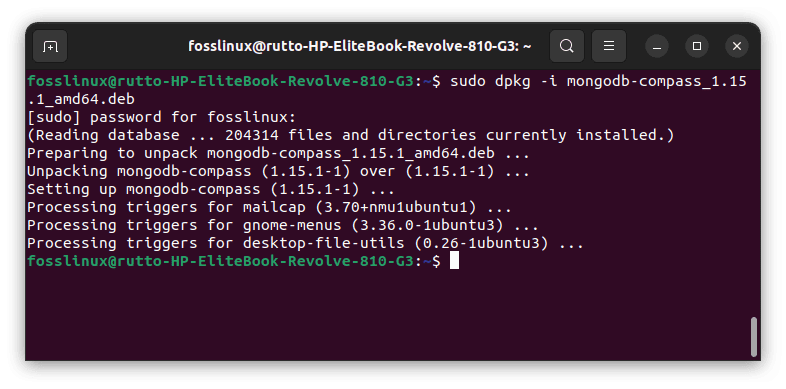
Install MongoDB Compass
Alternatively, you can double-click the .deb file to install it via the Ubuntu Software center. This process is relatively easy. However, the major downside is that it won’t work for all Linux OS’s.
Note: When using the terminal method, ensure to replace the MongoDB Compass file name with the existent file name of the downloaded file. If unsure, cd to the Downloads section and use the ls command to check and copy the file name. This will help you evade unnecessary errors.
Installing MongoDB Compass on Windows
Before installing MongoDB on your OS, ensure you have the following prerequisites:
- MongoDB 3.6 and above installed on your Windows OS
- Microsoft .Net Framework 4.5 and above
- 64-bit Microsoft version
- Windows 7 and Above
Once you have assembled all the prerequisites, proceed and follow the steps below to complete the installation of MongoDB Compass on your Windows OS.
Step 1: Download MongoDB Compass
Launch your favorite browser, and navigate to this link to download the MongoDB Compass installer file.
Step 2: Unzip the MongoDB Compass installer
Once the installer file has been downloaded and saved to your PC, locate the downloaded file and unzip it using any of your favorite applications. For illustration purposes, I will be using the WinRAR application.
Step 3: Install MongoDB Compass
After unzipping the installer file, double-click on the installer icon. Follow the on-screen prompts, and customize the installation according to your preference.
Note: If you have not installed Microsoft .NET Framework, the installer will prompt you to install it during the installation process.
Once the installation process is complete, launch the MongoDB Compass and enjoy using it.
Installing MongoDB Compass on macOS
Before installing MongoDB Compass on macOS, ensure you have fulfilled the following system requirements:
- MongoDB 3.6 or higher installed
- 64-bit macOS 10.12 or above (MongoDB Compass only supports 64-bit versions)
Note: MongoDB Compass for macOS is supported by M1 systems with Rosetta or Rosetta 2 installed. Rosetta (2) is pre-installed and doesn’t require manual installation using macOS Big Sur or a more modern operating system. However, if you run an operating system earlier than macOS Big Sur, Rosetta must be manually installed.
Once you have the prerequisites in place, follow the steps provided herein to complete the installation:
Step 1: Download MongoDB Compass
Launch your preferred browser and navigate to the MongoDB official downloads page. Download the latest MongoDB Compass version available.
Note: Always ensure the file you are downloading contains a “.dmg’ extension.
Download .dmg file
Step 2: Install MongoDB Compass
Once the file has been successfully downloaded, you can find it in the “Downloads” section. Double-click on it and open the disk image using the default macOS Finder application. Now drag the MongoDB Compass application to your Applications folder to install it.
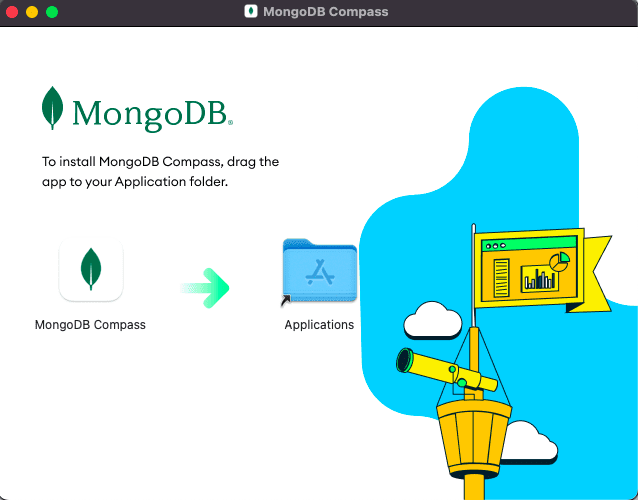
Move MongoDB to Applications
Once the application completes copying to the applications folder, eject the disk image. You can launch the application by double-clicking it from the applications folder.
Note: When opening MongoDB Compass for the first time, you might encounter an error stating that the application was downloaded from the internet and needs permission to launch. If you get such an error warning, don’t freak out. Click the “Open” button to continue and launch your newly installed MongoDB Compass application.
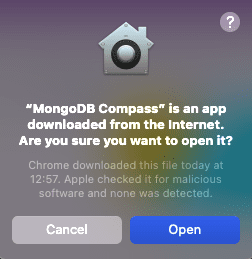
Click Open
Now that we are done with the installation phase let us learn how to use MongoDB, and for illustration purposes, I will be using My Ubuntu 22.10 OS.
How to use MongoDB Compass
Before using the MongoDB Compass, ensure the MongoDB server is active and running on your Ubuntu 22.04 system. If the MongoDB server is not running, you will be unable to connect to the MongoDB database, which means you will eventually be unable to use the MongoDB Compass. You may start the MongoDB server by typing “mongo” into your system’s console.
Note: If by chance you haven’t installed MongoDB and would like to know how to install it on your Ubuntu OS, then check out this in-depth article on How to install and configure MongoDB on Ubuntu
Once the MongoDB server is up and operating on your machine, you may proceed as follows:
Step 1: Launch MongoDB Compass
You can start the MongoDB Compass by searching for it in your Ubuntu 22.04 application Menu and clicking on the correct search result.

Launch MongoDB Compass
The picture below depicts the MongoDB Compass tool’s welcome interface:
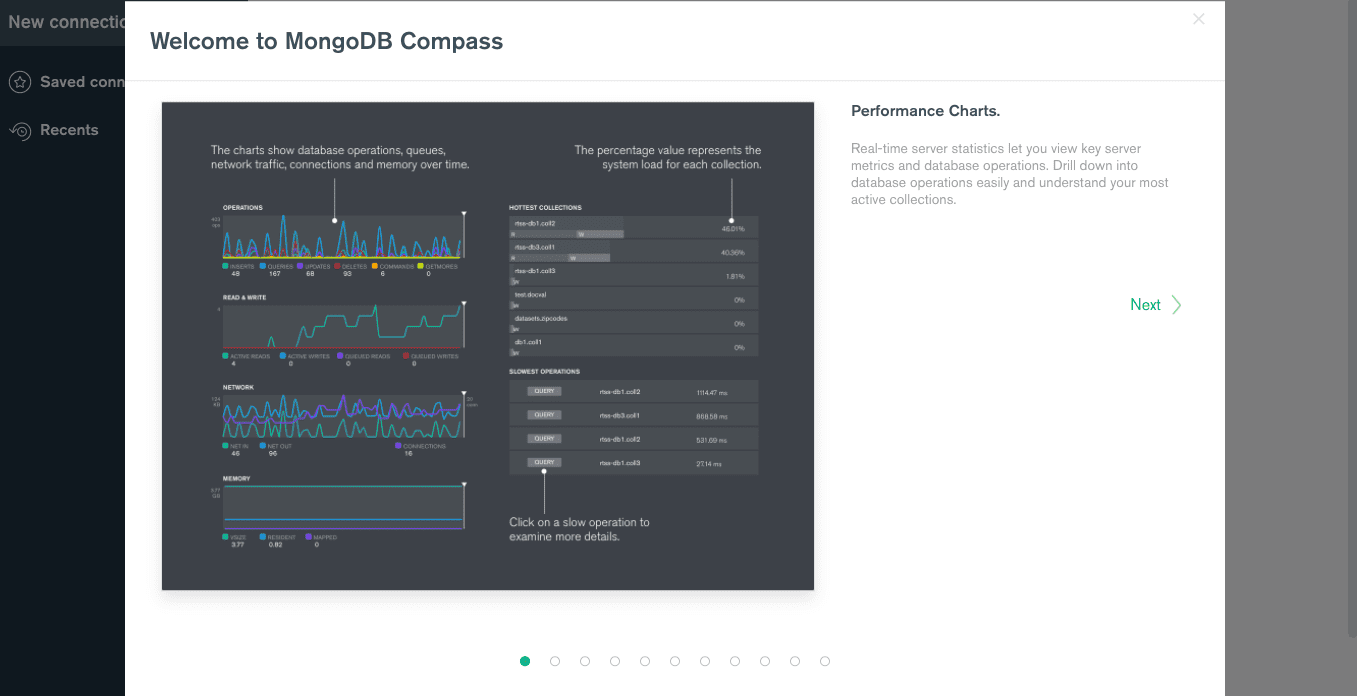
MongoDB Welcome Screen
When you dismiss the welcome message dialogue box, the Privacy Settings dialogue box appears, as seen in the figure below. To proceed, click the “Start Using Compass” option.
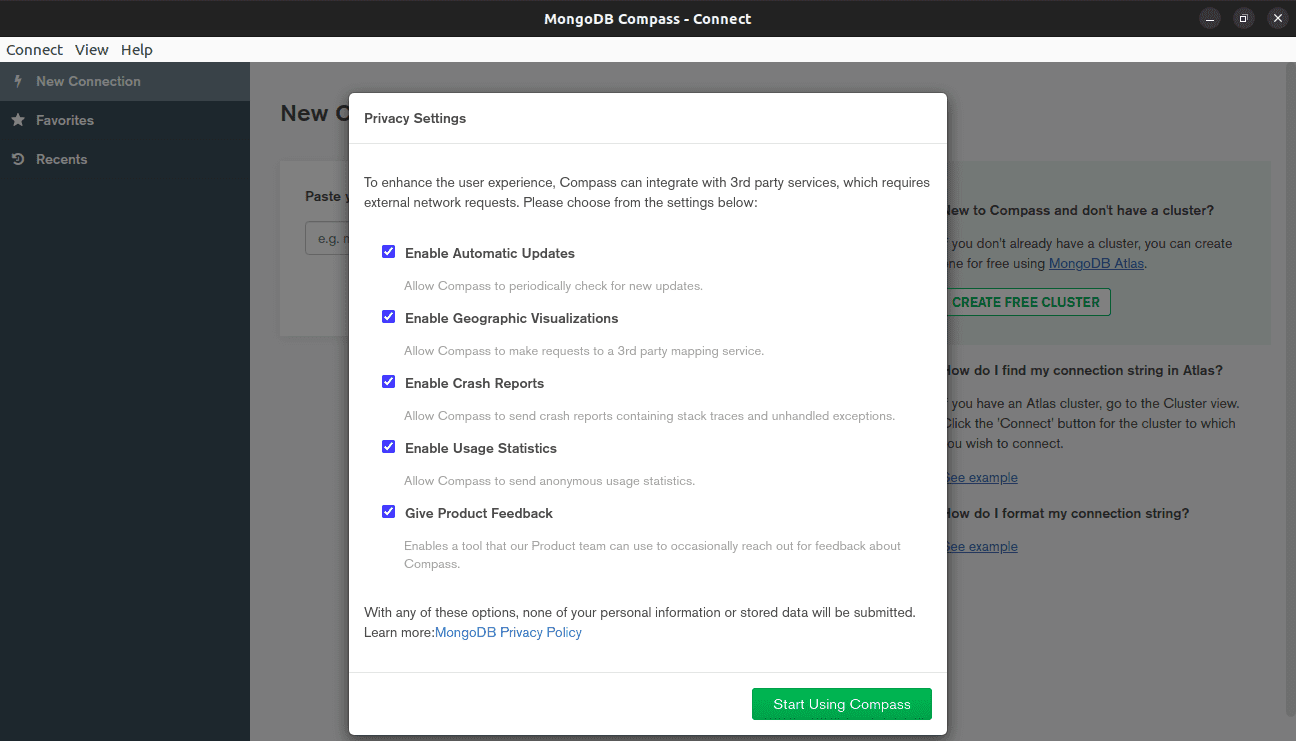
MongoDB Compass Privacy settings
Under the privacy settings, you must enhance your experience by changing some preferences. But before we do so, it is essential to put across that the MongoDB Compass can integrate with 3rd party services that require external network resources. To allow the integration, use the simplified section below to help you choose wisely:
- Enable automatic updates: Allows the application to check for new releases periodically.
- Enable geographic visualizations: Allows the application to send requests to a third-party or middle-man mapping service
- Enable usage statistics: Allows the application to send usage statistics
- Enable crash reports: Allows the application to send crash reports that contain unhandled exceptions and stack traces
- Give product feedback: This is a tool that the MongoDB product team occasionally uses to obtain feedback from its users about the application
Once you are done selecting your privacy settings, proceed to step 2 below:
Step 2: Connect MongoDB Compass to the MongoDB Database
Now you must connect to the MongoDB database. To do so, enter your Local Host Address in the given field and click the Connect button, as seen in the image below:

Create a new connection
Step 3: Create a Database and Collection in MongoDB Compass
Once you successfully connect your MongoDB Compass to your MongoDB Database, you can easily create a DB (Database) and collection using MongoDB Compass. To do so, click on the “Databases” tab to create a new database. Once you click the “Databases” tab, you will be presented with the three default databases: the admin, config, and local databases, as shown in the image below:

Three Default databases
To create a new database, click the “Create database” button highlighted in the snapshot below:
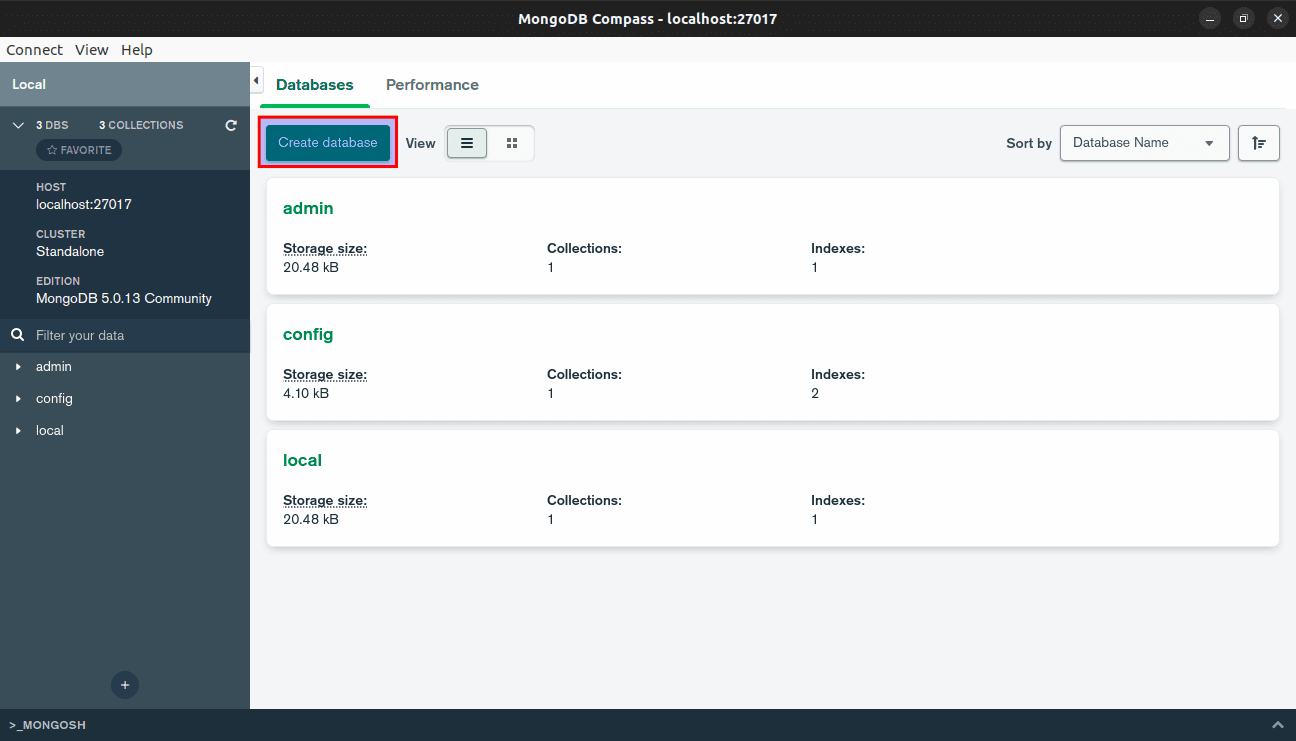
Create new database
When you select this button, you will be prompted to provide the name of your database and the name of the collection you wish to create inside it (you can create more collections inside the same database later on). After entering the database and collection names, you must click the Create Database button, as seen below:
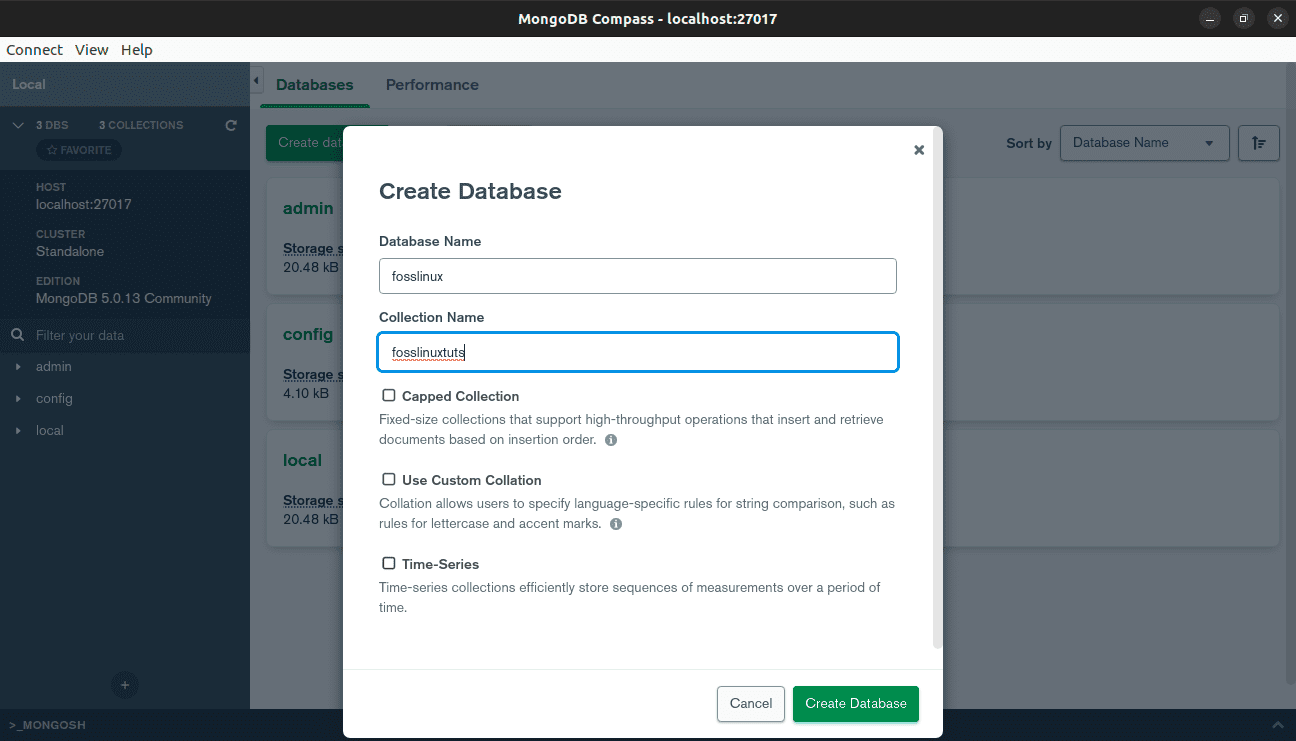
Click Create database
Step 4: Insert a document in a MongoDB Compass collection
After creating your database in step 3 above, it will be displayed alongside other existing databases, such as the three default ones shown earlier in this article. You first need to expand your database by clicking on its name to insert a document inside the newly created collection in your MongoDB database. Now select the name of your specific collection, as illustrated in this snapshot:
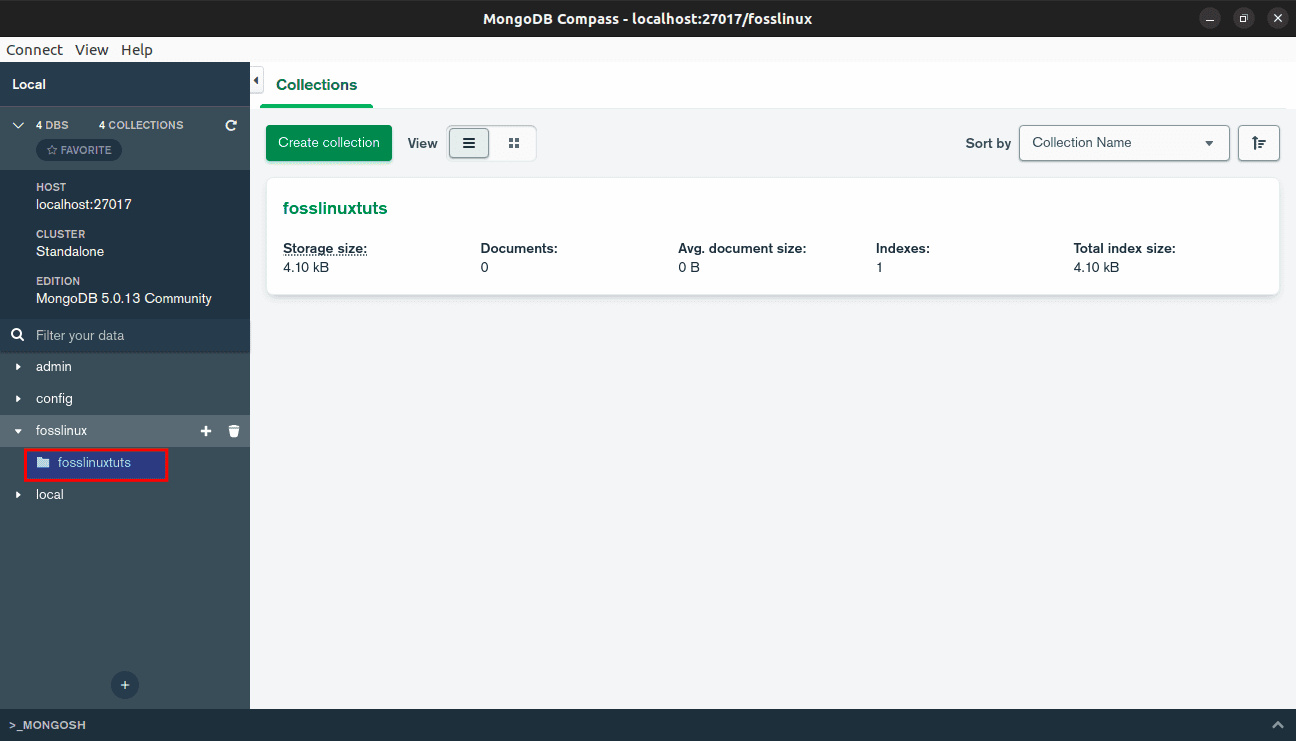
Select the name of the collection
Inside your new collection, click on the “ADD DATA” button and then choose the “Insert Document” option to insert a new document into your collection.
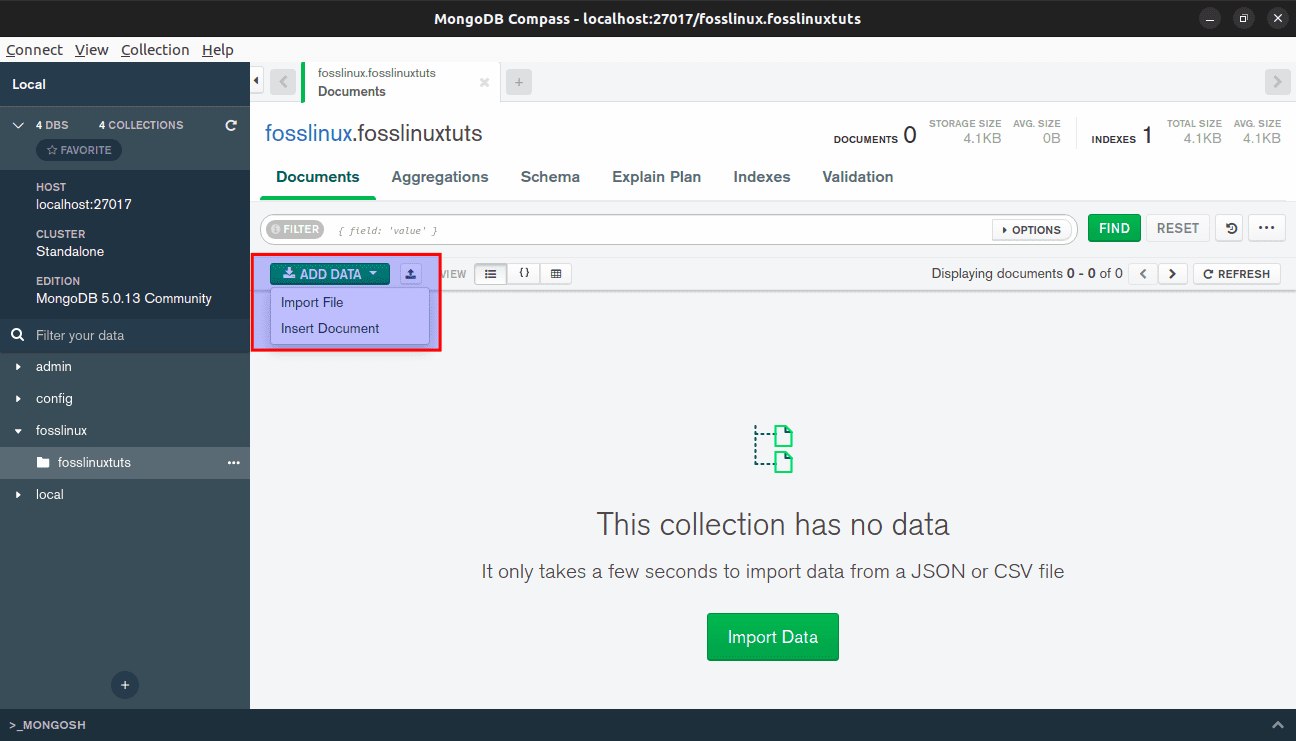
Click ADD DATA
After clicking the “Insert Document” option, you will be presented with a sample document like the one shown herein:
Sample collection document
Depending on your preference, you can append the sample text and create your custom document. In addition, you can insert multiple documents simultaneously while using the comma to separate the documents.
Note: Be keen with the syntax you input on your document/s to avoid running into unexpected errors.
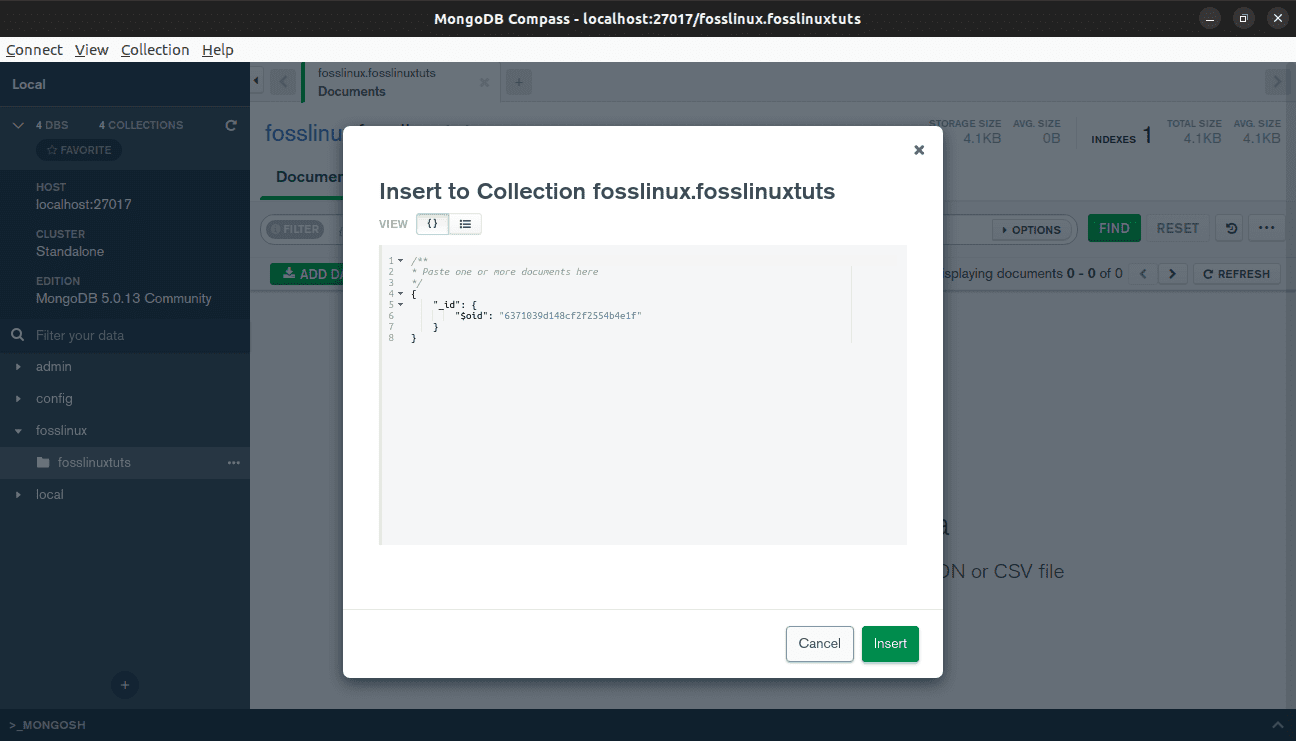
Once you have appended the document to suit your needs, click the green “Insert” button.
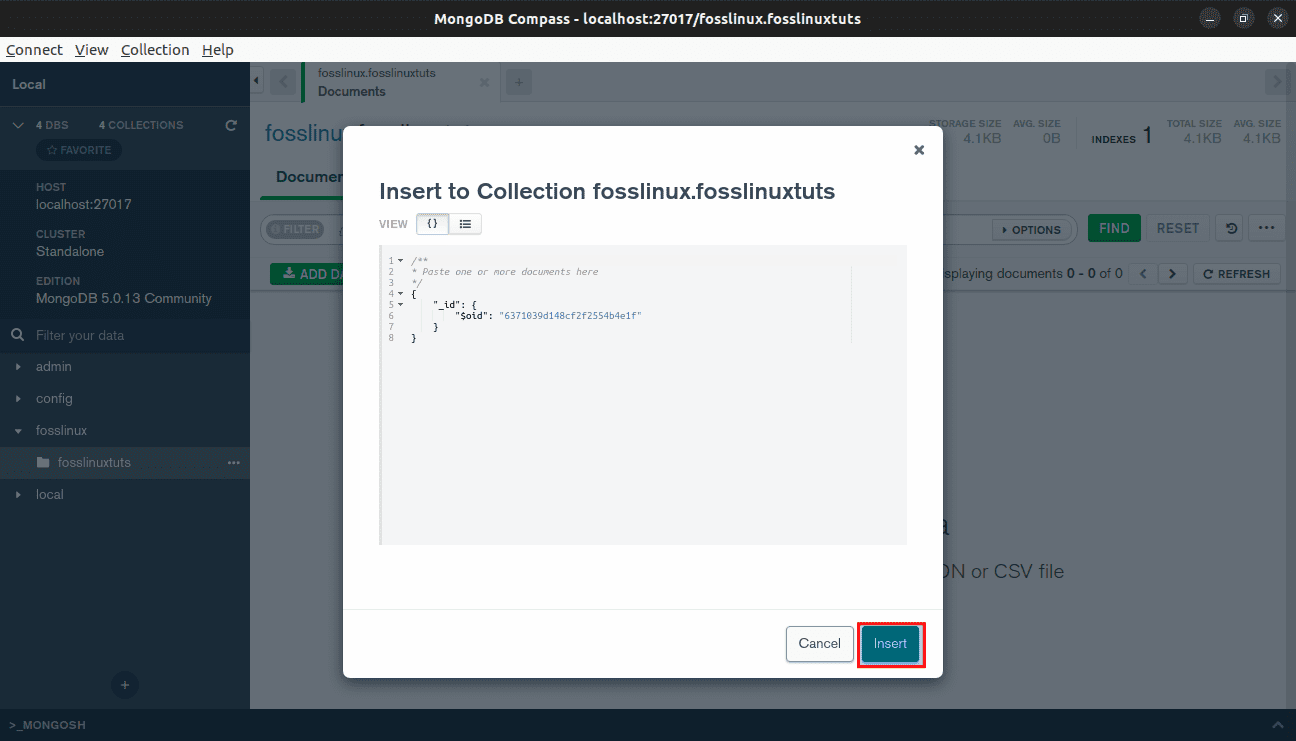
Click Insert button
The appended/ inserted document can now be seen inside your collection as illustrated herein:
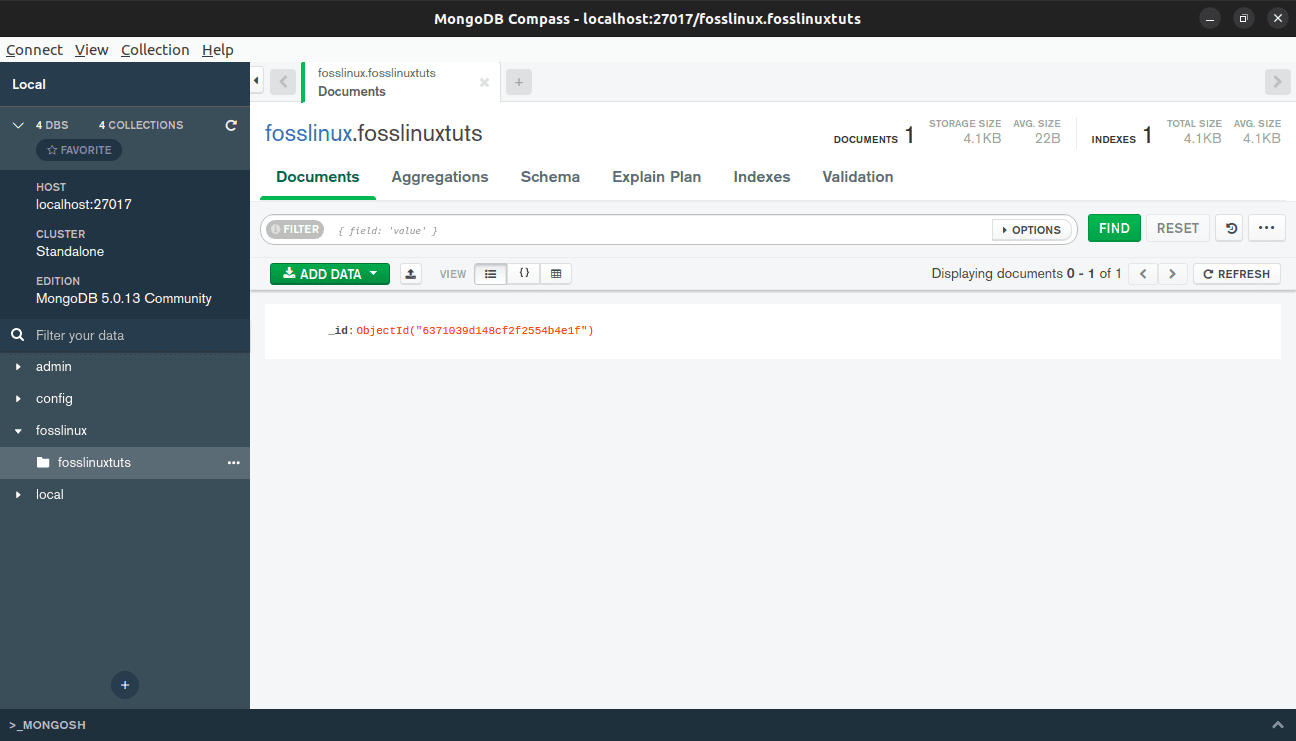
Example of the inserted document
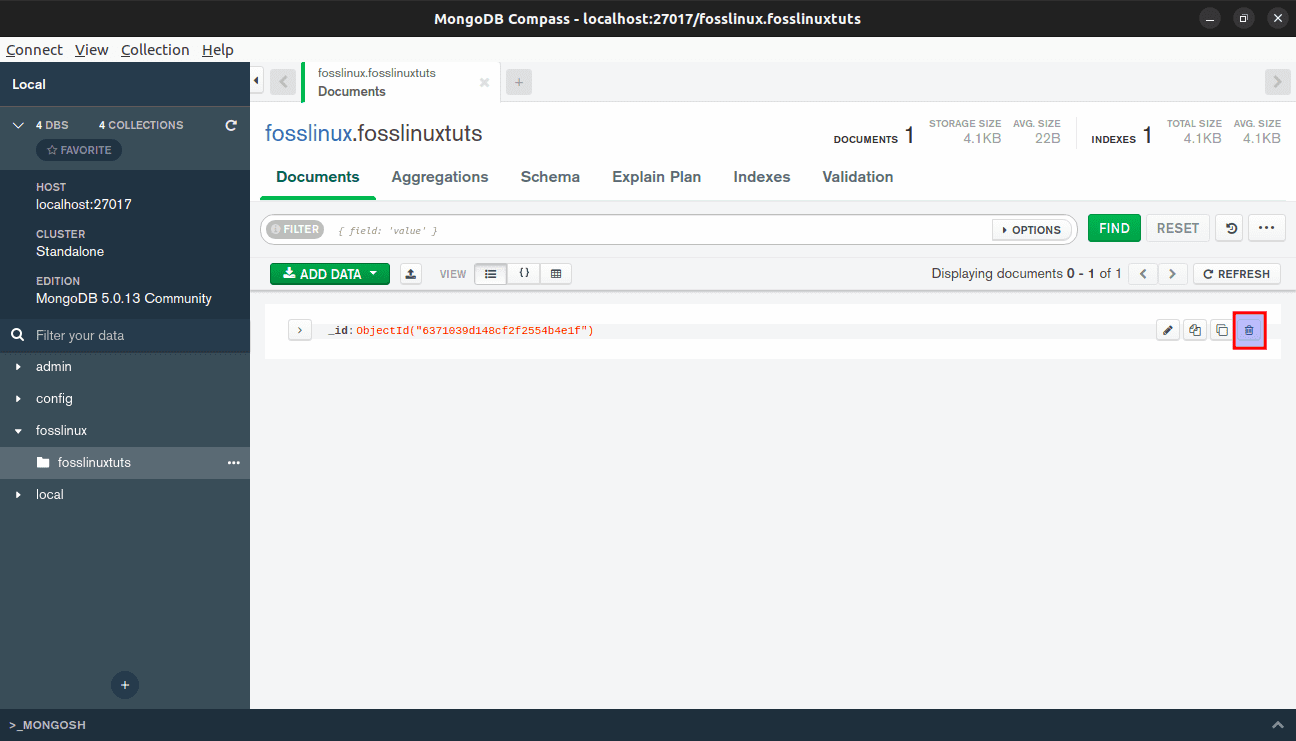
Step 5 Delete a document from a MongoDB Compass collection
Deleting a document is relatively easy. All you need to do to delete the recently added document to our collection is hover the mouse over it and click the “Remove” icon.
Delete document
A second screen will appear, prompting you to confirm its deletion. Press the “DELETE” button to completely do away with the document file.

Confirm file deletion
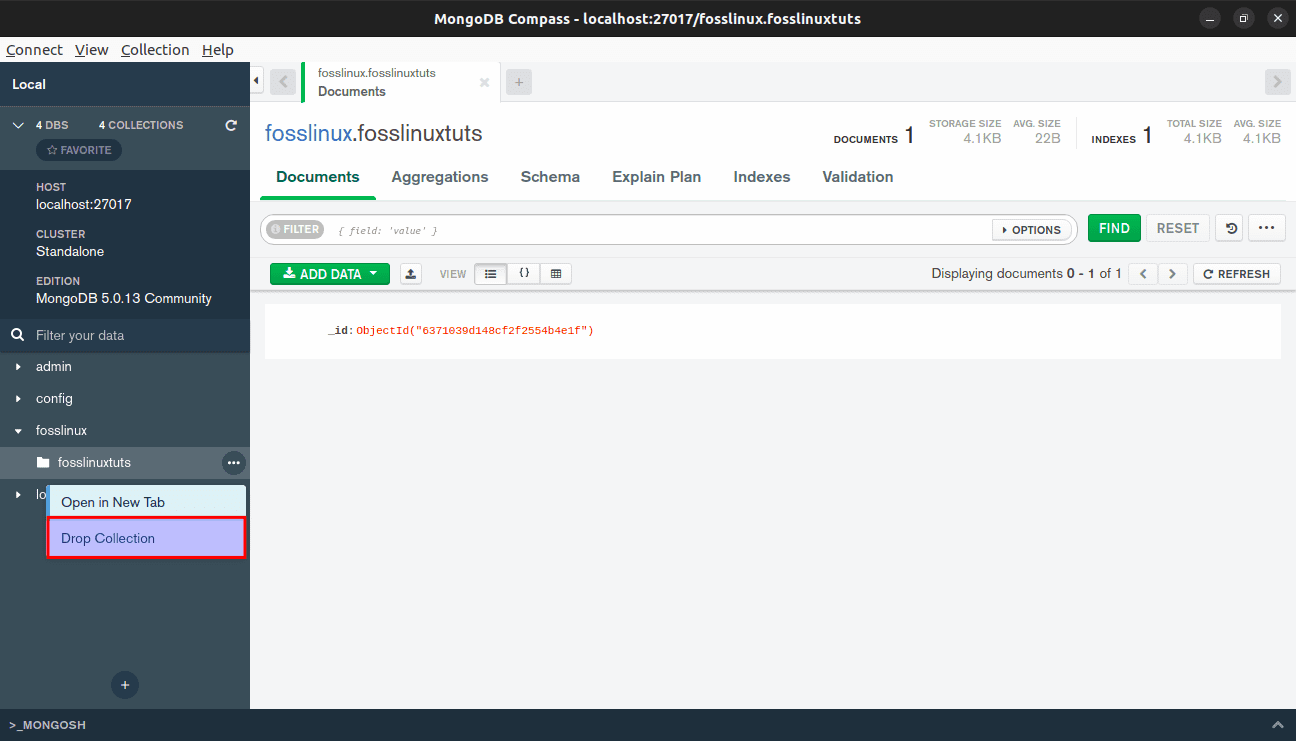
Step 6 Delete a collection from a MongoDB Compass
Removing a collection is possible, and the process is relatively straightforward. Locate the collection you intend to delete, click the “three ellipses,” and select the “Drop Collection” option.
Drop collection
After clicking the “Drop Collection” option, you will be prompted to confirm the deletion process. To do so, click the “Drop Collection” button as shown below:

Confirm collection deletion
That’s it. I hope you are now in a position to install and use the Mongo