
MongoDB Atlas is easy and free to set up and deploy MongoDB on Heroku. The MongoDB Atlas is commonly referred to as the multi-cloud data application platform. It is an integrated data and cloud DB service that simplifies and accelerates how users build with data.
When you start building more complex cloud-native apps, selecting the proper tools and services tends to be quite overwhelming. However, that is not the case when choosing the best cloud DB service, as MongoDB Atlas is your best solution.
On the other hand, Heroku is a Platform as a Service (PaaS) that provides developers with the ability to run, build, manipulate and operate apps on the cloud. Heroku supports a multitude of programming languages.
This article guide will illustrate how to deploy MongoDB on Heroku. We shall be using the MongoDB Atlas version since it easily integrates with most Heroku applications. This process might seem complex at first, but you will realize nothing is complicated when you dive deep into it. All needed is to set your MongoDB Atlas cluster connection string to a known Heroku config variable, and you are good to go.
The Atlas edition is a fully-managed cloud MongoDB service that automates MongoDB cluster management in the cloud. It offers users auto-scaling, automated backups, complete suite management, analytic tools, and a multi-AZ tolerance fault. MongoDB Atlas is among the most sophisticated DBaaS.
Follow the steps provided herein to learn how to get MongoDB up and to run quickly. You will also be able to see how to connect the MongoDB Atlas cluster to the Heroku apps by following the in-depth guide provided in this article.
How to deploy MongoDB on Heroku
This article guide presumes that you have the following prerequisites in place:
- You are well conversant with MongoDB and have written MongoDB applications
- You are conversant with Heroku and have deployed Heroku applications before
- You have installed the Heroku CLI
- You are conversant about Git and have installed it.
With the mentioned prerequisites, let us learn more about the subject matter discussed above.
Setting up MongoDB Atlas Cluster
First, we shall be looking at how to set up the MongoDB Atlas Cluster in less than five steps.
Step 1: Creating a MongoDB Atlas account
Note: If you have already created a MongoDB account with your email address, skip the registration process and sign in to your account.
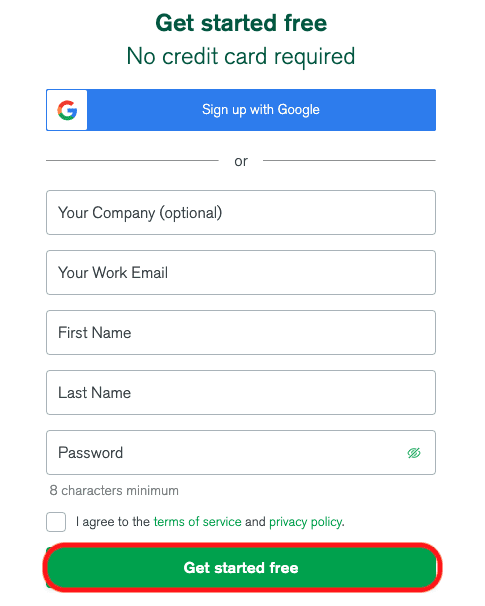
Registering for a new MongoDB Atlas account is very easy. You can opt to use your email address or your Google account to register.
The process is entirely free; therefore, you don’t have to worry about incurring additional charges.
Follow this link to register for a MongoDB Atlas account for free. Just fill in your details and click on the “Get started free” button to get your free Atlas account.
Create MongoDB Account
Once you have an Atlas account, proceed to the next step
Step 2: Creating your Project and organization
MongoDB Atlas will, by default, prompt you to create an organization and project after completing the registration process. Quickly fill in the required details to complete this process and move to the next step. The organization and project will be used to deploy your cluster in the future.
Step 3: Deploy cluster
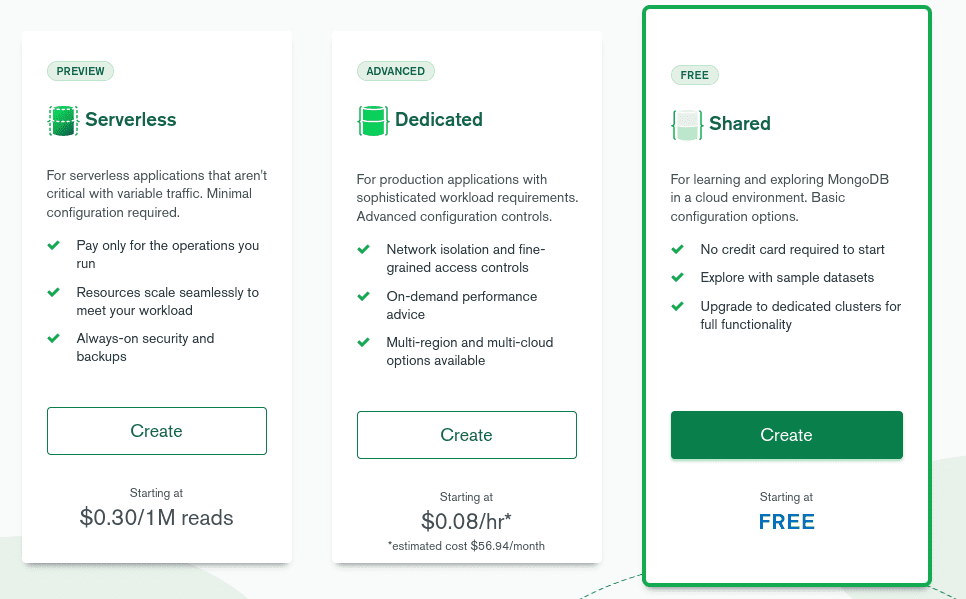
In this phase, you will select a cluster from various cluster options. For the sake of this article guide, we shall be using the “Shared Cluster” option, which is the free cluster option provided by MongoDB Atlas. Below the “Shared Cluster” option, click on “Create.”
Shared Cluster
You will be prompted to select a few options for your cluster on the next page, as highlighted below:
Cloud Provider & Region
Here you are required to choose where your cluster will be deployed to. It is essential to select a region closest to your application. Ideally, you should select a constant region to minimize latency-related issues. We shall be using this Region, “N. Virginia (us-east-1),” with AWS as our source cloud provider for this guide. We selected AWS as our cloud provider since we shall be deploying on Heroku and hosting their infrastructure on AWS.

Cloud Provider
Cluster tier
In this subsection, you will see the available cluster tiers for the cluster option we chose, in this case, the shared cluster options. Here, you will see a comparison of RAM, Storage, tiers Base Price, and vCPU. These comparisons will help you select the correct tier suited for your project. We shall leave it to the default “M0 Sandbox” tier for this guide.

Cluster tier
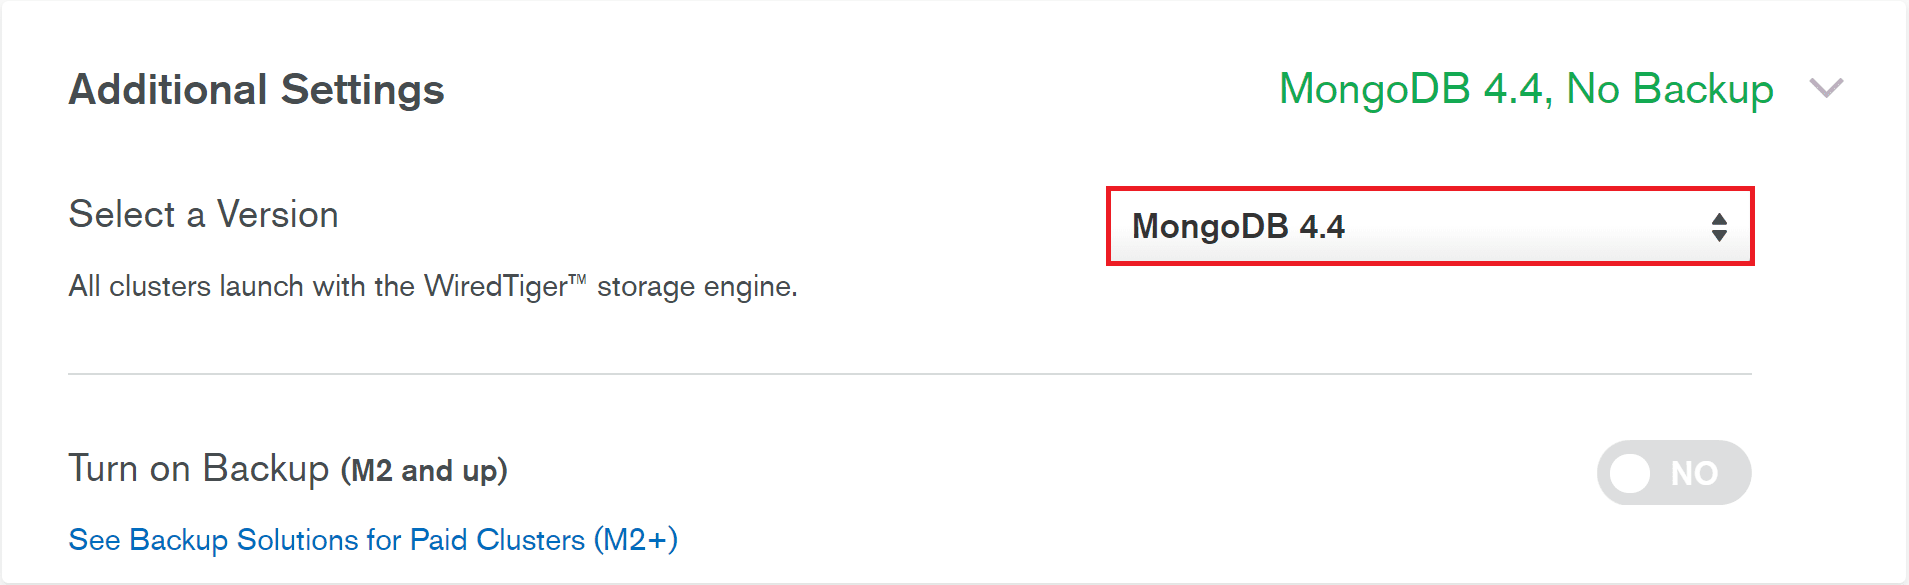
Additional Settings
This section is dependent on the tier you choose. You might get some additional settings depending on the tier you select. These settings will include backup options and MongoDB versions to be deployed. Select MongoDB version 4.4 and leave the backup option off.
Additional Settings
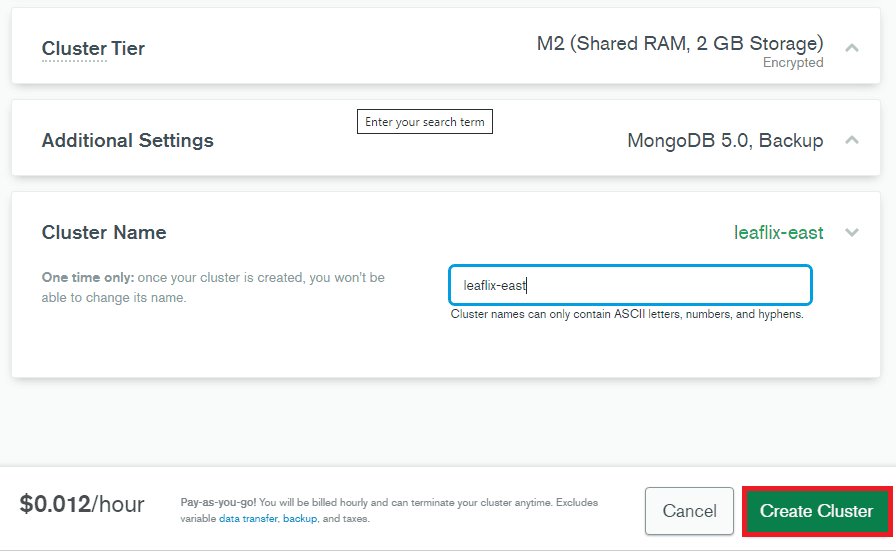
Cluster name
This is the last option. Here it would help if you named your cluster. I will call our cluster “Leafix.” Remember that you will not be allowed to change it once you have created the cluster.
Note: It is advisable to review the selected options and make necessary changes before creating the cluster using the “Create Cluster” button.
Create Cluster
Step 4: Create a DB User for your newly created cluster
MongoDB Atlas requires that clients authenticate as MongoDB database users to access clusters. Follow the steps provided to create a DB user for your cluster.
- Navigate to the “Database Access” section. It is located under the “Security” tab on the left-hand side.
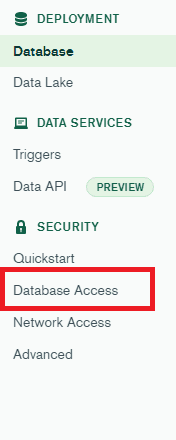
Database Access
- Click on the “Add a new Database User” option.
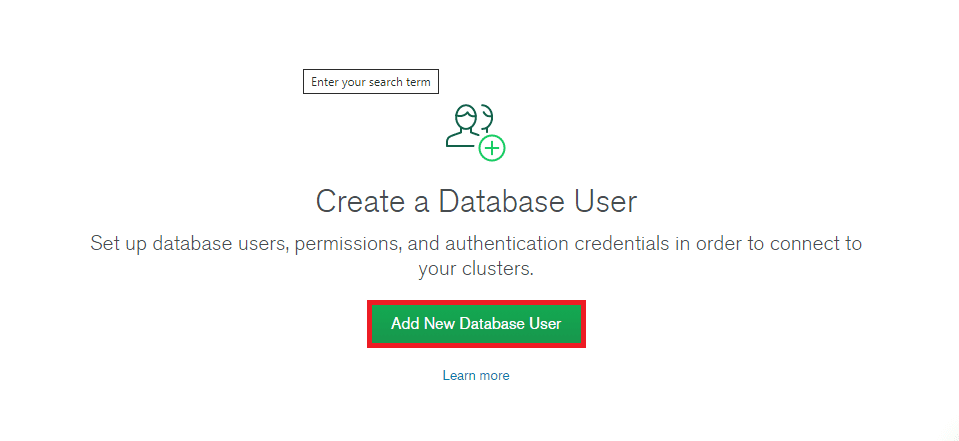
Create Database User
- A prompt will appear. Input your authentication method, and database user privileges
- Use the “Password” as your authentication method and provide the password and username.

Authentication Method
Note: It is highly recommended to autogenerate a strong password from Atlas to prevent insecurity-related complications. Once you have autogenerated the password, copy and save it in a convenient place to easily retrieve it in the future. This step is vital as we shall require the password while connecting to the cluster.
- Grant the user the most privileges by selecting the “Atlas admin” option.

Atlas Admin
- Once you are done, click on “Add user” to create a DB user.
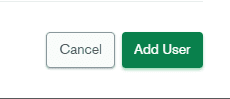
Add User
Step 5: Grant authorized IP addresses cluster access
This is the final step when setting up the MongoDB Atlas cluster. This section will choose the IP addresses that allow us to access the Atlas cluster. To grant authorization, follow the steps mentioned herein:
- Under “Security,” select “Network Access.”
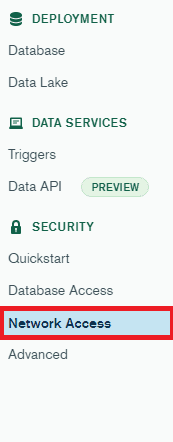
Network Access
- Next, choose “Add IP Address.”

Add IP address
- Select “Allow Access from Anywhere” and click on the “Confirm” button to complete the process.
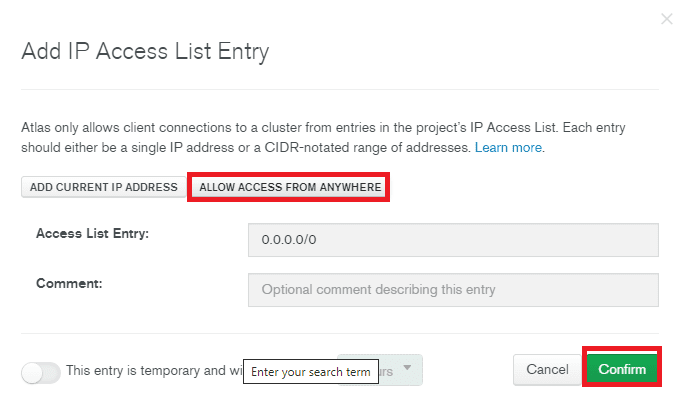
Allow IP access
That’s all. You have successfully set up your MongoDB Atlas cluster.
Note: You don’t want to allow this type of IP address access in a production environment due to security issues. You need to identify the exact IP address for your application and explicitly set the IP address range. This process is tailored to enhance your cluster’s security.
Connecting to your Cluster
To connect to your newly created cluster, follow this guide:
- Under the “Data Storage” section on the left-hand navigation bar, click on “Clusters.”
- Click on the “Connect” tab
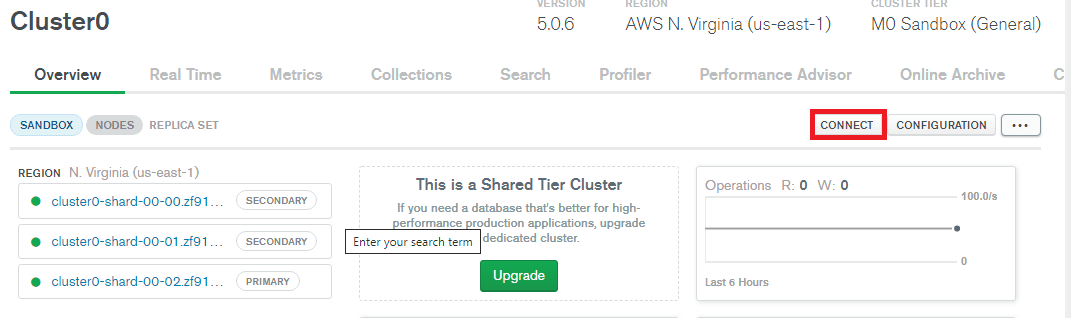
Connect
- Choose your driver version, then copy the connection string only

Copy string
Once you are done, update the connection string. Again, don’t neglect to add your username and password.
Creating a Heroku account
Creating a Heroku account is very easy. First, visit Heroku’s official website and sign up just like we did for MongoDB Atlas. After completing your Heroku account, proceed and install the Heroku CLI.
Install Heroku CLI
It is vital to ensure you have Git installed on your Linux OS since the Heroku CLI requires Git. Git is a popular version control system commonly used by most developers. Installing Git is very easy. Open your terminal and execute the command below:
sudo apt-get install git-all
Output:
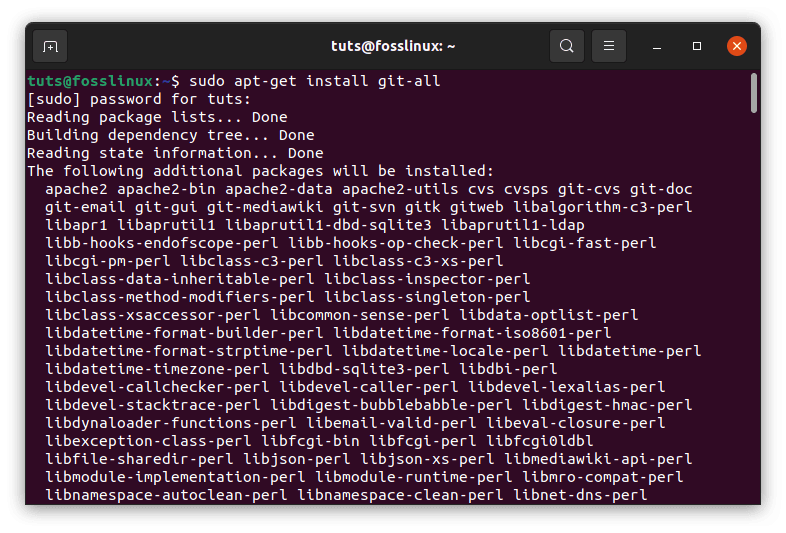
Install git
That command will install Git into your Linux OS. After that, run this other command to install Heroku on your Linux OS:
sudo snap install --classic heroku
Output:

Install Heroku
Give the terminal time to execute the command and install Heroku entirely.
Login and Create a New application on the Heroku Website
We believe you have been following the article closely, and you have created a Heroku account. If so, open your Heroku Dashboard. Input the details you used creating your Heroku Account to log in to your dashboard. After you’ve logged in, proceed to the next step to create a new application:
- Navigate to heroku.com/apps
- Select New>Create new app>Choose Region>Create app.
- Be patient as the app is created.
- Once the process finishes, you will be redirected to your dashboard. Select the “Deploy” section
Connecting the Heroku application to local repositories
Follow the deployment guides provided in this article’s deploy section you previously selected.
Still, log in to Heroku on the “Deploy” section we selected previously.
Run the following commands (also specified in the Deploy section) to connect to Heroku and build a new Dyno from your server/project root directory:
Note: The angle brackets “<>” used in the examples below denote the user-supplied identifier/parameter/argument values. When running the commands, you should leave them out.
# Add Heroku remote
heroku git:remote -a <name-of-the-newly-created-app>
# Take a look at the available remotes.
# The connection to the new ‘heroku’ remote repository should be visible.
git remote -v
# On the development branch, commit the most recent work.
git add .

git commit -m 'Write a clear, meaningful commit message here.'

git push origin <development-branch-name>
# Branches should be checked out to the master branch.
git checkout master
# Updates from the development branch are merged.
git merge <development-branch-name>

git push heroku master
Setting up Heroku to connect to the MongoDB Atlas Cluster using configuration variables
We had a lot of fun quickly setting up our Atlas cluster, but we think you’ll enjoy this section even more!
Heroku applications that are Atlas-backed are straightforward to build up. Construct an application-level config var that contains your cluster’s connection string. You can safely access that config var within your application once it’s been set up!
This is how you do it:
Step 1: Open the Heroku CLI and log in.
heroku login
This command takes you to the Heroku login page in your web browser. Click the “Log in” button if you’re already logged in. You can also use the -i flag to log in from the command line.
Step 2: Make a copy of my demo app
I’ve constructed a prototype Node application that uses MongoDB Atlas and that I’d like to publish to Heroku to continue this lesson. Clone it, then go to the following directory:
git clone https://github.com/adriennetacke/mongodb-atlas-heroku-leaflix-demo.git

cd mongodb-atlas-heroku-leaflix-demo
Output:
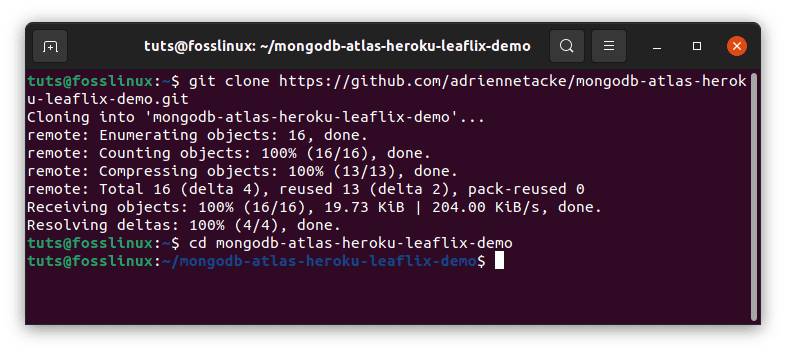
Clone leaflix demo
Step 3: Build a Heroku app
heroku create leaflix
Output:
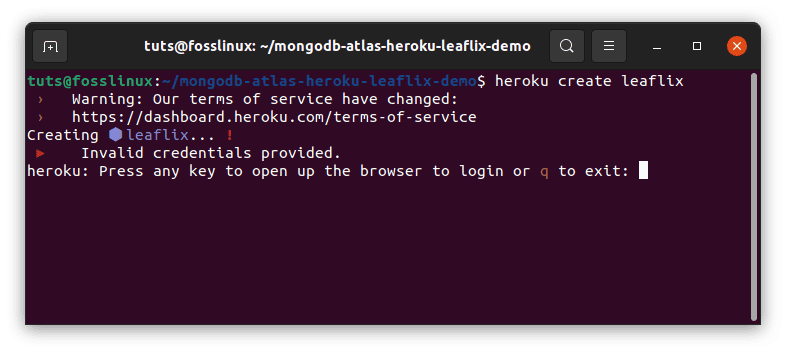
Create leaflix
As you can see, I’ve given my leaflix a name.
Obtain your Atlas Cluster connection string
Please return to your Atlas cluster’s dashboard to retrieve our connection string.
- Select “Connect” from the drop-down menu.
- Select “Connect your application” from the drop-down menu.
The connection string we’ll need to connect to our cluster will be found here. Jot down the connection string.
Paste the connection string into an editor; we’ll make some changes before assigning it to a Heroku configuration variable.
Atlas has easily included the username of the database user we previously created, as you can see. Replace the “password” with your personal database user’s password and “dbname” with “sample_mflix,” which is the sample dataset our demo app will use to complete the connection string and make it valid.
Note: If you don’t have the password for your database user, autogenerate one and use it in the connection string. If you autogenerate it again, remember to update it! Go to Database Access > Click “Edit” on the database user you would want to find the password for > Reset your password > Autogenerate another Safe Password.
Create a MONGODB_URI configuration variable
Now that we’ve correctly created it, it’s time to save our connection string in a Heroku config variable. Set the MONGODB_URI config variable to our connection string:
heroku config:set MONGODB_URI="mongodb+srv://yourUsername:yourPassword@yourClusterName.n9z04.mongodb.net/sample_mflix?retryWrites=true&w=majority"
Here are a few key points to keep in mind:
- This command consists of only one line.
- Because our connection string’s format contains special characters, it must be enclosed in quotes.
It’s as simple as that! You’ve successfully added your Atlas cluster’s connection string to a Heroku config variable, allowing you to securely access it after your app is deployed to Heroku.
Note: You may also enter this config var in the Heroku Dashboard’s “Settings” tab for your app. Go to Leaflix > Settings in your apps. Click the “Reveal Config Vars” button in the Config Vars section and enter your config var there.
The final step is to change your application’s code to allow access to these variables.
Using Heroku config var values to connect your App to a MongoDB Atlas Cluster
You’ll notice that we’ve hard-coded our Atlas cluster connection string in our demo application. We need to rework our code to use the previously generated Heroku config variable.
Environment variables are used to expose config vars to your application’s code. The language you choose to access these variables will determine how you access them; for example, in Java, you’d use System.getenv(‘key’) calls, and in Ruby, you’d use ENV[‘key’] calls.
Knowing that our application is written in Node, we can use the process.env variable in Node.js to connect to our Atlas cluster. Change the uri constant in the server.js file to:
const uri = process.env.MONGODB_URI;
That concludes our discussion. Our application will securely access our Atlas cluster connection string once deployed because we added it as a Heroku config var.
Save the file, commit the modification, and then deploy to Heroku.
git commit -am "fix: refactor hard-coded connection string to Heroku config var"

git push heroku master
Your application has now been deployed! Using this command, you may double-check that at least one instance of Leaflix is running:
heroku ps:scale web=1
You’ll know that at least one instance is up and running if you get a notice that states, “Scaling dynos… done, currently running web at 1:Free.”
Finally, navigate to your app’s website. You can do so by sticking to the steps below:
heroku open

Welcome message
When you press the “Need a Laugh?” button, our software will select a movie based on the ” Comedy ” category in the genres area. If everything is in order, you should see something like this: the sample_mflix dataset is used in this example, which comes straight from our Atlas cluster.
Configuring IP addresses for Heroku in MongoDB Atlas
Our cluster is already operational, and our app is now live on Heroku!
We set up our cluster to accept connections from any IP address to get us through the article guide. You’d prefer to limit access to your application solely, and there are a few options on Heroku for doing so.
The first option is to utilize an add-on to give your application a static outbound IP address that you can use to restrict access in Atlas. Some examples can be found here.
Another option is to use Heroku Private Spaces and use the space’s static outbound IPs. This is a more expensive choice, but it eliminates an additional add-on.
There are various docs and articles out there that claim you may use AWS or Heroku IP ranges to provide access to IPs originating in your AWS area or Heroku Dynos in those regions. While this is conceivable, it is not advised because such ranges may alter over time. So instead, we suggest using one of the two approaches listed above.
You can use the IP address(es) for your application to configure your firewall in Atlas once you have them.
Remove any existing IP ranges from your Atlas cluster, then add them to your allow list. You can do so by following the procedure we used to “Add IP addresses and delete the existing IP ranges.”
That’s all! You have successfully deployed MongoDB on Heroku