
Every Linux distribution has its capabilities and preferences as per the user requirements. That brings forth the need to run different distros on one laptop. For example, a CyberSecurity enthusiast might prefer to use Ubuntu for development and Kali Linux for penetration testing.
Even though you can use virtualization technology to run multiple operating systems as virtual machines in your PC, memory allocation might be an issue. It raises the need for doing a dual boot or multi-boot. In that, you can install two or more operating systems on your laptop and choose the one you wish to use on boot.
Configure your PC to dual-boot Ubuntu and Fedora
In this article, you will learn how to dual boot Ubuntu and Fedora on your computer.
The key to performing any Linux dual boot is understanding how to partition your PC’s internal storage. You will install every distro in an independent partition. We will also need to set a swap space that acts as virtual memory on the computer’s storage device.
1. Install Ubuntu
You can install the operating systems in any order you like, but from personal experience, begin with Ubuntu. Our Ubuntu release of choice for this tutorial is Ubuntu 19.04. However, the method is the same, no matter the version.
Step 1). Create a bootable USB drive of Ubuntu. The are several tools you can use to perform this action. You can read our article on how to create a multi-boot USB drive using the MultiBootUSB tool.
Step 2). Insert your bootable USB drive and use it to boot your PC. You will need to change the boot order by pressing various functional keys, depending on your laptop brand.
Step 3). After a successful boot, you should see the Ubuntu boot screen. Here, you have two options to select from, Try Ubuntu and Install Ubuntu. Choose ‘Install Ubuntu’ and also choose your language of choice from the left pane. Click Continue.
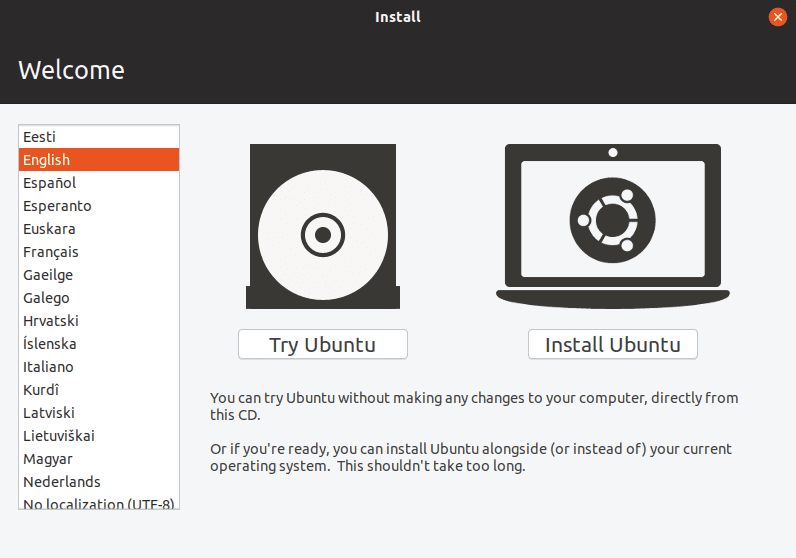
Ubuntu Boot Screen
Step 4). In the next window, you will need to select your keyboard layout. Click Continue when done.

Select the Keyboard Layout
Step 5). On the next screen, you will need to select the type of installation you wish to use. It will determine the applications that will be installed automatically during the installation process. If you are new to this, choose ‘Normal Installation.’
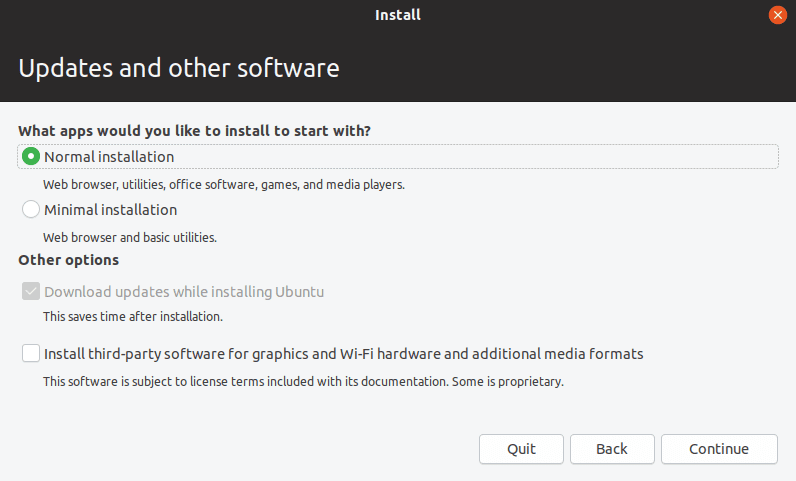
Select the installation type.
Step 6). The next window brings us to the most crucial step – the installation type. You will have four options to choose from.
- Erase disk and install Ubuntu
- Encrypt the new Ubuntu installation
- Use LVM
- Something else
Select the option ‘Something else.’

Select installation type to configure your partitions
Step 7). On the next screen, you will see your partitions. For this tutorial, I assume you are performing a clean installation on a new hard disk. Therefore, I will guide you with the partitioning, so you won’t have a problem with installing Fedora.
From the image below, you can see I currently have one partition – sda.
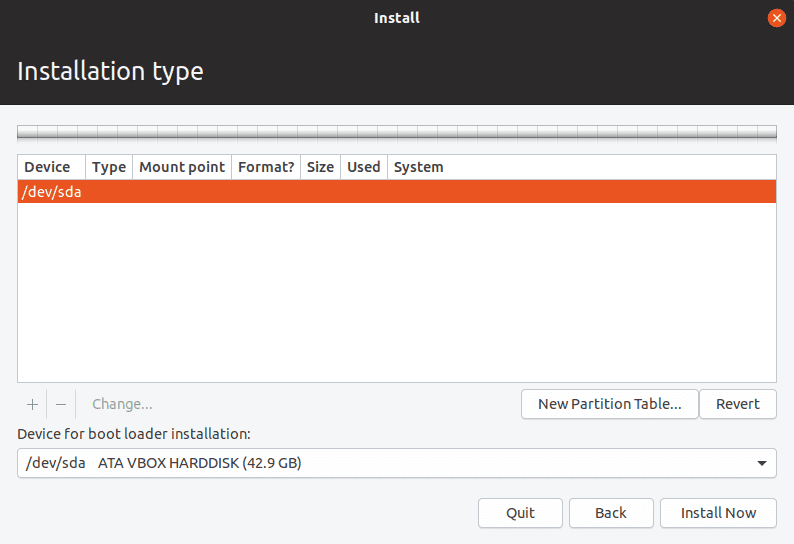
Installation Type
Step 8). We need to have at least two or three partitions. Select the partition and right-click on it. You will see the option ‘New Partition table.’ Click on it. You might see a pop-up warning, click Continue.
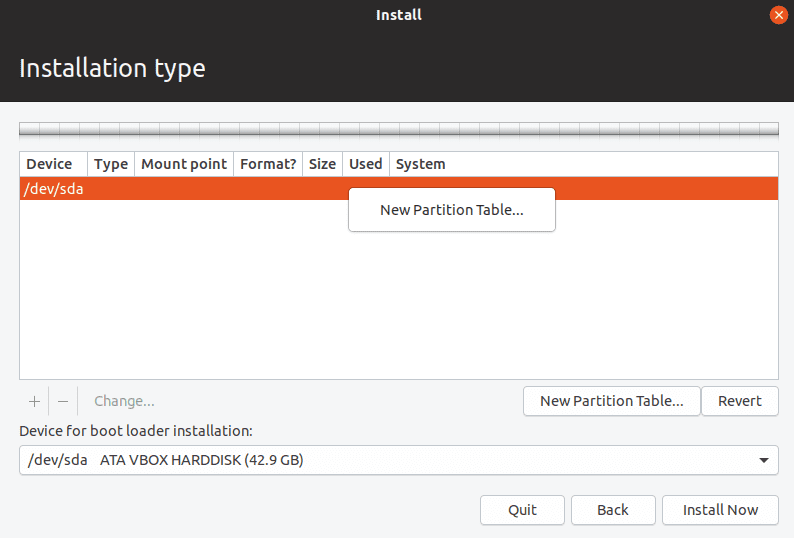
Installation Type – Create a new partition table
Step 9). Now, we have created a free space, as shown in the image below. My storage size is around 40GB. It is the storage space that will host both Ubuntu and Fedora. Therefore, we need to partition it further.
Right-click on the free space and select the option ‘Add…‘
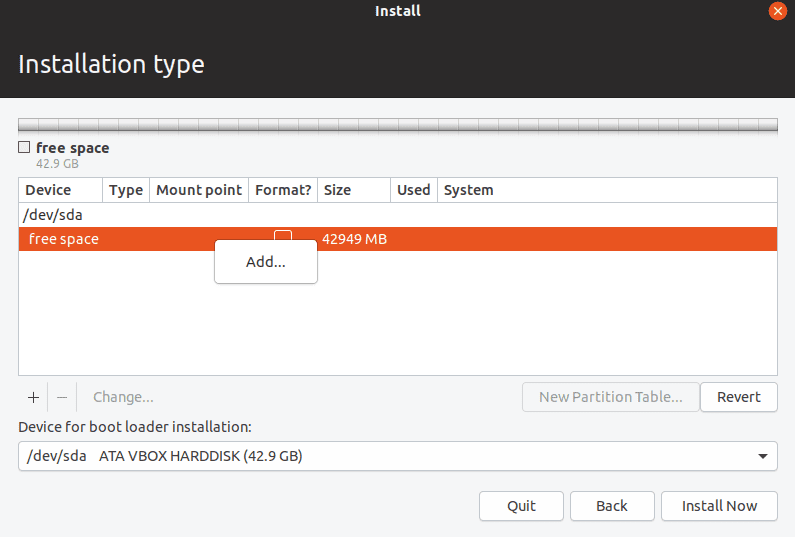
Installation Type – Add a new partition
Step 10). A window will pop-up. We will use this to create our partitions. Let’s first create a swap space of about 3GB, as shown below. Ensure on the drop-down option ‘Use as:‘ you have selected ‘swap‘ as illustrated below. Click OK.
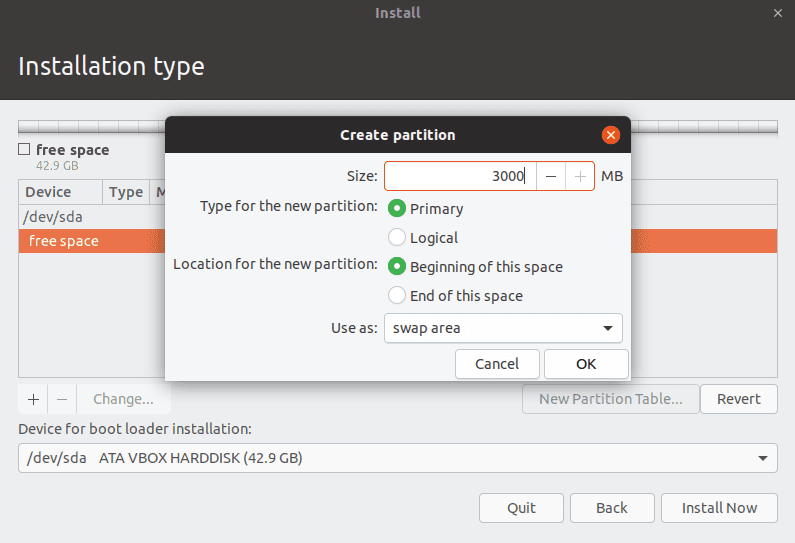
Installation Type – Create swap space
Step 11). From the remaining storage amount, let’s create a 20GB partition that will hold our Ubuntu system. Like before, right-click on the free space left and click on the ‘Add...’ option.
On the create partition window that appears, set the size you wish to assign and ensure that on the ‘Use as:’ drop-down option, you have selected the ‘Ext4 journaling system‘ as illustrated in the image below. Make sure also set the mount point as root (/).
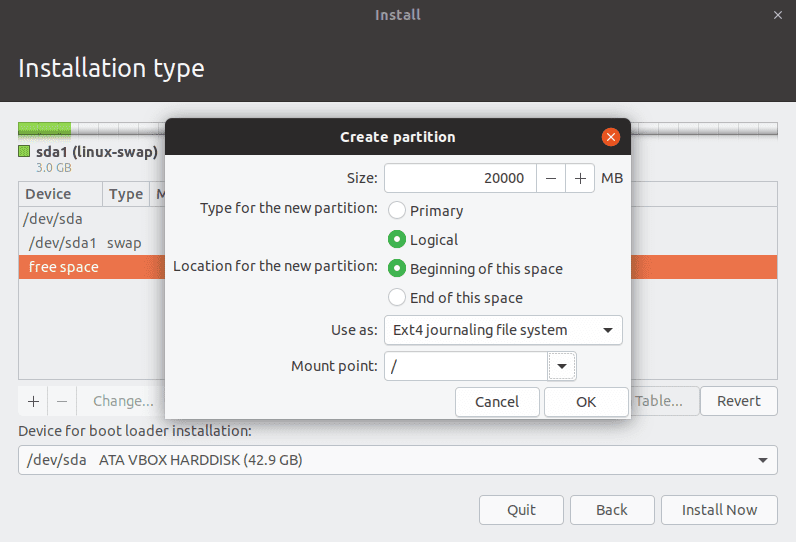
Create Ubuntu Partition
Click OK.
Step 12). On your ‘Installation Type’ screen, you should see your partition formats. Note, if you have other partitions, they won’t be affected as long as you have your ext4 partition. Once satisfied, click on ‘Install Now.‘
A warning screen will pop-up asking you to verify whether the partitions listed there are the correct ones. Verify and click Continue.
Next, you will have to input your location by clicking on your country from the map on the ‘Where are you?’ screen. You should see your capital city selected. Click Continue.
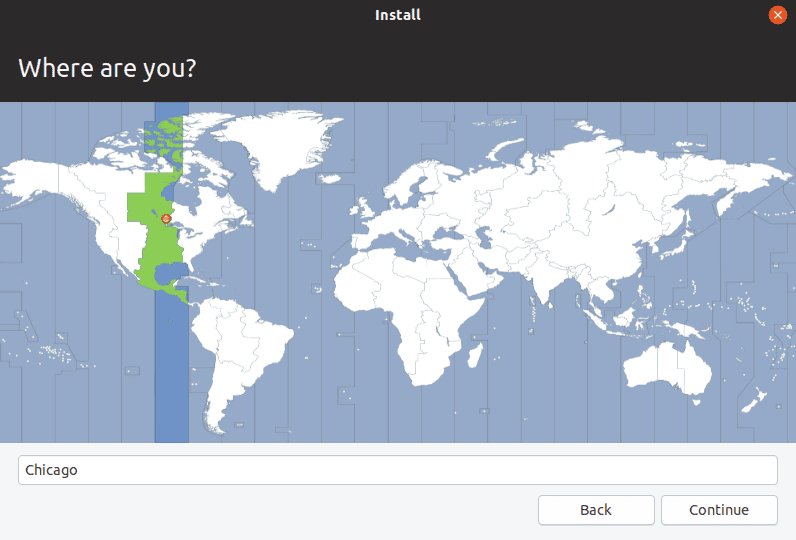
Select your Region
On the next screen, set your username and password. Click Continue.
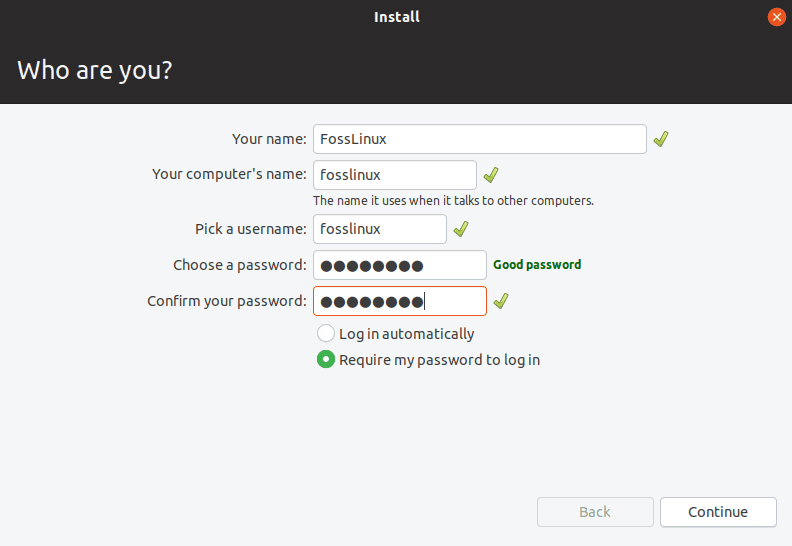
Enter username and passwords
The installation process should start. Wait and until it’s finished, and you will commence with your Fedora installation.
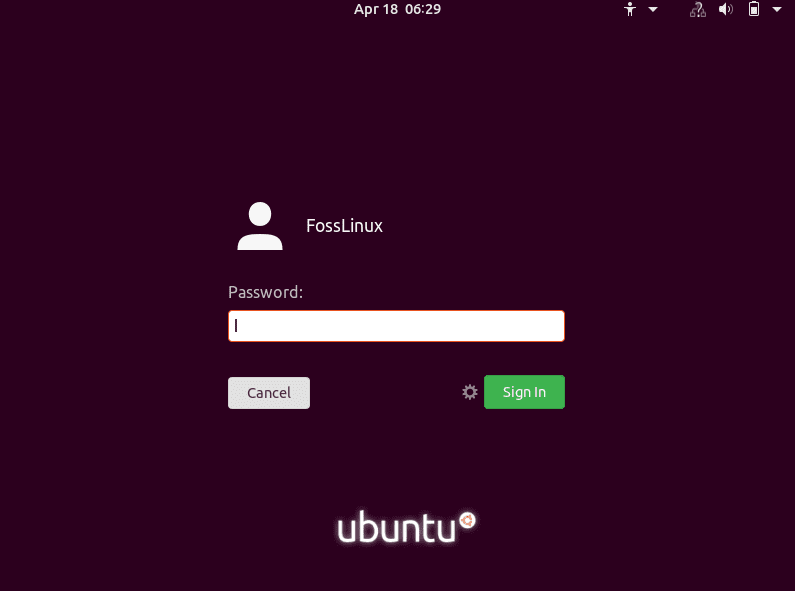
Ubuntu Desktop Login page
2. Install Fedora
Step 1). Create a bootable disk of Fedora and use it to boot your PC. You should see the Fedora boot screen load. Select the option, ‘Start fedora-Workstation.‘
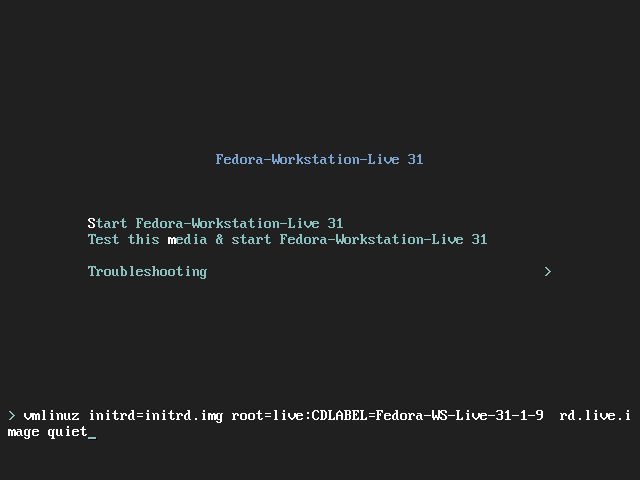
Start Fedora workstation
Step 2). On the next screen, you will see two options. ‘Try Fedora‘ and ‘Install to hard drive.’ Select the latter to begin the installation process.

Step 3). The language window will open. Select the language you wish to use for the installation process. Click Continue.
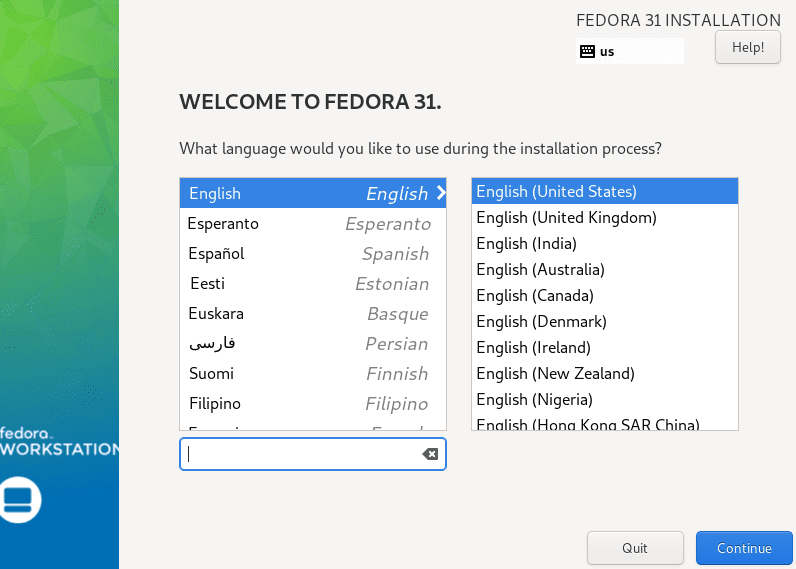
Select language
Step 4). In the next screen, you will see your Keyboard and Time & Date settings. If they are not OK, click on any of them and configure them correctly. You will see the System option that allows us to select the partition to install our operating system. Click on it.
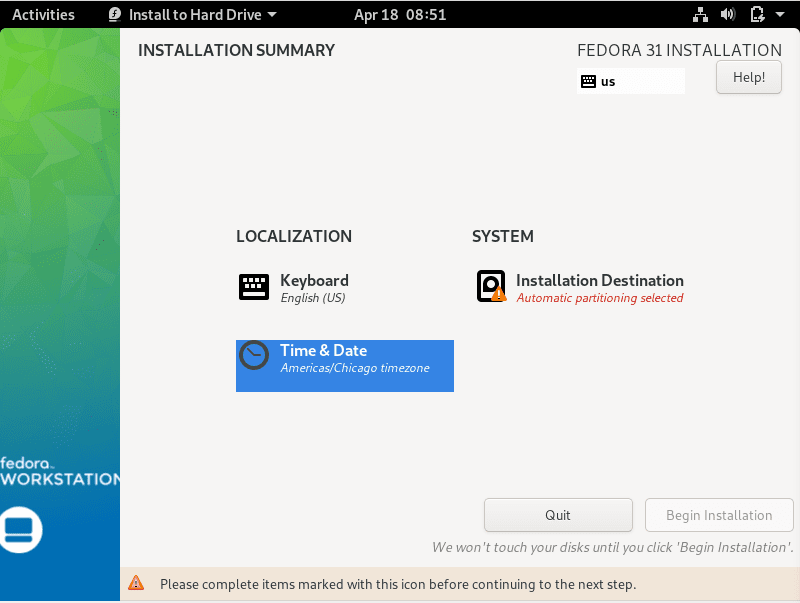
Set time and date and select partition to install
Step 5). You should see your internal storage device listed below. Remember, this is where you installed your Ubuntu system. Select it. For this article, I am using the 40GB storage, as indicated below.
At the bottom of the window, select the ‘Custom‘ option so that you can specify the exact partition you wish to install your Fedora distro. Click Done when finished.
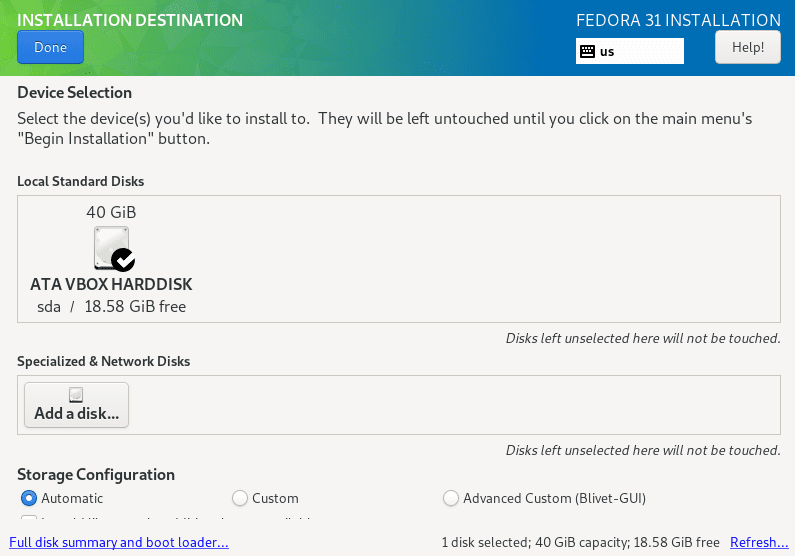
Select installation disk
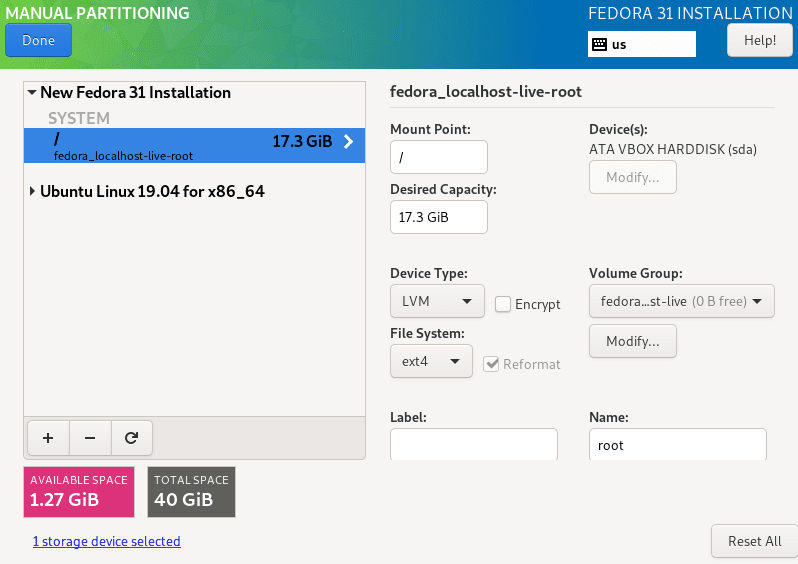
Step 6). The Manual Partitioning window will open. Here, you can see all the partitions in your storage drive. We will install Fedora in the free space left after installing Ubuntu. On the partition scheme, you can use LVM or Standard partition. Click on the ‘+’ button above the free space left.
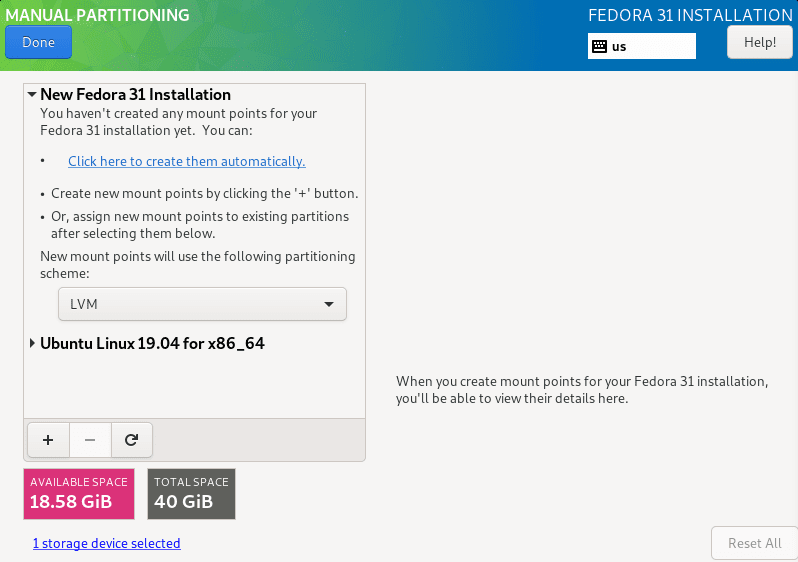
Manual partitioning window
Step 7). A small window will pop-up. Here, you will need to select your mount point and the partition size you wish to use. The mount point should be root, indicated with the ‘/’ sign. Enter the capacity you want to allocate Fedora distro. However, it shouldn’t exceed the free space available. Click ‘Add mount point‘ when done.
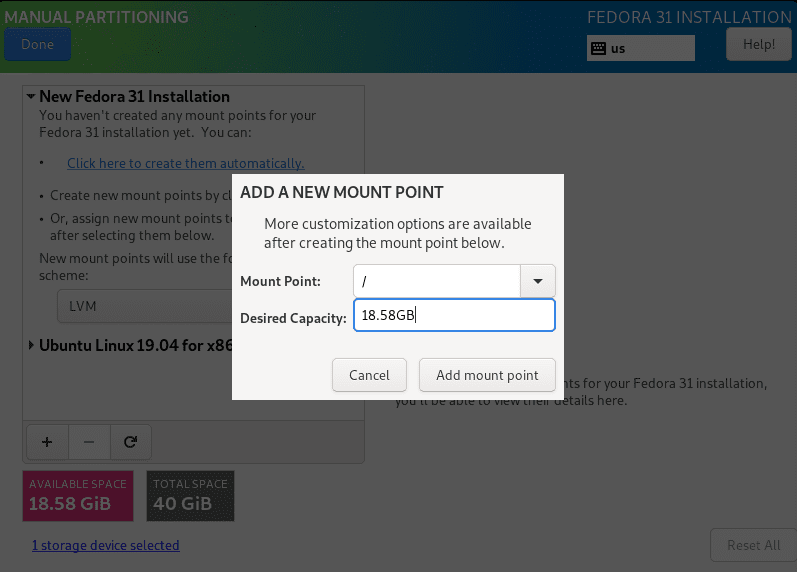
Add mount point
Step 8). You will return to the Manual partitioning window, which will show you a summary of all your configurations. Click Done if you are OK with the settings.
Overview of all partition configurations
Step 9). A window will pop-up listing all the partition changes that will take place. Click ‘Accept Changes‘ to continue. Note, your changes might not be the same as those listed in the image below.
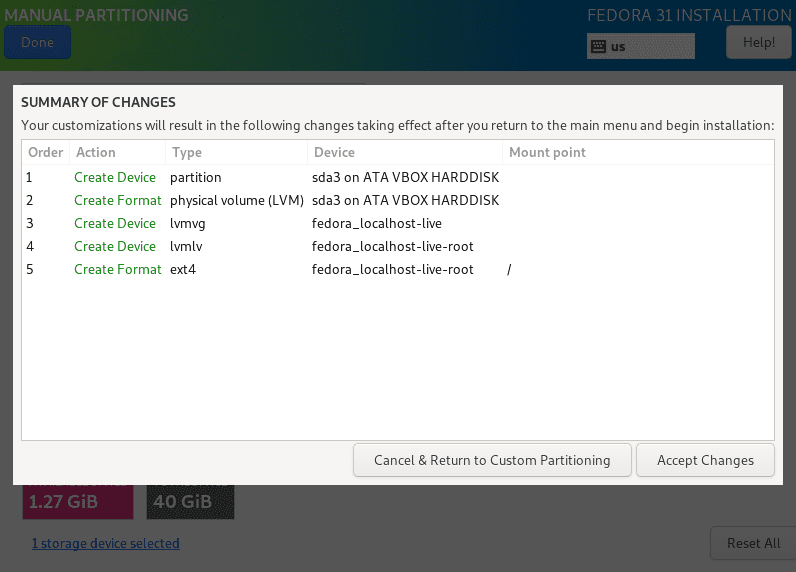
Summary of all partitions set
Step 10). The main installation window will open. Click on the option, ‘Begin installation.’
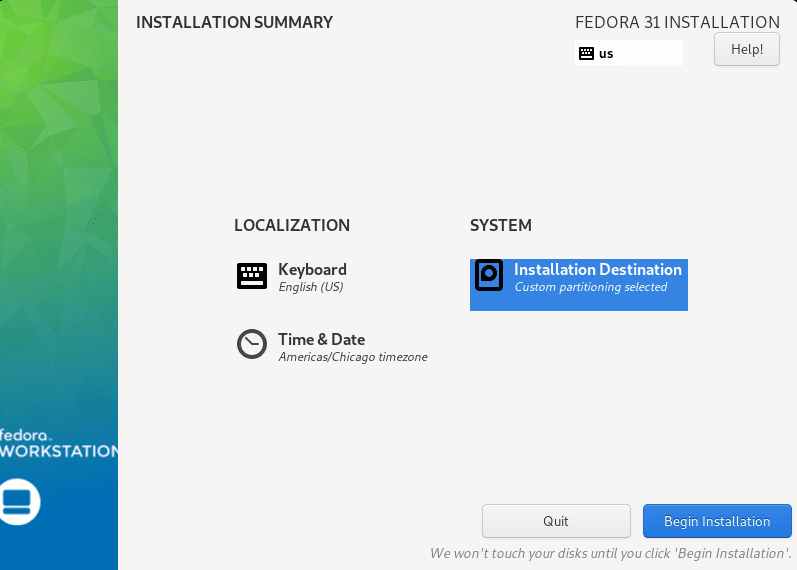
Begin Fedora installation
Step 11). The fedora installation process will commence.
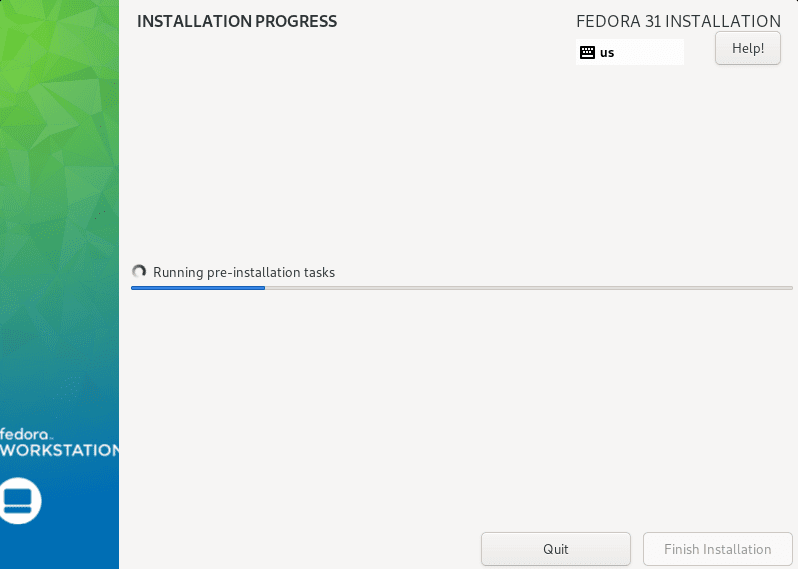
Fedora Installation Progress
After a successful installation, you should see the Fedora login screen.
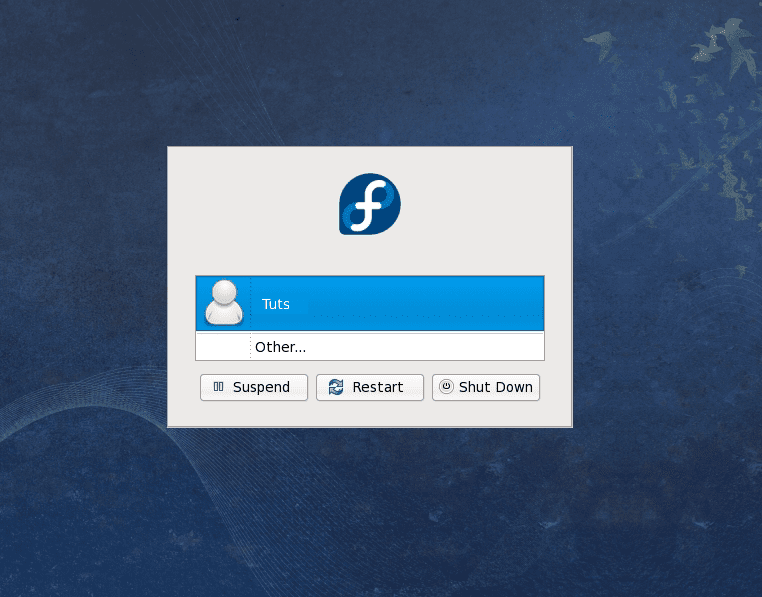
Fedora Desktop Login screen\
From this point, you can now restart your computer and boot into any of the distros that you wish to use. Your boot screen should look something similar to the image below.
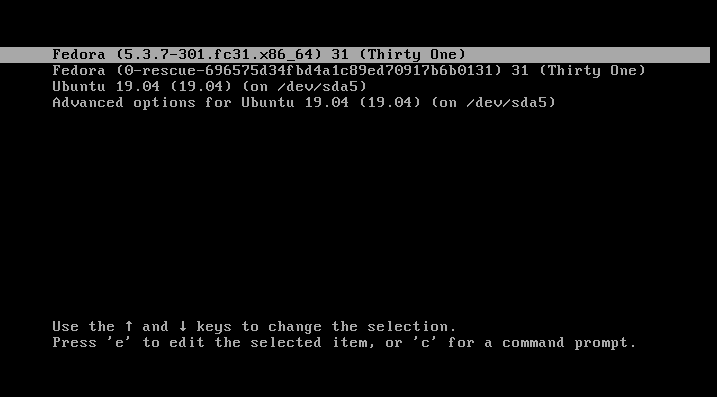
Ubuntu – Fedora Dual Boot Screen
Conclusion
That’s all about setting up dual booting Ubuntu and Fedora. We hope this step by step procedure helped you in guiding through the installation of both these wonderful Linux distros. The crucial thing to a multi-boot system is understanding how to create and manage partitions on your computer storage device. If you have any queries or information you wish to share with our readers, feel free to leave a comment below. If you find this article helpful, please share the link with a friend.
1 comment
Tried to install ubuntu 21 in a machine running Fedora 34, but after completing the installation of ubuntu i could never boot fedora again. It just doesn’t show up in the boot menu.
Tried every posible solution found online to no avail; so, probably, is MANDATORY to install ubuntu first