
Ubuntu is one of the most popular Linux-based operating systems, favored by developers, IT professionals, and home users alike. With its user-friendly interface and powerful features, Ubuntu has made it easy for users to perform various tasks, from web browsing to software development. However, Ubuntu is not immune to problems like any other operating system. From software incompatibility to boot issues, Ubuntu users may face various challenges affecting their productivity and experience.
This article will handle just that. It will give you some tips and tricks for solving common issues in Ubuntu. Whether you are a new user or an experienced Ubuntu enthusiast, this guide will provide the knowledge and tools you need to troubleshoot and fix Ubuntu problems.
Step-by-step procedure for troubleshooting problems in Ubuntu
Below is a basic process that you can use to troubleshoot any problem or issue you face while using your Ubuntu system.
1. Document the problem: This involves taking note of the specific symptoms of the problem, such as error messages, system crashes, or other anomalies.
2. Examine the log files: Ubuntu maintains various system logs that can help diagnose problems. Reviewing these logs can provide insights into what’s causing the issue.
3. Compare configurations: If possible, compare the settings and configurations of your system with those of a similar, properly functioning system. This can help identify any differences that may be contributing to the problem.
4. Check peripheral connections: Sometimes, a problem can be caused by faulty or loose connections to peripheral devices such as printers, scanners, or external hard drives.
5. Remove newly connected hardware: If you recently added a new piece of hardware to your system, try removing it and see if the problem disappears. Sometimes new hardware can cause conflicts or compatibility issues with other components.
6. Close running programs: If your system is running too many programs at once, this can cause performance issues or crashes. Close newly opened programs or apps that are consuming too much memory one by one. Always check if the problem is resolved after closing each application.
7. Reproduce the problem: If you can reliably reproduce the problem, try to isolate the circumstances that trigger it. For example, does it happen when a program runs or a specific configuration is applied? This information can help narrow down the possible causes and identify potential solutions.
Common issues on Ubuntu and their solutions
Now that you know the general procedure of troubleshooting a problem on your system, let’s look at some common issues you may run into while working with Ubuntu and some tips and tricks you can use to solve the problem.
1. Grub Rescue – Booting problem
Grub Rescue is a common issue when the Grub bootloader becomes corrupted or cannot locate the boot partition. This can happen for various reasons, such as after a failed operating system update, a multi-boot or dual-boot gone wrong, or a hard drive failure.
When the Grub Rescue prompt appears, you’ll see an error message that says “error: no such partition” or “error: file not found.” This means Grub cannot find the boot partition or the necessary files to start the operating system.
Tips and tricks for solving “Grub Rescue Error”
To solve the Grub Rescue booting problem in Ubuntu, follow the steps below:
1. Download the Ubuntu ISO file and burn it on a flash drive/ DVD using a tool like Balena Etcher. Feel free to check out our post for a detailed guide. How to create a bootable Ubuntu Live USB drive. Boot your PC from the live Ubuntu USB/ DVD. You will see two options on the installation screen – “Install Ubuntu” and “Try Ubuntu.” Select “Try Ubuntu.”
2. Open a terminal window once you’re in the Live environment. Type the following command to identify the partition where your Ubuntu installation is located:
sudo fdisk -l
This command lists all the partitions on your hard drive.
3. Once you’ve identified the partition, mount it to a temporary directory using the following command:
sudo mount /dev/sdXY /mnt
Replace sdXY with the actual partition name, you identified in step 3.
4. Install Grub using the following commands:
sudo grub-install --boot-directory=/mnt/boot /dev/sdX
sudo update-grub
Replace sdX with the name of the hard drive where Grub should be installed.
5. Reboot your computer and remove the Live CD or USB drive. Your system should now boot normally.
If you still have an issue with Grub, read our guide on How to repair the GRUB bootloader using a Ubuntu Live USB drive.
2. Freezing desktop screen
The freezing desktop screen issue is a common problem in Ubuntu when the system becomes unresponsive, and the desktop interface stops working. This can happen for various reasons, such as running too many applications simultaneously, insufficient system resources, or driver compatibility issues.
Tips and Tricks for solving the “Freezing Desktop Issue”
1. Press the Alt + F2 or Alt + F3 keyboard shortcut to switch to a console interface.
2. You will see a prompt to log in. Use your username and password to log in to your desktop interface.
3. Execute the top command to list all the programs and processes running on your system. This command lists running processes, resource usage, and PIDs (Process Identifier).
4. Once you’ve identified the troublesome application, use the “kill” command to terminate it. For example, if the problematic application has a process ID of “1234”, you can kill it using the following command:
sudo kill 1234
or
sudo kill -9 1234
After terminating the troublesome application, switch back to the desktop interface using the Alt + F7 keyboard shortcut.
These steps should be able to fix the freezing desktop screen issue in Ubuntu and get your system back to regular operation. However, if the problem persists, try other methods discussed in our post – 5 Things to do when your Linux system GUI freezes.
3. Directory and file permission issues
Directory and file permission issues can occur in Ubuntu when users do not have the appropriate permissions to access or modify files and directories. This can happen when a different user manually creates files and directories or changes permissions.
Linux systems use three main permissions to enforce security on your system.
- Read (r) permission
- Write (w) permission
- Execute (x) permission
This permission is applied uniquely to the owner, group, and other users.
Tips and tricks to fix “Permission Issues” on Ubuntu
One primary method of setting file and directories permissions is using the chmod command. Here are some examples of how to use the “chmod” command:
To add write permissions for the owner of a file, use the following command:
chmod u+w index.html
You can also decide to use numbers to assign permissions. For example, the chmod command below assigns read, write, and execute permissions to the owner, group, and other users accessing the “index.html.”
sudo chmod 777 index.html
You can also use the chown command to change the owner and group of a file or directory. For example, to change the owner of a file to “jane,” use the following command:
chown jane index.html
4. Package installation errors/ issues on Ubuntu
Package installation errors can occur in Ubuntu when there is a problem with the package repository or conflicts with other packages. These errors make it difficult to install new packages or update/ upgrade existing packages.
Tips and tricks to fix “Package installation issues” on Ubuntu
1. Check the package repository: The first step is to ensure the package repository is working correctly. You can do this by running the following command:
sudo apt update
This command updates the repository package lists and checks for errors.
2. Resolve package conflicts: If there are conflicts with other packages, you may need to resolve them before installing or upgrading the package. You can use the following command to check for broken packages:
sudo apt install -f
This command will attempt to fix any broken dependencies and conflicts that may prevent the package from being installed.
3. Clean the package cache: Sometimes, package installation errors can occur due to a corrupted package cache. You can clean the cache by running the following command:
sudo apt clean
This command removes all packages from the cache, which may help to resolve installation errors.
4. Reinstall the package: If all else fails, you can try reinstalling the package to fix any installation errors. You can use the following command to reinstall a package:
sudo apt-get --reinstall install packagename
5. Troubleshooting network configurations
Configuring network settings in Ubuntu involves setting up and managing network connections, including wired, wireless, and virtual private network (VPN) connections. This is important for accessing the internet and other network resources. If you are having issues with your network (maybe the browser is not responding), you first need to run a ping command.
You can use any popular site as your target. Take a look at the example below.
ping fosslinux.com
or
ping google.com
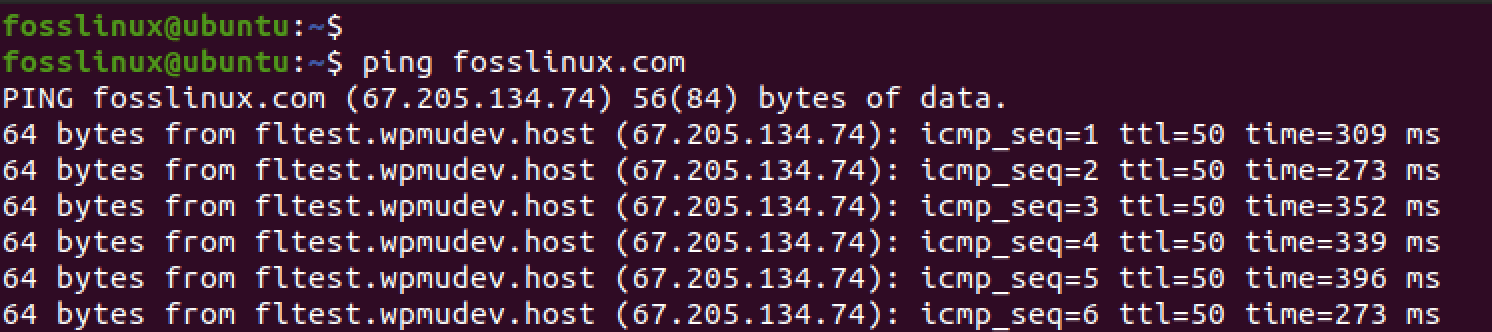
Ping Command
Your system is offline if you don’t get any response, as shown in the image above. First, use another device to confirm if the network you are connected to is active (your ISP does not deactivate it). If you use the Ethernet cable, confirm it is well plugged in. For WiFI users, ensure you are connected to an excellent WIFI network.
Next, launch the Graphical network utility. Here you will see all the current network connections. Click on the connection you want to configure to see the configuration screen popup.
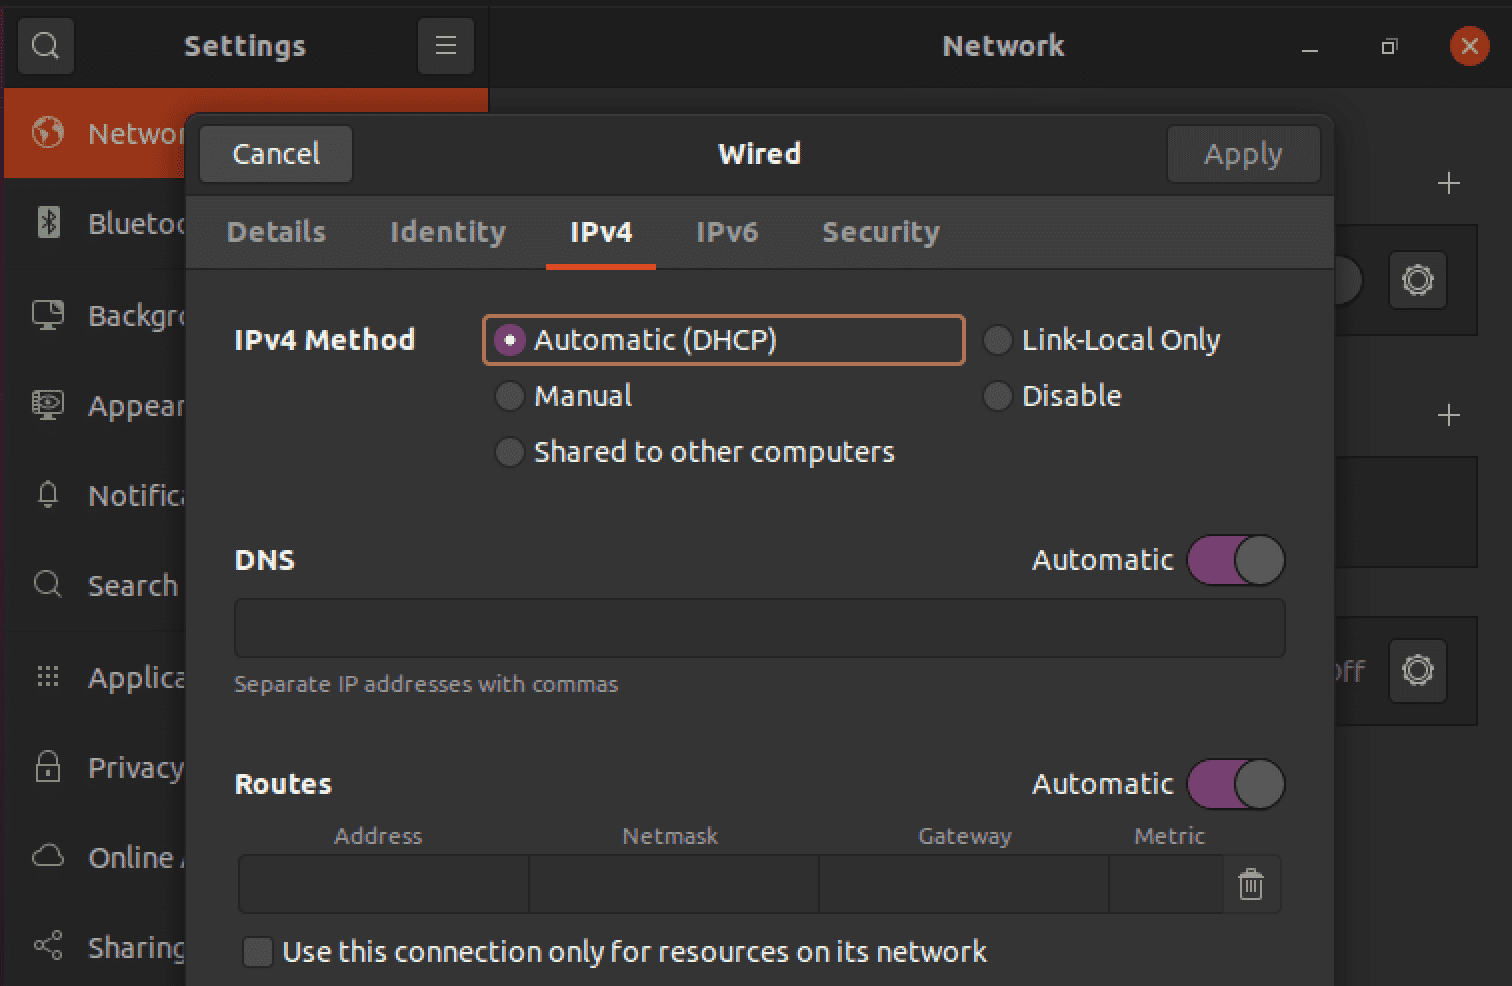
Network Configurations
Alternatively, if you are well versed with Linux commands, you can also troubleshoot your networks using commands like ifconfig, ip and editing the /etc/network/interfaces file. If you are facing the error “No WIFI adapter found,” please check out our post on how to Fix the “No Wi-Fi Adapter Found” Error on Ubuntu.
6. Checking system logs
Ubuntu stores various system logs that can provide valuable information when troubleshooting. These logs record multiple events and activities in the system, such as software installations, hardware changes, network connections, and error messages. You can better understand what went wrong and how to fix it by analyzing these logs.
To access system logs in Ubuntu, you can use the Log File Viewer tool, which is preinstalled in most Ubuntu distributions. You can launch the Log File Viewer by searching for it in the Applications menu or typing “gnome-system-log” in the terminal.
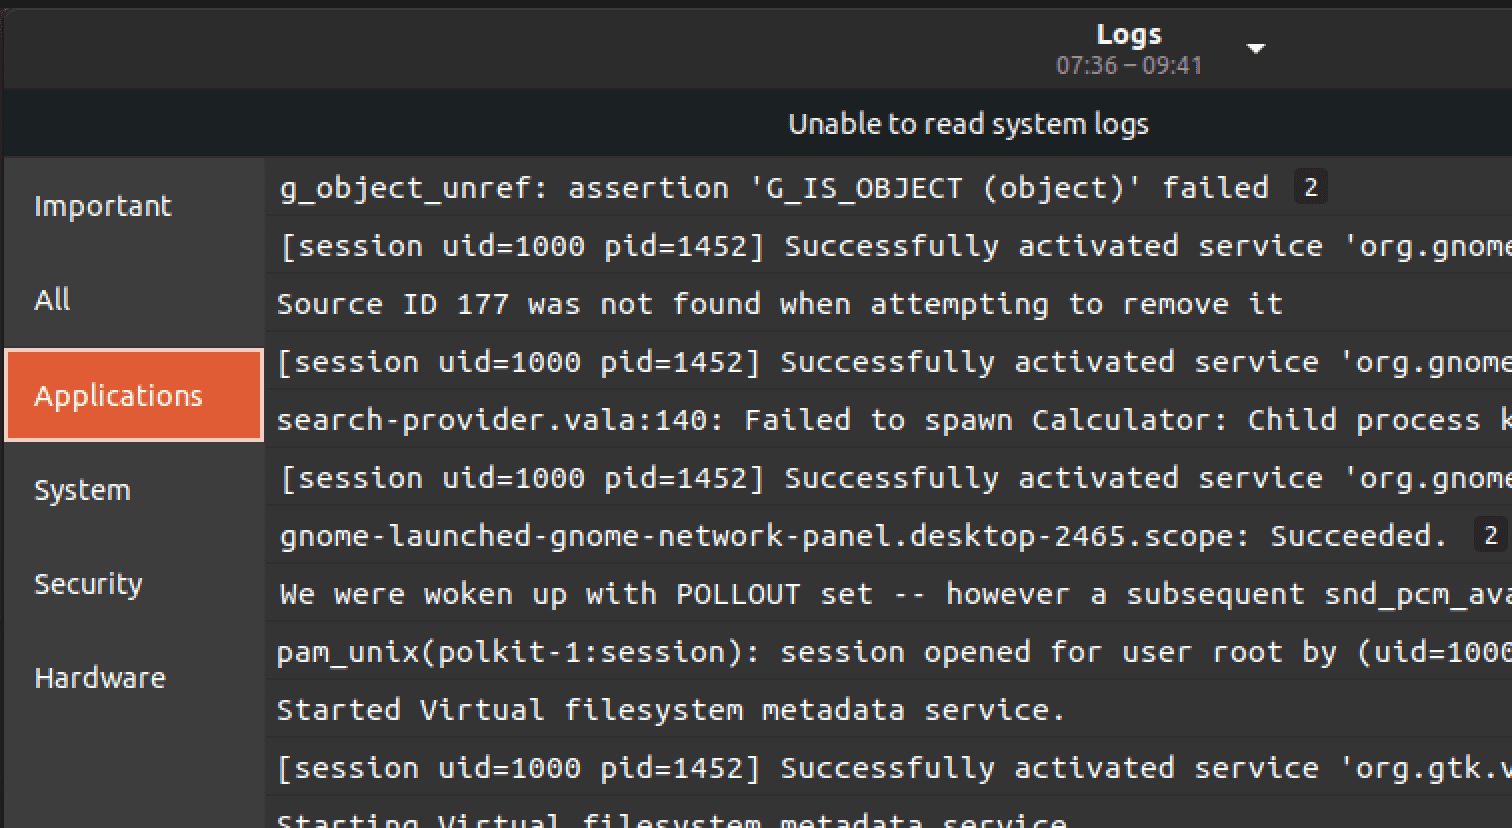
Log File Viewer
The Log File Viewer provides a graphical interface for browsing and searching through various system logs, such as the kernel log, the system log, the auth log, and the Syslog. You can select a log from the left pane and view its contents in the right pane. The Log File Viewer also allows you to filter logs by severity, date, and keyword, making it easier to locate relevant information.
7. Clearing cache and temporary files
Over time, Ubuntu may accumulate various cache and temporary files, such as web browser caches, application caches, system logs, and package archives. While these files can improve system performance and speed up everyday tasks, they can consume valuable disk space and cause problems, such as software conflicts and slow boot times.
Therefore, it is recommended to periodically clear these files to maintain a healthy and stable Ubuntu system. You can use various tools, such as the System Cleaner, BleachBit, or the terminal commands “sudo apt-get clean” and “sudo apt-get autoremove,” to remove unnecessary cache and temporary files from your Ubuntu system.
8. Managing hardware drivers
Hardware drivers are essential software components that allow Ubuntu to communicate with various hardware devices, such as graphics cards, network adapters, and printers. While Ubuntu has many preinstalled drivers, some hardware devices may require additional drivers or updates to work correctly. Therefore, managing and updating hardware drivers regularly is essential to ensure optimal performance and stability.
Ubuntu provides a user-friendly tool called “Additional Drivers” that allows you to manage and install hardware drivers for your system. You can launch the “Additional Drivers” tool by searching for it in the Applications menu or typing “software-properties-gtk –open-tab=4” in the terminal. The “Additional Drivers” tool scans your system for available drivers and displays a list of recommended and alternative drivers for each device.
Wrapping up
Ubuntu is a powerful and versatile operating system that a wide range of users can use for various purposes. However, while it’s generally stable and reliable, users may encounter various issues or problems that can impact their productivity and experience.
Following the steps outlined in this article, you can troubleshoot and fix many common issues that Ubuntu users may face, such as boot problems, freezing desktop screens, and software compatibility issues. With these tips and tricks, you can ensure that your Ubuntu system runs smoothly and efficiently, allowing you to focus on your work and other activities without interruption.
1 comment
I am facing a nasty issue that happened after windows 11 installed an update
when i try to enter Kubuntu(dual boot with windows) it fails to start or even showing grub screen leaving me with this message:
Failed to open efi ubuntu grubx64.efi
Failed to load image \EFI\UBUNTU\grubx64.efi: Not found
start_image() returned Not found