
Ubuntu is one of the most popular Linux-based operating systems, known for its stability, security, and flexibility. One of the great things about Ubuntu is that it is highly customizable, allowing you to personalize your desktop environment to suit your preferences and style. This includes changing the look and feel of your desktop with different themes and icons.
This post will show you two ways that you can use to tweak your Ubuntu Desktop appearance.
- Customize the Ubuntu desktop by tweaking the desktop theme and icons
- Customize the Ubuntu desktop by changing the Desktop Environment
Customize the Ubuntu Desktop by tweaking the desktop theme and icons
A theme is a collection of settings that define the visual style of your desktop, including the color scheme, window borders, icons, and fonts. Changing your Ubuntu theme can give your desktop a fresh look and make it more visually appealing. On the other hand, Icons are small images representing files, folders, and applications on your desktop. Changing your Ubuntu icons can make it easier to identify files and applications and add to your desktop’s overall aesthetic appeal.
A desktop theme can have an impact on several different elements of your desktop environment, including:
Controls: In a desktop environment, the buttons and widgets allow you to interact with windows and applications. These can include the minimize, maximize, and close buttons on windows, checkboxes, radio buttons, and other interactive elements. A theme can change the appearance of these controls to make them more visually appealing or easier to use.
Colors: The color scheme of your desktop environment can also be changed with a theme. This includes your desktop’s background color, text, icons, and the colors used for interface elements like menus and toolbars.
Window Border: The window border is the frame around the edge of each window in your desktop environment. A theme can change the appearance of the window border, including the thickness, color, and style.
Icons: Icons are small images representing files, folders, and applications on your desktop. A theme can change the appearance of these icons to make them more visually appealing or easier to identify.
Pointer: The pointer, or cursor, is the small arrow or other icons that move around your screen when you move your mouse. A theme can change the pointer’s appearance to make it more visually appealing or easier to see on your desktop.
This topic will explore how to install and apply different themes and icons to your Ubuntu desktop and customize and create your tunes and icons.
Note: We will use the default GNOME Desktop Environment for this particular post.
Install the GNOME Tweak Tool
The GNOME Tweak Tool is a graphical tool for adjusting various advanced settings in the GNOME desktop environment, such as themes, fonts, icons, and extensions. It allows users to customize their desktop environment to their liking and improve their productivity.
To install GNOME Tweak Tool on Ubuntu, you can follow these steps:
1. Launch the Terminal from the application menu or use the keyboard combination (Ctrl + Alt + T) to open it.
2. Next, you need to add the universe repository. This repository provides access to a vast collection of open-source software packages not included in the official Ubuntu repositories. To add the universe repository, open the Terminal and run the following command:
sudo add-apt-repository universe
3. Update the system by running the commands below on the Terminal. Please do not skip this command, especially now that you have added a new repository to your system.
sudo apt update
Tip: This process might take a while, depending on your network connection and when you last ran the update and the upgrade commands. Please be patient.
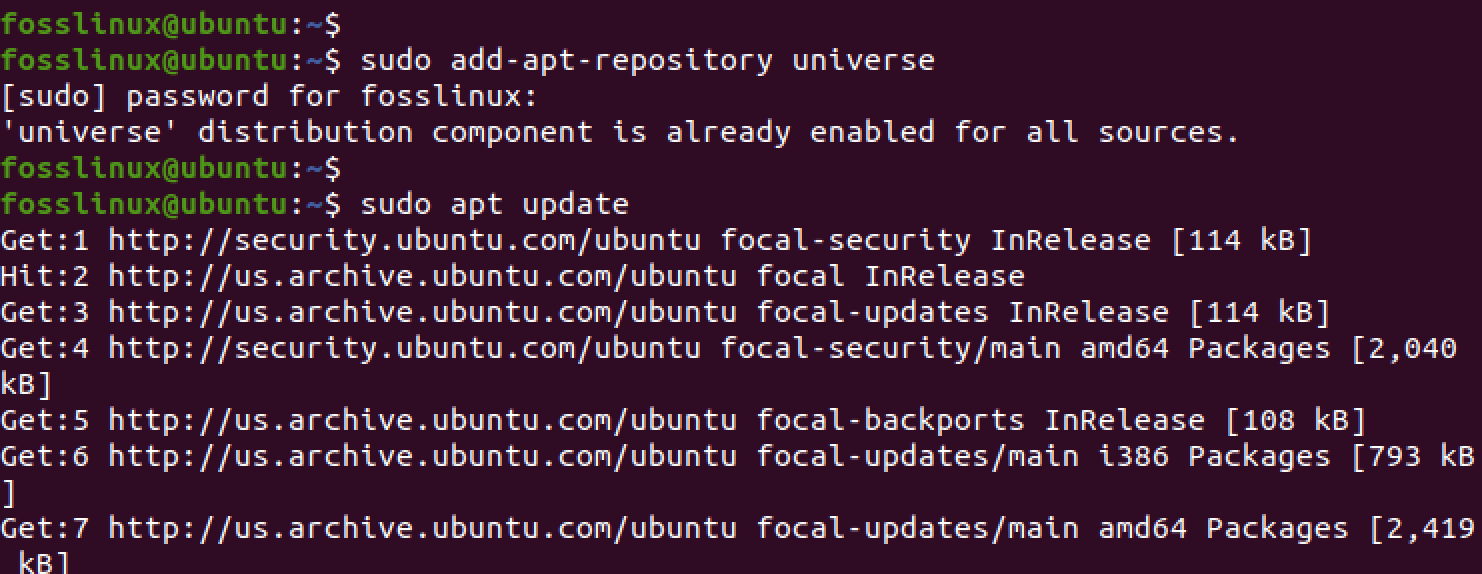
Add universe repository and update system.
4. After successfully updating your system, use the command below to install GNOME Tweak Tool on your Ubuntu system.
sudo apt install gnome-tweaks
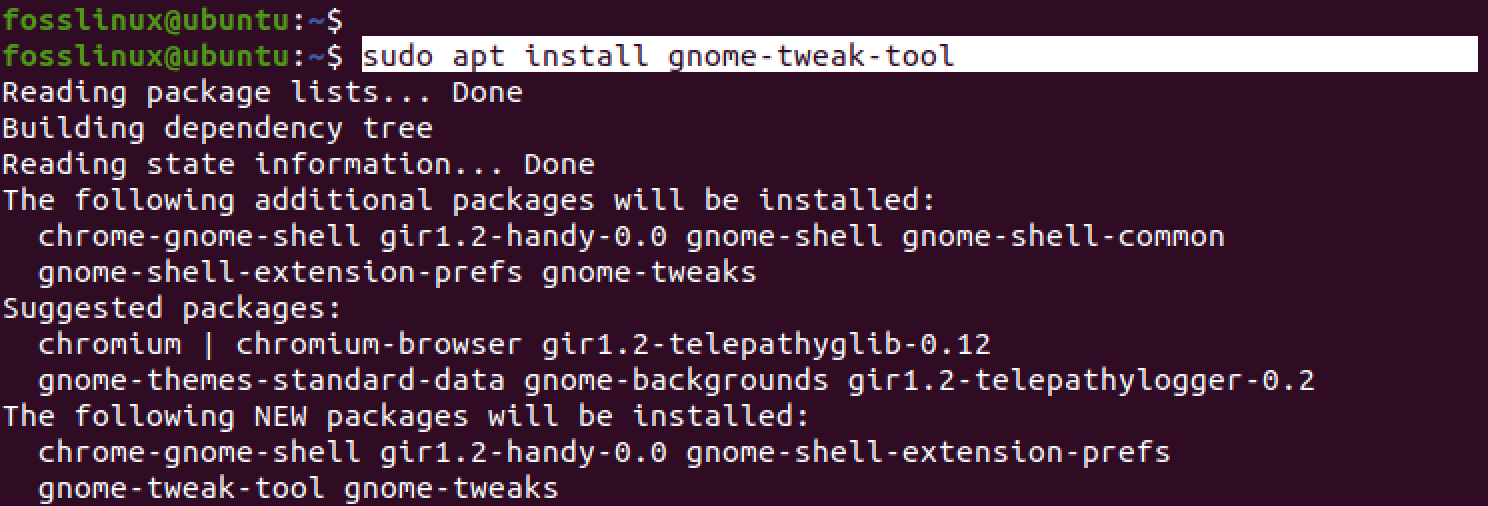
Install the GNOME tweak tool.
5. Once the installation is complete, you can open GNOME Tweak Tool by searching for it in the Activities overview, as shown in the image below.
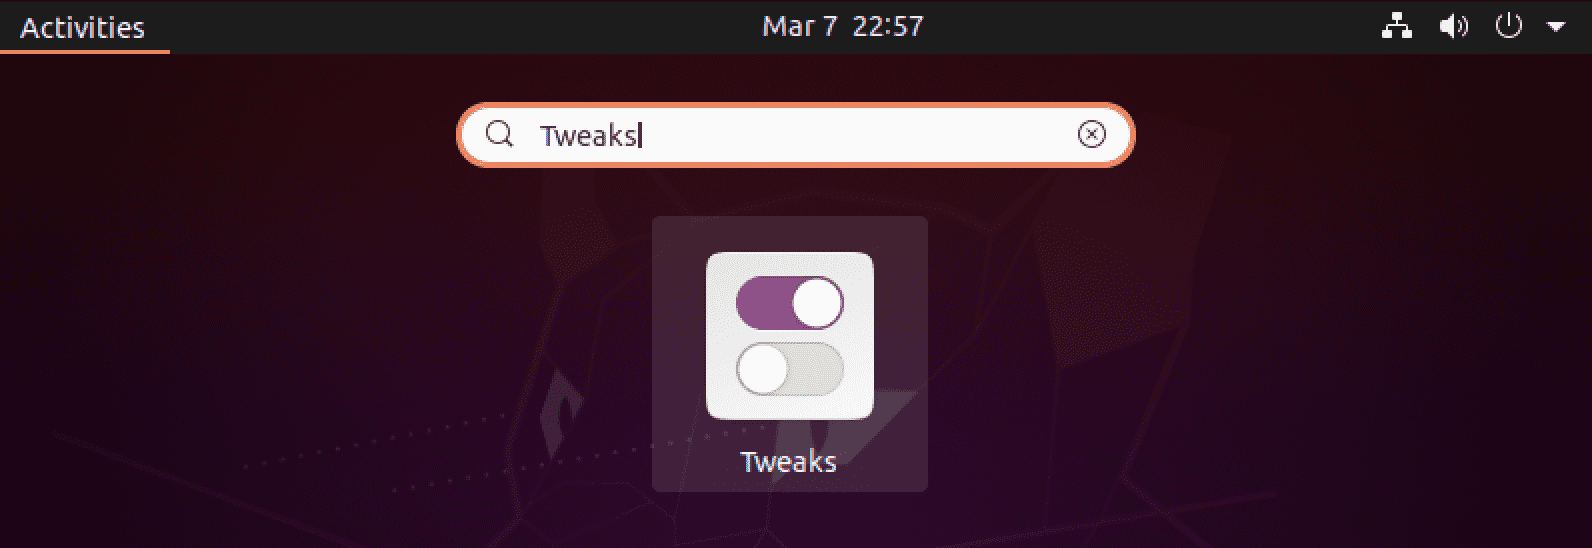
GNOME Tweaks
Alternatively, you can launch GNOME Tweaks by executing the following command in the Terminal:
gnome-tweaks
The GNOME Tweak Tool interface will appear, allowing you to customize various aspects of your desktop environment.
Note: Ensure you use the GNOME tweaks in a maximized window. Minimizing the window to a smaller width makes the main menu hidden and inaccessible.
GNOME Tweaks window
GNOME Tweaks features
GNOME tweaks come with several options that you can use to customize the appearance and feel of your GNOME Desktop environment. These options are available on the main menu located vertically on the left side of the window, as shown in the image above. Let’s review each tab and see how to use it to customize your desktop.
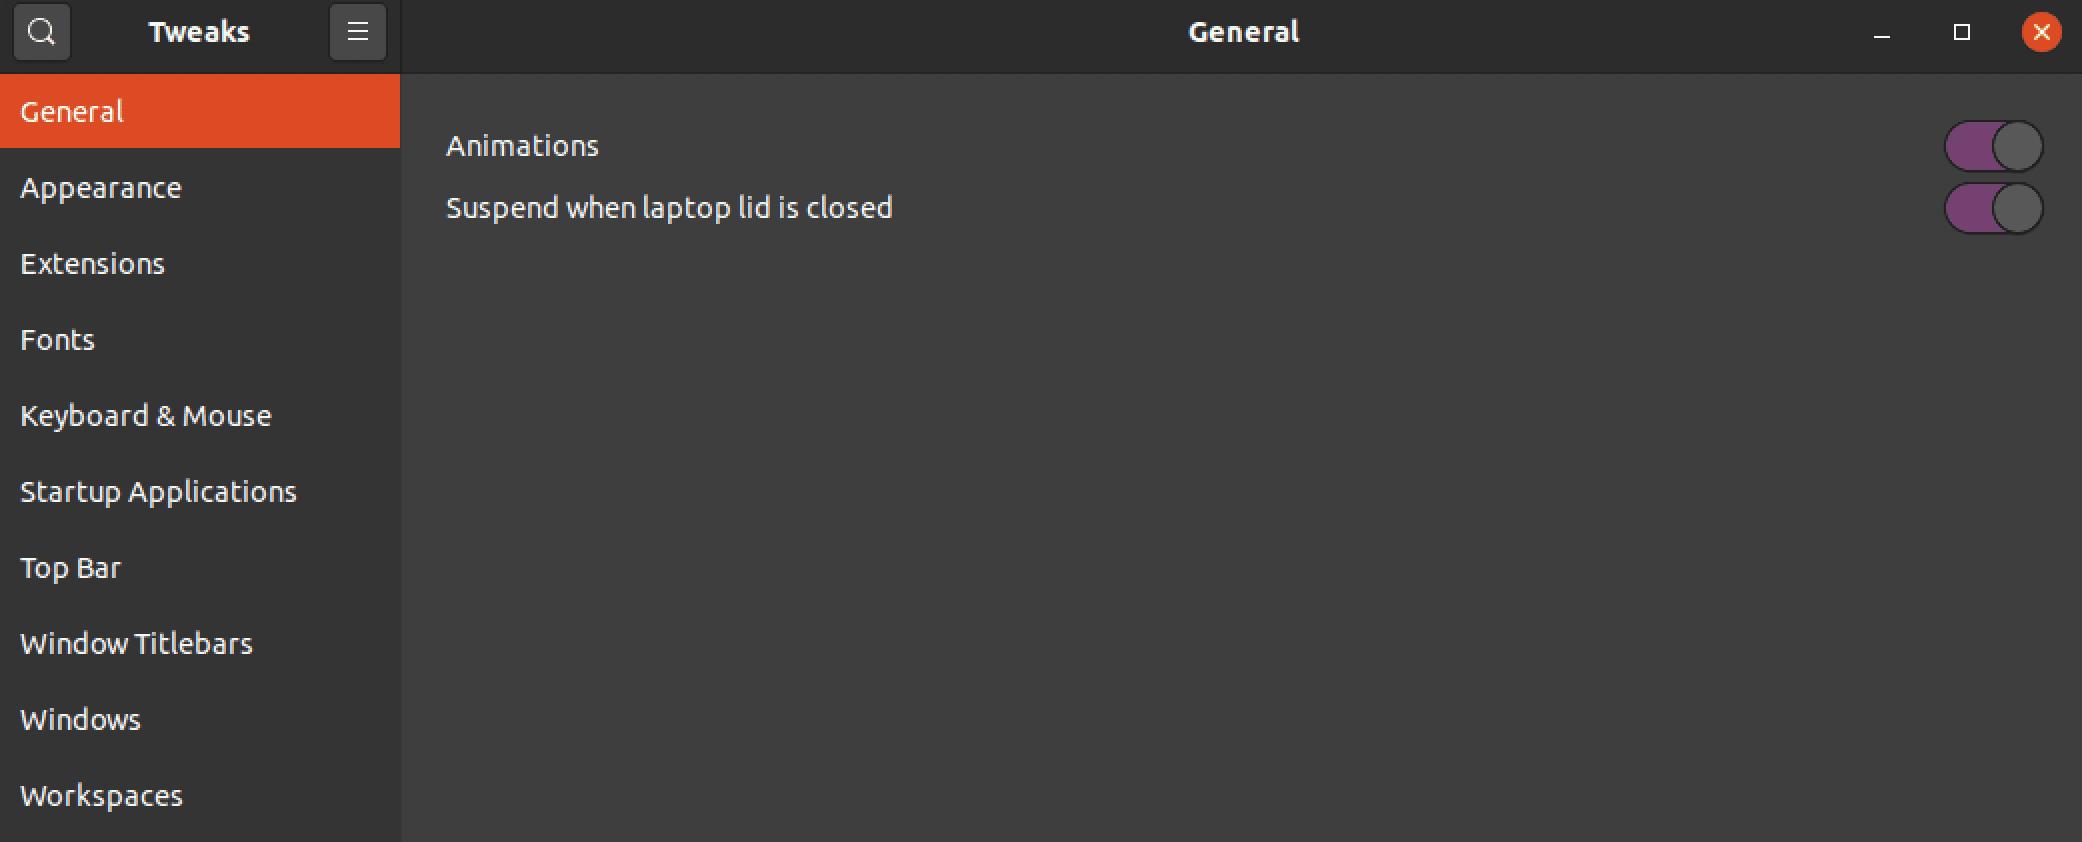
1. The General tab
The General tab in the GNOME Tweaks provides various settings that affect the overall behavior of the GNOME desktop environment. Here’s an explanation of the two options available under the General tab:
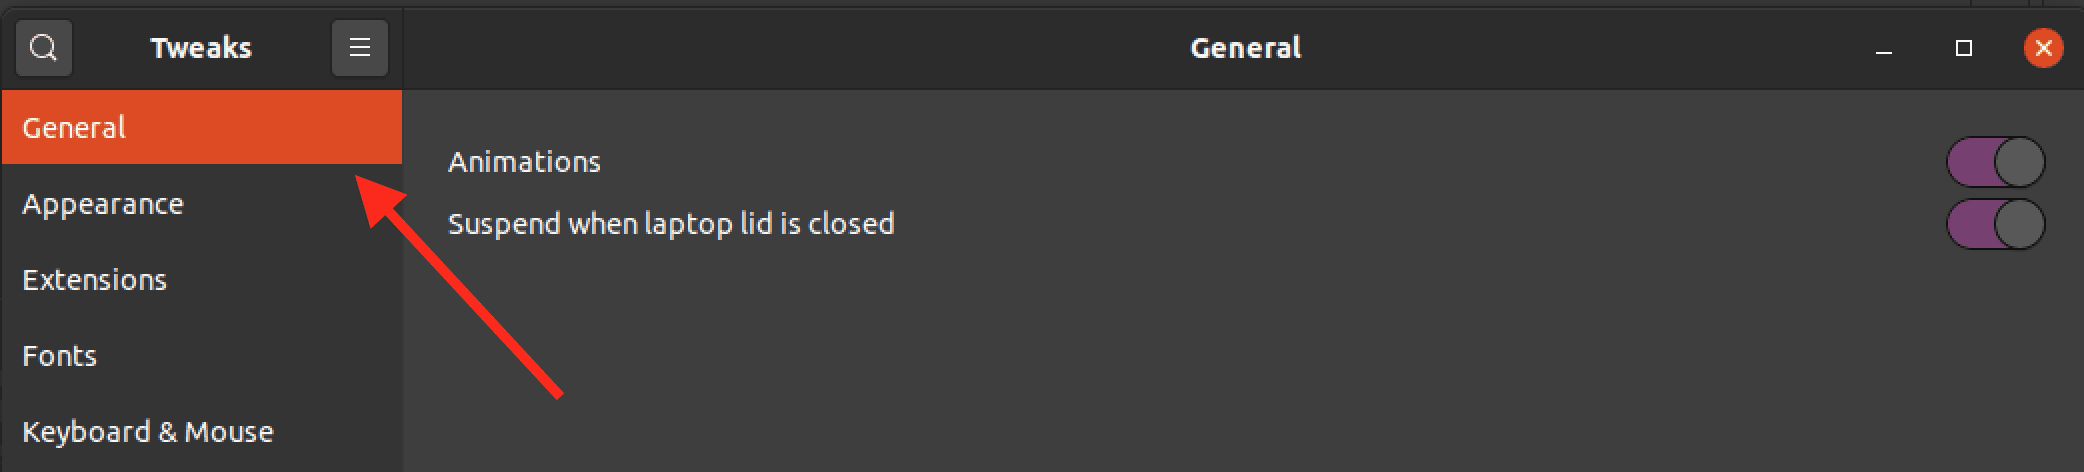
General Tab
- Animations: This option controls the animations and transition effects when you open or close windows, switch between workspaces, and perform other actions in the GNOME desktop environment. This option is enabled by default.
- Suspend when the lid is closed: This option allows you to control what happens when you close the top of your laptop. This option is enabled by default. Therefore, when you close your laptop lid, the system will automatically “suspend.”
2. The Appearance tab
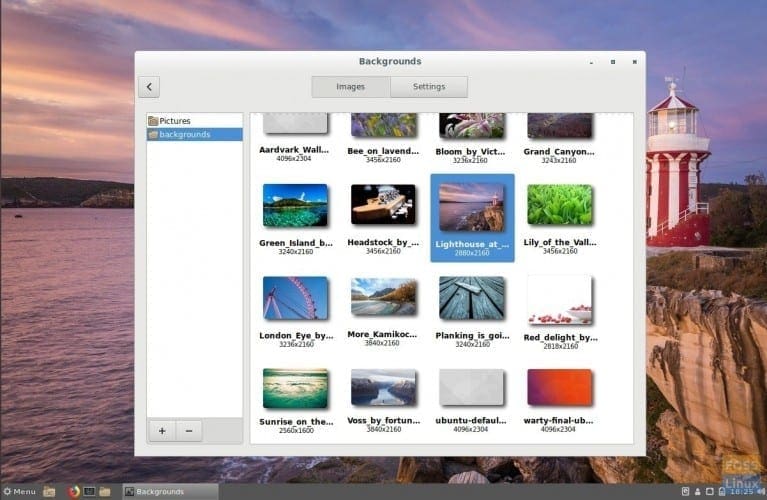
The Appearance tab can be considered the “mother of all customizations.” That is where you can change the desktop theme, the background image, and the lock screen image. Remember, there are so many desktop elements whose design and feel are dependent on the theme.
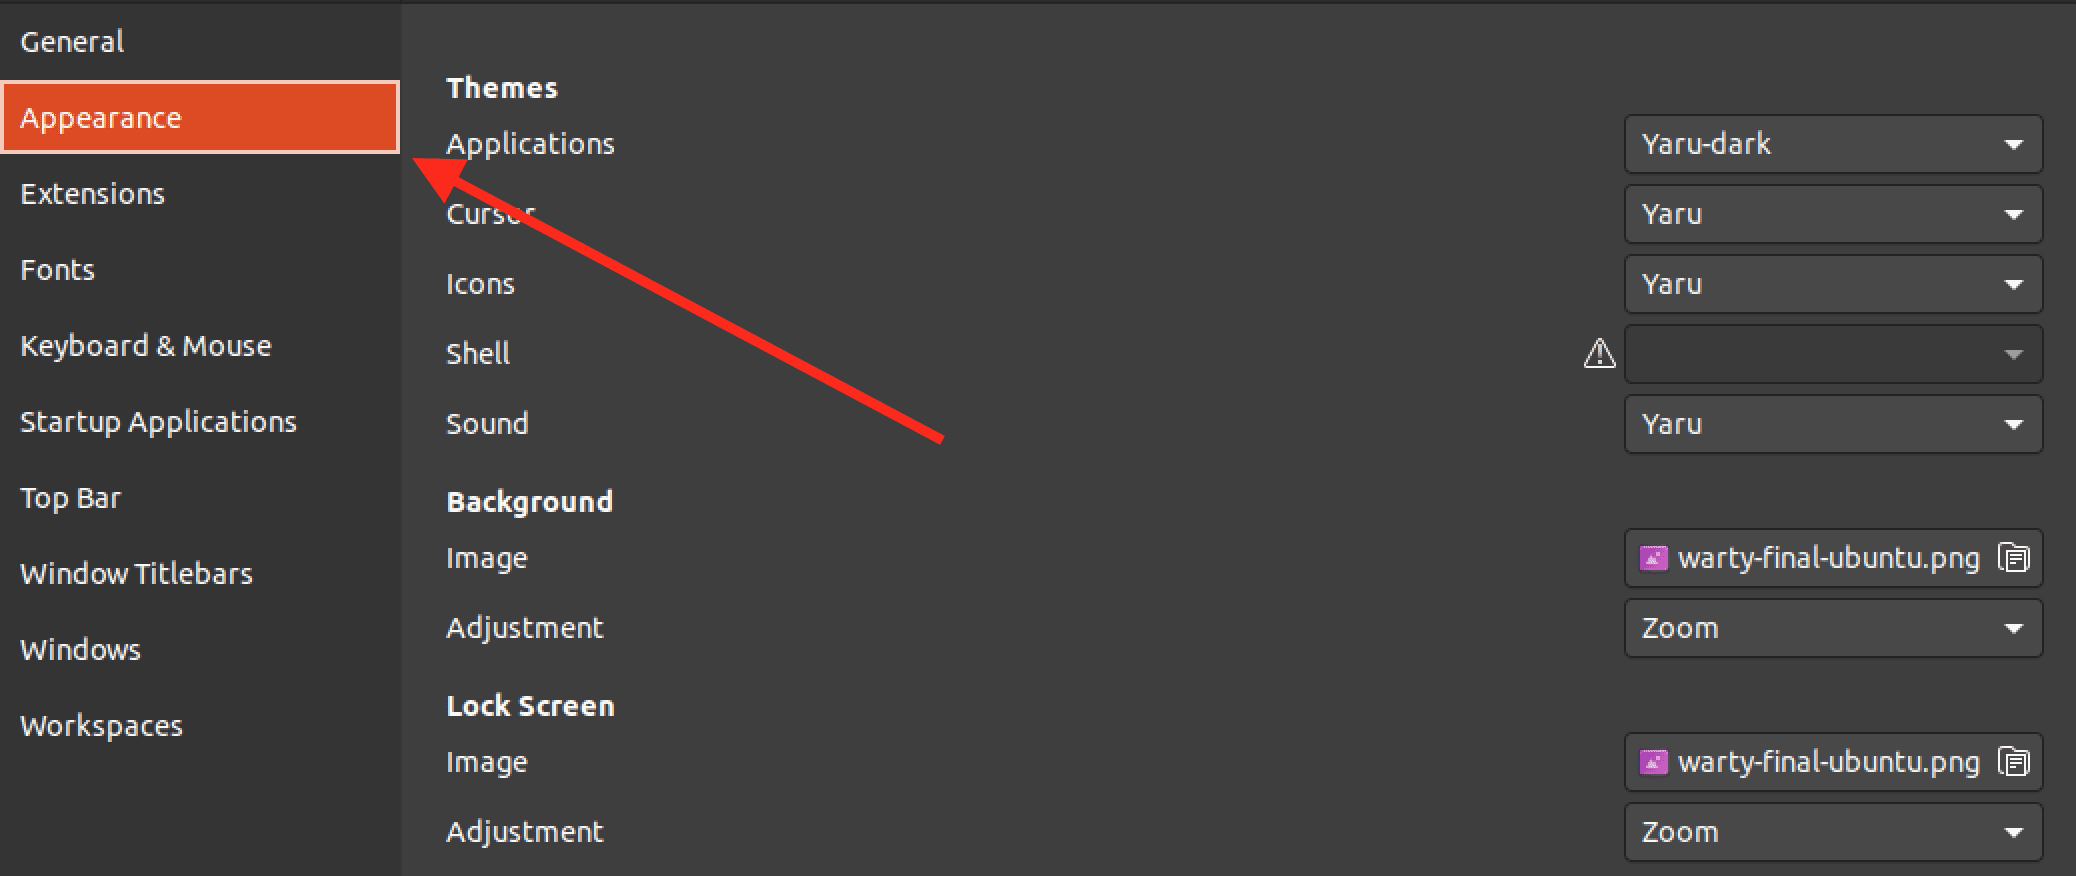
The appearance tab
This section will give you a step-by-step guide on customizing your Ubuntu desktop appearance by installing a new theme and icon set. The default GTK and Shell theme on Ubuntu is Yaru.
Step 1. Install Gnome Shell Extension
The GNOME Shell Extension is a feature of the GNOME desktop environment that allows users to customize and extend the functionality of the GNOME Shell. It provides a simple way to add new features and functionality to the desktop environment without modifying the underlying code.
Currently, you will notice that there is an exclamation mark next to the “Shell” option under the themes section. That means you cannot import/ use a new theme.
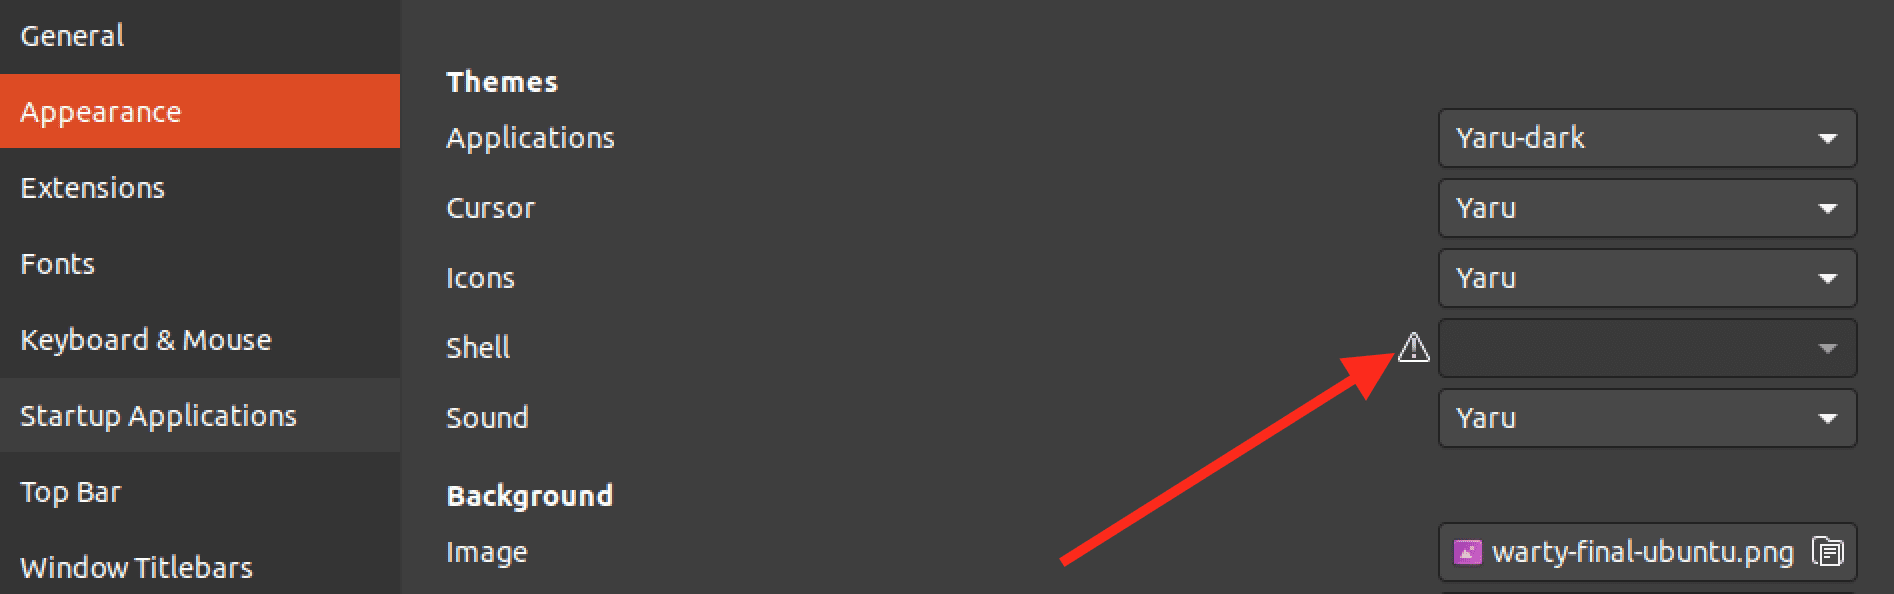
Cannot import a shell theme
We need to install the Gnome Shell Extension package to solve that error. Execute the command below on your Terminal.
sudo apt install gnome-shell-extension
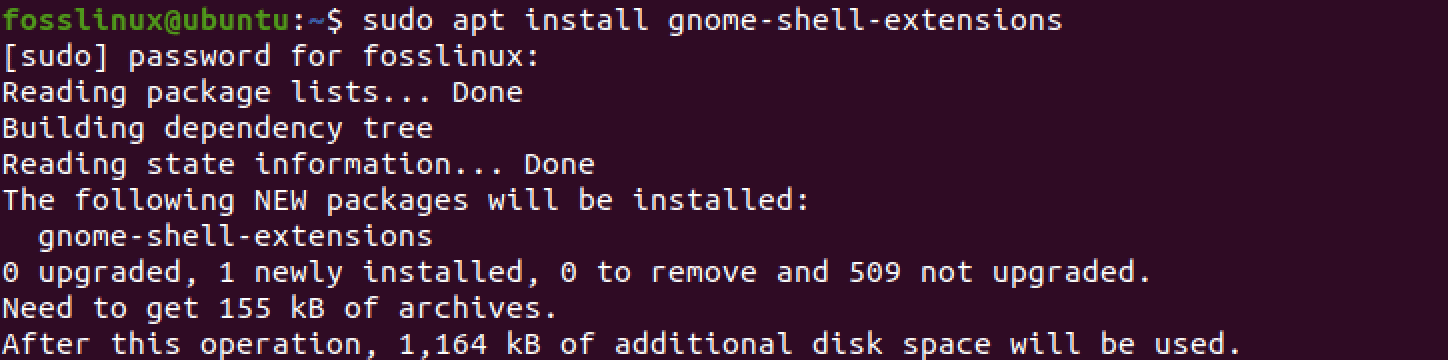
Install Gnome Shell Extension
After successfully installing the extension, Reboot or Logout and Login.
Step 2. Enable user themes
Note: You will not see the “User themes” option if you do not log out or reboot your system after installing the Gnome Shell Extensions package.
Launch Gnome Tweaks and click the “Extensions” tab. Next, scroll down to the bottom and toggle the button next to “User Themes” to ON.
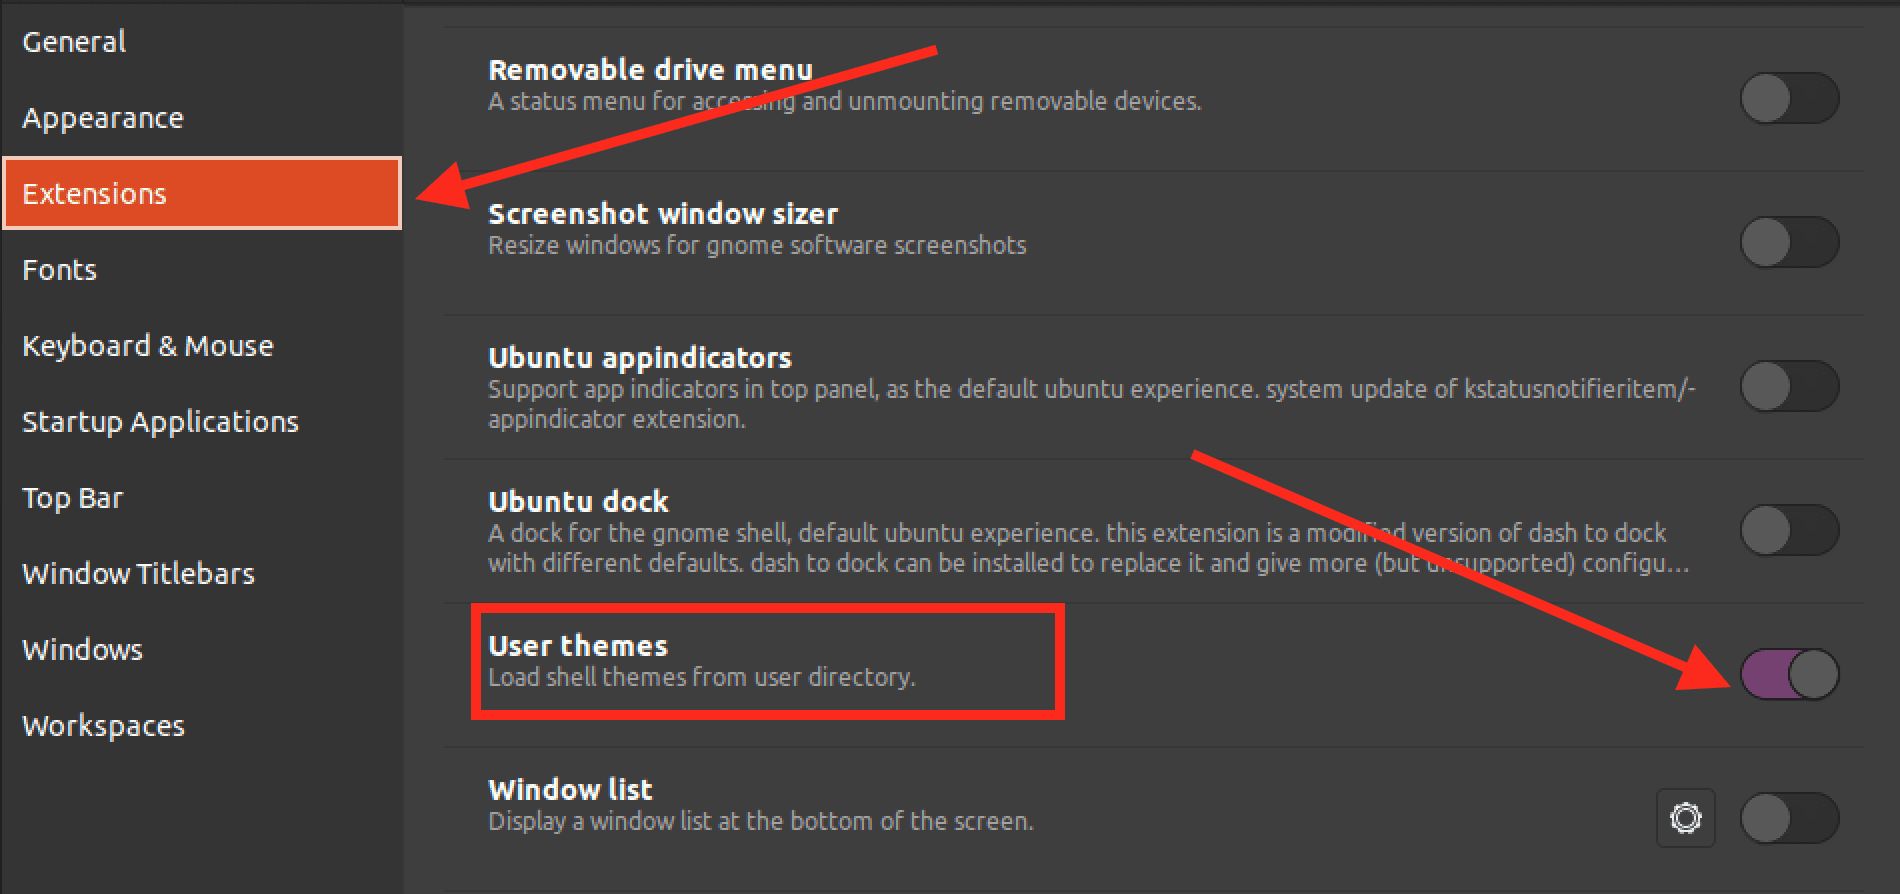
Enable user themes
Close the Tweaks window and re-open it, or log out and log in to apply the changes.
When you re-open Gnome Tweaks and click the “Appearance” tab, you will notice that the exclamation sign next to the Shell option is gone, and you can now import your third-party themes.
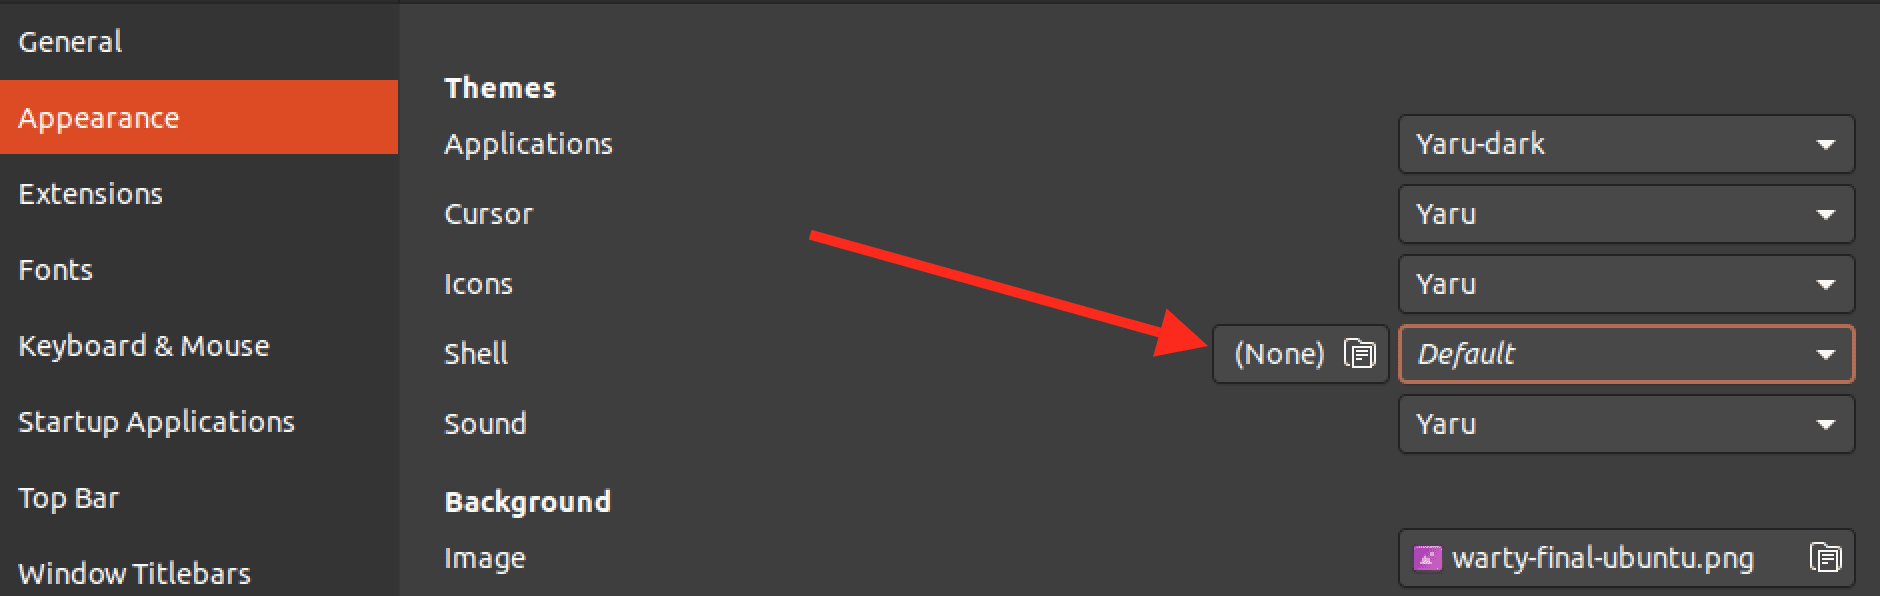
Shell themes
Step 3. Create the themes and icons directories
Ubuntu doesn’t come with the Themes and Icons directory by default. Type the following command in the Terminal to create the themes directory:
mkdir ~/.themes
This will create a hidden directory called .themes in your home directory, where you can store custom themes.
To create the icons directory, type the following command in the Terminal:
mkdir ~/.icons
This will create a hidden directory .icons in your home directory, where you can store custom icon themes.
Step 4. Download themes and icons
You can find various themes and icons on the gnome-look.org website. Here, you can browse and download hundreds of user-created themes and icons to personalize your desktop environment. Whether looking for a sleek and modern theme or a more traditional design, gnome-look.org is the go-to destination for Ubuntu customization.
For this post, we will download the material-black COLORS Complete Desktop theme and the Buuf Plasma Icons. These files are downloaded in a compressed format, as shown in the image below.
Themes and Icons
Right-click on each file and select the option “Extract Here.” Once done, you must move each folder to a specific destination. You will move the Material-Black-Cherry folder to the themes directory and the Buff Plasma Iocns folder to the icons directory.
Use the mv commands below.
Tip: You only need to move the folder that contains the themes or icon files. Some of these folders can be deeply nested. Therefore, move the main folder, not the parent folders generated when unzipping the files. For example, our downloaded theme and icon files had one parent folder. We had to navigate inside so that we could move the main folder.
mv Material-Black-Cherry-LA/ ~/.themes/
mv buuf-icons-for-plasma/ ~/.icons/
Move them and icon files
Step 5. Set Theme and Icons
You have now downloaded the themes and icons to customize your Ubuntu desktop. Now, follow the procedure below.
Launch the Gnome tweaks tool and select the “Appearance” tab. Make the following changes under the “Theme” section.
- Applications: Set the theme to Material Black Cherry or any other theme you downloaded.
- Cursor: You can leave the cursor as “Yaru,” or you can select a theme from the dropdown menu that appears.
- Icons: Set the icons to “Buff Icons for plasma.” Alternatively, you can use any other icon set that you downloaded.
- Shell: Set the Shell theme to Material Black Cherry or any other theme you downloaded.
- Sound: You can leave the sound a default “Yaru.”
You can also change the background image to any wallpaper or photo you want. You can quickly get beautiful wallpapers for your system online.
Set theme and icons
Up to this point, your Ubuntu system should have a new look and feel. Below is our Ubuntu desktop appearance after applying the configurations above.

New ubuntu look
Wow! That is quite a stunning desktop appearance we have for our Ubuntu system. We are not done yet. Let’s check out the extensions tab and see what more we can do.
3. The Extensions tab
You can use the extensions tab to enable or disable extensions using the toggle switch next to each extension in the list. Disabling an extension will turn off its functionality until it is re-enabled. Some extensions may require a restart of the GNOME Shell for the changes to take effect.
In addition to enabling or disabling extensions, users can configure individual extension settings by clicking on the gear icon next to each extension in the list. This will bring up a configuration dialog that allows users to customize the behavior or appearance of the extension.
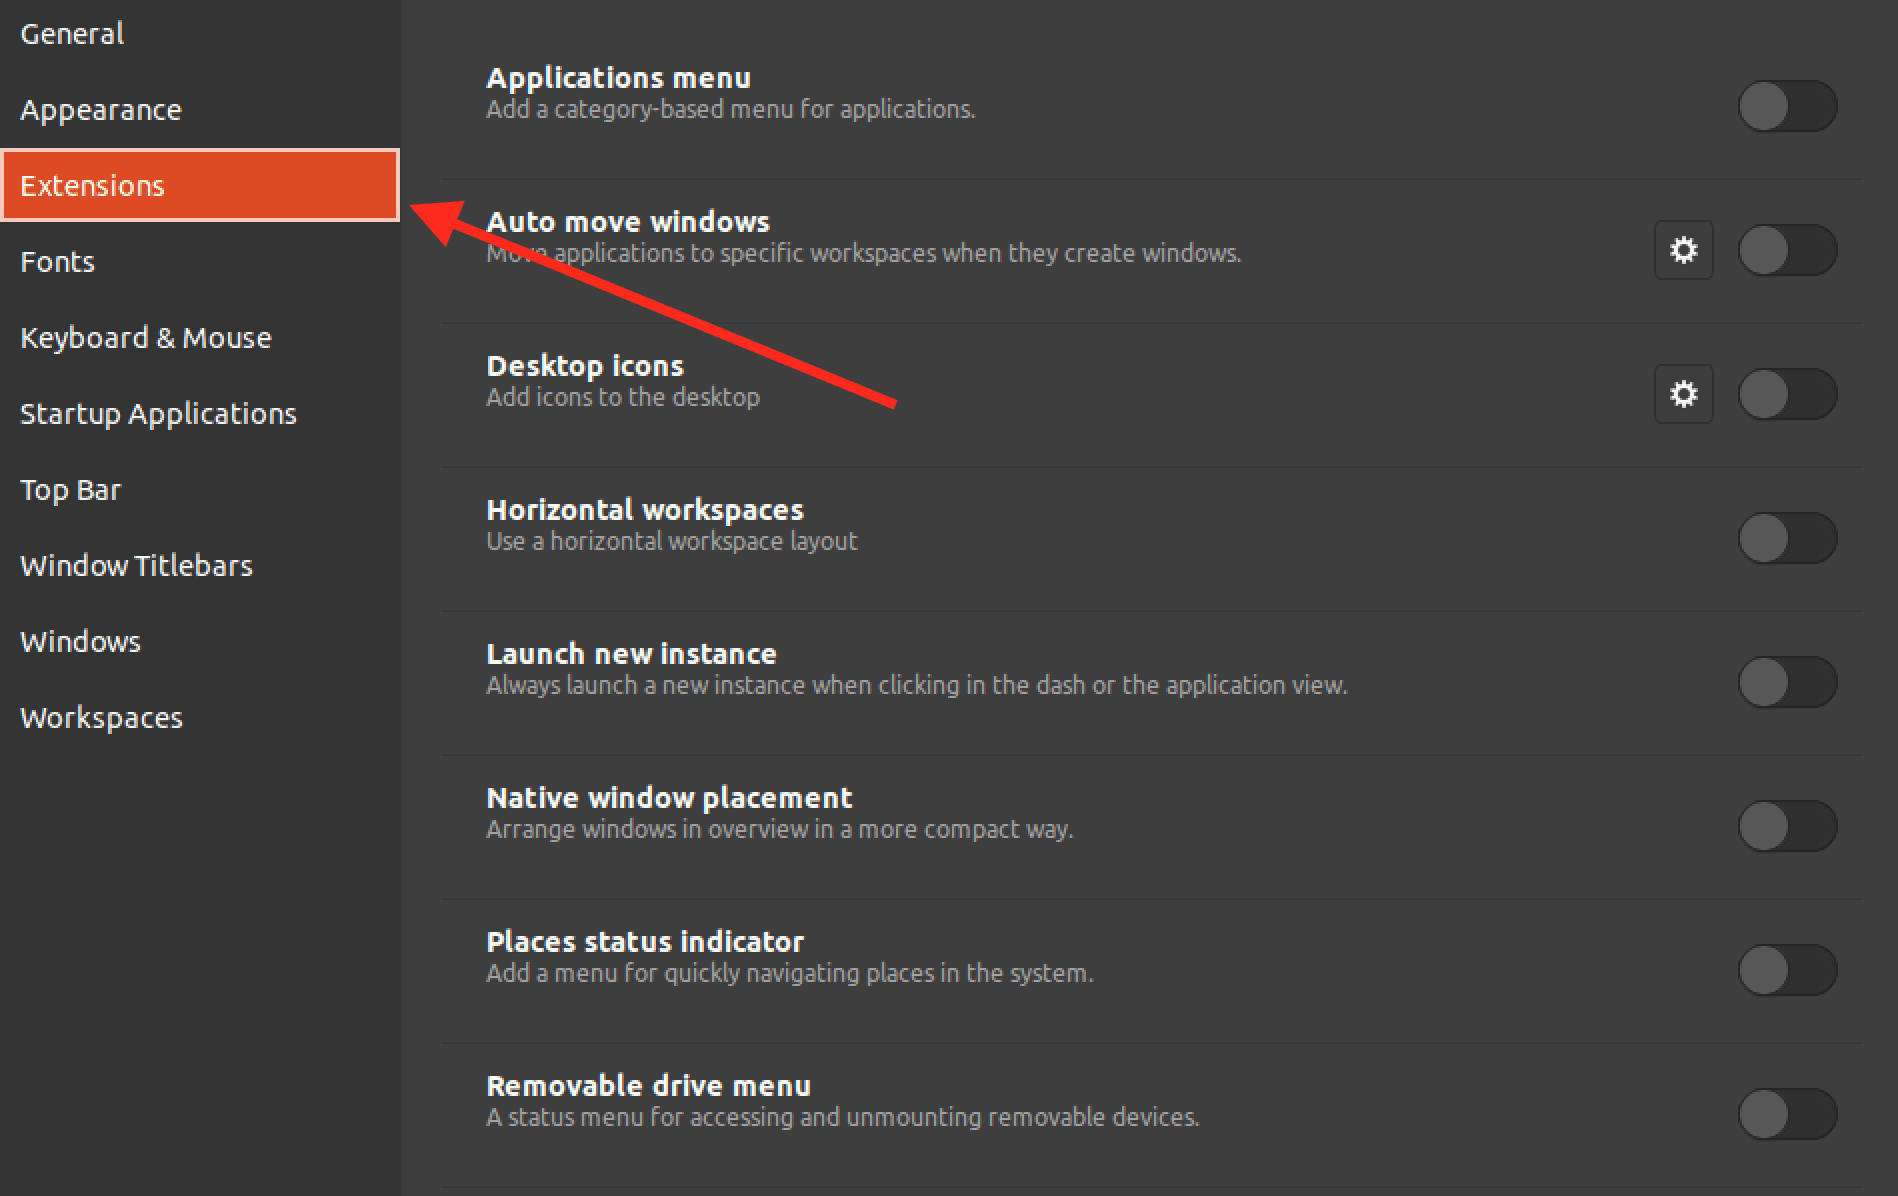
Extensions Tab
4. The Fonts Tab
The Fonts tab in the GNOME Tweaks tool allows users to configure the system fonts used in various areas of the GNOME desktop environment. Here is a breakdown of the options available in the Fonts tab:
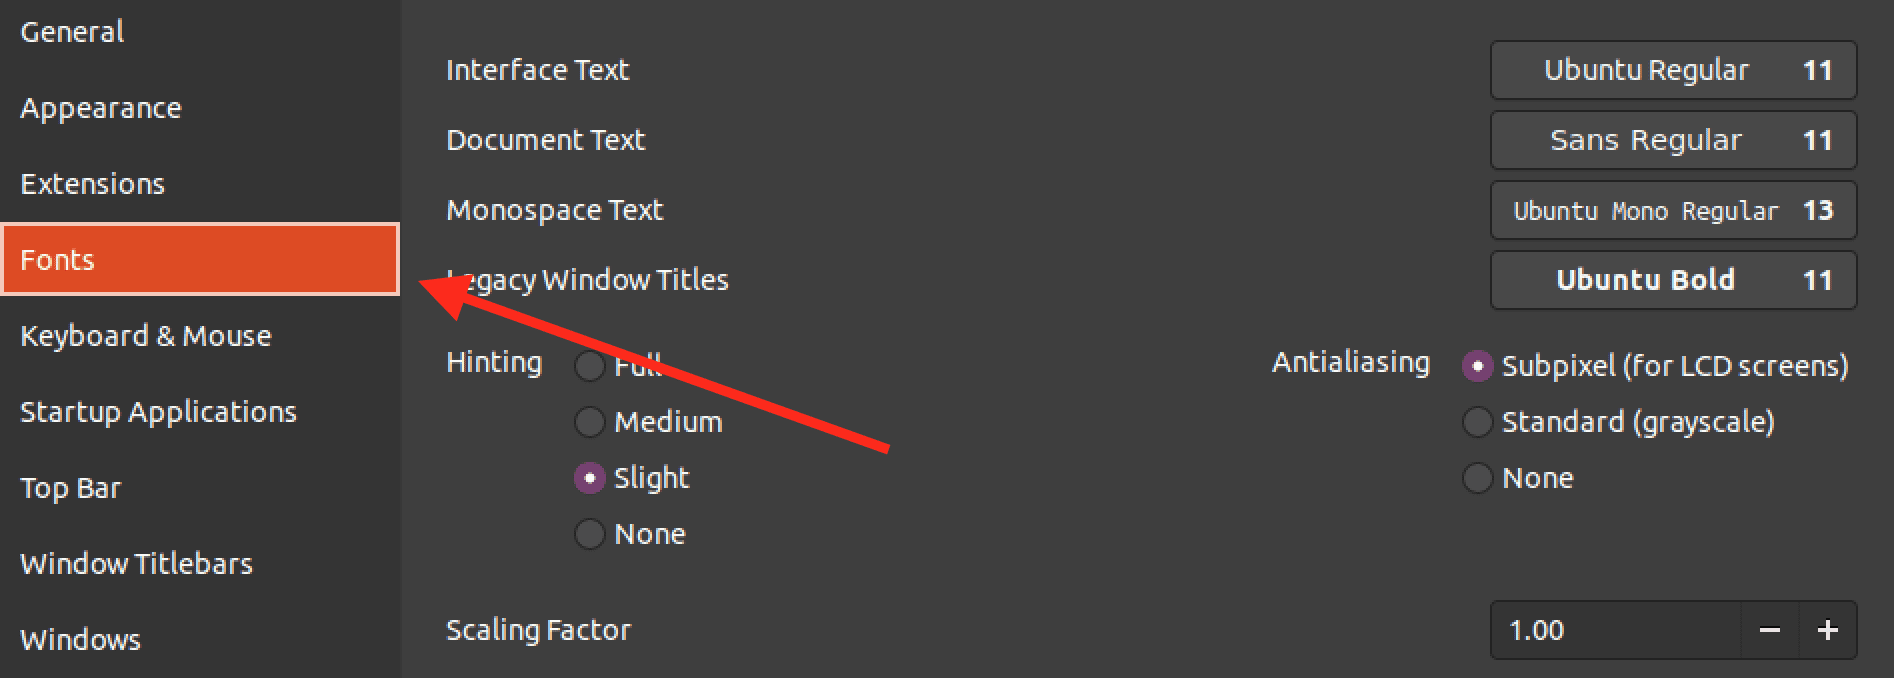
Fonts tab
- Interface Text: This option sets the font used for the GNOME interface, such as the text displayed in menus, buttons, and dialogs.
- Document Text: This option sets the font used for document text, such as the text in a text editor or word processor.
- Monospace: This option sets the font used for monospace text, such as the text in a terminal or code editor.
- Legacy Window Titles: This option sets the font used for legacy window titles, which are window titles that are not drawn using modern GTK3 libraries.
- Scaling Factor: This option allows users to adjust the scaling of the system fonts, which can be helpful in high-resolution displays or for users who prefer larger or smaller fonts.
5. The Top Bar
The top bar allows you to set the icons you want to appear at the top bar of your Ubuntu Desktop. These include:
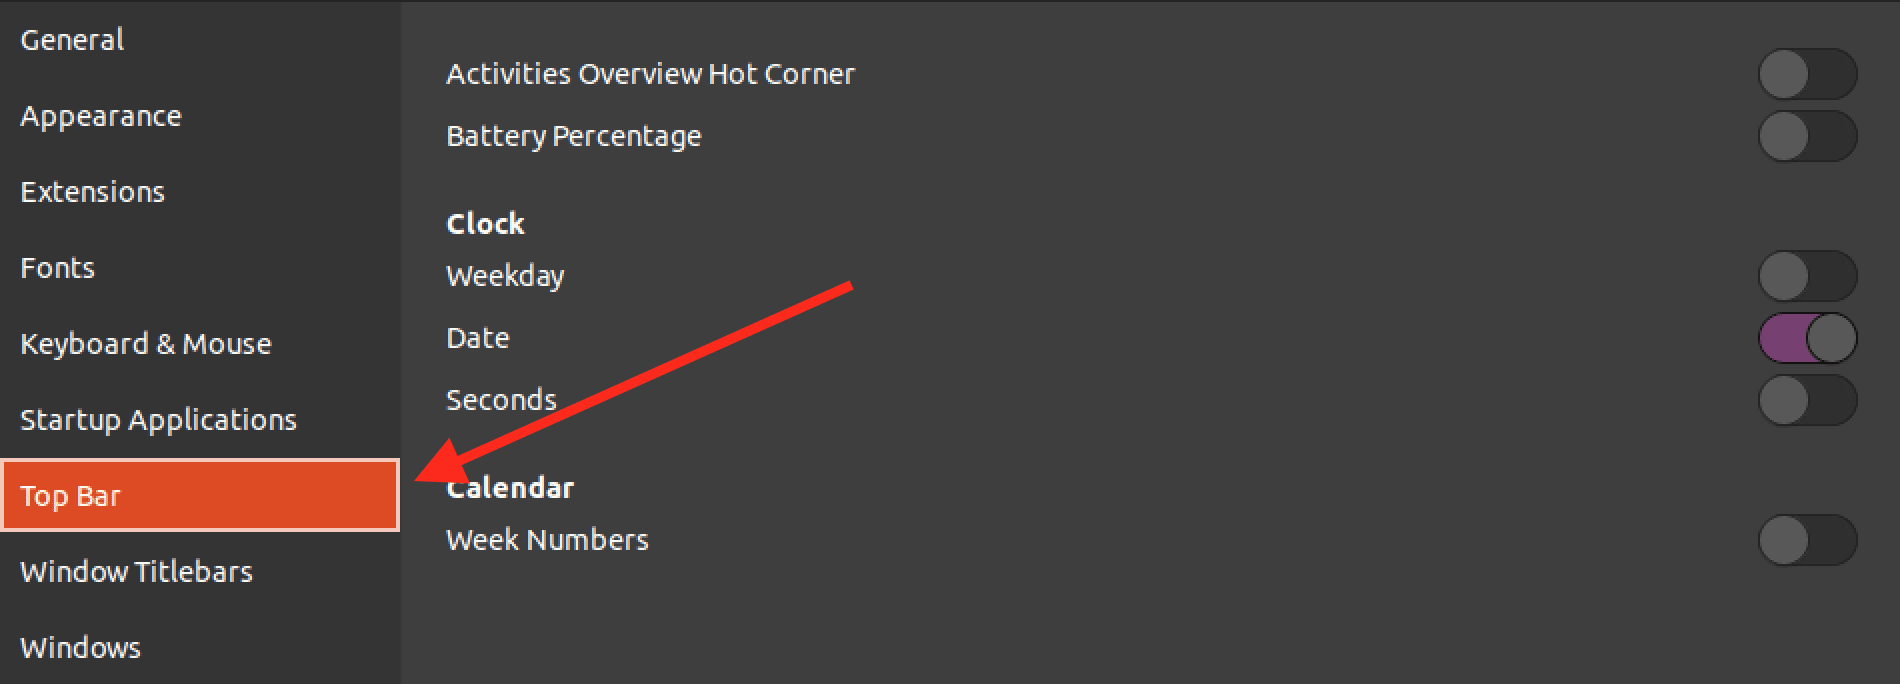
Top bar
- Activities overview hot corner
- Battery percentage
- Clock: Here, you can select whether you want to show Weekdays, dates, seconds, or all.
- Calendar: Here, you have the option to show week numbers.
6. Window Titlebars
The “Window Titlebars” menu in the GNOME Tweaks tool allows users to customize the appearance and behavior of window title bars in the GNOME desktop environment. Here are the options available in this menu:
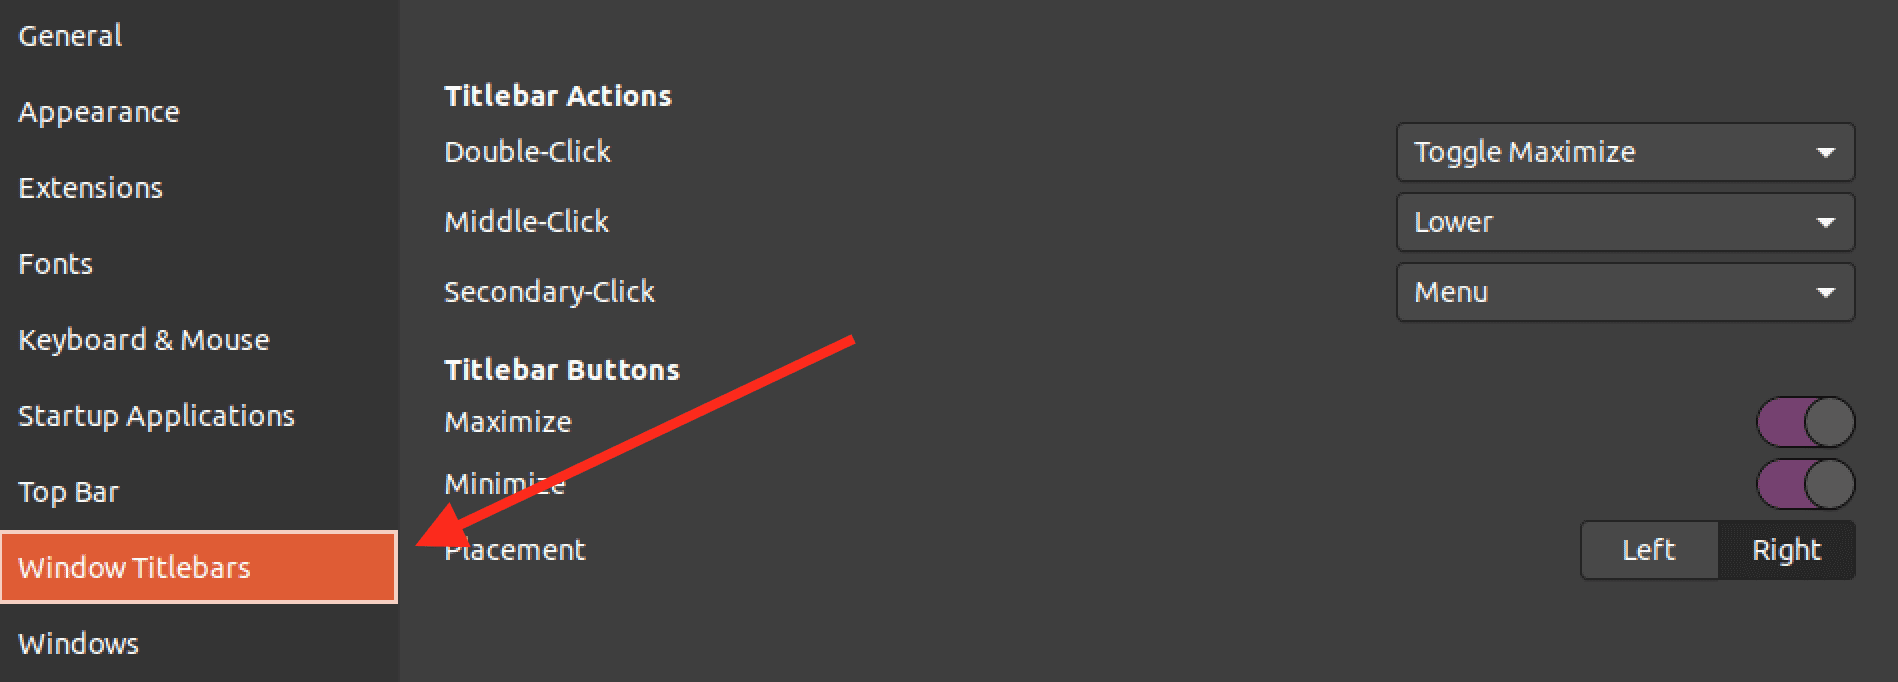
Window Titlebars
Titlebar Buttons: This option lets users choose which buttons appear on window title bars. Users can enable or disable buttons such as “Minimize,” “Maximize,” “Close,” and “Always on Top.”
Double-Click Titlebar Action: This option lets users choose what happens when double-clicking on a window title bar. By default, this action maximizes or restores the window, but users can choose to minimize or shade the window instead.
Titlebar Actions: This option allows users to configure what happens when they click on specific areas of a window title bar. For example, users can minimize the window when they middle-click on the title bar or move it when they right-click and drag.
Titlebar Fonts: This option allows users to set the font for window title bars.
Titlebar Clicks: This option allows users to choose what happens when they click on different areas of a window title bar. For example, users can move the window when they left-click and drag it on the title bar or raise it when they middle-click.
Customize the Ubuntu desktop by changing the desktop environment
Choosing the proper Desktop Environment is the first step to personalizing your Ubuntu system and creating a beautiful UI that suits your needs and feelings. A Desktop Environment (DE) is a graphical interface designed to provide users with a unified and consistent way to interact with their computer. It includes a window manager, graphic panels, system settings, file managers, and other applications that create a complete user interface. DEs are responsible for how the desktop looks, feels, and functions.
Below are the various Desktop Environments you can install on your Ubuntu system.
1. GNOME
It is the default DE in Ubuntu and offers a modern and streamlined interface focusing on simplicity and productivity. Have you switched to the Ubuntu default Desktop Environment and would love to switch back to GNOME? Check out our comprehensive post on how to install Gnome on Ubuntu.

Ubuntu GNOME
2. KDE Plasma
It provides a more customizable and feature-rich environment with many options for users who like to tweak their desktops. KDE Plasma is regarded as one of the most beautiful and customizable Desktop Environments for Linux systems. Check out our step-by-step guide for installing KDE Plasma desktop on Ubuntu.

KDE Plasma
3. Deepin
Deepin Linux DE is a desktop environment known for its modern, sleek, and user-friendly design, similar to the macOS Big Sur desktop. The Chinese Linux distribution Deepin develops the DE, and it has been gaining popularity in recent years due to its clean and intuitive interface and wide range of customization options. Are you interested in trying out Deepin Desktop? Here is a step-by-step guide to installing and setting Deepin on Ubuntu.

14. deepin app launcher full screen
4. Cinnamon
It is a user-friendly and modern DE based on GNOME, providing a more customizable interface. Here is a comprehensive guide to installing the Cinnamon desktop on Ubuntu.
Cinnamon Desktop on Ubuntu 17.10
Conclusion
Ubuntu is a highly customizable operating system that lets you personalize your desktop environment to suit your preferences and style. One of the ways to customize your Ubuntu desktop is by tweaking the desktop theme and icons, which can give your desktop a fresh look and make it more visually appealing.
Using the GNOME Tweak Tool, you can easily install and apply different themes and icons to your Ubuntu desktop and customize and create your tunes and icons. With these customization options, you can enhance your productivity and make your Ubuntu desktop experience more enjoyable. Alternatively, you can change the entire Desktop Environment and get a DE with the look and feel you want.