
Perl, short for “Practical Extraction and Reporting Language,” is a versatile and powerful programming language that has been an integral part of the development and system administration landscape for over three decades. Renowned for its excellent text processing, automation capabilities, and adaptability, Perl has maintained its popularity among developers, system administrators, and programming enthusiasts alike. In this step-by-step guide, we will walk you through the process of installing Perl on your Linux machine, ensuring a smooth and seamless experience for both newcomers and experienced users.
Top 7 reasons to have Perl on Linux
There are several reasons why Perl and Linux make an excellent combination for various tasks, including text processing, automation, web development, and more. Here are some of the key reasons why you might want to use Perl on Linux:
- Prevalence in the Linux ecosystem: Perl has been a popular choice for scripting and automation tasks within the Linux ecosystem since the early days of Linux. Many system utilities, such as log analyzers and monitoring tools, are written in Perl, making it a valuable skill for Linux users.
- Versatility: Perl is a highly versatile programming language, making it suitable for a wide range of applications, from one-liner scripts to full-fledged web applications. Its adaptability and flexibility allow developers to use Perl in various contexts, depending on their needs and requirements.
- Powerful text processing: Perl excels at text processing, an essential aspect of many tasks in Linux system administration, such as log file analysis, configuration file manipulation, and data extraction. Perl’s built-in support for regular expressions and text manipulation functions make it an ideal choice for these tasks.
- Cross-platform compatibility: Although this article focuses on using Perl on Linux, it’s worth noting that Perl is a cross-platform language, which means that scripts written in Perl can often run on other operating systems, such as macOS and Windows, with minimal modifications. This cross-platform compatibility can be advantageous if you need to develop or maintain scripts that work across multiple platforms.
- Rich module ecosystem: Perl has an extensive ecosystem of modules available through the Comprehensive Perl Archive Network (CPAN). CPAN is a repository of over 200,000 Perl modules, which can help simplify and speed up your development process by providing pre-built solutions for various tasks and challenges.
- Active community: Perl has a large and active community of developers, which provides an invaluable source of knowledge, support, and resources. This community can help you overcome challenges, share ideas, and collaborate on projects.
- Open-source nature: Both Perl and Linux are open-source, which means that you can use, modify, and distribute them without any licensing fees or restrictions. This fosters collaboration, transparency, and continuous improvement, benefiting users and developers alike.
By using Perl on Linux, you can take advantage of the powerful capabilities of this programming language while leveraging the flexibility and robustness of the Linux platform.
Installing Perl on Linux
In this post, we will provide you with a comprehensive, step-by-step guide on installing Perl on Linux, ensuring that you can harness the full potential of this programming language on your machine.
Step 1 – Check for pre-installed Perl
Many Linux distributions come with Perl pre-installed. Before you proceed with the installation, checking whether Perl is already installed on your system is a good idea. To do this, open a terminal window and enter the following command:
perl -v
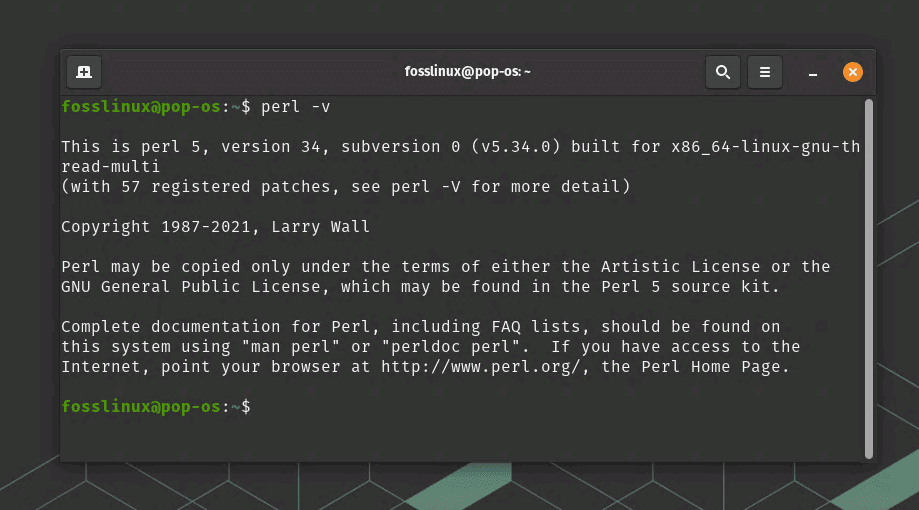
Check Perl installation
If Perl is installed, this command will display the version number. If it’s not installed or you want to install a newer version, proceed to the next section.
Step 2 – Installing Perl using the package manager
Installing Perl on Linux is easiest by using your distribution’s package manager.
2.1. Debian/Ubuntu-based distributions
For Debian-based distributions like Ubuntu, you can use the Advanced Package Tool (APT) to install Perl. Open a terminal and enter the following commands:
sudo apt update
sudo apt install perl
2.2. Fedora/RHEL/CentOS-based distributions
For Fedora, Red Hat Enterprise Linux (RHEL), and CentOS distributions, use the DNF package manager (or YUM for older versions) to install Perl. Open a terminal and enter the following commands:
sudo dnf update
sudo dnf install perl
(Replace ‘dnf’ with ‘yum’ if you’re using an older distribution that doesn’t support DNF.)
Alternative Step 2 – Installing Perl from the source
If you want to install a specific version of Perl or need to customize the installation, you can compile Perl from source. First, visit the Perl website (https://www.perl.org/get.html) to download the latest source code.
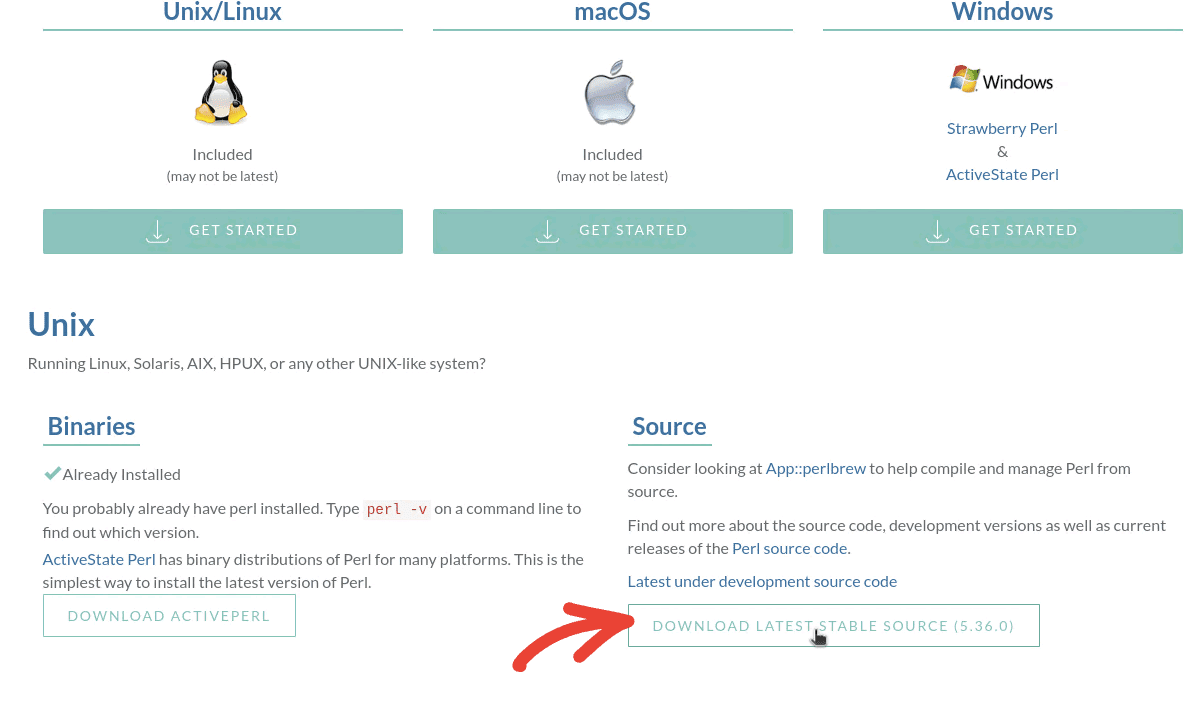
Download Perl Source Code
Then, follow these steps:
Extract the downloaded archive:
tar -xzf perl-VERSION.tar.gz
(Replace ‘VERSION’ with the actual version number. For example, 5.36.0 in our case.)
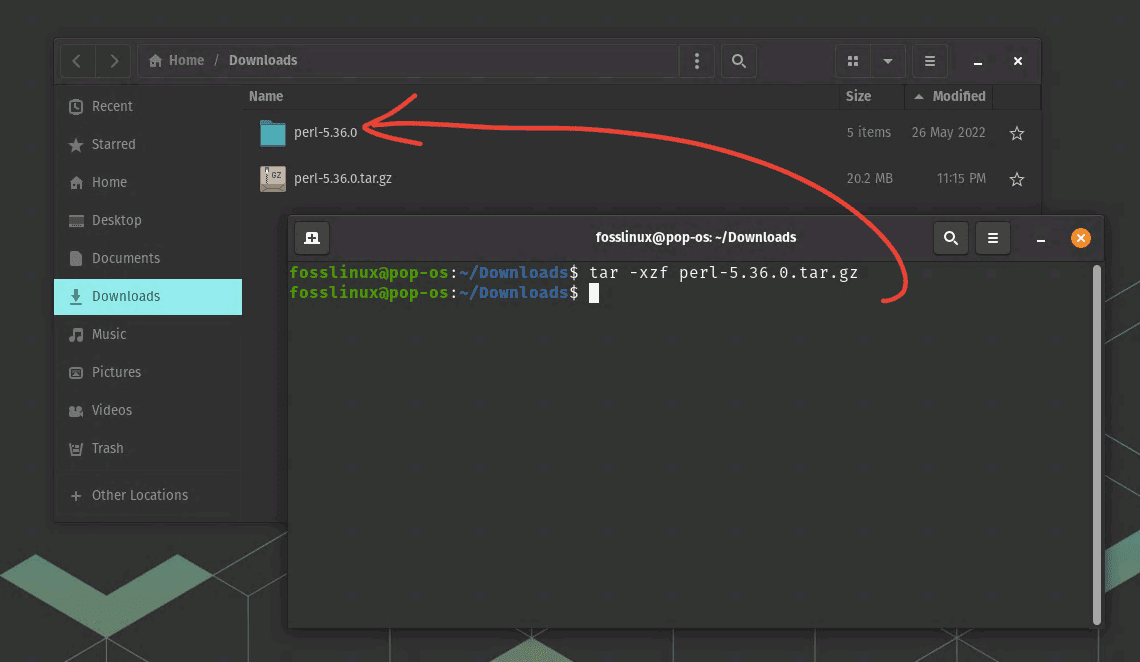
Extract Perl Source Code Tar File
Change to the extracted directory:
cd perl-VERSION
Configure the build:
./Configure -des -Dprefix=$HOME/localperl
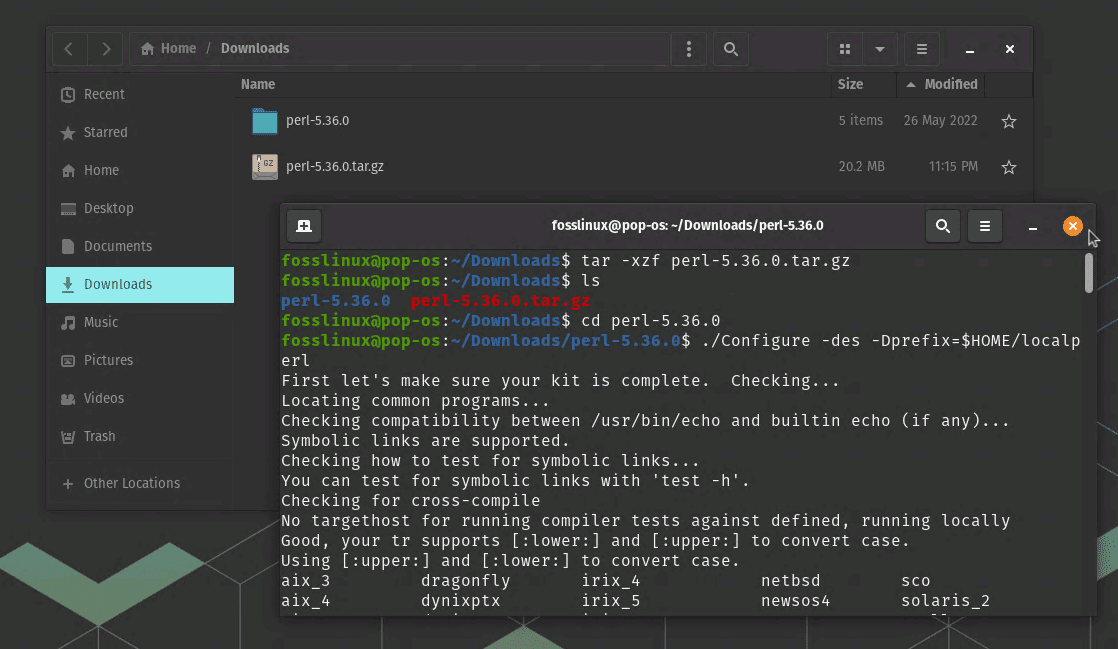
Configuring the build
(This command installs Perl in your home directory. You can change the installation location by modifying the ‘-Dprefix’ option.)
Compile and install Perl:
make
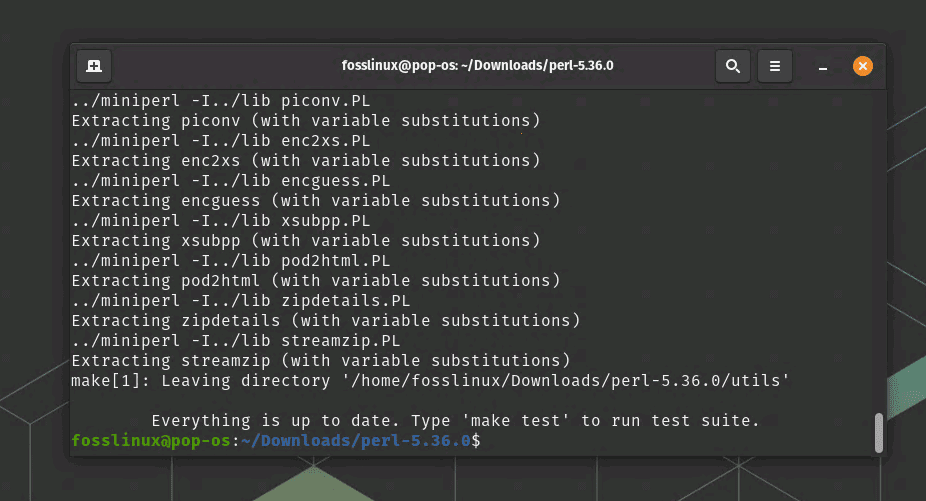
Make
After “make” is complete, run “make test”. This process is going to take a bit longer. This is simply a dry run for checking. You should see “All test

Make test process complete
Finally, run the “make install” command.
Perl installation complete
Step 3 – Verify the installation
After installing Perl, you should verify that it was installed correctly. To do this, open a terminal and enter the following command:
perl -v
This command should display the installed version of Perl.
Step 4 – Configure the Perl environment
To start using Perl, you may need to add the installation directory to your PATH environment variable. For example, if you installed Perl in your home directory, add the following line to your .bashrc or .bash_profile file:
export PATH=$HOME/localperl/bin:$PATH
(Replace ‘$HOME/localperl’ with the actual installation directory.)
Troubleshooting common issues – Installing Perl on Linux
Despite following the installation steps carefully, you might still encounter some issues while installing Perl on your Linux machine. In this section, we will discuss common problems and their solutions to help you overcome these obstacles and successfully install Perl on Linux.
1. Unable to locate package perl
If you receive an error message stating “Unable to locate package perl” while trying to install Perl using a package manager, it’s possible that your package list is outdated or your repositories are misconfigured. To fix this issue, update your package list and ensure your repositories are correctly set up.
For Debian/Ubuntu-based distributions:
sudo apt update
sudo apt install perl
For Fedora/RHEL/CentOS-based distributions:
sudo dnf update
sudo dnf install perl
(Replace ‘dnf’ with ‘yum’ if you’re using an older distribution that doesn’t support DNF.)
2. Permission denied errors during installation
Permission denied errors can occur during the installation process if you don’t have the necessary privileges. To resolve this issue, use ‘sudo’ to execute commands with root privileges.
For example:
sudo apt install perl
or
sudo dnf install perl
3. Compilation errors while installing from the source
If you encounter compilation errors while installing Perl from the source, your system may be missing some required libraries or tools. Check the error messages for any specific missing dependencies, and then use your package manager to install them.
For example, on Debian/Ubuntu-based systems, you might need to install the build-essential package:
sudo apt install build-essential
On Fedora/RHEL/CentOS-based systems, you might need to install the Development Tools group:
sudo dnf groupinstall "Development Tools"
(Replace ‘dnf’ with ‘yum’ if you’re using an older distribution that doesn’t support DNF.)
4. Perl scripts not executing after installation
If your Perl scripts are not executing after installation, it’s possible that your system’s PATH variable does not include the Perl binary directory. To fix this issue, update your PATH variable to include the Perl installation directory.
For example, if you installed Perl in your home directory, add the following line to your .bashrc or .bash_profile file:
export PATH=$HOME/localperl/bin:$PATH
(Replace '$HOME/localperl' with the actual installation directory.)
5. Incompatible Perl modules
If you experience issues with specific Perl modules after installation, it’s possible that the modules are incompatible with your installed Perl version. To resolve this issue, try updating the problematic modules using CPAN or cpanminus:
cpan Module::Name
or
cpanm Module::Name
If updating the module does not resolve the issue, consider seeking help from the module’s documentation, issue tracker, or the Perl community.
6. System still shows the old version of Perl when you compile from the source and install it.
If you have successfully installed recent Perl, for example, 5.36.0 from the source code but your system still shows older version, for instance, Perl v5.34 when you run perl -v, the older version of Perl is likely taking precedence in your system’s PATH variable.
To resolve this issue, you can update your PATH variable to include the new Perl installation directory before the old one.
Here’s how to do that:
Determine the installation directory of Perl 5.36.0. If you followed the instructions in this guide and used the -Dprefix option during configuration, the installation directory should be $HOME/localperl or the path you specified.
Open your shell’s configuration file (e.g., .bashrc, .bash_profile, or .zshrc) using a text editor. You can typically find this file in your home directory.
Add the following line to the configuration file, replacing /path/to/perl-5.36.0/bin with the actual path to the bin directory of your Perl 5.36.0 installation:
export PATH=/path/to/perl-5.36.0/bin:$PATH
Save and close the configuration file.
Restart your terminal or run source .bashrc (or the appropriate configuration file) to apply the changes.
Now, when you run perl -v, the output should show Perl 5.36.0.
If you still encounter issues, double-check the installation directory and ensure that you have updated the PATH variable correctly. Additionally, you can use the which command to verify the current Perl executable in use:
which perl
This command should return the path to the Perl 5.36.0 executable. If it still points to the older version, re-check your configuration file and ensure the PATH variable is correctly updated.
By addressing these common issues, you should be able to install and use Perl on your Linux machine successfully.
Conclusion
You have now successfully installed Perl on your Linux machine. With Perl at your disposal, you can begin to explore its numerous capabilities, from text processing and automation to web development and beyond. For those new to Perl, it’s highly recommended to visit the official Perl documentation (https://perldoc.perl.org) to learn more about the language and its features.
To further enhance your Perl development experience, consider installing a few additional tools:
- cpanminus: A modern, lightweight, and easy-to-use CPAN client that simplifies the process of installing and managing Perl modules. To install cpanminus, run:
curl -L https://cpanmin.us | perl - --sudo App::cpanminus
- Perl IDEs and Editors: Choose an Integrated Development Environment (IDE) or text editor with Perl support, such as Visual Studio Code, Sublime Text, or Atom, to help streamline your coding and debugging process.
- Perlbrew: A valuable tool for managing multiple Perl installations on a single system. Perlbrew allows you to switch between different Perl versions and installations easily. To install Perlbrew, visit the official website (https://perlbrew.pl) and follow the installation instructions.
Happy coding!