
Hello, fellow Ubuntu enthusiasts! Today, I want to share with you one of my favorite Ubuntu features: Recovery and Rescue Mode. In this blog post, we will delve into what they are, their differences, when to use each, and how to boot into Recovery and Rescue Mode using both Terminal and GUI methods. So let’s dive right in!
What is Recovery mode?
Recovery Mode is a built-in feature in Ubuntu that provides a suite of tools designed to help you diagnose and fix various system issues. It’s like a Swiss Army knife for your operating system, allowing you to repair broken packages, reset your password, and even recover lost files. As a longtime Ubuntu user, I’ve relied on Recovery Mode more than once, and it has been a lifesaver in many situations.
What is Rescue mode?
On the other hand, rescue mode is a more generic term used in various Linux distributions, including Red Hat, Fedora, and CentOS. Rescue mode allows you to boot the system into a minimal environment, providing access to the command line and essential tools to fix issues like file system errors or misconfigured settings. It’s essentially a stripped-down operating system version that focuses on troubleshooting and system repair.
Rescue vs. Recovery mode: What’s the difference?
While Recovery and Rescue modes share a common purpose (troubleshooting and fixing issues), they are not precisely the same. Recovery mode is specific to Ubuntu and Debian-based distributions, while rescue mode is a more general term used across various Linux distributions.
The main difference between the two modes is their range of tools and utilities. Recovery mode provides a more comprehensive set of tools for diagnosing and fixing issues, whereas rescue mode focuses on basic command-line utilities for troubleshooting purposes.
Which one should you use?
As an Ubuntu user, you’ll most likely want to use Recovery mode when facing system issues, as it offers a more extensive set of tools designed specifically for your operating system. However, if you’re working with other Linux distributions, you may need to use rescue mode instead.
Now that we’ve covered the basics let’s move on to the main course—booting into Recovery and Rescue Mode!
Booting into Recovery mode
This section will explore two ways to boot into Recovery Mode in Ubuntu: the GUI and the command-line methods. Your choice between these methods will depend on personal preferences, comfort level, and familiarity with Ubuntu. Additionally, the Terminal method might prove more advantageous if you’re accessing your system remotely. However, I recommend using the GUI method for this particular task due to its simplicity and user-friendly nature.
1. Using GUI (Graphical User Interface)
For those who prefer a graphical approach, don’t worry—I’ve got you covered! Here’s how to boot into Recovery Mode using the GUI:
Restart your computer.
Hold down the Shift key as your computer boots up or repeatedly press the Esc key to enter the GRUB menu. You may need to try both methods, as some systems respond differently.
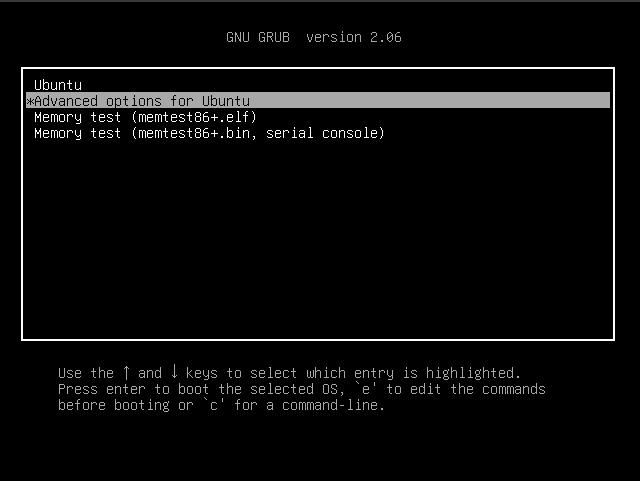
Grub – Advanced options for Ubuntu
Once in the GRUB menu, select the “Advanced options for Ubuntu” using the arrow keys and press Enter.
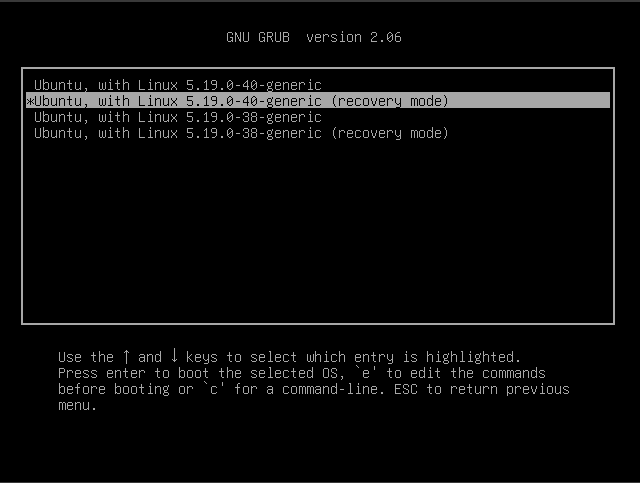
Grub options
Choose the “Ubuntu, with Linux [kernel version]-recovery” option and press Enter.
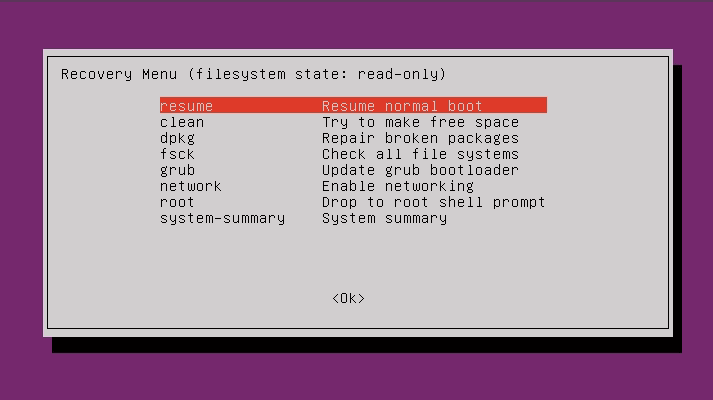
Ubuntu 22.04 LTS Recovery Mode
Your system will now boot into Recovery Mode.
2. Using terminal
If you’re like me and prefer the command line, you’ll be happy to know that you can boot into Recovery Mode using Terminal. Here’s how:
Open the Terminal by pressing Ctrl+Alt+T.
Update GRUB (the bootloader) by entering the following command:
sudo update-grub
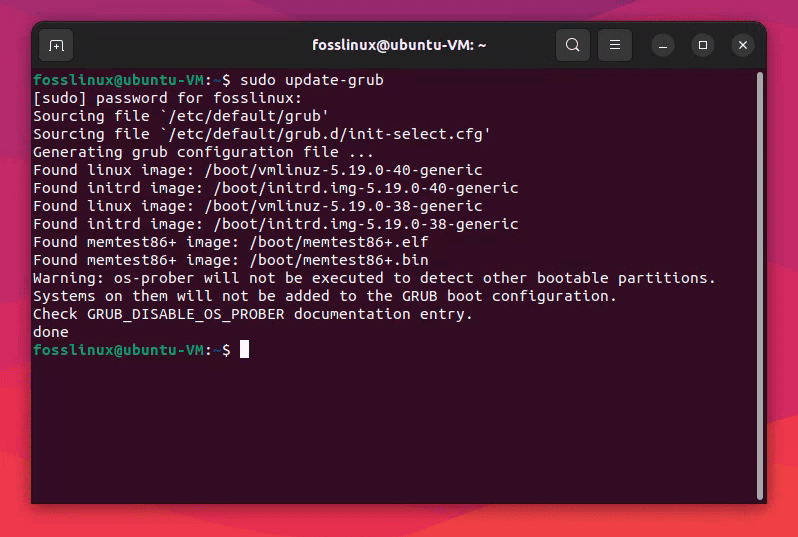
Updating Grub in Ubuntu 22.04 LTS
Next, copy and paste this command into the terminal.
grep -E "submenu|menuentry" /boot/grub/grub.cfg | grep -B 1 -E "recovery|submenu"
This command will display the “Advanced options for Ubuntu” grub submenu, the main menu entries, and the recovery mode entries within the submenu.
Here’s a breakdown of the command:
- grep -E “submenu|menuentry” /boot/grub/grub.cfg: This part searches for lines containing either “submenu” or “menuentry” in the /boot/grub/grub.cfg file.
- grep -B 1 -E “recovery|submenu”: This part filters the previous output, displaying only the lines containing “recovery” or “submenu” and the line immediately before them (using the -B 1 flag).
With this output, you can identify the “Advanced options for Ubuntu” submenu, its index in the main menu, and the recovery mode entry’s index within the submenu. For example, in the below image, Ubuntu is the first option. Its INDEX is 0. Next is “Advanced options for ubuntu”. Its INDEX is 1. Inside the “Advanced options for ubuntu”, “recovery” is listed as the 2nd option, which implies its INDEX is 1.

Using grep to see the grub entries
Next, open the GRUB configuration file using your favorite text editor (I’m using nano in this tutorial):
sudo nano /etc/default/grub
Locate the line GRUB_DEFAULT. To navigate inside the nano editor, use the arrow keys. By default, the grub content will look like the one below. Notice GRUB_DEFAULT value is “0” by default.
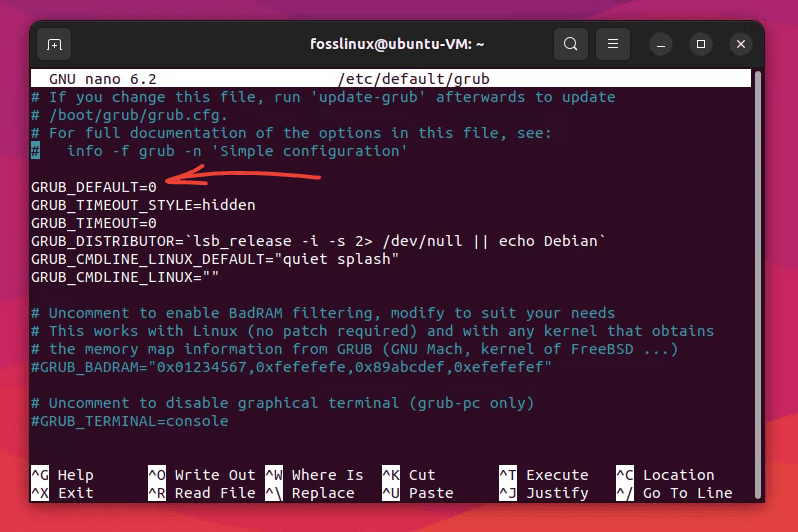
Default grub content (Before editing)
Change the value to the INDEX values you noted in before. In my case, it is 1>1. 1 for the main menu item and 1 for the Advanced options to the recovery menu.
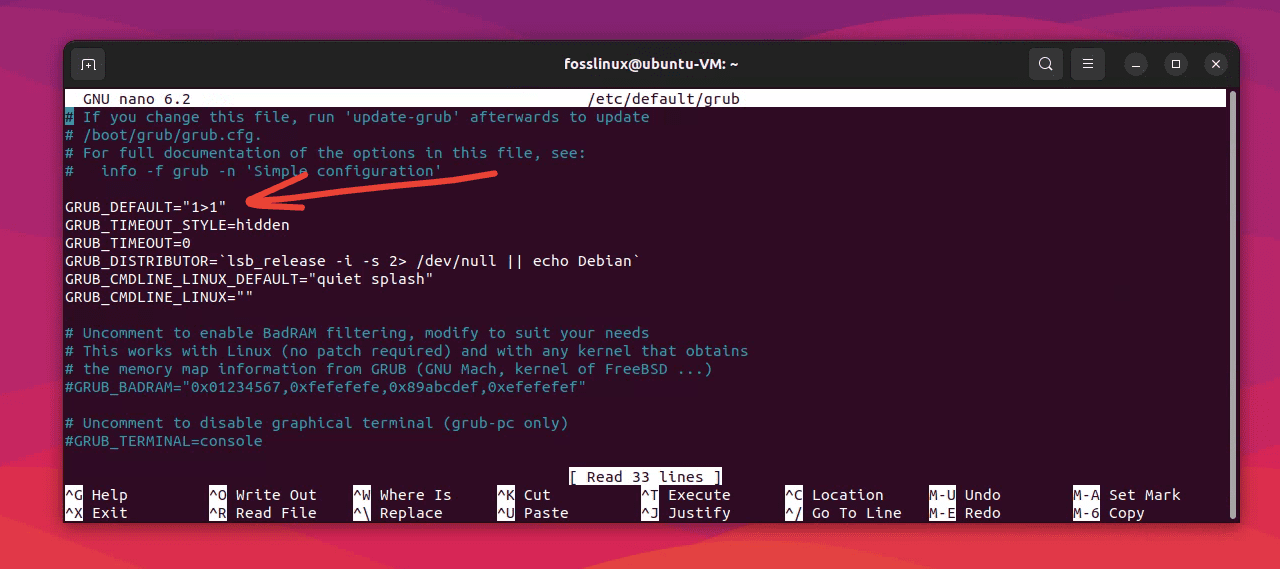
Editing the GRUB_DEFAULT value
Save and close the file (in nano, press Ctrl+X, then Y, and finally, Enter).

Saving grub
Update GRUB again:
sudo update-grub
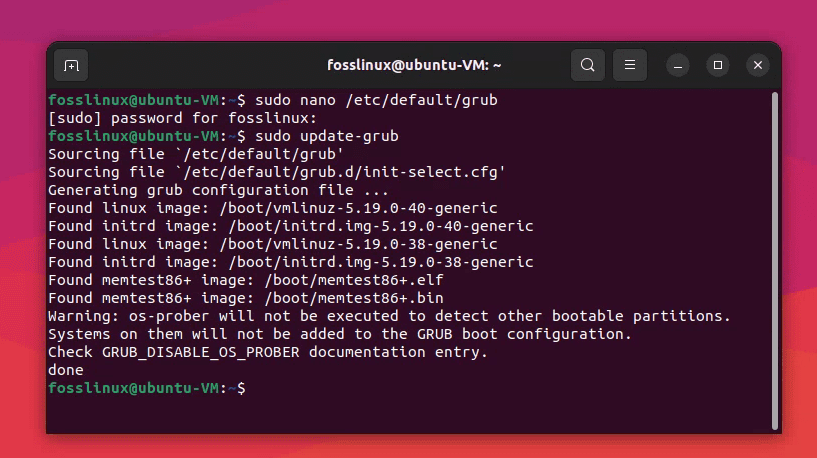
Updating grub after finishing the edit
Reboot your system with the following command
sudo reboot
After the reboot, your system will boot into Recovery Mode directly!
Ubuntu 22.04 LTS Recovery Mode
Remember to reset the GRUB_DEFAULT value to “0” from the GRUB configuration file and update GRUB again once you fix your issues in Recovery Mode.
And there you have it! Two different methods to boot into Recovery Mode in Ubuntu. I hope you find this guide helpful, and may you never fear tackling system issues again! Remember, Recovery Mode is there to help you, so don’t hesitate to use it when needed.
Booting into Rescue mode using terminal
Open Terminal by pressing Ctrl+Alt+T.
Update GRUB (the bootloader) by entering the following command:
sudo update-grub
Next, open the GRUB configuration file using your favorite text editor.
sudo nano /etc/default/grub
Locate the line GRUB_CMDLINE_LINUX_DEFAULT. Its default value should be “quiet splash,” as shown in the image below.
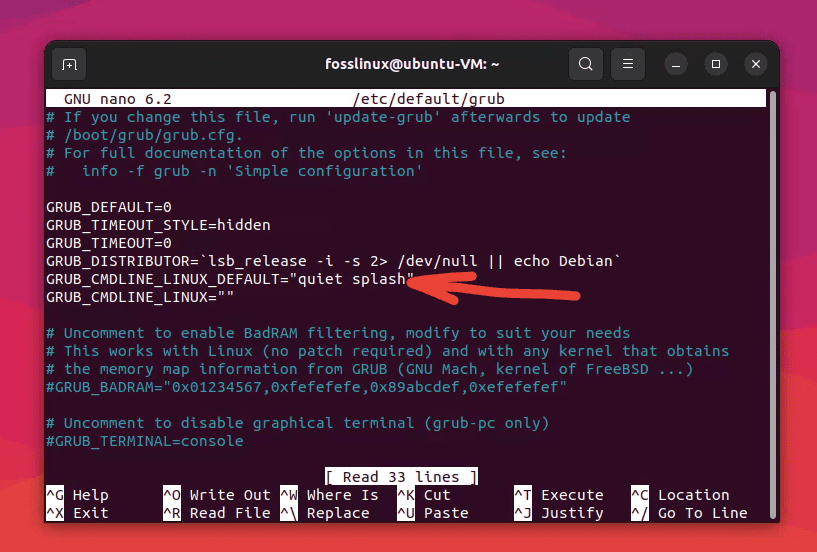
Showing default grub values in Ubuntu
Use arrow keys to navigate and add systemd.unit=rescue.target to the value.
GRUB_CMDLINE_LINUX_DEFAULT="quiet splash systemd.unit=rescue.target"
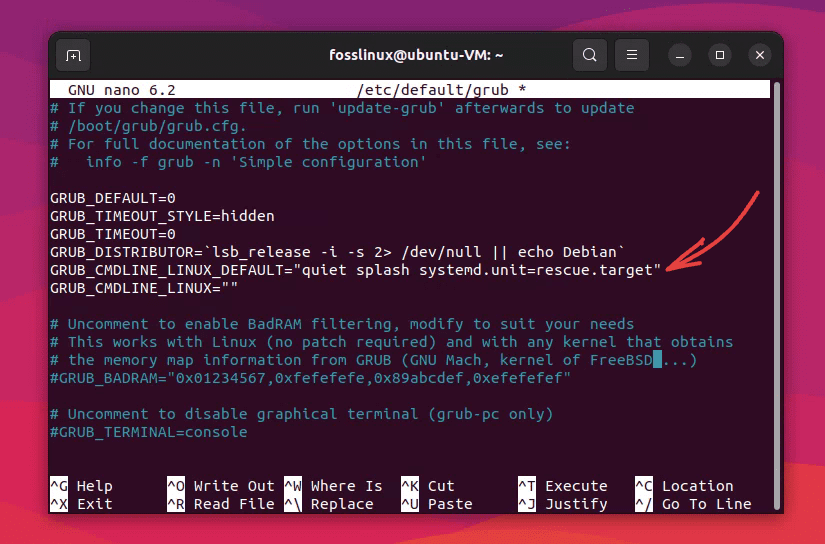
Editing grub to boot into rescue mode
Save and close the file (in nano, press Ctrl+X, then Y, and finally Enter).
Update GRUB again.
sudo update-grub
Reboot your system with the command sudo reboot.
After the reboot, your system will boot into Rescue mode.
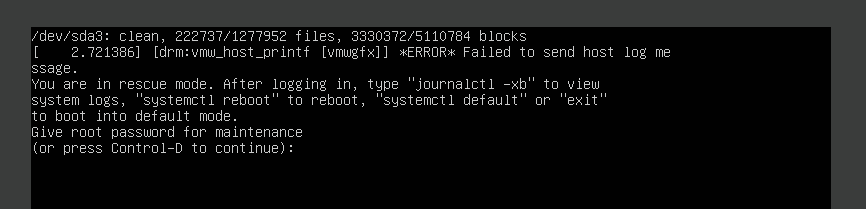
Rescue mode in Ubuntu 22.04
Remove the systemd.unit=rescue.target line from the GRUB configuration file and update GRUB once you fix your issues in Rescue mode. While in Rescue mode, you can still use the “sudo nano /etc/default/grub” and “sudo grub-update” commands to continue the normal boot process.
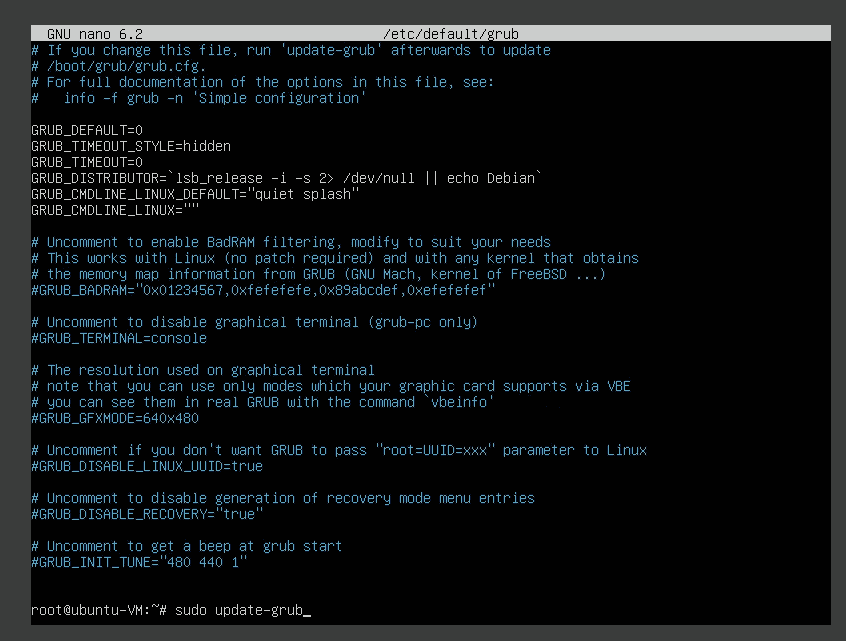
Updating grub while in Rescue mode
And there you have it! A comprehensive guide to Recovery and Rescue mode in Ubuntu.
Final thoughts
We’ve now explored the ins and outs of Recovery and Rescue Mode in Ubuntu, including their differences, when to use each, and how to boot into them using both Terminal and GUI methods. With this knowledge, you’ll be well-equipped to tackle various system issues and maintain a healthy and efficient Ubuntu environment.
Remember that the choice between Terminal and GUI methods depends on your personal preferences, skill level, and specific situations. Similarly, choosing between Recovery and Rescue Mode depends on your system’s requirements and the nature of your issue.
In my experience, Recovery Mode is a godsend for Ubuntu users, and I highly encourage everyone to familiarize themselves with it. Whether you’re a seasoned professional or a curious newcomer, it’s an essential part of your toolkit. Trust me; you’ll thank yourself the next time you encounter a system issue requiring extra help.
Ultimately, understanding and mastering these modes and methods will enhance your Ubuntu experience and make you a more confident and capable user in the world of Linux.