
I am sure that if you’re here, you have an interest in working with different operating systems, too. If not, buckle up because you’re about to embark on an exciting journey. There is a specific sense of accomplishment when I boot up a newly installed OS, and today I want to share that feeling with you. Today, I will walk you through installing CentOS Stream on Oracle’s VirtualBox, an OS that I hold in high regard for its security features and stability.
Before we delve deeper, let’s take a brief look at what CentOS Stream and VirtualBox are, for those who are unfamiliar.
Understanding CentOS Stream and VirtualBox
CentOS Stream is a Linux distribution that aims to provide a platform for rapid innovation. It is an upstream (development) branch of Red Hat Enterprise Linux (RHEL) and is designed to provide a more constant flow of updates than traditional CentOS. The “stream” in its name reflects this continuous delivery of features.
Tip: Confused between CentOS Linux and CentOS Stream? This article should help you clarify the differences.
Oracle’s VirtualBox, on the other hand, is a cross-platform virtualization application that allows you to run multiple operating systems simultaneously. You can install it on your current OS, which becomes the host, and then you can install other OS, which become guests. I recommend starting with the latest version of VirtualBox installed on your computer so that you benefit from the new features.
Installing CentOS Stream on VirtualBox
For someone who enjoys dabbling in different OS, VirtualBox has been a boon. However, I have to admit that the learning curve initially felt steep, and I grappled with the virtualization jargon. But, trust me, once you have it figured out, it’s a smooth sail.
Prerequisites for Installation
Before we start the installation process, ensure you have the following:
- Oracle VirtualBox: You can download VirtualBox from the official Oracle website. Make sure you download the right version for your host OS (Windows, Linux, or macOS).
- CentOS Stream ISO file: You can download the ISO file for CentOS Stream from the official CentOS website.
- Adequate Disk Space: You should have at least 20 GB of free space. CentOS itself will take around 10 GB, but we need to allow room for applications and files you may want to store.
- Sufficient RAM: The more, the merrier. However, 2 GB of RAM should be the bare minimum.
- Patience and Time: A somewhat overlooked, but essential, requirement.
Creating a Virtual Machine in VirtualBox
Once we have our requisites sorted, let’s dive into setting up our Virtual Machine (VM).
Download CentOS Stream: Head to the official CentOS site and download the latest version of CentOS Stream.
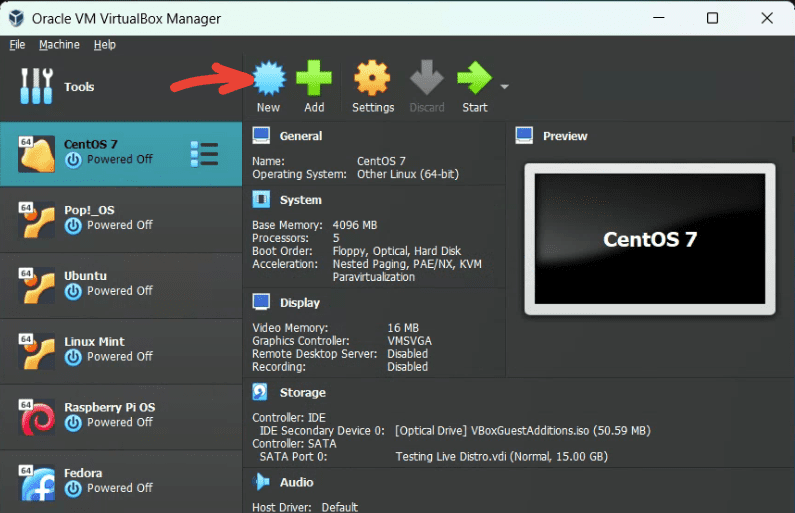
Open VirtualBox: Launch the VirtualBox application. You will see a screen displaying any VMs you have previously created. Since we are creating a new one, click on the “New” button on the top left.
Creating a New Virtual Machine
Name your Virtual Machine: In the pop-up window, give your VM a name. I will name mine “CentOS Stream”. Below that, you should select the type and version of the OS. Select “ISO Image” the select the downloaded CentOS Stream ISO file. Choose Linux for type and Red Hat (64-bit) for version. This should automatically get populated in the recent version of VirtualBox. Also, I would check the box “Skip Unattended Installation”. That way, you have more control over the installation settings.
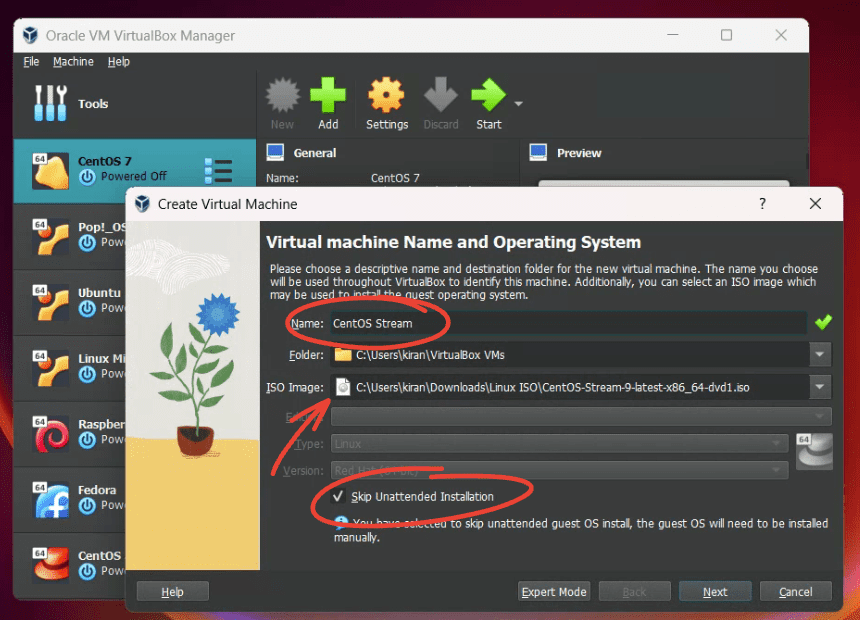
Virtual Machine Settings- Name and ISO image
Allocate RAM: The next step involves assigning memory to your VM. While you could stick to the recommended size, I would suggest assigning at least 2 GB of RAM, provided your host machine can afford it. More RAM ensures a smoother operation of your VM. Similarly, set the number of Processors. I recommend 2 or more processors.
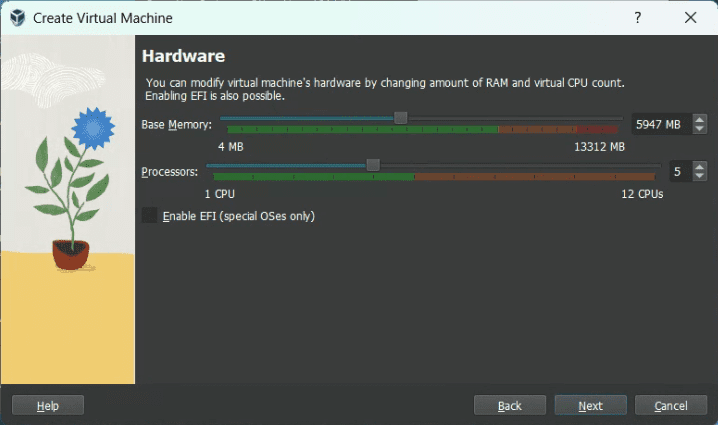
VirtualBox Settings – RAM and Processors
Create a virtual hard disk: Here, choose “Create a virtual hard disk now”. Click “Create”. In the hard disk file type, choose “VDI (VirtualBox Disk Image)”.
Allocate Disk Space: Now, assign the hard disk size. I recommend assigning at least 20 GB. Then, click “Create”. This completes the creation of our VM. But we’re not done yet, as we still have to install CentOS Stream.
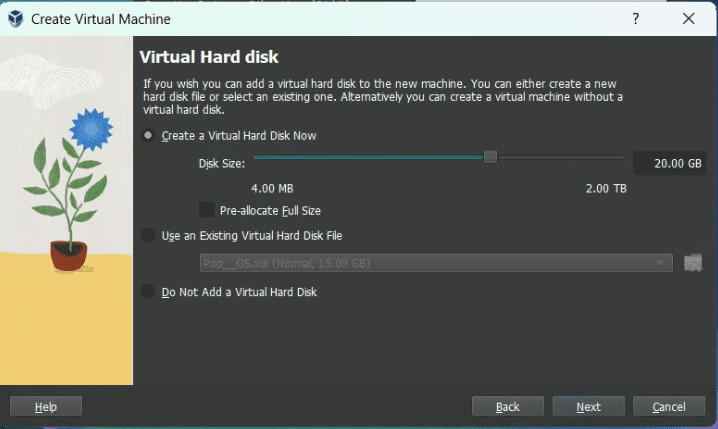
VirtualBox Settings – Disk Size
Finish VirtualBox Settings:
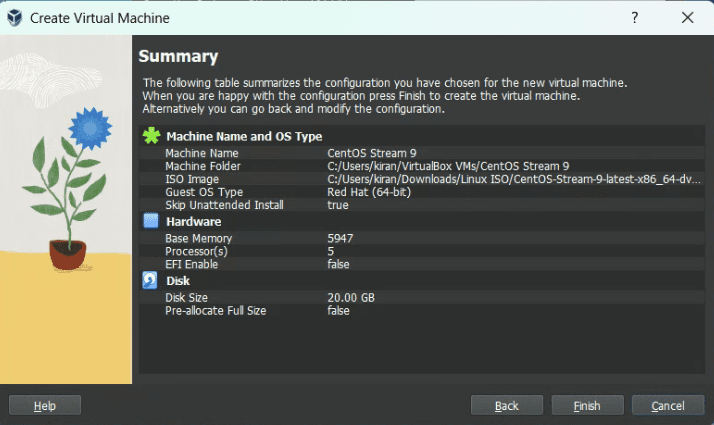
VirtualBox Settings – CentOS Stream Setup Summary
Installing CentOS Stream
With our VM ready, let’s install CentOS Stream. Here is how you do it:
Start the Virtual Machine: From the VirtualBox manager window, select your newly created VM and click on the “Start” button.
Select Startup Disk: A window will pop up asking for a startup disk. Click on the folder icon and navigate to the CentOS Stream ISO file you downloaded. Click “Start”.
Begin CentOS Stream Installation: A CentOS Stream boot menu will appear. Select “Install CentOS Stream 9” using your keyboard arrows, and press enter.
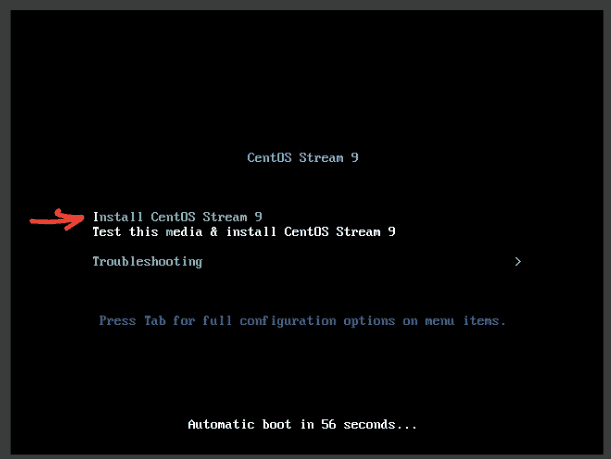
CentOS Stream 9 Boot Screen
Configure Installation: You’ll be guided through various configuration screens like language selection, date and time, keyboard layout, etc.
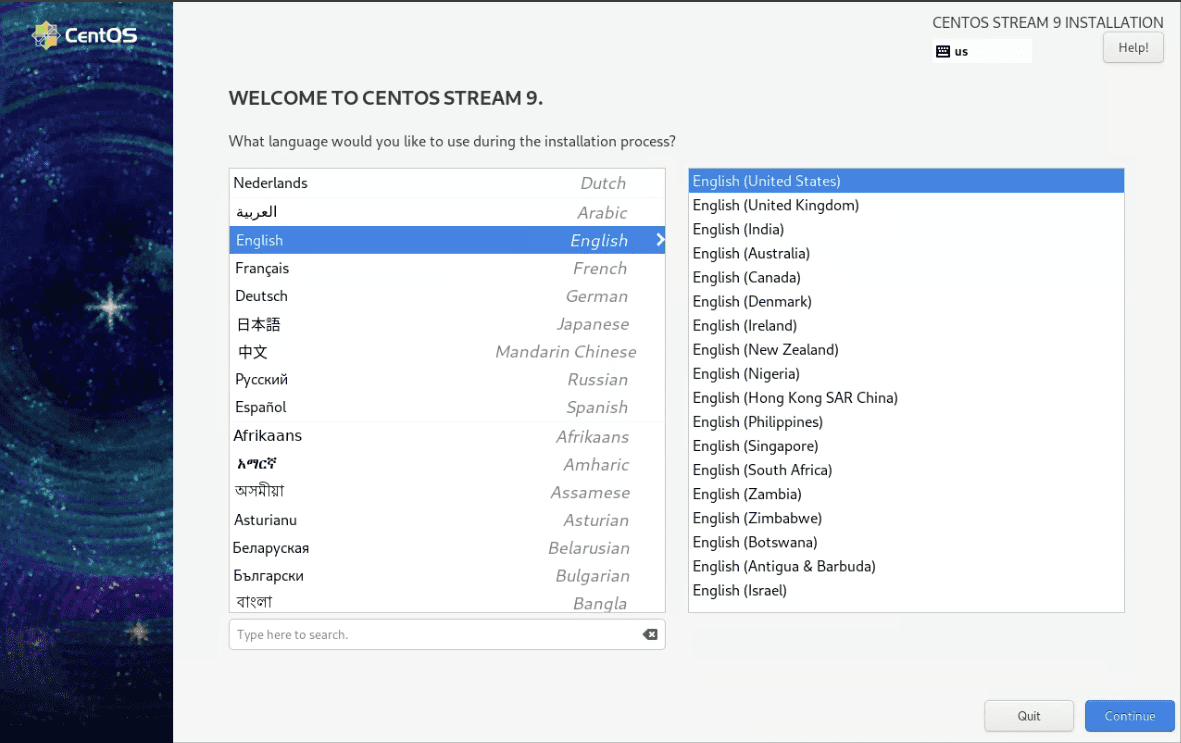
Selecting Language
Follow the prompts and configure as per your preferences. When you reach the installation summary screen, this is how it should like by default.
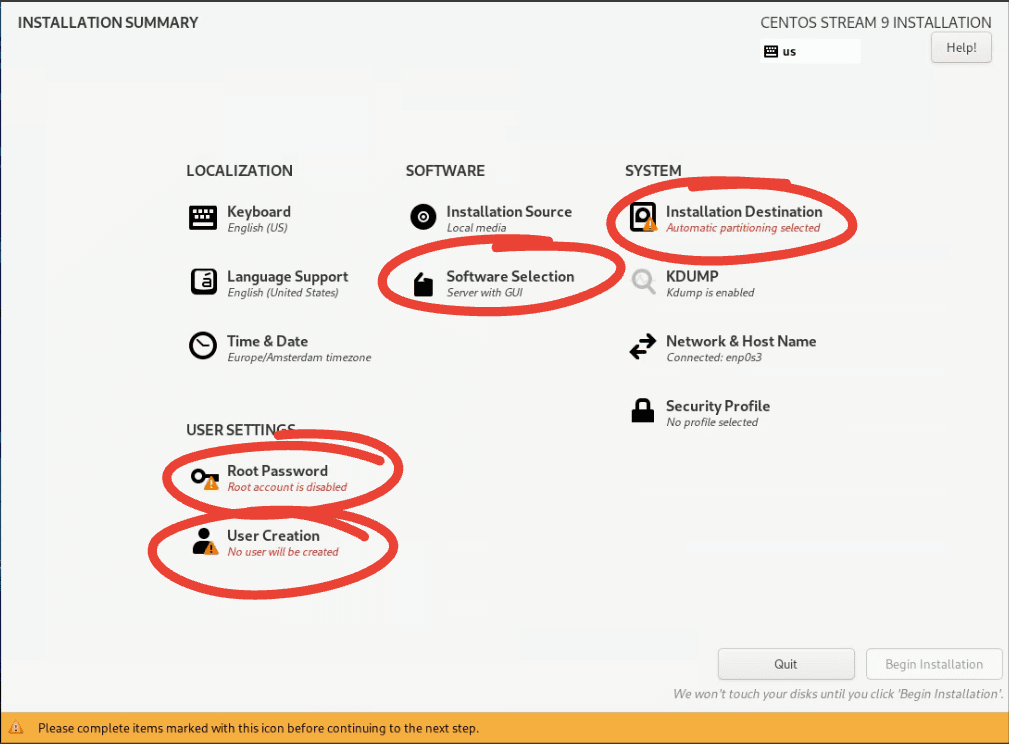
Initial Installation Summary
Ensure to click on “Installation Destination” and confirm that it shows the VirtualBox hard disk.
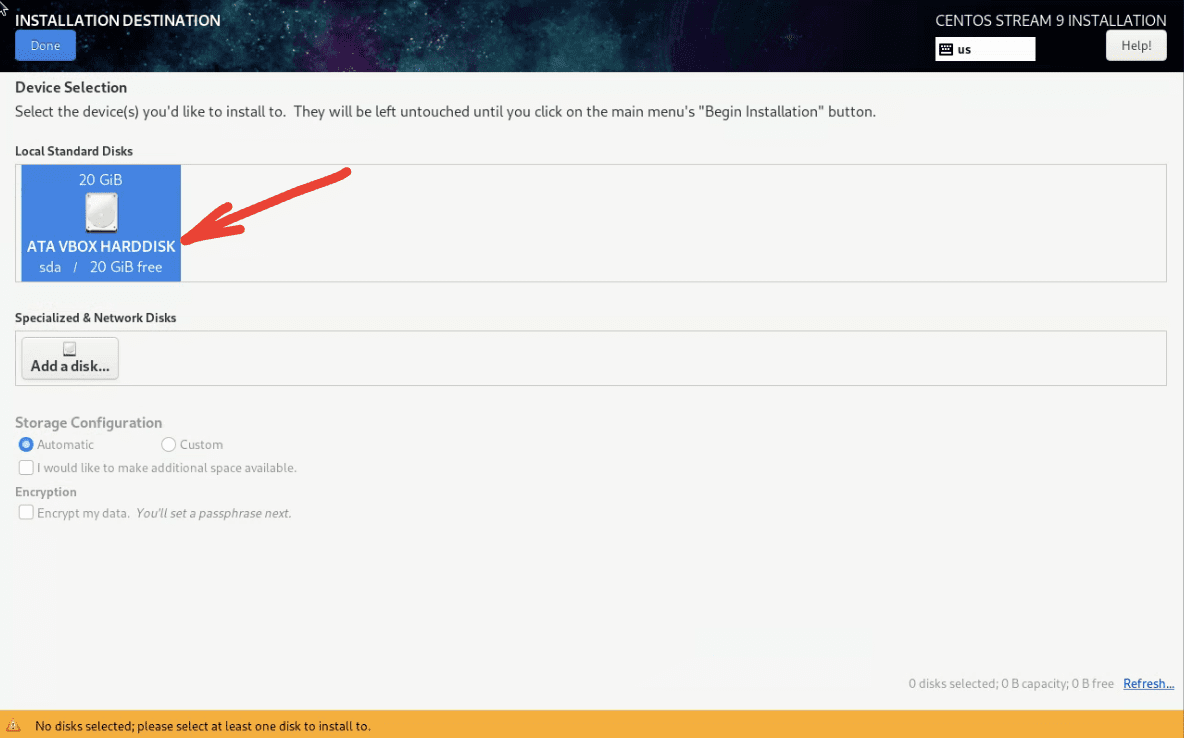
Selecting Disk
Configuring Software Selection in CentOS Stream Installation
Now, after setting your installation destination in the CentOS Stream installation, you’ll be directed to the Software Selection screen. This step is crucial and often overlooked, but it significantly affects your experience with CentOS Stream.
The Software Selection screen offers two main sections:
- Base Environment: This is the core system upon which you will build. Depending on your use case, you could opt for various base environments such as “Minimal Install”, “Server with GUI”, “Virtualization Host”, and more. I would recommend going for the “Server with GUI” option if you prefer a graphical interface.
- Add-ons for Selected Environment: Depending on the base environment you choose, you can select additional software that compliments your needs. These could be various server types, development tools, security tools, or even some basic system tools. For example, if you select “Server with GUI” as the base environment, add-ons such as “Backup Client”, “Basic Web Server”, and “Development Tools” would be available.
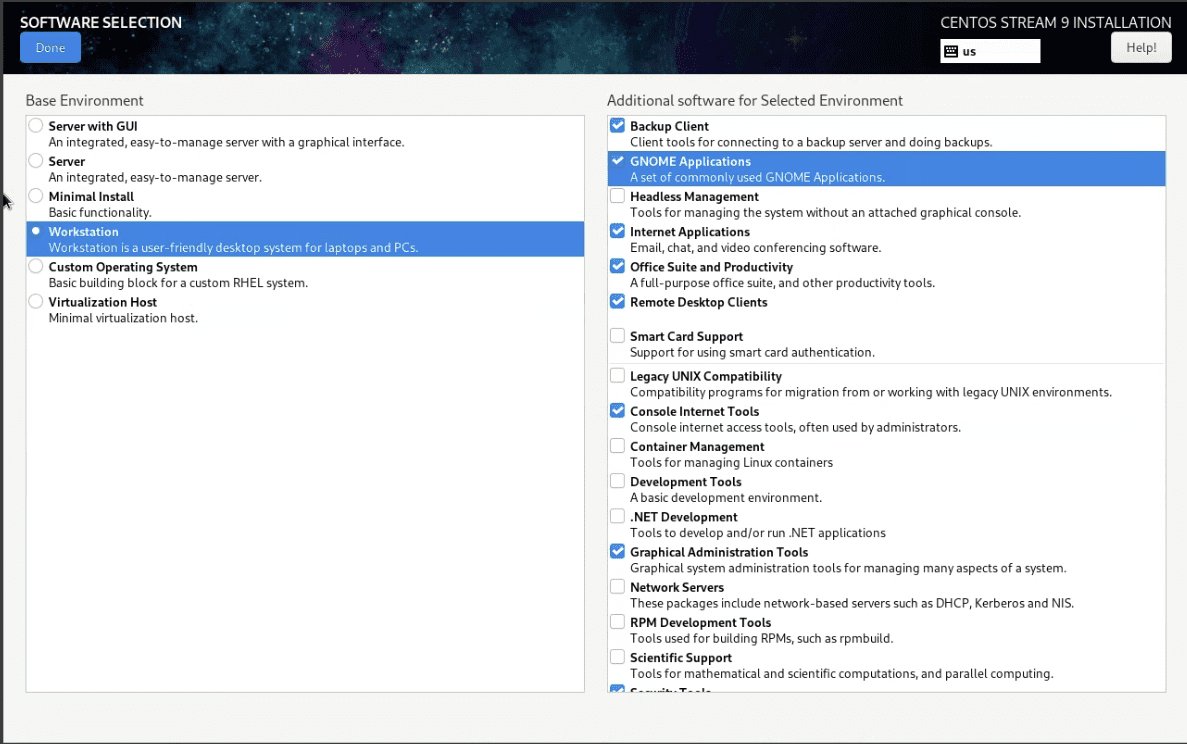
Software Selection
The main challenge here is knowing what you need. That knowledge comes with experience and understanding of what each tool or software does. However, to get started, I suggest you stick to the basics.
If you’re using CentOS Stream for general purposes, the “Server with GUI” base environment should suffice. It provides a basic graphical interface while leaving out unnecessary software, keeping your system lightweight and efficient.
As for the add-ons, “Development Tools” is an excellent option to have even if you’re not into development. It includes tools like gcc (GNU Compiler Collection), gdb (GNU Debugger), and make, which could come in handy at some point.
Now, remember, the beauty of CentOS Stream is its flexibility. You can always install or remove software later as per your requirements. So, don’t worry about getting everything right in this step.
Pro tip: If you want to run a lean system, go for the “Minimal Install” and only select necessary add-ons. This gives you more control over your system but also requires more work setting it up initially. If you are looking for a Desktop Workstation, the “Workstation” option with “GNOME Applications” is a preferred choice.
After that, return back to the “Installation Summary”. Visit the options “Root Password” and “User Creation” and enter your credentials. While on “User Creation,” don’t forget to select the option “Make this user administrator” if you are going to manage the system.
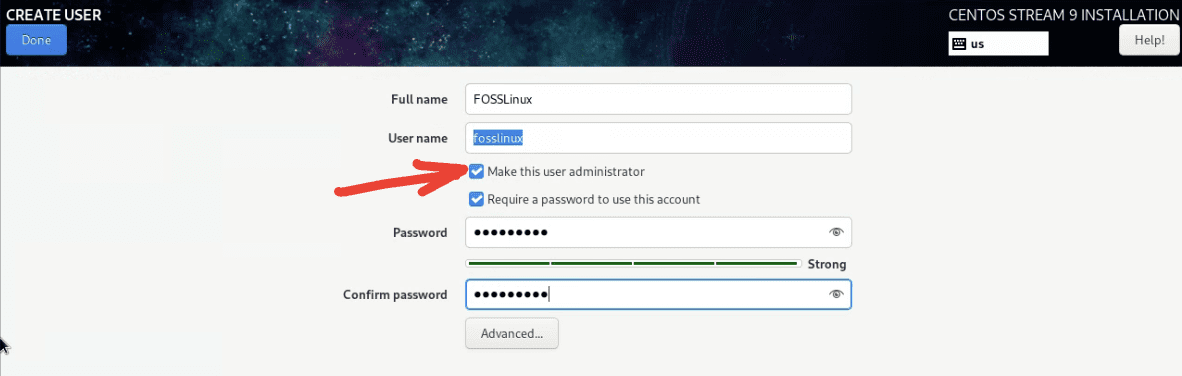
Creating User with Administrator Rights
Your final “Installation Summary” should look something like this.
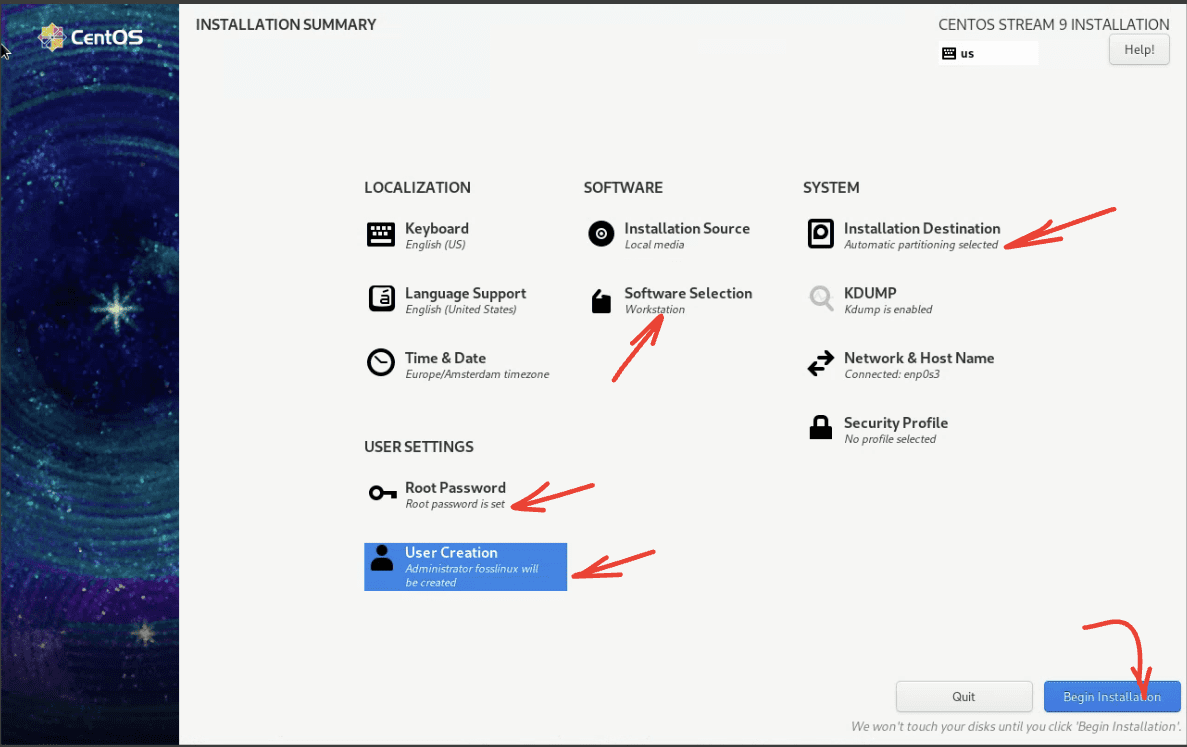
Final Installation Summary
Begin Installation: Click “Begin Installation”. You’ll be prompted to set a root password and create a new user.
Complete Installation: After all configurations are done, CentOS will start installing. The process can take a while, so feel free to stretch your legs or grab a cup of coffee.
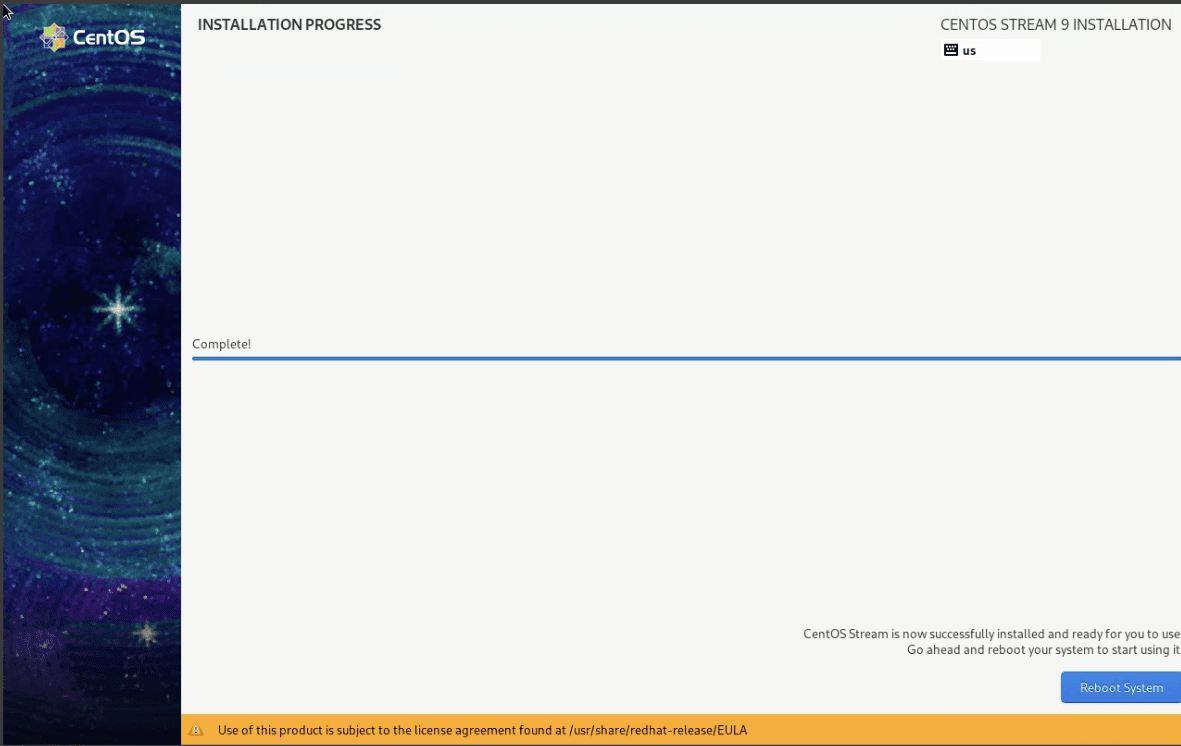
Installation Completion
Reboot the System: Once the installation is complete, click “Reboot”. Now, you will be in the CentOS Stream login screen. Enter your credentials and voila, you’ve successfully installed CentOS Stream on VirtualBox!
Pro Tips
Before we conclude, I would like to share a few tips that I have learned along the way:
Guest Additions: Install VirtualBox Guest Additions for better performance and usability features like clipboard sharing, automatic window resizing, and more. You can find this under the “Devices” tab in your VM window.
Take Snapshots: VirtualBox allows you to take snapshots of your VM. It can be very useful if you want to try something new but are afraid of breaking things. If something goes wrong, you can revert to a previous snapshot.
Allocate Resources Wisely: While allocating resources to your VM, be careful not to starve your host machine. Balancing resources between your VM and host machine is key.
Conclusion
And that’s it! We’ve successfully installed CentOS Stream on VirtualBox. The process may seem lengthy, but once you’ve done it a couple of times, you’ll be setting up VMs in no time.
While I love the stability and security that CentOS Stream offers, there’s always a slight pang of disappointment at the lack of a vast software repository like Ubuntu’s. But don’t let that deter you; CentOS Stream is a fantastic choice for server environments and development purposes.
So go ahead, explore CentOS Stream, and immerse yourself in the world of virtualization. The adventure is just beginning!