
Powerline fonts are a set of fonts designed to enhance the visual appearance of terminal applications by providing additional symbols, icons, and glyphs. These fonts are particularly popular in the context of terminal multiplexers like tmux, version control systems like Git, and various shell prompts including bash and zsh.
Powerline features
Here are key aspects to understand about Powerline fonts.
Special symbols and icons
Powerline fonts include a variety of special symbols, arrows, and icons that are not typically present in standard monospaced fonts. These symbols are designed to improve the visual representation of information, such as indicating the status of version control, showing the layout of terminal panes in tmux, or highlighting specific file types in the shell prompt.
Enhancing terminal applications
Powerline fonts are often used in conjunction with terminal applications to improve the overall user experience. For example, in a tmux session, these fonts can be used to create a more informative and visually appealing status bar. Similarly, when using Git on the command line, Powerline fonts can enhance the display of branch names and status information.
Compatibility with various terminals:
Powerline fonts are designed to work with a variety of terminal emulators and applications. They include a set of glyphs that cover a range of common use cases in terminal-based workflows. Users can choose and configure these fonts to work seamlessly with their preferred terminal emulator.
Integration with terminal multiplexers:
Terminal multiplexers like tmux allow users to manage multiple terminal sessions within a single window. Powerline fonts can be integrated with tmux to create a status bar that displays useful information about the current session, windows, and panes. This integration enhances the overall usability of terminal multiplexers.
Configuration and customization:
Users can configure and customize Powerline fonts to suit their preferences. This may involve selecting a specific Powerline font in the terminal emulator’s settings, adjusting font sizes, and configuring additional settings in applications like tmux or shell prompts.
Popular Powerline font families
There are several popular Powerline font families, including “DejaVu Sans Mono for Powerline,” “Source Code Pro for Powerline,” and “Hack.” These fonts are freely available and can be easily installed on various operating systems.
Installing Powerline package on Ubuntu
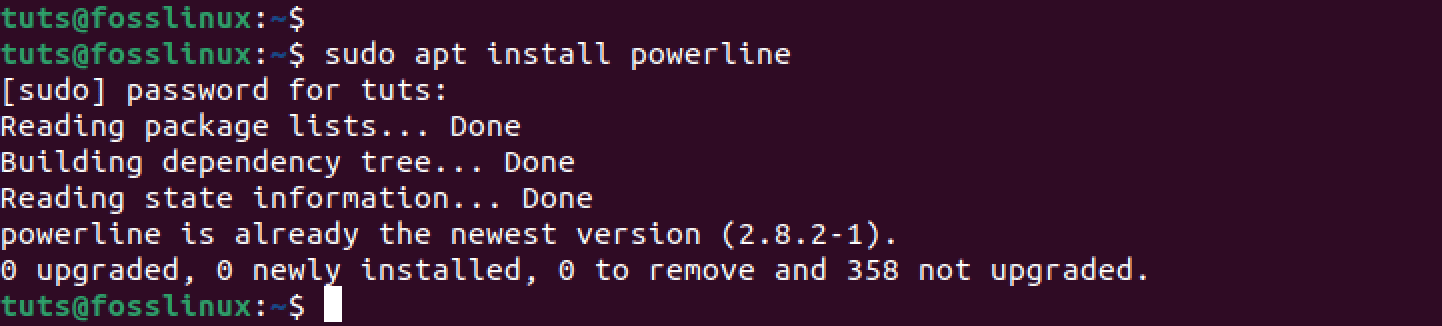
To enhance your terminal experience with Powerline, you need to install the Powerline package on your Ubuntu system. You can easily do that using the apt package manager. Follow these simple steps:
Launch the Terminal from the applications menu and run the following command to install the Powerline package:
sudo apt install powerline
This command fetches and installs the Powerline package along with its dependencies. Once the installation is complete, you’re ready to enjoy the benefits of Powerline in your terminal!
install powerline
Install Powerline fonts
There are several methods available for installing Powerline fonts on your Ubuntu system, including:
- Clone the Powerline GitHub repository and execute the installation script.
- Utilize the “apt” command.
Let’s explore both of these methods.
Method 1: Clone the Powerline GitHub repository
We highly recommend using this method to install Powerline fonts on your Ubuntu system. You will need to clone the Powerline GitHub repository onto your system and then run the installation script.
Launch the Terminal and use the command below to clone the repository.
git clone https://github.com/powerline/fonts.git --depth=1

Clone the powerline repository
If you get an error like “git: command not found,” that means you don’t have Git installed in your system. Please install it using the command below.
sudo apt install git
Let’s break down the git clone command:
git clone: This is a Git command used to clone, or copy, a repository. It creates a local copy of the entire repository, including all its files, commit history, and branches.https://github.com/powerline/fonts.git: This is the URL of the Git repository you want to clone. In this case, it’s the Powerline Fonts repository hosted on GitHub. The “.git” extension indicates that it’s a Git repository.--depth=1: This is an option used with git clone to limit the cloning to the most recent commit history. In this case, –depth=1 means only the latest commit and its associated files are cloned, providing a shallow clone. This can be useful when you’re only interested in the latest version and don’t need the entire commit history, saving time and bandwidth.
Now that you’ve got the repository, navigate to the fonts directory and initiate the installation process using the script:
cd fonts
./install.sh
This script will install the Powerline fonts on your system.
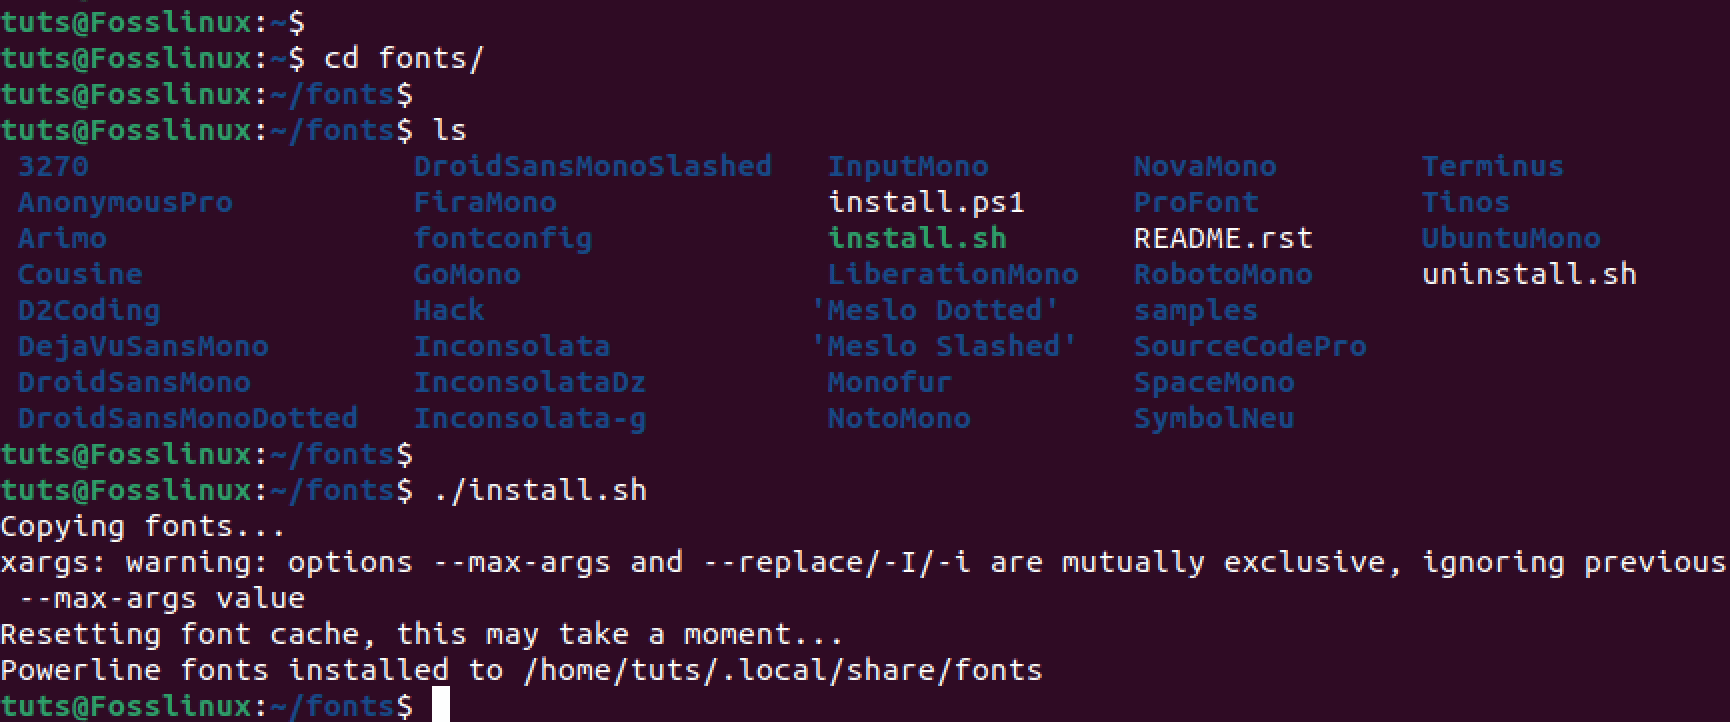
install powerline fonts
That’s it, you have successfully installed Powerline fonts on your Ubuntu system.
Method 2: Install Powerline fonts using the “APT” package manager
Another method you can use to install Powerline fonts is leveraging the “APT” package manager. This method ensures simplicity and efficiency. Here’s your step-by-step guide:
Launch the Terminal and run the command below to update your system.
sudo apt update
This fetches the latest information about available packages from the Ubuntu repositories.
Once done, run the command below to install Powerline fonts.
sudo apt install fonts-powerline
Configure shell prompt
Up to this point, you have successfully installed the Powerline package and the Powerline fonts on your Ubuntu system. Now we need to configure the shell prompt so that you can see Powerline symbols in your shell prompt.
Powerline glyphs/symbols are special characters that are used to customize the appearance of the status line in Powerline-compatible text editors and terminal emulators. They are typically used to display information about the current state of the editor or terminal, such as the current file name, the current branch in a Git repository, and the status of various plugins.
To get started, you first need to know the shell you are running currently. Launch the terminal and execute the command below.
echo $SHELL
From the image below, you can see we are running the Bash shell.

Bash shell
If you get an output like:
/bin/zsh
That means you are running the ZSH shell.
Now follow the instructions below depending on the shell you are running.
For Bash
Launch the terminal and run the command below to open ~/.bashrc file.
sudo nano ~/.bashrc
Copy and paste the following lines to your ~/.bashrc file.
if [ -f /usr/share/powerline/bindings/bash/powerline.sh ]; then
source /usr/share/powerline/bindings/bash/powerline.sh
fi
See the image below.
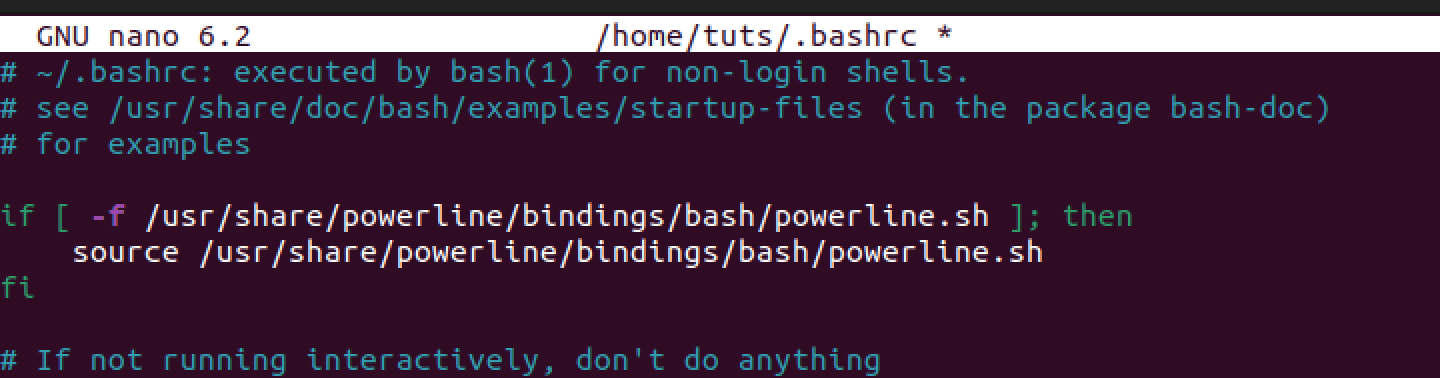
Configure bash shell
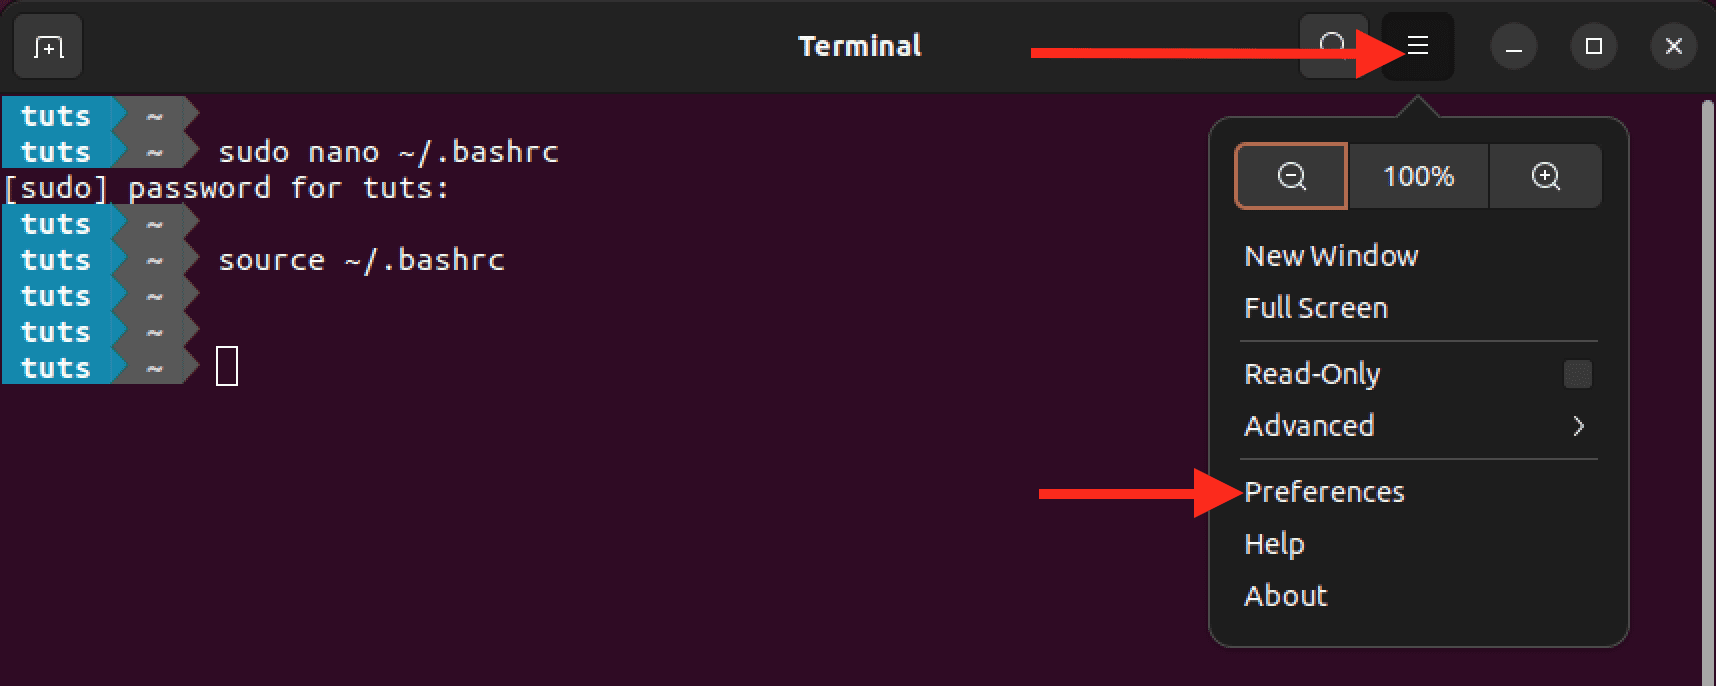
Save the file (Ctrl + O, then Enter) and exit (Ctrl + X). Run the command below to apply the new changes.
source ~/.bashrc
After running the above command, you will notice a change in your terminal prompt. See the image below.

Terminal prompt
For Zsh
If you’re using Zsh, add these lines to your ~/.zshrc file:
if [[ -r /usr/share/powerline/bindings/zsh/powerline.zsh ]]; then
source /usr/share/powerline/bindings/zsh/powerline.zsh
fi
Save the file (Ctrl + O, then Enter) and exit (Ctrl + X). Run the command below to apply the new changes.
source ~/.zshrc
Verify Powerline font installation
After completing the installation process, it’s always a good idea to confirm that everything went smoothly. To do so, you can check the list of installed fonts. Open your Terminal and execute the following command:
fc-list | grep -i powerline
This command performs a search for Powerline fonts in the list of installed fonts. If the installation was successful, you should see the Powerline fonts displayed in the output. This quick verification ensures that the fonts are ready for use in enhancing your terminal experience.

Verify powerline font installation
To test whether Powerline symbols are rendering correctly, you can echo a Unicode character directly in the terminal. For example:
echo -e "\u2B80 Powerline Test"
This should display a Powerline-like arrow symbol followed by “Powerline Test.” See the image below.

Test powerline glyphs
Now, let’s look at how you can use Powerline fonts in your Ubuntu system.
1. Use Powerline fonts in your terminal
The default font for the Ubuntu terminal is “monospace.” Now that you have installed Powerline fonts, you might want to use one of the many Powerline fonts available in your system. Follow the steps below.
i. Launch your Terminal and click the “hamburger” icon on the top-right.
ii. On the menu that appears, click the “Preferences” option to open the terminal settings window.
Launch terminal settings
iii. Select your profile. In our case, we are using the default “unnamed” profile.
iv. Tick the use “custom font” checkbox which allows the use of any font that you want.
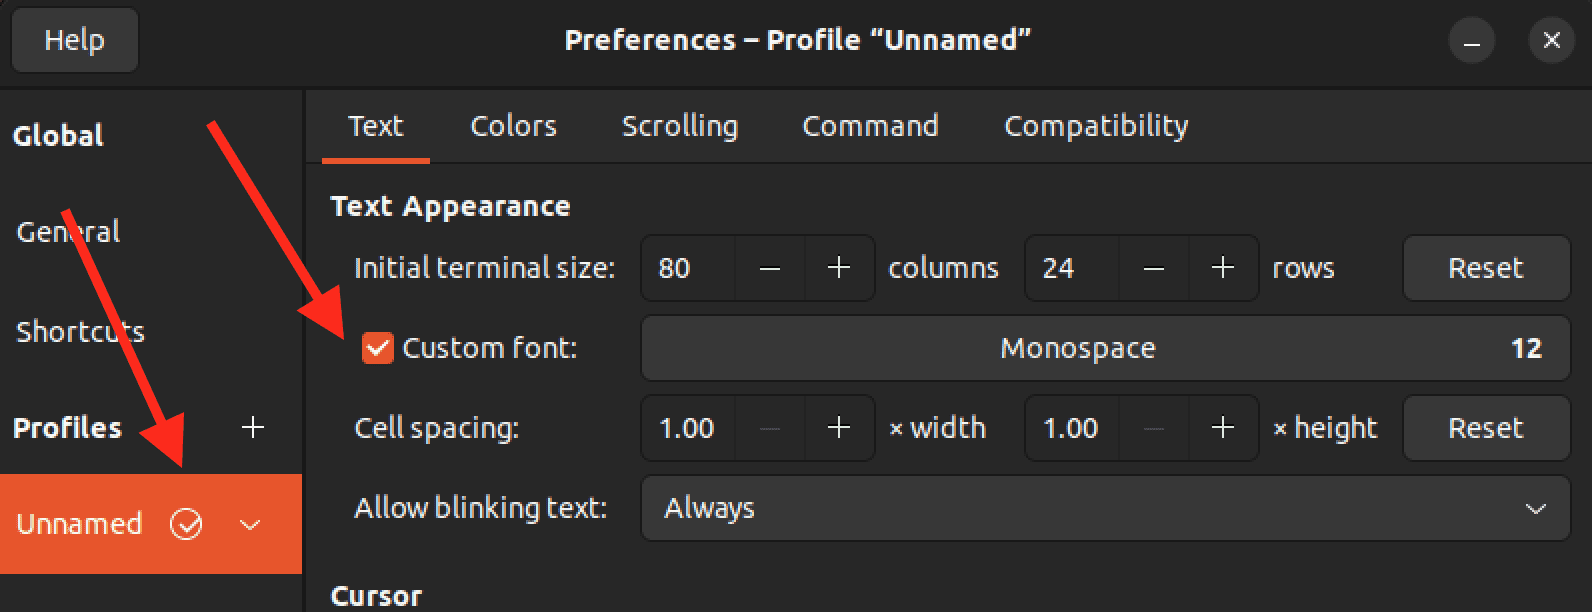
Enable custom font
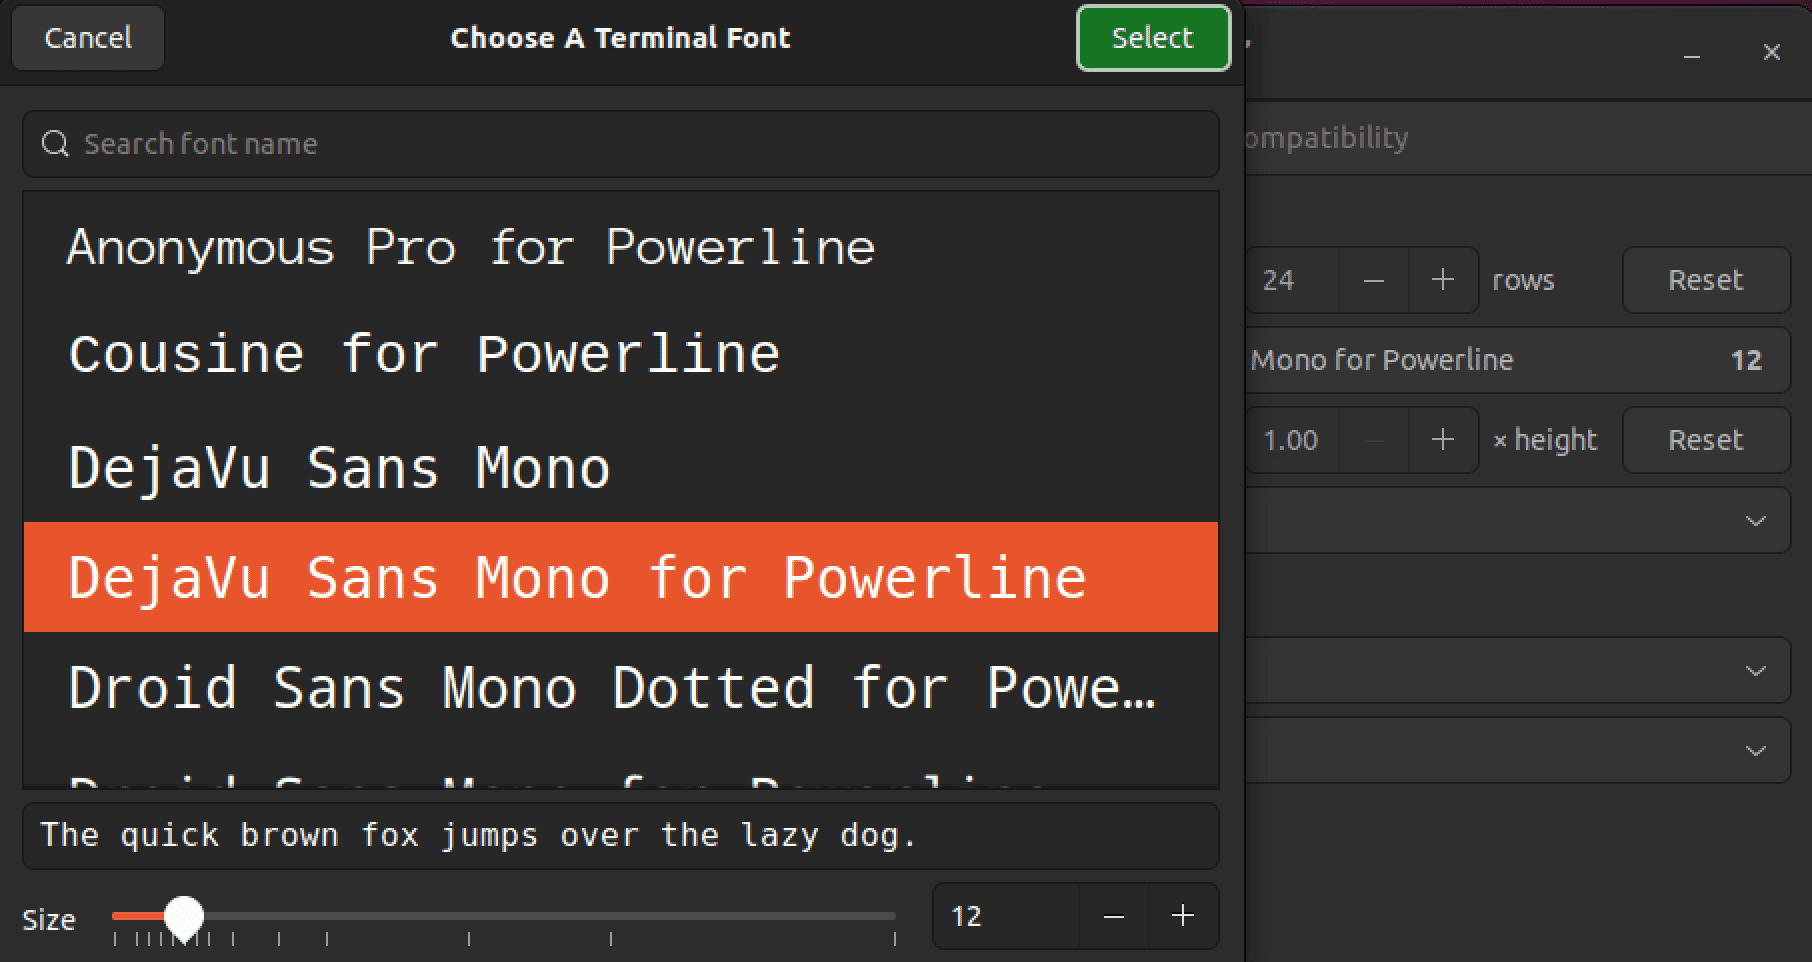
v. Now select any Powerline font you want to use. Note, that Powerline fonts will always have the “Powerline” line at the end. For example “DejaVu Sans Mono for Powerline.”
Select powerline font
Tip: In case you don’t see any Powerline fonts listed, and you have followed every step above, simply log out and log back in again. Alternatively, you can try restarting your terminal emulator by closing it and launching it again.
2. Customized bash prompt with Git information
Enhance your Bash prompt to display Git information using Powerline symbols. Add the following lines to your ~/.bashrc if you have not added them.
if [ -f /usr/share/powerline/bindings/bash/powerline.sh ]; then
source /usr/share/powerline/bindings/bash/powerline.sh
fi

PS1='\[\e]0;\u@\h: \w\a\]${debian_chroot:+($debian_chroot)}\[\033[01;32m\]\u@\h\[\033[00m\]:\[\033[01;34m\]\w\[\033[00m\]$(__git_ps1 " \[\033[01;33m\]\u238E %s \[\033[00m\]")\[\e[0m\]\$ '
This prompt includes the Powerline branch symbol, a Unicode arrow symbol, and the Git branch. Now, when you navigate to any directory that is Git-enabled, you will see something similar to the image below.
Customized bash prompt with git information
3. Install the Powerline status line plugin for Vim
You can use a plugin manager for Vim to easily install the Powerline status line plugin. Here, I’ll use the popular plugin manager called “vim-plug.”
i. First install the Vim text editor using the command below.
sudo apt install vim
ii. Next, install vim-plug. Open a terminal and run:
sudo curl -fLo ~/.vim/autoload/plug.vim --create-dirs https://raw.githubusercontent.com/junegunn/vim-plug/master/plug.vim
Tip: If you get an error like “Command ‘curl’ not found,” install it with the command below.
sudo apt install curl

install vim plug
iii. Next, create or edit your ~/.vimrc file to include the following lines:
" ~/.vimrc

" Specify a directory for plugins (optional but recommended)
call plug#begin('~/.vim/plugged')

" Add the Powerline statusline plugin
Plug 'vim-airline/vim-airline'
Plug 'vim-airline/vim-airline-themes'

" Specify the end of the plugin list
call plug#end()

" Enable Powerline symbols in Vim
let g:Powerline_symbols = 'unicode'
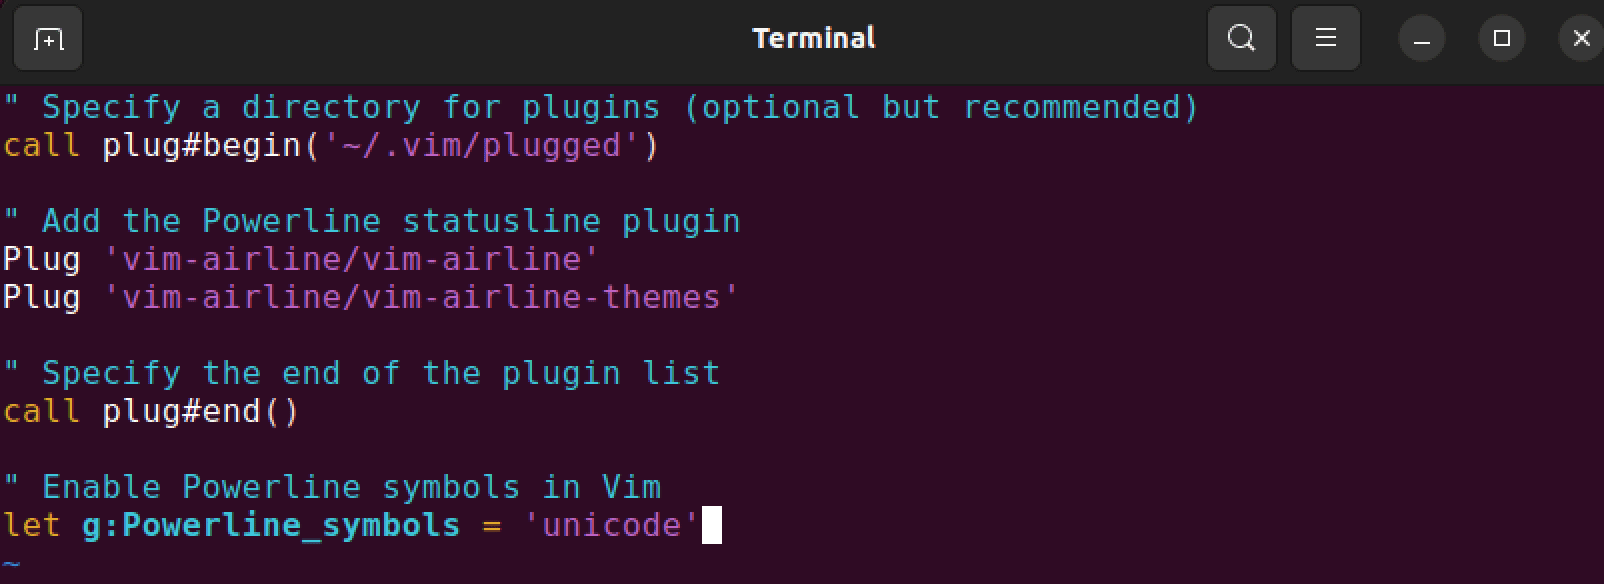
Configure vim
Save the ~/.vimrc file and restart Vim.
iv. Install Plugins within Vim
After configuring vim-plug in your ~/.vimrc, open Vim and run the following command to install the specified plugins:
:PlugInstall
This command will download and install the Powerline status line plugin and its themes.
Wrapping up
This post has provided a comprehensive guide on installing and utilizing Powerline fonts to enhance terminal applications’ visual appeal and functionality. It has also given you insights into the features of Powerline fonts, such as special symbols, icons, and glyphs, designed to improve the visual representation of information in terminal environments. For example, when you run a command and get an error, the error code will show in the terminal prompt as shown below.

Display error code
Hit the comments if you encounter any issues while working with Powerline fonts.