
Here is our comprehensive guide on managing drivers in Ubuntu, the popular open-source operating system. Ubuntu is known for its ease of use and robust support for a wide range of hardware. However, setting up and troubleshooting drivers can sometimes be a challenge, especially for new users.
In this guide, we will cover everything from installing basic drivers using terminal commands to handling more complex hardware like graphic drivers, network adapters, and audio drivers. We will also explore the user-friendly graphical method for managing additional drivers through the Software & Updates tool, making the process accessible even for those who prefer not to use the command line. Let’s get started!
Why drivers matter in Ubuntu
Before we start, let’s talk about why drivers are important. Drivers are the bridge between your hardware and your operating system. They ensure that your hardware components (like graphics cards, audio drivers, and network adapters) communicate effectively with your system. Without the right drivers, your hardware might not function correctly, or at all.
Finding out what drivers you need
The first step is identifying the drivers your system requires. Ubuntu makes this quite easy with its built-in tools. Open your terminal (Ctrl + Alt + T is my go-to shortcut for this) and enter the following command:
ubuntu-drivers devices
This command lists the drivers that are applicable to your hardware. I love this feature because it takes out the guesswork.
Example from our test PC:
$ ubuntu-drivers devices
== /sys/devices/pci0000:00/0000:00:1c.0/0000:03:00.0 ==
modalias : pci:v000010DEd00001C82sv00001462sd00003267bc03sc00i00
vendor : NVIDIA Corporation
model : GP107 [GeForce GTX 1050 Ti]
driver : nvidia-driver-460 - third-party free recommended
driver : nvidia-driver-450 - third-party free
driver : xserver-xorg-video-nouveau - distro free builtin

== /sys/devices/pci0000:00/0000:00:1f.6 ==
modalias : pci:v00008086d000015BEsv0000103Csd000083B2bc02sc00i00
vendor : Intel Corporation
model : Ethernet Connection (7) I219-V
manual_install: True
driver : e1000e - distro free builtin
In this example:
- The system has identified an NVIDIA GeForce GTX 1050 Ti graphics card. It suggests the
nvidia-driver-460as the recommended driver, along with other available driver options likenvidia-driver-450and the open-sourcexserver-xorg-video-nouveau. - There is also an Intel Ethernet Connection listed, with the
e1000edriver noted as built into the distribution and available for use.
Remember, the exact output will vary depending on your system’s hardware. This command is incredibly helpful for quickly identifying the right drivers for your devices.
Installing drivers on your Ubuntu system
Automatic installation: the easy way out
Ubuntu offers an incredibly straightforward way to install drivers. You can use the ubuntu-drivers command to auto-install drivers. Here’s how:
sudo ubuntu-drivers autoinstall
This command will install drivers that are appropriate for your hardware. I personally appreciate this method when I’m setting up a new system.
Example:
$ sudo ubuntu-drivers autoinstall
[sudo] password for user:

Reading package lists... Done
Building dependency tree
Reading state information... Done
The following additional packages will be installed:
nvidia-dkms-460 nvidia-driver-460 nvidia-kernel-source-460 nvidia-settings nvidia-utils-460
xserver-xorg-video-nvidia-460
Suggested packages:
nvidia-prime
The following NEW packages will be installed:
nvidia-dkms-460 nvidia-driver-460 nvidia-kernel-source-460 nvidia-settings nvidia-utils-460
xserver-xorg-video-nvidia-460
0 upgraded, 6 newly installed, 0 to remove and 32 not upgraded.
Need to get 115 MB of archives.
After this operation, 390 MB of additional disk space will be used.
Do you want to continue? [Y/n] Y

Get:1 http://us.archive.ubuntu.com/ubuntu focal-updates/restricted nvidia-driver-460 460.39-0ubuntu0.20.04.1 amd64 [9,676 B]
...
...
Setting up nvidia-utils-460 (460.39-0ubuntu0.20.04.1) ...
Setting up nvidia-driver-460 (460.39-0ubuntu0.20.04.1) ...
Processing triggers for libc-bin (2.31-0ubuntu9.7) ...

Building initial module for 5.8.0-41-generic
Done.

nvidia:
Running module version sanity check.
- Original module
- No original module exists within this kernel
- Installation
- Installing to /lib/modules/5.8.0-41-generic/updates/dkms/

depmod...

DKMS: install completed.
Setting up nvidia-settings (460.39-0ubuntu0.20.04.1) ...
Processing triggers for man-db (2.9.1-1) ...
Processing triggers for mime-support (3.64ubuntu1) ...
In this example output:
- The system identifies that the NVIDIA driver version 460 is suitable for the hardware and begins the installation process.
- You will notice that several packages related to the NVIDIA driver (like
nvidia-dkms-460,nvidia-driver-460, etc.) are being installed. - The system may ask for confirmation (
Do you want to continue? [Y/n]). TypingYwill proceed with the installation. - After downloading and installing the packages, the system might build and set up the necessary kernel modules.
Manual installation: for the control freaks
Sometimes, you might need (or want) to install a specific driver manually. This is common with graphics drivers, especially for NVIDIA or AMD cards.
First, add the graphics drivers PPA to your system:
sudo add-apt-repository ppa:graphics-drivers/ppa
sudo apt update
Then, install the driver you need. For instance, for an NVIDIA driver:
sudo apt install nvidia-driver-XXX
Replace ‘XXX’ with the driver version number you wish to install.
Dealing with wireless drivers
Wireless drivers can be a bit tricky, especially for Broadcom wireless cards. First, identify your card model with:
lspci -nnk | grep -iA2 net
Example Output:
$ lspci -nnk | grep -iA2 net
02:00.0 Network controller [0280]: Intel Corporation Wireless 8265 / 8275 [8086:24fd] (rev 78)
Subsystem: Intel Corporation Dual Band Wireless-AC 8265 [8086:1010]
Kernel driver in use: iwlwifi
Kernel modules: iwlwifi

03:00.0 Ethernet controller [0200]: Realtek Semiconductor Co., Ltd. RTL8111/8168/8411 PCI Express Gigabit Ethernet Controller [10ec:8168] (rev 15)
Subsystem: Hewlett-Packard Company RTL8111/8168/8411 PCI Express Gigabit Ethernet Controller [103c:8331]
Kernel driver in use: r8169
Kernel modules: r8169
In this example output:
- The system has identified an Intel wireless network controller (Wireless 8265 / 8275) and a Realtek Ethernet controller.
- The
Kernel driver in useline tells you which driver is currently being used by each device. For the Intel wireless controller, it’siwlwifi, and for the Realtek Ethernet controller, it’sr8169. - The
Kernel modulesline lists the kernel modules available for the device. This information can be useful if you’re troubleshooting or looking to change drivers.
This command is particularly helpful for diagnosing network issues or when you need to know which drivers your network devices are using.
Then, you can install the appropriate drivers. For example, for a Broadcom BCM43xx card:
sudo apt-get install bcmwl-kernel-source
Audio drivers installation
Installing and managing audio drivers in Ubuntu is generally straightforward, as most are included and enabled by default within the kernel. However, if you’re encountering issues with your audio or just curious about your audio drivers, here’s a guide to check and manage them:
Checking Audio Devices and Drivers
To check your audio hardware and see the drivers in use, you can use a couple of commands in the terminal:
1. List audio devices:
You can use lspci or lsusb to list PCI and USB audio devices, respectively. For example:
lspci | grep -i audio
This command will show you onboard audio devices connected through the PCI. For USB audio devices, replace lspci with lsusb.
Example:
$ lspci | grep -i audio
00:1f.3 Audio device: Intel Corporation Sunrise Point-LP HD Audio (rev 21)
01:00.1 Audio device: NVIDIA Corporation GP107GL High Definition Audio Controller (rev a1)
In this example output:
- The first line indicates an onboard Intel HD Audio device, which is part of the Sunrise Point-LP chipset (common in many laptops and desktops).
- The second line shows an NVIDIA High Definition Audio Controller, which is typically associated with the audio component of an NVIDIA graphics card, useful for transmitting sound over HDMI or DisplayPort connections.
2. Check ALSA (Advanced Linux Sound Architecture) information:
ALSA is the standard audio API in Linux. To see detailed information about your ALSA devices, use:
aplay -l
This command lists all ALSA audio playback devices.
Example:
$ aplay -l
**** List of PLAYBACK Hardware Devices ****
card 0: PCH [HDA Intel PCH], device 0: ALC3246 Analog [ALC3246 Analog]
Subdevices: 1/1
Subdevice #0: subdevice #0
card 0: PCH [HDA Intel PCH], device 3: HDMI 0 [HDMI 0]
Subdevices: 1/1
Subdevice #0: subdevice #0
card 0: PCH [HDA Intel PCH], device 7: HDMI 1 [HDMI 1]
Subdevices: 1/1
Subdevice #0: subdevice #0
card 0: PCH [HDA Intel PCH], device 8: HDMI 2 [HDMI 2]
Subdevices: 1/1
Subdevice #0: subdevice #0
card 0: PCH [HDA Intel PCH], device 9: HDMI 3 [HDMI 3]
Subdevices: 1/1
Subdevice #0: subdevice #0
card 0: PCH [HDA Intel PCH], device 10: HDMI 4 [HDMI 4]
Subdevices: 1/1
Subdevice #0: subdevice #0
In this example output:
- The system has an audio card labeled as
card 0, identified asHDA Intel PCH. This is a common label for onboard audio on Intel motherboards. - The device has multiple playback devices listed under it. The device named
ALC3246 Analogis likely the primary output for speakers or headphones. - There are also several HDMI outputs listed (HDMI 0, HDMI 1, etc.). These are for sending audio through HDMI ports, typically used when connecting to a TV or external monitor with built-in speakers.
3. PulseAudio control:
PulseAudio is another layer on top of ALSA and is the default sound server in Ubuntu. To manage PulseAudio settings, you can use pavucontrol (PulseAudio Volume Control), a graphical tool that lets you control volumes for each application, output/input devices, and more. Install it via:
sudo apt install pavucontrol
Example:
Then run pavucontrol to open the interface.
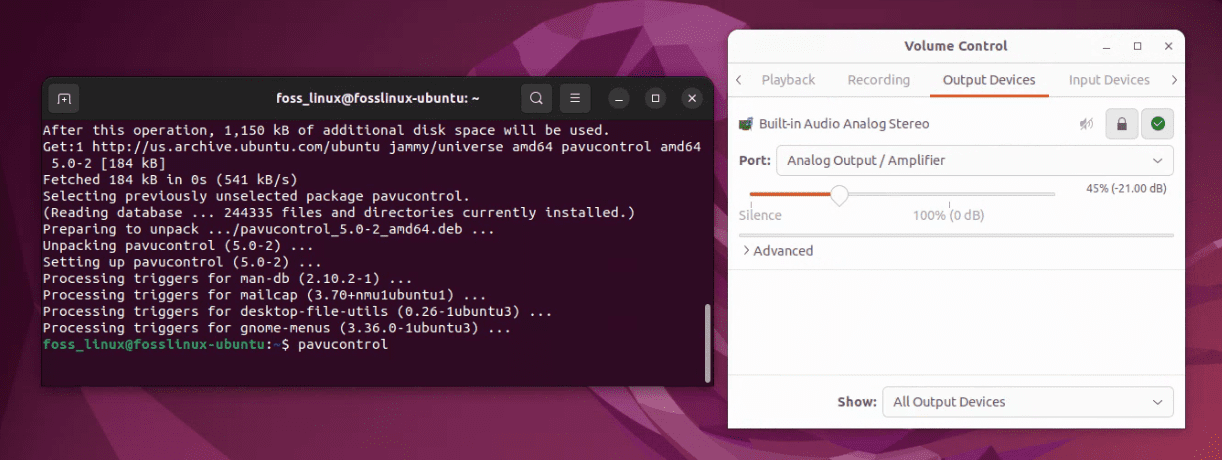
Pavucontrol User Interface
Troubleshooting and tips
Sometimes, things don’t go as planned. Here are a few tips:
- Always reboot your system after installing a new driver.
- If a driver doesn’t work, you can use
sudo apt-get purge <driver-name>to remove it. - For graphics issues, booting into recovery mode and uninstalling/reinstalling the graphics driver can help.
Installing additional drivers via GUI in Ubuntu
While the terminal in Ubuntu is a powerful tool for managing drivers, not everyone is comfortable with command-line operations. Fortunately, Ubuntu provides a user-friendly graphical interface for managing additional drivers. This is particularly useful for installing proprietary drivers for graphics cards, Wi-Fi adapters, and other hardware. Here’s a step-by-step guide:
Step 1: Open Software & Updates
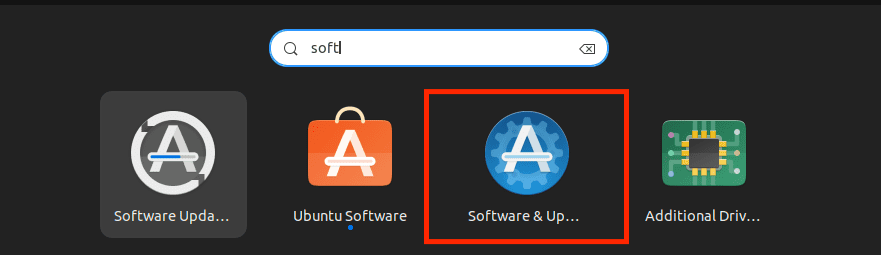
Software & Updates
- Click on the Ubuntu menu and search for “Software & Updates”. This is typically found in the System Settings or directly in the main menu, depending on your version of Ubuntu.
- Click on the “Software & Updates” icon to open it.
Step 2: Navigate to the Additional Drivers tab
- In the Software & Updates window, you’ll find several tabs at the top. Click on the “Additional Drivers” tab.
- This tab shows you any proprietary drivers available for devices on your system. These drivers are not open-source but are provided by hardware manufacturers for better performance or functionality.
Step 3: Choose the drivers you want to install

Additional drivers
- The Additional Drivers tab will list all available drivers for your hardware. This commonly includes drivers for graphics cards (like NVIDIA or AMD) and Wi-Fi adapters.
- Each device will have multiple driver options. This can include tested and certified drivers from Ubuntu, as well as proprietary drivers directly from the manufacturer.
- For graphics cards, you might see options like “Using NVIDIA driver metapackage from nvidia-driver-xxx (proprietary, tested)” or “Using X.Org X server – Nouveau display driver from xserver-xorg-video-nouveau (open source)”.
- Select the radio button next to the driver you wish to use.
Step 4: Apply changes
- After selecting the driver, click the “Apply Changes” button. You may be prompted to enter your password.
- Ubuntu will then download and install the selected drivers. This process may take some time depending on your internet connection and the size of the driver.
Step 5: Restart your computer
- Once the installation is complete, it’s a good idea to restart your computer to ensure the changes take effect.
Step 6: Troubleshooting (if needed)
- If you encounter issues after installing a new driver, you can revert to the previous driver by following the same steps and selecting a different driver option.
- In some cases, especially with graphics drivers, additional configuration may be required. You can usually find this information in the documentation provided by the driver.
FAQs on installing drivers in Ubuntu
In my time exploring Ubuntu and helping others with their setup, I’ve encountered a range of questions regarding driver installation. Here are some of the most frequently asked questions, along with answers based on my experience and knowledge:
Do I always need to manually install drivers in Ubuntu?
No, not always. Ubuntu is quite adept at automatically detecting and installing necessary drivers for a wide range of hardware. However, for certain devices, especially some graphics cards and wireless adapters, you might need to manually install proprietary drivers for optimal performance.
How do I know if I have the correct drivers installed?
You can check if your devices are recognized and functioning correctly. Tools like lspci, lsusb, and ubuntu-drivers devices are helpful. If your hardware is performing as expected, it’s likely that the correct drivers are installed.
Can I use Windows drivers on Ubuntu?
Generally, no. Windows drivers are not compatible with Linux systems like Ubuntu. You need drivers specifically designed for Linux. However, for some network cards, you can use a tool called ndiswrapper to use Windows drivers as a last resort.
What should I do if I can’t find Linux drivers for my hardware?
First, search forums and the Ubuntu community for any workarounds or third-party drivers. If there’s no solution, you might need to consider replacing your hardware with a more Linux-compatible model.
Is it safe to use third-party repositories for driver installation?
While many third-party repositories are safe, always exercise caution. Use reputable sources and check community reviews. Adding unofficial repositories can sometimes lead to stability and security issues.
How do I update my drivers in Ubuntu?
Most driver updates are handled through the standard system updates. You can keep your drivers up to date by regularly applying system updates via the Software Updater tool or by using sudo apt update and sudo apt upgrade commands.
Are proprietary drivers better than open-source drivers?
It depends on the specific hardware and use case. Proprietary drivers often provide better performance or more features for certain hardware (like graphics cards), but open-source drivers are generally well-supported, more stable, and in line with the Linux philosophy.
Can I switch between different graphics drivers easily?
Yes, Ubuntu allows you to switch between different graphics drivers, especially for NVIDIA and AMD cards, through the “Additional Drivers” utility. However, after switching drivers, a system reboot is usually required.
Conclusion
We’ve seen that while Ubuntu handles most drivers automatically, there are times when manual intervention is necessary, especially for specific hardware like graphics cards or printers. The flexibility to switch between different drivers, the availability of user-friendly GUI options, and the wealth of resources and support from the Ubuntu community make managing drivers in Ubuntu a manageable task.
Effective driver management is crucial for a smooth and efficient Ubuntu experience, and with the guidelines provided in this guide, you’re well-equipped to handle most driver-related tasks in Ubuntu.