
Do you want to push your Linux system to its maximum limits? Or are you interested in evaluating your Linux PC in terms of performance? Either way, benchmark apps and stress test tools can give you a quantitative understanding of the performance of your Linux PC.
With this in mind, we have a list covering some of the best Linux apps to benchmark performance and stress tests. But first, let’s get a clear understanding of benchmarking and stress testing and the differences between the two.
Benchmarking vs. Stress Testing: What’s the Difference?
A Benchmark Tool is used to measure the maximum performance possible by the PC when handling a specific task or function. It is most useful when trying to compare two similar products. You can compare the benchmark scores between the products to see which one offers better performance.
A Stress Test Tool is designed to implement heavy load on the system to see if it fails. You can perform a stress test on different parts of the system, including the processor, memory, network, etc. This type of tool can help you test the stability of the system. During a stress test, the app will also check whether the system can safely recover from the heavy load and return to its normal stage.
Also, if you are interested in keeping an eye on resource consumption and system usage statistics, then we recommend you see our list of the best Linux performance monitoring tools.
Best Linux Apps to Benchmark and CPU Stress Test
Now that you have a basic understanding of what benchmark and stress test tools do for you let’s quickly dive into our list of the best Linux apps for benchmarking and stress testing. Do note that not all the tools mentioned here can be used for both benchmarking and stress testing.
Some of the tools are specifically designed for stress testing, whereas others are mainly intended for benchmarking performance. This is because there are very few apps that can perform both functionalities at a good enough level. But that being said, we have included a couple of apps that comes with decent tools for basic stress testing and benchmarking, if that’s all you need.
We will also show you how to install and use these tools on your Linux system. We will use a Ubuntu system to show you the setup process. However, the same steps should apply to any other Linux distros.
Geekbench
Windows users might be familiar with Geekbench. It is a popular cross-platform benchmark tool with a simple scoring system that shows the results of both single-core and multi-core performance of the system. A higher Geekbench score means better performance.
You can also use Geekbench to stress test your system by simulating real-world scenarios to check how the system stacks up.
How to Install and Use Geekbench:
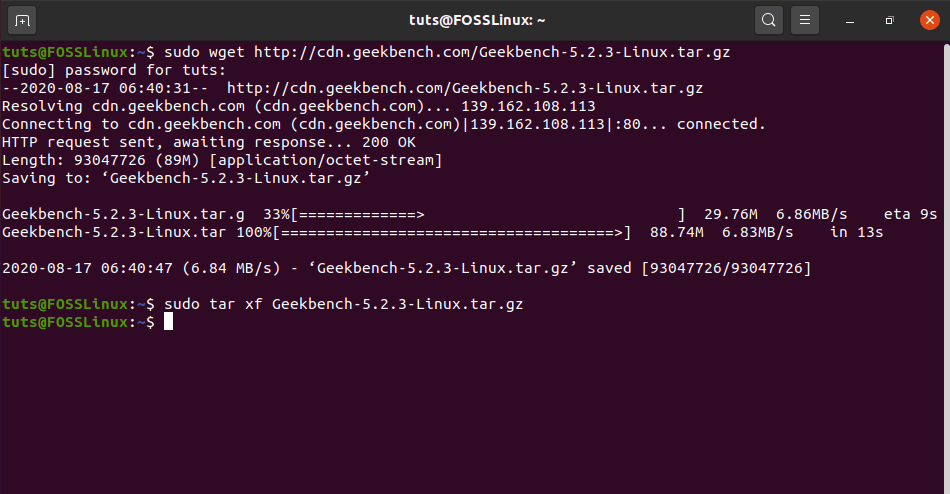
For this quick tutorial, we will be installing Geekbench 5.2.3, since it is the latest version. To do this, open the terminal and enter the following command to download and extract the Geekbench 5.2.3 archive file.
$ sudo wget http://cdn.geekbench.com/Geekbench-5.2.3-Linux.tar.gz
$ sudo tar xf Geekbench-5.2.3-Linux.tar.gz
Installing Geekbench
Once you have extracted the file, run the following command to launch Geekbench.
$ cd Geekbench-5.2.3-Linux && ./geekbench5
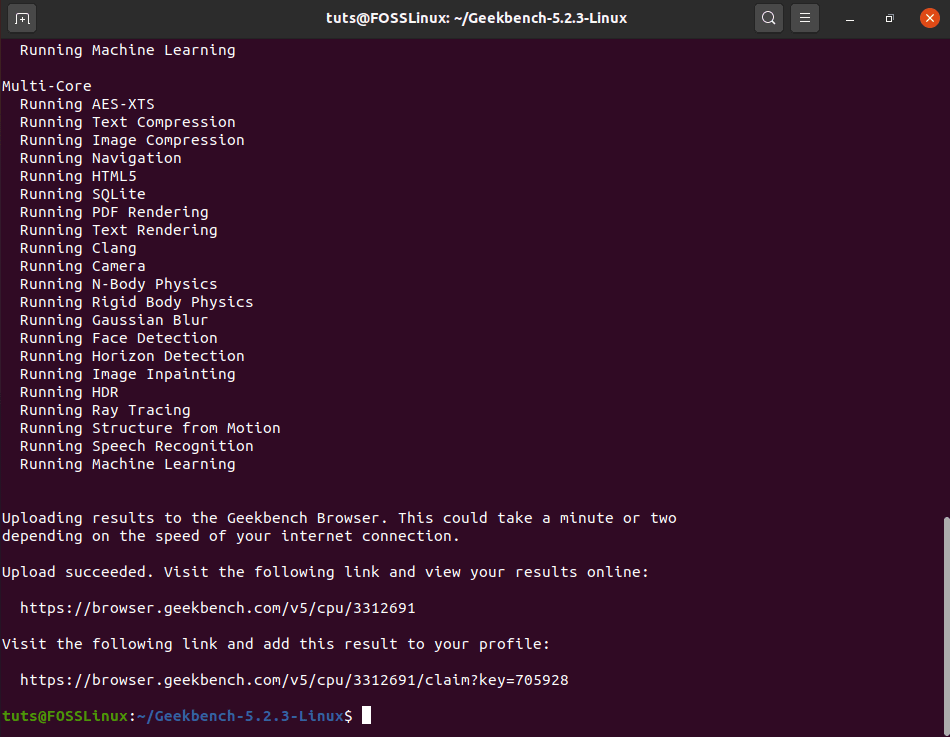
Geekbench running tests
As you can see, unlike the Windows version, on Linux, Geekbench will automatically start a series of tests that you see from the command-line. Also, when the tests are completed, you will get a URL link. You can visit this link to see the results.
Here is our result:

Geekbench test results
Note: When you are reading this article in the future, a newer version of Geekbench might come out. Check their official download page to see if any newer version is available.
If yes, then all you need to do is replace all the above commands having 5.2.3 with the newer version. Also, if a new version like Geekbench 6 or 7 comes out, then you will need to replace the last command with “./geekbench5” to “./geekbenchx” where ‘x’ is the new version number.
Phoronix Test Suite
Phoronix Test Suite is one of the most comprehensive performance testing and benchmarking tools for Linux. It is fully open-source and gives you access to over 100 tests that you can run to get a quantitative as well as a qualitative idea of your system’s performance.
All the tests are carried out in a fully automatic manner, starting from execution to reporting. The best part is that each of these tests can be easily reproduced, allowing you to make tweaks, and retest your system to see how that changes the performance.
How to Install and Use the Phoronix Test Suite:
For Ubuntu and Debian users, the Phoronix Test Suite can be easily installed following a few basic steps. First, use the wget command to download the latest version of Phoronix Test Suite like this:
$ sudo wget http://phoronix-test-suite.com/releases/repo/pts.debian/files/phoronix-test-suite_9.8.0_all.deb
Note: At the time of writing, Phoronix 9.8.0 is the latest version, so we are downloading it. When you are reading this, if a newer version is available, you can download it by just changing 9.8.0 in the above command to the latest version.
If you are on any other distro that’s not based on Debian, you can visit their official website to download the universal Linux tar file.
Next, install the gdebi, which is useful for installing external *.deb packages. To do this, enter the following command:
$ sudo apt install gdebi-core
Finally, to install the Phoronix Test Suite, enter this command:
$ sudo gdebi phoronix-test-suite_9.8.0_all.deb
Note: Change 9.8.0 to the newer version of Phoronix if you have downloaded that instead.
Once it has finished installing, you can run the tool by entering the following command:
$ phoronix-test-suite
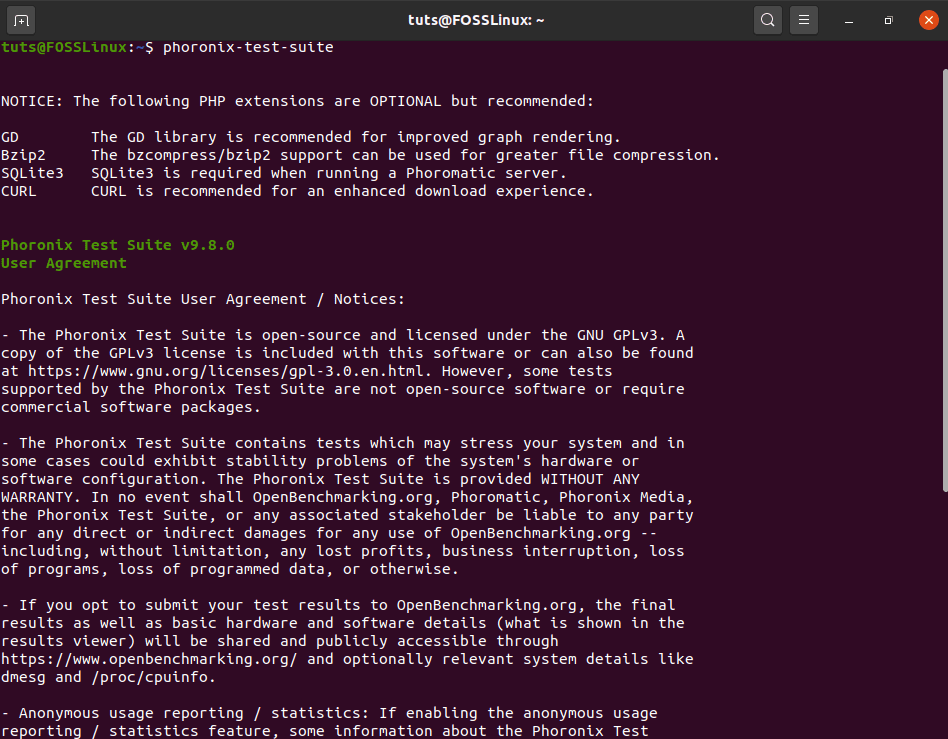
Setting up the Phoronix Test Suite
As you can see, it will first show you all the terms and conditions and ask you whether you agree with them or not. Enter ‘y’ for yes, to accept. The tool will then load up all the available tests for you to run on your system.
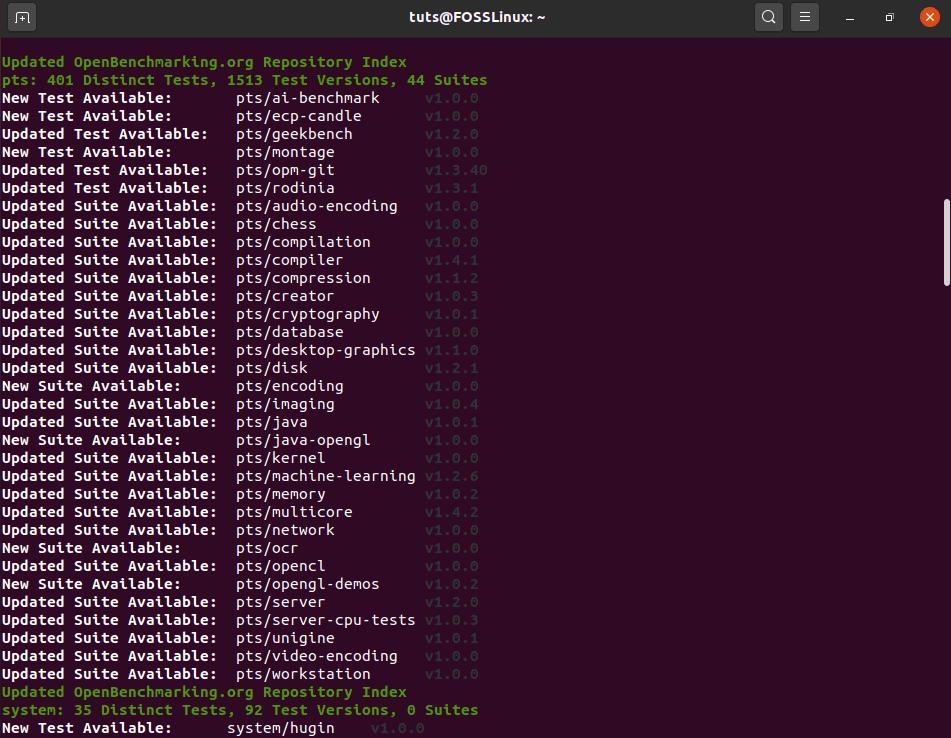
List of Phoronix Test
Every Phoronix test comes with its own set of dependencies. You need to install them on your system before you can run any of the tests. Furthermore, each of the dependencies is very large, some of which can be over 1 GB.
Also, if you are using it on Ubuntu, you will need to modify the install-ubuntu-packages.sh script to allow Phoronix to download the necessary dependencies. If you wish to use this stress test tool, then here is a detailed installation and set-up guide for Phoronix to help you out.
Sysbench
Sysbench is a free and open-source benchmarking tool based on LuaJIT. It is a scriptable multi-threaded benchmark tool that is most commonly used for database benchmarking. However, it does come with features that allow you to test and benchmark different parts of your system, including the CPU, memory, and file throughput.
How to Install and Use Sysbench:
If you are running Ubuntu, you can easily install Sysbench from the apt repository. All you have to do is enter the following command:
$ sudo apt install sysbench
Once the tool is downloaded, you can start benchmarking the CPU performance by entering this command:
$ sysbench cpu --threads=2 run
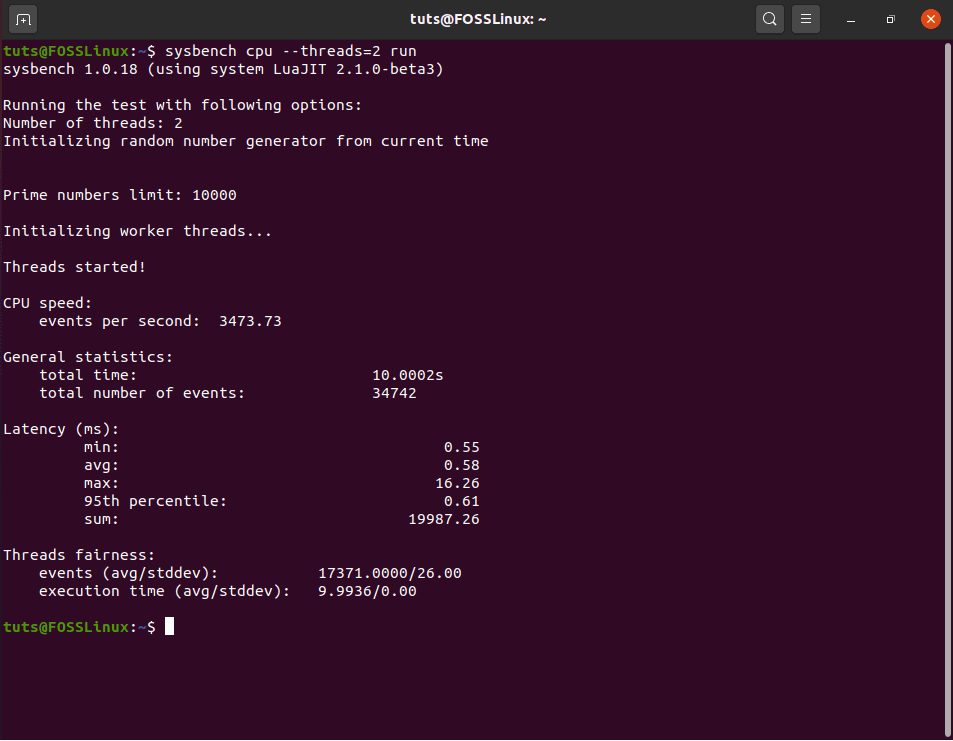
Running Sysbench Benchmark
In the above command, ‘CPU’ states the test type, and ‘threads’ specifies the number of threads that will be created by Sysbench to run the multi-threaded benchmark.
Here is a more detailed look at all the other types of tests and options available under Sysbench. Once the test is complete, Sysbench will show you the results directly in the terminal. To evaluate the CPU performance, you can measure and compare the “Events Per Seconds” variable with other systems.
Stress-ng CLI Tool
Stress-ng is an updated implementation of Stress – which itself is a simple command-line utility that can be used to stress test CPU, memory, and even disk input and output speeds.
Stress-ng builds on top of its predecessor by adding hundreds of advanced tests to put extra load and stress out your system.
How to Install and Use Stress-ng:
On Ubuntu, you can install Stress-ng straight from the apt repository. To do this, enter the following command in the terminal:
$ sudo apt install stress-ng
Once installed, you can start using the tool to stress-test different parts of your system like CPU, memory, and disk I/O speeds. However, for this demonstration, let’s look at how you can use the tool to stress your CPU.
$ stress-ng --cpu 2

Stress-ng CPU Test
The above command tells the Stress-ng to stress test the CPU where “2” refers to the number of workers spinning on sqrt(rand()). Once you run the command, the tool will begin to sequentially run 70 CPU tests one after the other to Stress out the CPU.
There are many more commands to help you run different stress tests on different parts of your system. If you want to know more, you can see all the various Stress-ng commands right here.
Disclaimer: Stress-ng is not a benchmarking app but a stress testing tool. It will not give you any benchmark score. Once activated, it will start hammering down your CPU so that it continually runs at 100% usage.
When using the tool, you should kill all other running apps to ensure there are no anomalies in the stress test. Also, it is not recommended to stress your system for too long as that might lead to a system crash. If this happens, you will need to do a hard reboot to recover your PC.
GTKStressTesting (GST)
GST, short for GTKStressTesting, is a feature-rich performance monitoring and stress test tool for Linux PCs. The app is built on top of Stress-ng. As such, you get access to all the stress testing features of the CLI tool. However, unlike Stress-ng, GST comes with a GUI to let you control the app and its different features.
Also, GST includes a small benchmark feature, something that is absent in Stress-ng. Other than this, GST can also fetch necessary information about your CPU, RAM, and motherboard, and display the usage metrics on a clean GUI, similar to CPU-Z.
How to install and Use GTKStressTesting:
GST is available in the Flatpak repository. So if the flavor of Linux you are running supports Flatpak, then you can install GST on your system. Here is the official set up guide for Flatpak. Use this first to install Flatpak on your Linux distro.
Once done, run this command to install GST:
$ sudo flatpak install flathub com.leinardi.gst
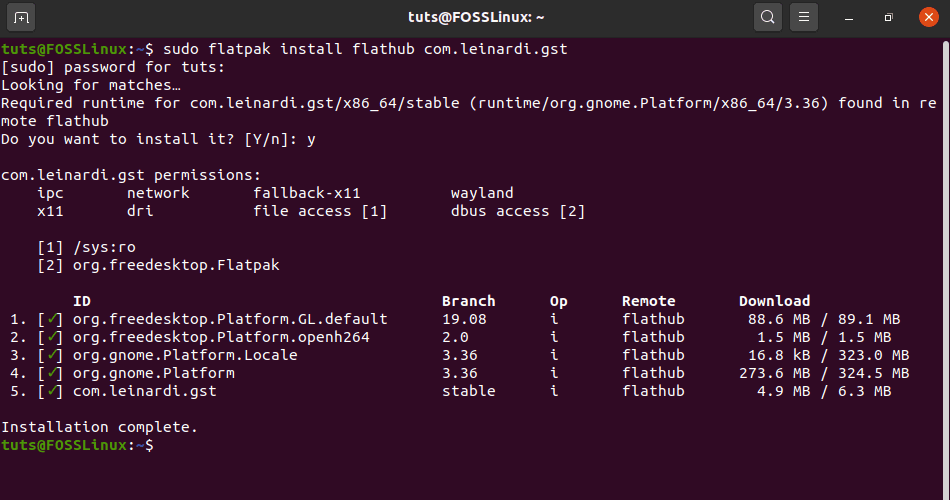
Installing GTKStressTesting
After the installation is complete, run GST by entering this command:
$ flatpak run com.leinardi.gst
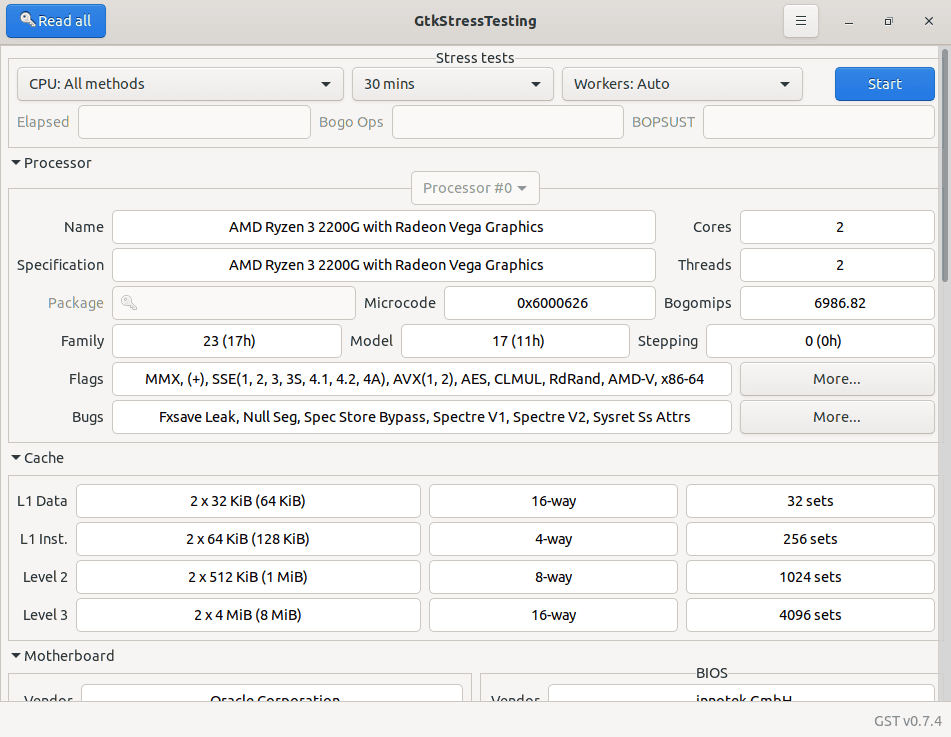
GTKStressTesting App
As you can see, the tool presents to you tons of information regarding your system. Looking at the top, you have the stress test settings. There is an option to choose the stress test type along with the time duration and a predefined number of workers.
7-Zip
And for the final entry in our list, we have 7-zip. Some of you might already know and use this application as a file compression tool – which is its intended use.
However, the cool thing about 7-zip is that it can perform extreme levels of compression on your files to significantly reduce their size and store them in the 7z archive format. You can use this extreme compression algorithm to measure the CPU performance of your system. 7-zip comes with a dedicated feature called the LZMA compression benchmark that lets you do just that.
How to Install and Use 7-ZIP to Benchmark Performance:
Ubuntu users can easily install 7-zip using the apt-get command like this:
$ sudo apt-get install p7zip-full
Once installed, you can use the following command to run a single-threaded benchmark using the tool:
$ 7z b -mmt1

Single-Threaded benchmark with 7zip
You can also do a multi-threaded benchmark using this command:
$ 7z b
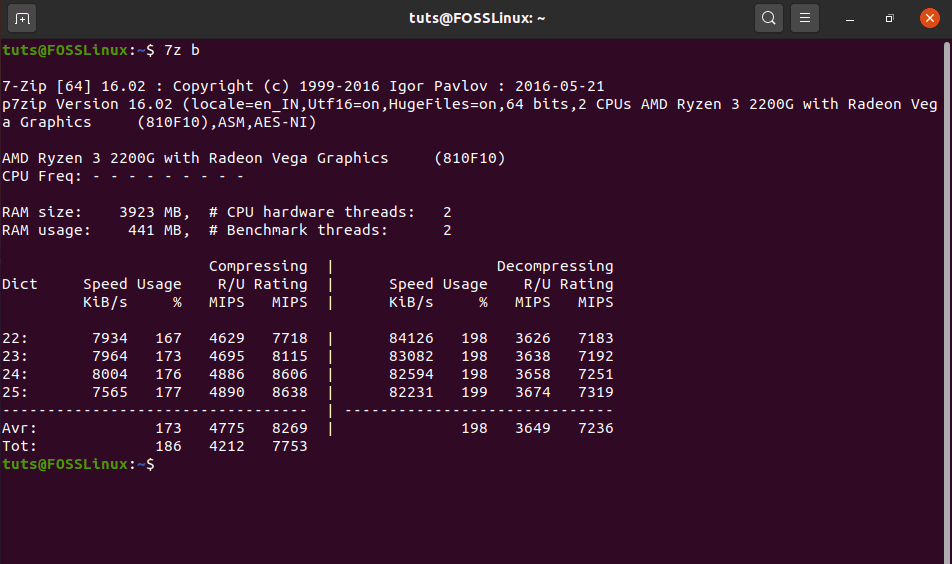
Multi-Threaded benchmark with 7zip
As you can see, all the results are recorded in ‘million instructions per second’ or MIPS. You can now compare these results with other CPUs to see where your system ranks.
Wrapping Up
So these were our picks for the best Linux apps for benchmark and stress test. We hope you found this read useful and that it helped you in evaluating the performance of the Linux PC.
With that being said, there are plenty of other stress testing and benchmarking apps available in the market. As such, if you have missed out on your favorite tool for measuring the performance of your Linux system, then do let us know in the comments. We would love to know which tools and apps you use on your Linux PC. And it will also give your fellow readers more options to choose from.
2 comments
`sudo` should be removed from the wget and tar -d lines. This unneeded and will just make the user `sudo` to delete the archives later.
For Geekbench, you wrote ” you will get a URL link” no you don’t. You get no results after the tests. You have to be a member and be signed in . You can only see your results online. This sucks IMO. The terminal window in Linux just closed on its own after the test, I was WTF? is going on. The only good thing was seeing my cores going to maximum in Multicore testing, and nothing bad happening.