
We live in a world of inexpensive data storage. And, that means anyone can use multiple, inexpensive disk drives into arrays to back up their data — hence providing the necessary redundancy they require to keep their data safe. Meet RAID — the process of combining multiple disk drives to create an array of drives. The computer that the RAID is connected to sees it as a single drive or unit and handles it.
In this article, we will look at RAID in Linux and learn how to configure it. However, before we do that, let’s try to under RAID in depth.
What is RAID?
RAID stands for Redundant array of independent disks(RAID). With RAID, the user can use multiple disks for accessing and storing information. RAID is possible using techniques such as disk mirroring(RAID Level 1), disk striping(RAID Level 0), and parity(RAID Level 5). Using these techniques, the RAID setup can achieve benefits such as redundancy, increased bandwidth, lower latency, and recovery of data if the hard disk or storage crashes.
To achieve all the above-mentioned benefits, RAID needs to distribute data to the array drive. The RAID then takes care of the data distribution process by breaking down the data into 32K or 64K sized chunks. The RAID is also capable of dividing the data into bigger chunks and as per the requirement. Once the chunks are created, the data is then written into the hard drive, which is created based on the RAID array.
Similarly, the data is read using the same reversed process, creating the process of data storage and recovery using the RAID array.
Who should use it?
Anyone can actually use RAID arrays. However, system administrators can benefit from it as they need to manage a lot of data. They can also use RAID technology to minimize disk failures, improve storage capacity, or enhance speed.
Types of RAID
Before we proceed further, let’s take a look at the types of RAID. As a system administrator or a Linux user, you can set up and use two types of RAIDs. They are hardware RAID and software RAID.
Hardware RAID: Hardware RAID is implemented independently on the host. This means that you need to invest in hardware to set it up. Of course, they are fast and have their own dedicated RAID controller provided through the PCI express card. This way, the hardware does not use the host resources and performs best thanks to the NVRAM cache that enables faster read and write access.
In case of failure, the hardware stores the cache and rebuilds it using the power backups. Overall, hardware RAID is not for everyone and requires a good amount of investment to get started.
The advantages of Hardware RAID includes the following:
- Genuine performance: As dedicated hardware improves the performance by not taking the host’s CPU cycles or disks. They can perform at their peak with no overhead usage, considering that there is enough caching to support the speed.
- RAID controllers: The RAID controllers used offers abstraction when it comes to underlying disk arrangement. The OS will see the whole array of hard disks as a single storage unit. This means that the OS doesn’t have to figure out how to manage it as it interacts with the RAID as a single hard disk drive.
The hardware RAID does have some drawbacks. For instance, there can be vendor lock-in. In that case, if you want to move to a different hardware vendor, you may not get access to your previous RAID system arrangement. Another disadvantage is the associated cost with the setup.
Software RAID: Software RAID depends on the host for resources. This means that they are slow compared to the hardware counterparts, and that’s obvious as they do not get access to their own set of resources compared to hardware RAID.
In the software RAID case, the operating system has to take care of the disk relationship.
The key advantages that you get using software RAID are as below:
- Open source: The software RAID is open-source, considering it can be implemented and used in open-source solutions such as Linux. This means that you can change between the systems and ensure that they work without any changes. If you make a RAID configuration in Ubunutu, you can later export it and use it on a CentOS machine.
- Flexibility: As RAID needs to be configured in the operating system, you have complete control over making it work. So, if you want to make changes, you can do so without changing any hardware.
- Limited cost: As no specific hardware is required, you do not have to spend a lot!
There is also one more type of RAID that you should know, i.e., hardware-assisted software RAID. It is a firmware RAID or fake RAID, which you get either at motherboard implementation of inexpensive RAID cards. This approach is ideal for multi-operating system support, whereas the disadvantages include performance overhead, limited RAID support, and specific hardware requirement.
Understanding RAID Levels
The last piece of the puzzle that we need to learn about is the RAID level. If you have paid attention, we already mentioned the different RAID techniques, especially the RAID level. They determined the relationship and configuration of the disks. Let’s go through them briefly below.
- RAID 0: RAID 0 is a disk configuration where you can use two or more devices and then strip data across them. Striping data means breaking them into data chunks. Once broken, they are written on each of the disk arrays. RAID 0 approach is extremely beneficial when it comes to distributing data for redundancy. In theory, the more number of the disk you use, the better the RAID’s performance. However, in reality, it cannot reach that level of performance. In RAID 0, the final disk size is simply the addition of the existing disk drives.
- RAID 1: RAID 1 is a useful configuration when there is a need to mirrors data between devices(two or more). So, the data is written on each drive in the group. In short, each one of the disks has the exact copy of the data. This approach is beneficial for creating redundancy and useful if you suspect that you will have device failure in the future. So, if a device fails, it can be rebuilt using the data of other functional devices.
- RAID 5: RAID 5 configuration uses bits from both RAID 0 and RAID 1. It stripes data across the devices; however, it also ensures that the striped data is verified across the array; it uses mathematical algorithms to check the parity information. The advantages include a performance boost, data reconstruction, and a better redundancy level. However, there are drawbacks to this approach, as RAID 5 is suspectable to slow-downs, impacting write operations. If a drive in the array fails, it can put many penalties on the whole grid.
- RAID 6: When it comes to RAID 6, the approach it takes is similar to that of RAID 5. However, the key difference is the double parity information.
- RAID 10: Lastly, we have RAID 10, which can be implemented in two different approaches, the Nested RAID 1+0 and the mdam’s RAID 10.
How to configure RAID in Linux
As you can see that there are different RAID configurations that you can configure on your device. So, it is practically not possible to cover all of them in this post. For the sake of simplicity, we are going to do a software RAID 1 implementation. This implementation can be done on the existing Linux distributions.
Before you get started, you need to have some basic stuff ready at your disposal.
- Make sure that you have a proper Linux distribution installed on your hard drive. The drive at which you installed the Linux distribution will be used throughout the process. So, you may want to mark it down somewhere to access it readily.
- In the next step, you need to grab at least one more hard drive. To ensure proper installation, it is recommended that you take two hard drives and name it /dev/sdb and /dev/sdc. You are free to take disk drives of different sizes and as per your convenience.
- Now, you need to create special file systems on both of your new hard drives.
- Once done, you should be able to create the RAID 1 array with the help of the mdadm utility.
1. Getting your hard drive ready
The first step is to make your hard disk ready for the RAID configuration. To know the names of the hard drives that are connected to your computer, you need to open up the terminal and run the following command.
sudo fdisk - 1
This will list the disk drives or hard drives that are connected to your computer.
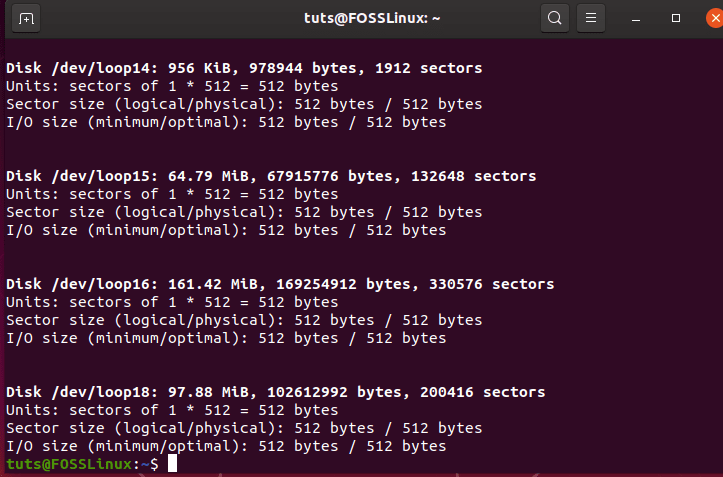
For the sake of the tutorial, we are going to use the first disk drive name as /dev/sdb and /dev/sdc
With the hard disk drive names sorted, it is now time to create a new MBR partition table on both the hard drives. Before you do so, it is advisable that you back up any of the data on those hard drives as formating and creating a new MBR partition means losing all your existing partitions and the stored data on the disks.
The code to create new partitions is as below.
sudo parted /dev/sdb mklabel msdos
Similarly, you can partition the 2nd one using the same command. However, you need to change the disk drive name in the command.
In case you want to create GPT based partitions, you can do so by replacing MS-DOS with gpt. However, if you are doing it for the first time and are following the tutorial, we suggest using the MBR partition type.
The next step is to create new partitions on the freshly formatted drives. This is necessary as it will help us to make sure the partitions are auto-detected during the Linux raid autodetect file system.
To get started, type in the following command.
sudo fdisk /dev/sdb

Now, you will have to go through the following steps:
- For creating a new partition, you need to type n.
- For primary partition, you need to type p
- Now to create the /dev/sdb1, you need to type 1
- From there, press Enter to select the default first sector.
- Similarly, you also need to select the default last sector as well.
- Pressing P will now showcase to you all the information about your newly created partitions.
- Next, you need to change the partition type by pressing t
- To change to Linux raid autodetect, you need to enter fd
- Finally, recheck the partition information by typing p
- Lastly, it would be best if you typed w so that all the changes can be applied.
2. Getting mdadm to work
As we are working with multiple disk drives, we also need to install the mdadm tool. The tool stands for managing MD or managing multiple devices. It is also known as RAID in Linux software.
If you are using Ubuntu/Debian, then you can install it using the following command:
sudo apt install mdadm

In case you are using Redhat or CentOS, you need to use the following command:
sudo yum install mdadm
Once installed, it is now time to examine the devices that you are using the RAID. To do so, you should use the following command.
sudo mdadm –examine /dev/sdb
You can also add more devices to command with space in between them. You can also type fd command(Linux raid autodetect) to learn about the devices. Clearly, you can also see that the RAID is not formed yet.
3. Creating the RAID 1 Logical Drive
To create RAID 1, you need to use the following command.
sudo mdadm --create /dev/md3 --level=mirro --raid-devices=2 /dev/sbd1 /dev/sdc1
You need to name the new logical drive. In our case, we have made it /dev/md3.
In case you are not able to execute the command, then you need to reboot your machine.
If you want more information about the newly created raid device, you can use the following commands.
sudo mdadm --detail /dev/m3
You can also check each of the separate partitions as well by using the –examine option.
sudo mdadm --examine
4. RAID 1 Logical Drive File System
It is now time to create the file system on the newly created logical drive. To do so, we need to use the mkfs command as below.
sudo mkfs.ext4 /dev/md3
Now, you can create a mount and then mount the RAID 1 drive. To do so, you need to use the following commands.
sudo mkdir /mnt/raid1

sudo mount /dev/md3 /mnt/raid1
5. Check if everything is running as intended
Next, you need to see if everything is running as intended.
To do so, you need to create a new file on the new logical drive. You first go to the newly mounted RAID and then create a file there.
If everything works as intended, congrats, you have successfully created your RAID 1 configuration.
Also, you need to save your RAID 1 configuration. You can do so by using the following command.
sudo mdadm --detail --scan --verbose | sudo tee -a /etc/mdadm/mdadm.conf
Conclusion
RAID is a beneficial technique to take advantage of your other drives as they provide redundancy, better speed and configuration, and much more!
We hope you found the guide useful. Also, as there are different RAID types, you need to do things differently for each one of them. We will keep adding those guides in the future, so suggest subscribe and keep visiting FOSSLinux.
Also, what do you think about RAID? Do you think you need them? Comment below and let us know.
1 comment
Hi Foss , I noticed a couple of typos in the latter part of the instructions
sudo mdadm –create /dev/md3 –level=mirro –raid-devices=2 /dev/sbd1 /dev/sdc1 , this is the typo line
sudo mdadm –create /dev/md3 –level=mirror –raid-devices=2 /dev/sdb1 /dev/sdc1 this is my edited line which by trial and error I learned to make the instructions work , great job you do and thanks for all the tutorials
ps sudo mdadm –detail /dev/m3 missing d
sudo mdadm –detail /dev/md3
I’m not sure if I needed a RAID array but i now have one if I do , thanks very much , it might save the day when I next mess up big time , Steve , an occasional supporter