
Linux Containers have been around for some time but were introduced in the Linux kernel in 2008. Linux containers are lightweight, executable application components that combine app source code with OS libraries and dependencies required to run the code in different environments.
Developers use containers as an application packaging and delivery technology. One key attribute of containers is combining lightweight application isolation with the flexibility of image-based deployment methods.
RHEL based systems like CentOS and Fedora Linux implements containers using technologies such as control groups for resource management, namespaces for system process isolation, SELinux for security management. These technologies provide an environment to produce, run, manage and orchestrate containers. In addition to these tools, Red Hat offers command-line tools like podman and buildah for managing container images and pods.
This article introduces building, running, and managing container images and pods in Fedora using the podman command. Before you can get started, check out our guide on introduction to Linux containers to get an overview of open-source tools to manage and orchestrate container images.
Getting started with Podman
Podman is a tool for running Linux containers. Podman is a powerful alternative to Docker with an ever-growing community of developers.
Characteristics of Podman
The podman command can run and manage containers and container images. Podman and docker support similar commands and features. The main difference is that podman is lightweight and doesn’t require an active container engine or a docker service for commands to work. In addition, Podman supports running containers in pods, and it fully integrates with systemd. The best attributes of Podman include:
- Podman can run in rootless mode – its containers are more secure since they run without any added privileges.
- Podman is daemonless- it has lower resource requirements at idle because if you are not running containers, Podman is not running. Docker, on the other hand, has a daemon always running.
- Systemd integration -it allows you to run containers as system services.
Installation
You can install Podman in your distro from your package manager or build it from the source. Use the following command to install Podman.
Linux package manager
Fedora
sudo dnf -y install podman
Fedora-CoreOS, Fedora SilverBlue
Podman is built-in
Arch Linux & Manjaro Linux
sudo pacman -S podman
CentOS
sudo yum -y install podman
openSUSE
sudo zypper install podman
Debian
sudo apt-get -y install podman
Ubuntu
sudo apt-get -y update
sudo apt-get -y install podman
Build Podman and run dependencies
Fedora, RHEL, CentOS
You should run make package-install for RHEL based distros like Fedora and CentOS to install dependencies, build the source, produce RPMs, and install them.
sudo dnf install -y \
btrfs-progs-devel \
conmon \
containernetworking-plugins \
containers-common \
crun \
device-mapper-devel \
git \
glib2-devel \
glibc-devel \
glibc-static \
go \
golang-github-cpuguy83-md2man \
gpgme-devel \
iptables \
libassuan-devel \
libgpg-error-devel \
libseccomp-devel \
libselinux-devel \
make \
pkgconfig
Debian and Ubuntu-based distros
sudo apt-get install \
btrfs-progs \
git \
golang-go \
go-md2man \
iptables \
libassuan-dev \
libbtrfs-dev \
libc6-dev \
libdevmapper-dev \
libglib2.0-dev \
libgpgme-dev \
libgpg-error-dev \
libprotobuf-dev \
libprotobuf-c-dev \
libseccomp-dev \
libselinux1-dev \
libsystemd-dev \
pkg-config \
runc \
uidmap
OpenSUSE
sudo zypper -n in libseccomp-devel libgpgme-devel
Podman commands
The following is a list of typical commands you can use with the podman command. You can use the – help command to find out how to work with Podman.
$ podman --help
$ podman <subcommand> --help
podman commands
attach – Attach to a running container
commit – Create a new image from the changed container
build – Build an image using Container file instructions
create – Create, but do not start a container
diff – Inspect changes on container’s filesystems
exec – Run a process in a running container
export – Export container’s filesystem contents as a tar archive
images – List images in local storage
import – Import a tarball to create a filesystem image
kill – Send a specific signal to one or more running containers
mount – a working container’s root filesystem
pause – Pauses all the processes in one or more containers
ps – List containers
pull – an image from a registry
push – an image to a specified destination
restart – one or more containers
rm – remove one or more containers from the host.
rm -f – remove containers if running.
rmi – removes one or more images from local storage
run – a command in a new container
search – registry for image
start – one or more containers
stop – one or more containers
top – the running processes of a container
umount, unmount – a working container’s root filesystem
unpause – Unpause the processes in one or more containers
wait – Block on one or more containers
Note: Podman illustrations in this article are run in a Fedora system but should also work in your Linux distro.
Managing Container images
You can use the Podman tool to pull images, inspect, save, load, redistribute, and many more.
Container registries
A container registry is a collection of repositories for storing container images and container-based application artifacts. The following are registries provided by Fedora and Red Hat:
- registry.fedoraproject.org
- registry.access.redhat.com
- registry.redhat.io
Use the podman pull command to get container images from a remote registry like the Fedora container registry and add them to your local system.
The pull command uses the following format:
# podman pull <registry>[:<port>]/[<namespace>/]<name>:<tag>
where <registry>[:<port>]/[<namespace>/]<name>:<tag> is the name of the container image.
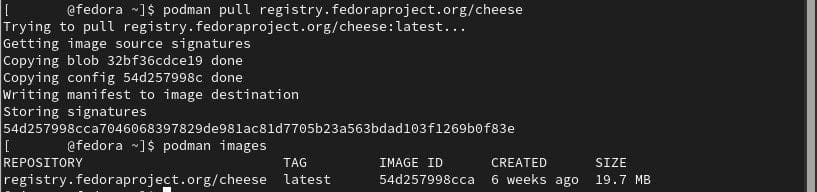
For example, to get the cheese container image from the Fedora registry.
podman pull registry.fedoraproject.org/cheese
Verify:
podman images
REPOSITORY                        TAG     IMAGE ID    CREATED     SIZE
registry.fedoraproject.org/cheese latest 54d257998cca 6 weeks ago 19.7 MB
Searching for images
Use the podman search command to search selected container registries for images. You can also search for images in the Fedora Container Registry. The Fedora Container Registry includes the image description, stars, contents such as official, automated, health index, and other information.
For example, search Fedora repositories for compneuro
podman search registry.fedoraproject.org/compneuro
INDEX NAME DESCRIPTION STARS OFFICIAL AUTOMATED
fedoraproject.org registry.fedoraproject.org/compneuro 0
fedoraproject.org registry.fedoraproject.org/f33/compneuro 0
fedoraproject.org registry.fedoraproject.org/f34/compneuro 0
fedoraproject.org registry.fedoraproject.org/f35/compneuro 0

To display all images provided by a particular registry (Fedora Container Registry).
#podman search registry.fedoraproject.org/
To search for the image name in all registries.
#podman search cheese
Pulling images
You can use the podman pull command to get a container image to your local system.
To pull the registry.fedoraproject.org/evolution container image:
#podman pull registry.fedoraproject.org/cheese
Verify by listing all images pulled to your local system:
$ podman images
fedora container registry: cheese
Pulling containers using short-name aliases
You should pull an image by its fully-qualified name. However, it is customary to pull images by short names. For instance, you can use evolution instead of rregistry.fedoraproject.org/evolution:latest.
You can specify aliases for short names in the registries.conf file to give you full control over where images are pulled from. Aliases are specified in an aliases table in the form “name” = “value”. You can see a complete list of aliases in the /etc/containers/registries.conf.d directory in Fedora.
You can use secure short names to get the image to your local system. Use the following command to pull a Nginx container image.
[#####@fedora ~]$ podman pull nginx
? Please select an image:
registry.fedoraproject.org/nginx:latest
registry.access.redhat.com/nginx:latest
▸docker.io/library/nginx:latest
quay.io/nginx:latest
A new short-name alias is recorded if the selected image is pulled successfully. You can then verify by listing all images pulled to your system.
$ podman images
Listing container images
Use the podman images command to list images in your local storage.
$ podman images
Inspecting local container images
Use the podman inspect command to investigate pulled images in your local system. It displays information on containers and images, such as what the image does or checks what software is in the image.
$ podman inspect docker.io/library/nginx
Tagging images
You can use the podman tag command to add an additional name to a container image in your local system.
Use the following commands to assign the [fossnginx] name to the docker.io/library/nginx using the image name or image ID.
Using image name:
$ podman tag docker.io/library/nginx fosslinux_nginx
Using image ID:
$ podman tag 605c77e624dd fosslinux_nginx
Note:
- Both commands give the same result.
- All the image names are assigned to the single image ID 605c77e624dd.
- The default tag is the latest for both images.
You can also add a numbered tag such as [9.6.3] to the docker.io/library/nginx registry:
Using image name:
$ podman tag docker.io/library/nginx fosslinux_nginx:
Using image ID:
$ podman tag 605c77e624dd fosslinux_nginx:9.6.3

Saving container images
You can use the podman save command to save an image to a container archive. Supported formats include docker-dir (default), docker-archive, oci-archive, andoci-dir.
Use the following commands to save the docker.io/library/nginx image as a tarball:
$ podman save -o nginx.tar docker.io/library/nginx:latest
Note that the nginx.tar archive is stored in your current directory.
After creating an archive, you can restore it to another container environment or share it.
To load the nginx.tar docker.io/library/nginx:latest image from the nginx.tar:
$ podman load -i nginx.tar
[#####@fedora ~]$ podman load -i nginx.tar
Getting image source signatures
Copying blob d874fd2bc83b skipped: already exists
Copying blob 2edcec3590a4 skipped: already exists
----
Removing container images
Use the podman rmi command to remove locally stored container images by either their ID or name.
Note that you have to first stop all containers running from the image you want to stop. You can stop a container by either its ID or name with the podman stop command.
To remove the registry.fedoraproject.org/cheese image:
$ podman rmi registry.fedoraproject.org/cheese
To remove multiple images:
$ podman rmi registry.fedoraproject.org/cheese registry.fedoraproject.org/evolution
To remove all images:
$ podman rmi -a
Remove images with multiple names (tags) associated with them using the -f option.
$ podman rmi -f 605c77e624dd
Managing containers
A container is a running or stopped process created from the files in a container image.
Working with the podman run command
The podman run command runs a process in a new container based on the container image. If the container image is not already loaded, the podman run pulls the image and its dependencies before it starts the container.
Note that a container process has its own file system, isolated process tree, and its networking.
The podman run command provides the following basic options:
podman run [options] image [command [arg ...]]
- -d (–detach) -run a container in the background.
- -a (–attach) -run a container in the foreground mode.
- -n (–name) -assign a name to a container. Note that if a name is not assigned to the container, it generates a random string name.
- -i (–interactive) -for interactive processes.
- -t (–tty) -it allocates and attaches the pseudo-terminal to the standard input of a container. You can use -i and -t (-it) to allocate a terminal for a container process.
- –rm – to automatically remove a container when it exits.
Running a container
Use the following command to run a basic HTTP server that serves only its index page.
$ podman run -dt -p 8080:80/tcp registry.fedoraproject.org/f29/httpd
Notes:
- The container is running in detached mode, represented by the -d. Podman will print the container ID after it has executed the command.
- The -t adds a pseudo-tty to run arbitrary commands in an interactive shell.
Listing containers
Use the podman ps command to list running containers in your system.
To list all running containers:
podman ps
To list all containers, running or stopped:
podman ps -a
Starting containers
You can use the podman start command to re-run stopped containers. You can specify the containers by their name or container ID.
To start a container in a non-interactive mode:
$ podman start fedora_foss
To start a container in interactive mode with -a (–attach) and -t (–interactive) options:
$ podman start -a -i fedora_foss [name]
$ podman start -a -i 564377a2c35 [Container ID]
To exit the container and return to the host:
[root@ 564377a2c35 /]# exit
Executing commands inside a running container
Use the podman exec command to execute a command in a running container. The podman exec command allows you to investigate a running container without interrupting the container activity.
For example, you can execute the rpm -qa command inside the free_foss container to list all installed packages:
$ podman exec -it free_foss rpm -qa
You can also execute a /bin/bash command in the furious_foss container then install system utilities such as ps, top, uptime.
$ podman exec -it furious_foss /bin/bash
# dnf install procps-ng
# ps -ef [#list every process on the system]
# uname -r [#display system information]
# df -h [#display file system disk space usage]
Sharing files between containers and host
A volume is typically a folder stored on the host machine. You can use it to share data among multiple containers and persist data in containers even when deleted. In essence, volumes can be shared between the host and a container.
Volumes can be convenient for any system administrator. Mainly because they can be shared between containers, they do not increase the size of the container and are also easier to migrate or backup.
Sharing files between a container and host.
The following are simple steps to share files among containers.
Step 1: Create a volume in the host:
$ podman volume create foss_volume
Use podman volume inspect to display information about the volume:
$ podman volume inspect foss_volume
[{
"name": "foss_volume",
"labels": {},
"mountpoint": "/home/username/.local/share/containers/storage/volumes/foss_volume/_data",
"driver": "local",
"options": {},
"scope": "local"
Note that the command above creates a volume in the (.local/share/containers/storage/volumes/) directory.
Step 2: Create a text file inside the volume directory :
$ echo "Hello from the third dimension! I am your HOST" >> /home/username/.local/share/containers/storage/volumes/foss_volume/_data/host.txt
To list all files in the volumes directory:
$ ls /home/username/.local/share/containers/storage/volumes/foss_volume/_data/
Step 3: Map the volume directory on the host to a directory on the container:
$ podman run -it --name -v foss_volume:/container_volume_001 registry.access.redhat.com/ubi8/ubi /bin/bash
To list all files in the shared volume on the container:
# ls /container_volume_001
host.txt
Step 4: Create a text file inside the /container_volume_001 directory:
# echo "Hello from the fourth dimension! This is CONTAINER 001" >> /container_volume_001/container_001.txt
Detach from the container with CTRL+p and CTRL+q.
Step 5: List the files in the shared volume on the host:
$ ls /home/username/.local/share/containers/storage/volumes/foss_volume/_data/
container_001.txt host.txt
Sharing files between two containers.
Use the following steps to share files between containers.
Step 1: Map the volume directory on the host to a directory on a second container:
$ podman run -it --name fedora_foss -v foss_volume:/container_volume_002 registry.access.redhat.com/ubi8/ubi /bin/bash
To list the files in the shared volume on the second container:
# ls /container_volume_002
container1.txt host.txt
You can see the host.txt file created on the host and container_001.txt created inside the first container.
Step 2: Create a text file inside the /container_volume_002 directory:
# echo "Hello from the fourth dimension! This is CONTAINER 002" >> /container_volume_002/container_002.txt
Step 3: List all files in the shared volume on the host:
$ ls /home/username/.local/share/containers/storage/volumes/foss_volume/_data/
container_001.txt container_002.txt host.txt
Exporting and importing containers
Use the podman export command to export the file system of a running container on your local system to a tarball. You can use it to export a current snapshot of a running container into a tarball. Exporting containers comes in handy if you have containers that you use infrequently or some that you want to save a snapshot of to revert to it later.
You can also use the podman import command to import an exported tarball and save it as a filesystem image. You can then run the filesystem image.
Step 1: Run a container based on the — image:
$ podman run -dt --name=fosslinux_fedora_001 registry.fedoraproject.org/fedora-minimal

podman run: fedora image
Step 2: Attach to the fosslinux_fedora_001 container:
$ podman attach fosslinux_fedora_001
Step 3: Create a file named testfile:
[root@db5dda4753c0 /]# echo "hello" > testfile
Detach from the fosslinux_fedora_001 container with CTRL+p and CTRL+q.
Step 4: Export the file system of the fosslinux_fedora_001 container as a fosslinux_fedora_001-container.tar on the local machine:
$ podman export -o fosslinux_fedora_001.tar db5dda4753c0
Step 5: Import the fosslinux_fedora_001.tar file and save it as a filesystem image:
[#####@fedora ~]$ podman import fosslinux_fedora_001.tar fosslinux_fedora_imported
Getting image source signatures
Copying blob 642637367834
Copying config ad2541fcf8 done
Writing manifest to image destination
Storing signatures
sha256:ad2541fcf83a592b6cb66a8052233eac07c81c181485c7978b9ea07bc2d01539
To list all images:
[#######@fedora ~]$ podman images
REPOSITORY                           TAG   IMAGE ID     CREATED        SIZE
localhost/fosslinux_fedora_imported latest ad2541fcf83a 11 minutes ago 92.5 MB
Inspecting containers from the host
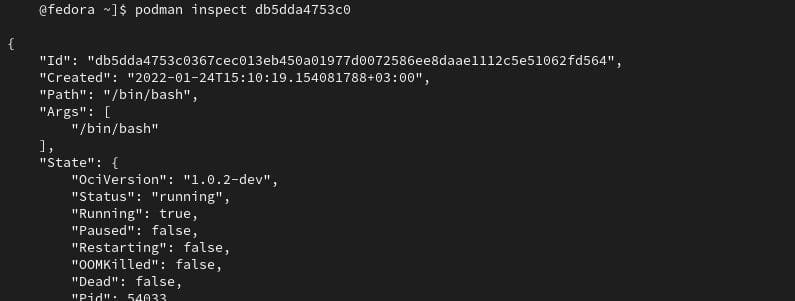
Use the podman inspect command to inspect the metadata of a container by specifying their container ID or name. Note that the metadata is displayed in JSON format.
[#####@fedora ~]$ podman inspect db5dda4753c0
[{
"Id": "db5dda4753c0367cec013eb450a01977d0072586ee8daae1112c5e51062fd564",
"Created": "2022-01-24T15:10:19.154081788+03:00",
"Path": "/bin/bash",
"Args": [
"/bin/bash"
podman inspect container
You can also get particular items from the JSON file:
[#####@fedora ~]$ podman inspect --format='{{.State.StartedAt}}' db5dda4753c0
2022-01-24 15:10:24.280562077 +0300 EAT
Stopping a running container
You can use the podman stop command to stop a running container by specifying their container ID or name.
$ podman stop fosslinux_fedora_001 #using the container name
$ podman stop db5dda4753c0 #using the container ID
You can also stop a running container attached to a terminal session with the exit command.
Note that the podman stop command sends a SIGTERM signal to terminate a running container. However, if the container does not stop, Podman sends a SIGKILL signal.
You can also use the podman kill command to kill a container (SIGKILL) or send a different signal to a container.
# podman kill --signal="SIGHUP" a3290c9b553b
Removing containers
You can use the podman rm command to remove containers by specifying a container ID or name.
To list all running or stopped containers:
[#####@fedora ~]$ podman ps -a
CONTAINER ID  IMAGE                                            COMMAND   CREATED       STATUS   PORTS     NAMES
db5dda4753c0 registry.fedoraproject.org/fedora-minimal:latest /bin/bash 40 minutes ago Up 40 minutes ago fosslinux_fedora_001
a3290c9b553b localhost/fosslinux_fedora_imported:latest cate testfile 14 minutes ago Created fosslinux_fedora_imported
To remove the fosslinux_fedora_imported container:
$ podman rm fosslinux_fedora_imported
To remove a running container ( fosslinux_fedora_001), first, stop the container and then remove it:
$ podman stop fosslinux_fedora_001
$ podman rm fosslinux_fedora_001
To remove multiple containers:
$ podman rm fosslinux_fedora_001 fosslinux_fedora_002 fosslinux_fedora_003
To remove all containers:
$ podman rm -a
Fun fact:
A group of whales is called a pod. There can be between two to 30 whales in one pod
Managing pods
A container is the smallest unit you can manage with the Podman container tool. A Podman pod is a group of one or more containers. The concept of pods was introduced by Kubernetes and is defined as the smallest compute units that you can create, deploy, and manage in Kubernetes or OpenShift environments.
All Podman pods include an infra container that stores the namespaces associated with the pod and allows Podman to connect other containers to the pod. The infra container will enable you to start, stop, and manage containers within the pod.
Creating pods
To create an empty pod:
[#####@fedora ~]$ podman pod create --name fosslinux_001_pod
e5a46d8de36304c450a4e35fb873eb35dd38be5462d6540531827747e774581f
To list all pods:
$ podman pod ps
[#####@fedora ~]$ podman pod ps
POD ID         NAME             STATUS CREATED       INFRA ID     # OF CONTAINERS
e5a46d8de363 fosslinux_001_pod Created 2 minutes ago e57bf4a36645 1
Note that the pod has one container in it.
To run a container(fosslinux_fedora_002) in an existing pod (fosslinux_001_pod):
[#####@fedora ~]$ podman run -dt --name fosslinux_fedora_002 --pod fosslinux_001_pod registry.fedoraproject.org/fedora-minimal:latest /bin/bash
4add4683501677ba1e16acfcc42b7f3cc8637b37bb73b9f4832cc8b8f3290098
To list all pods:
[######@fedora ~]$ podman pod ps
POD ID        NAME             STATUS  CREATED        INFRA ID    # OF CONTAINERS
e5a46d8de363 fosslinux_001_pod Running 10 minutes ago e57bf4a36645 2
Notice that the pod has two containers.
List all pods and containers associated with them:
$ podman ps -a --pod
Getting pod information
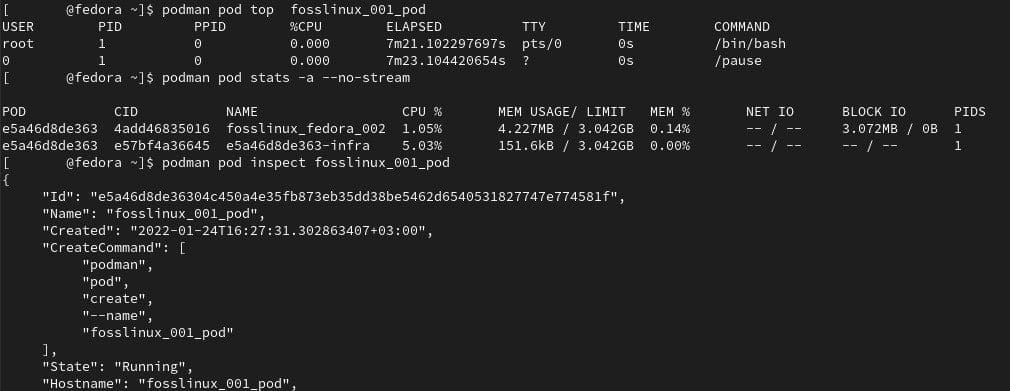
You can use the top command to display the running processes of containers in a pod:
$ podman pod top fosslinux_001_pod
To display a live stream of resource usage stats for containers in a pod.
$ podman pod stats -a –no-stream
To display information describing the pod:
$ podman pod inspect fosslinux_001_pod
[#####@fedora ~]$ podman pod inspect fosslinux_001_pod
{
"Id": "e5a46d8de36304c450a4e35fb873eb35dd38be5462d6540531827747e774581f",
"Name": "fosslinux_001_pod",
"Created": "2022-01-24T16:27:31.302863407+03:00",
"CreateCommand": [
podman inspect, stats
Stopping pods
Use the podman pod stop command to stop one or more pods.
$ podman pod stop fosslinux_001_pod
Removing pods
Use the podman pod rm command to remove one or more stopped pods and containers.
$ podman pod rm fosslinux_001_pod
To check that all containers and pods were removed:
$ podman ps
$ podman pod ps
Working with privileged and unprivileged Podman containers
By default, Podman containers are unprivileged are only allowed limited access to devices running them.
Attributes of privileged containers
- It disables the security features such as read-only mount points, Apparmor/SELinux separation, Seccomp filters, dropped Capabilities, and limited devices that isolate the container from the host.
- A privileged container has the same access to the machine as the user launching the container.
- It cannot have more privileges than the user account that launched them.
Running Podman with extended privileges
You should exercise caution while running a container with extended privileges since it disables all security features.
To run a Podman container in the Podman container:
$ podman run --privileged --name=fosslinux_privileged_podman registry.access.redhat.com/ubi8/podman podman run ubi8 echo HELLO
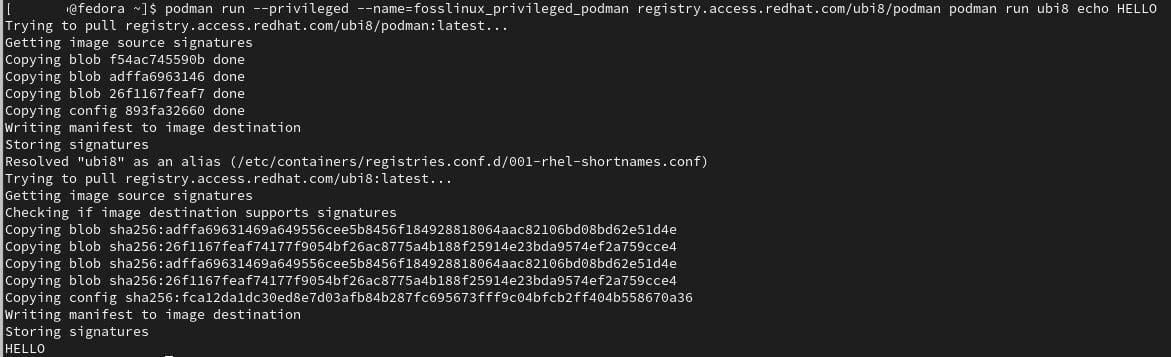
podman privileged
Notes:
- The –privileged flag option disables the security features that isolate the container from the host.
Running Podman with less privileges
A more secure option of running two nested Podman containers is without the –privileged option.
To run two nested containers:
$ podman run --name=fosslinux_unprivileged_podman --security-opt label=disable --user podman --device /dev/fuse registry.access.redhat.com/ubi8/podman podman run ubi8 echo HELLO
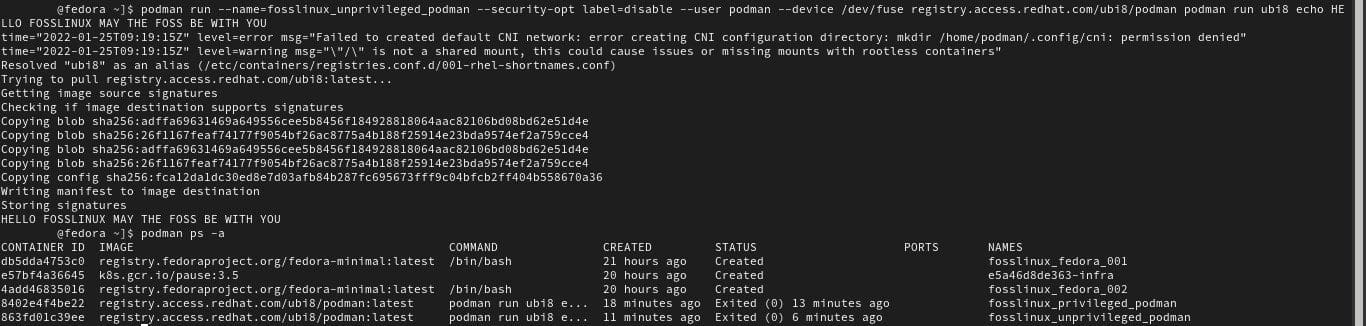
unprivileged podman
Notes:
- –security-opt label=disable flag options disables SELinux separation on the host Podman.
- –user podman flag option causes Podman in the outer container to run within the user namespace.
To list all containers:
$ podman ps -a
Monitoring containers
Podman provides several commands to manage your Podman architecture to determine the health of containers, monitor Podman events, and display system and pod information. The Podman healthcheck command consists of the command and scheduling components such as retries, interval, start-period, and timeout. Note that healthchecks run inside a container.
- Command – executes the command inside the container.
- Retries – sets the number of failed healthchecks that need to occur before your container is marked “unhealthy”.
- Start-period – defines the time between when the container starts and when to ignore healthcheck failures.
- Interval – defines the time between running the healthcheck command.
- Timeout – defines a time the healthcheck must complete before being considered unsuccessful.
To define a healthcheck:
$ podman run -dt --name health_check_001 -p 8080:8080 --health-cmd='curl http://localhost:8080 || exit 1' --health-interval=0 registry.access.redhat.com/ubi8/httpd-24
The flap option –health-cmd sets a healthcheck command for your container.
Use the -health-interval=0 flag option with 0 value to run the healthcheck manually.
To run the health check manually:
$ podman healthcheck run health_check_001
Display Podman system information
Use the podman system command to manage and display Podman system information.
To display Podman disk usage:
$ podman system df
To display detailed information on disk usage:
$ podman system df -v
To display host information, storage stats, and build of Podman:
$ podman system info
To remove all unused images, containers, and volume data:
$ podman system prune
Monitoring Podman event
Podman consists of several event types that you can monitor to determine different statuses.
Container event types
You can generate the following statuses from container event types.
- attach
- commit
- init
- kill
- remove
- start
- restore
- checkpoint
- create
- import
- mount
- restart
- stop
- unmount
- Cleanup
- export
- exec
- prune
- pause
- sync
- unpause
Pod event types
You can generate the following statuses from pod event types.
- create
- pause
- start
- unpause
- Kill
- remove
- stop
Image event types
You can generate the following statuses from image event types.
- prune
- pull
- save
- tag
- push
- save
- remove
- untag
System event types
You can generate the following statuses from system event types.
- Refresh
- renumber
Volume event types
You can generate the following statuses from volume event types.
- Create
- remove
- prune
To display all Podman events:
$ podman events
To show specific Podman events:
$ podman events --filter event=restore
$ podman events --filter event=push
Wrapping up
Containers function just like processes running on your local system, without configuring a virtual machine or an emulated environment. On the longer side, the article is an intermediate guide to the podman tool. You will get examples of building, running, and managing container images, containers, and pods using the Podman tool. Once you configure Podman in your system, containers feel more like commands than virtual environments. It makes containers, images, and pods easy to configure and manage. I highly recommend you give Podman a try if you haven’t already!