
We have previously looked at how you can create a bootable USB drive of various Linux distributions from a Windows PC. Some of these posts include Creating a Linux Mint Live USB drive on Windows and create a bootable Ubuntu Live USB drive on Windows using tools like Rufus and PowerISO. This post will do the reverse – How to create Windows 10 USB installation Drive in Linux.
Requirements
- Windows 10 ISO file
- A USB drive (at least 8GB)
- Root privileges
- An active internet connection to download some of the tools
Creating Windows 10 USB installation Drive in Linux
To get started, download the Windows 10 ISO file from their official website. Earlier versions were around 4GB in size, but I saw the latest version is nearly 5.7GB. That’s why I recommend you have a USB drive with at least 8GB of space. However, if you are using an earlier Windows ISO version (maybe Windows 10 2015), which is about 3.6GB, a 4GB-USB Drive would be okay.
Format the USB Drive
Even though we will look at various methods you can use to make the USB drive bootable, always ensure your USB is formatted with the right file format. We will use the disk utility that comes pre-installed with most Linux distribution and Gparted. Note: GParted is not pre-installed in most Linux distribution, but it’s one of the best tools to manage and partitions your disks. Our post on How to safely create or resize partitions in Linux using GParted can give you a little more insight into this fantastic tool.
Format USB with Disks Utility
Step 1. Insert/Plug your USB drive and launch the Disks utility from the applications menu.

Launch Disks
Step 2. The Disk Utility window will open, listing all the available Hard drives and USB drives connected to your PC. Select your USB drive. From the image below, you can see I have my 8GB USB drive selected.
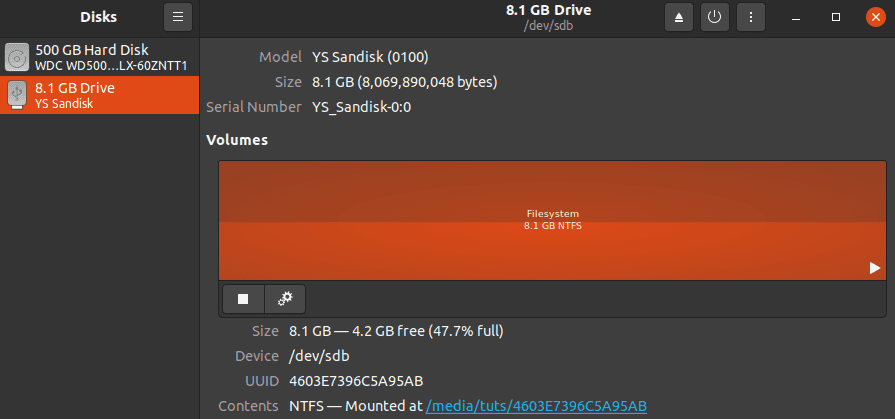
Disk Utility
Step 3. With your USB selected, click on the Settings button (represented with a gear icon). A menu will pop-up with several options. Select the first option, which is ‘Format.’
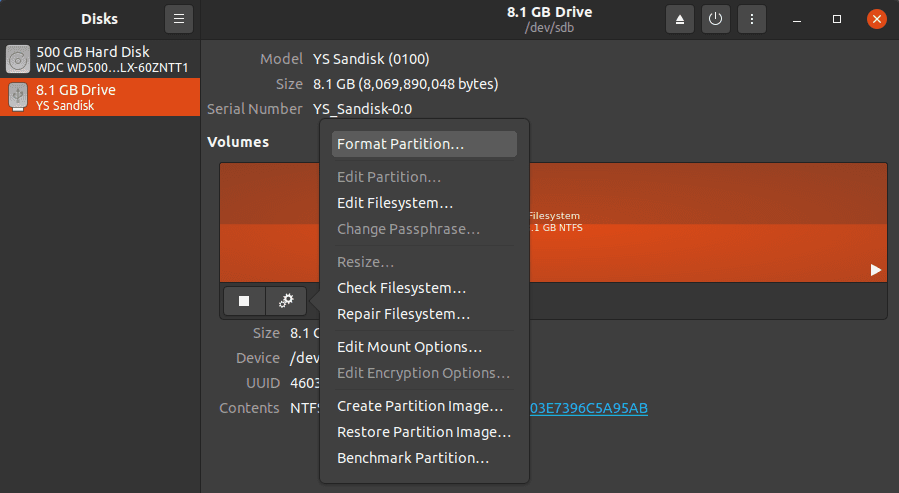
Open Settings
Step 4. A window will pop-up listing several options. Enter the Volume Name (can be any) and select the file format you want to use.
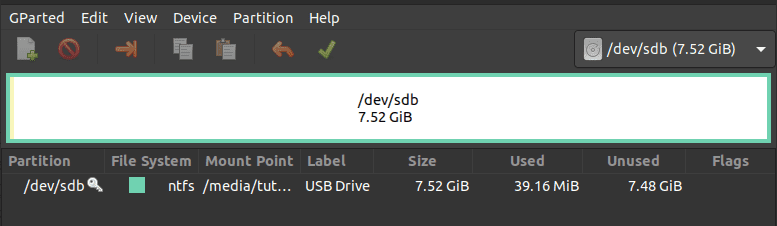
Note: If your Windows ISO file is less than 4GB, you can select the FAT option. However, if it’s bigger than that, use the NTFS option as I have done on the image below. That is because the FAT file system only supports a maximum file size of 4GB; for any file more extensive than 4GB, use exFAT or NTFS. Click Next when done.
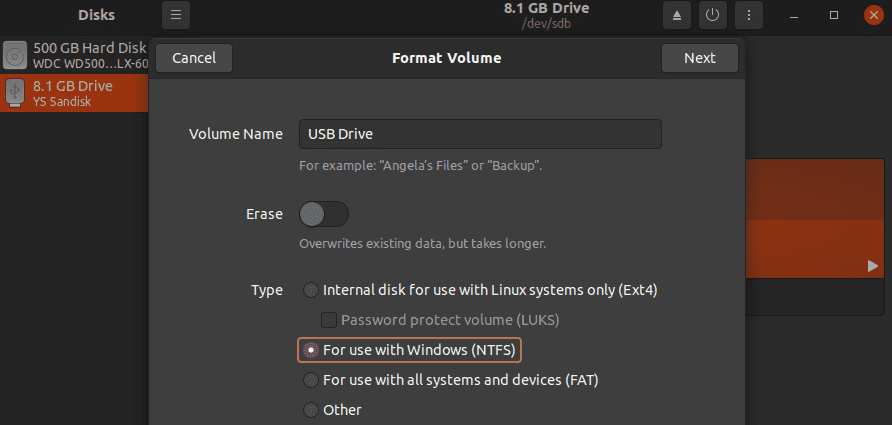
Format USB
Step 5. You will see a warning – “all data on the volume will be lost.” You can also see the configurations below. Click on Format to finalize the process.
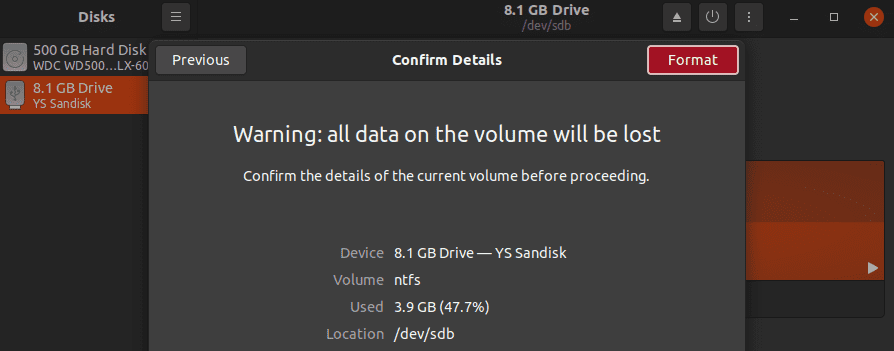
Confirm and Format USB
Once the format process complete, you can now create a bootable USB drive of Windows.
Format USB with GParted
Gparted is a free Disk manager utility available for most Linux distributions. It creates, resize, and move partitions, format and also create partition tables.
To install Gparted, execute any of the commands below depending on your distribution.
-
Ubuntu/Debian
sudo apt install gparted
-
Fedora
su -c "yum install gparted"
-
Mageia
sudo urpmi gparted
-
OpenSUSE
sudo zypper install gparted
Once you have successfully installed GParted, proceed to launch it from the applications menu or execute the command GParted on the Terminal. Note: GParted requires root privileges. You will, therefore, be required to enter your Root password.

Launch GParted
Select your USB drive from the drop-down menu at the top-left corner.
Select USB drive
Right-click on your USB drive and select the Format option. Use the NTFS file system. If you don’t see these options (or they are greyed out), you might need to unmount your USB drive first. You will see the unmount option when you right-click on the USB.
Once done, click on the Green tick at the top to apply the changes.
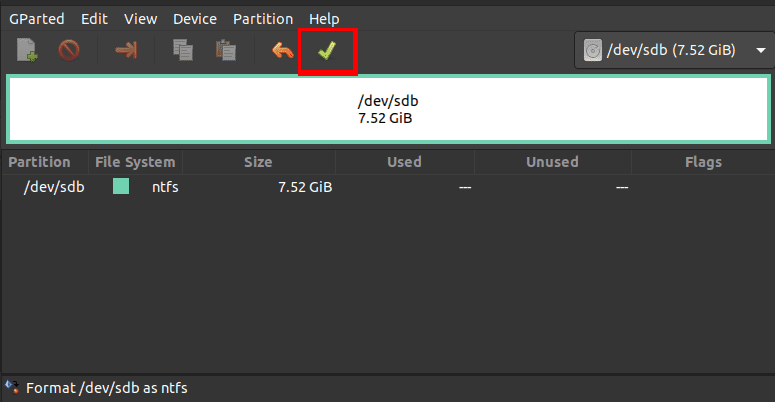
Apply Changes
Let’s now look at the various methods you can use to create a bootable USB drive of Windows on Linux.
1. Create a bootable Windows USB with Disk Image Mounter
Step 1. Launch the File Manager and navigate to the directory containing your Windows ISO file. Right-click on it and select the option “Open with Disk Image Mounter.”
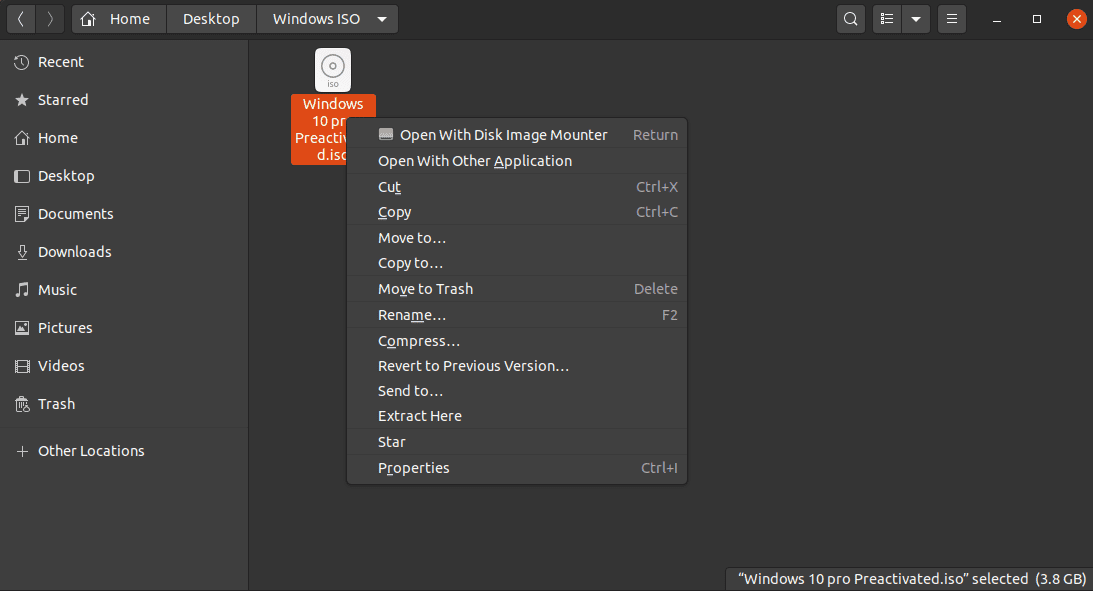
Disk Image Mounter
Step 2. The Windows ISO file will be mounted as a drive, and you can find it on the left side of the file manager. For some, you might need to click on “Other Locations” to see the mounted Windows ISO.
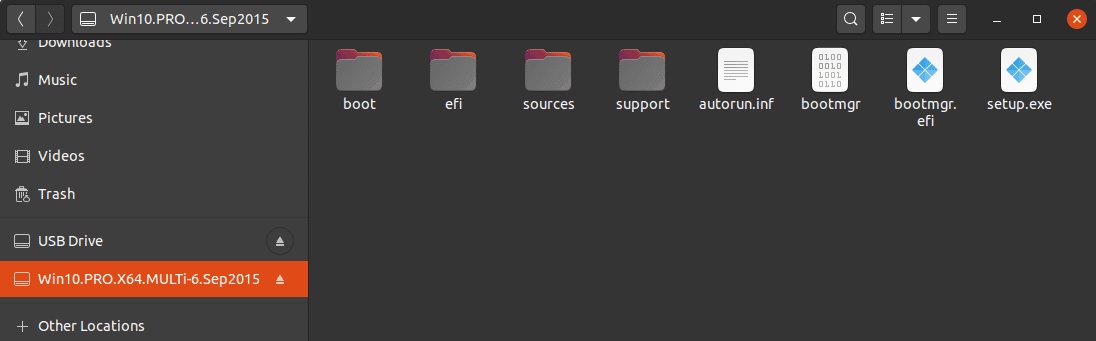
Mount Windows ISO
Step 3. Click on the mounted Windows ISO and copy all the contents to the USB drive. You can use the shortcuts Ctrl + A to select everything, Ctrl + C to copy, and Ctrl + V to paste the files to the USB drive.
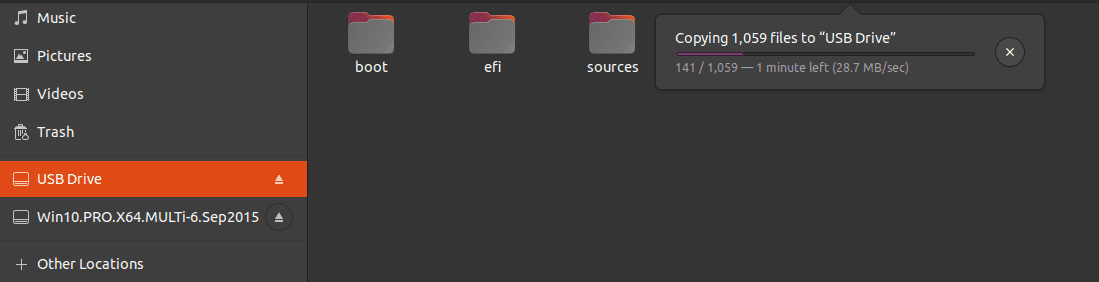
Copy Files to USB
Now, wait for the process to complete. Once done, you can proceed to eject your PC from the file manager. Do this by right-clicking on the drive and clicking the eject option. You might get an error like “Do not unplug the drive until the write process has finished.” Please wait for a while until you see the notification, “can be safely removed.”
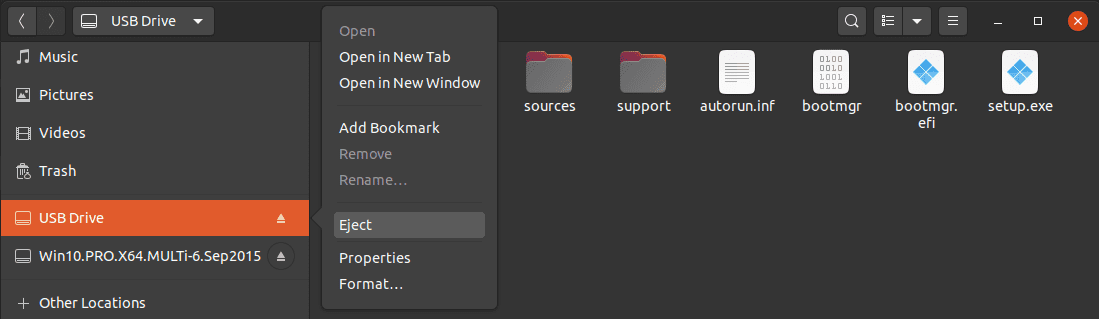
Eject USB Drive
Note: From my experience working with Linux systems, never remove/unplug your USB drive from your PC without ejecting it from the file manager first. That’s especially when copying files. Even though it might show a “tick,” which means the copying process is complete, that might not be the case, and you will lose data if you forcefully unplug it without ejecting it.
If you did everything correctly, you now have a bootable USB drive of Windows 10. You can proceed to use it to boot up your PC and install Windows 10.
2. Create a bootable Windows USB with WoeUSB
WoeUSB is a Linux tool used to create a bootable USB drive for Windows. The tool is available in two formats. The woeusb program runs on the command-line and the woeusbgui, which presents a graphical interface. WoeUSb is free, and the source code is available on GitHub.
Install WoeUSb
Below are the installation procedure and commands for various Linux distributions.
-
Ubuntu/Debian
sudo add-apt-repository ppa:nilarimogard/webupd8
sudo apt update
sudo apt install woeusb
Alternatively, you can download the DEB file from the link below;
Note: If you get an error like “woeusb : Depends: libwxgtk3.0-0v5 (>= 3.0.4+dfsg), but it is not installable – E: Unable to correct problems, you have held broken packages” while executing the commands above, download and install the libwxgtk package from this link. Once done, try installing WoeUSB again.

Broken package error
-
Fedora
To install WoeUSb on Fedora, we will use the Snap package format. Execute the commands below:
sudo dnf install snapd
sudo ln -s /var/lib/snapd/snap /snap
sudo snap install woe-usb --edge
-
Linux Mint
use the commands below:
sudo add-apt-repository ppa:nilarimogard/webupd8
sudo apt update
sudo apt install woeusb
-
Elementary OS
Like Fedora, use the snap package manager to install WoeUSb on Elementary OS:
sudo apt update
sudo apt install snapd
sudo snap install woe-usb --edge
If you are using any other Linux distribution that is not mentioned above, use Snap to install WoeUSb. Now, let’s proceed and see how you can create a bootable USB drive of Windows in Linux systems.
Step 1. Format the USB drive. Use any of the methods described above.
Step 2. Once you have successfully installed WoeUSB, launch it from the applications menu.

Launch WoeUSB
The main WoeUSB window will open. It contains three main sections. The Source section is where you will select the Windows ISO file you want to use. In the File system section, select the file system format you want to use – whether FAT or NTFS. The final section is the Target device. Here, you will need to select the destination USB drive that you want to make bootable.
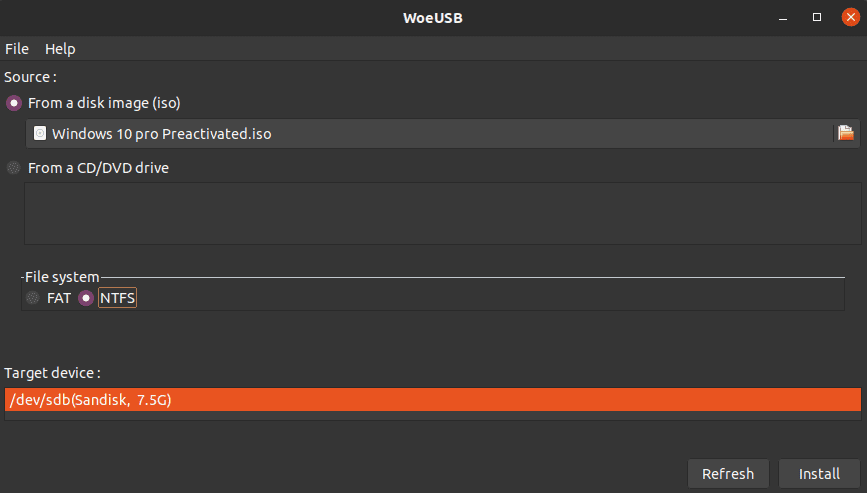
WoeUSB main window
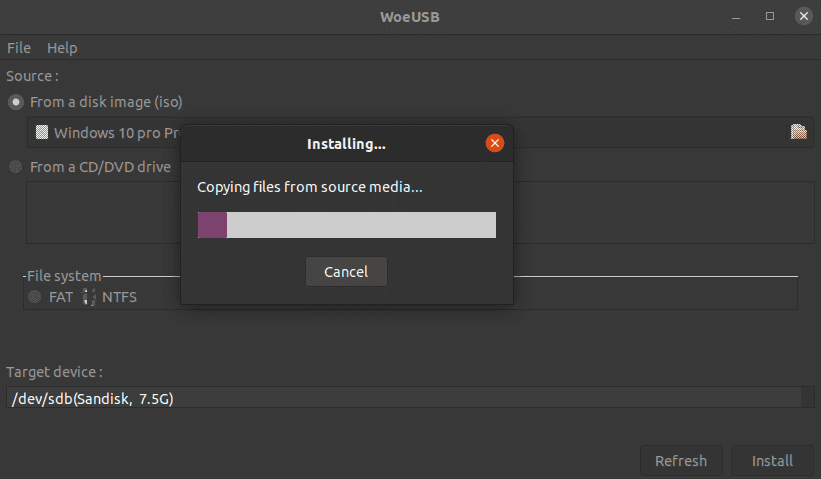
Step 3. After you have selected the ISO file, chosen the file system format to use, and the destination USB drive, click on the Install button at the bottom right. WoeUSB will start copying the files to the destination USB drive.
WoeUSB
Note: It might take some time to make the USB drive bootable (up to 15 minutes). You might see the “Done” notification but don’t eject the USB drive until you see an “Installation Success” pop-up window.
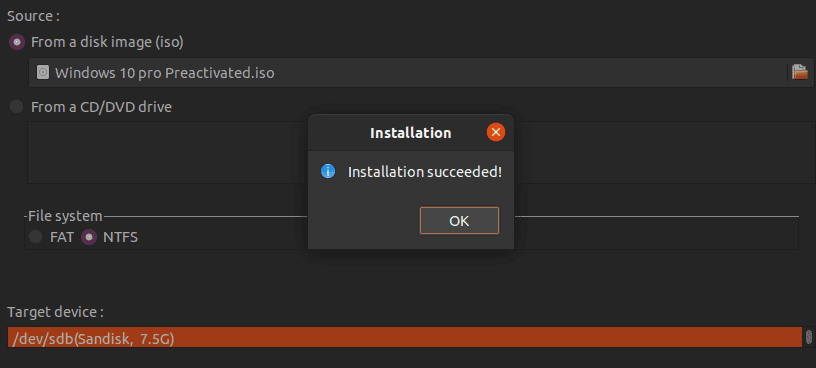
Installation Success
Step 4. Click OK and close the WoeUSb window. You can now eject the USB drive from the file manager and use it to boot and install Windows.
3. Create a bootable Windows USB with UNebootin
UNetbootin is a cross-platform utility used to create a bootable USB drive. Unlike WoeUSb, which supports only Windows ISO files, UNetbootin can also create bootable USB drives of Linux files. One additional exciting feature with the UNetbootin is it is available as a bin file. Therefore, you are only required to make it executable and run it. You don’t need to install it.
Step 1. Download UNetbootin bin file.
To download the 64bit file of UNetbootin, execute the command below.
wget https://github.com/unetbootin/unetbootin/releases/download/675/unetbootin-linux64-675.bin
To download the 32bit file of UNetbootin, execute the command below:
wget https://github.com/unetbootin/unetbootin/releases/download/675/unetbootin-linux-675.bin
In my case, I will download the 64bit file.
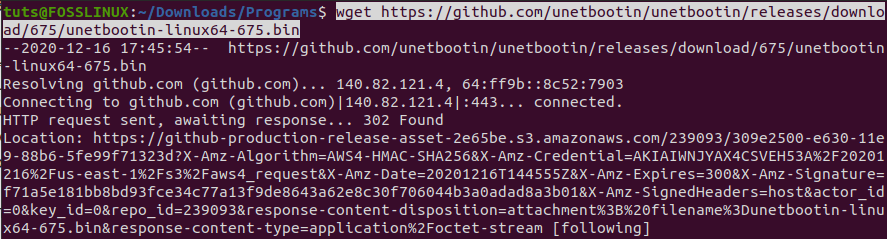
UNetbootin 64bit
Step 2. Make the UNetbootin bin file executable with the command below
chmod +x unetbootin-linux64-675.bin

Make the file executable
Step 3. Once done, you can proceed to run the bin file. Execute the command below to run UNetbootin as root.
sudo QT_X11_NO_MITSHM=1 /home/tuts/Downloads/Programs/unetbootin-linux64-675.bin
Please note, you might need to change the path to point to the directory containing the Windows ISO file.

Launch UNetbootin
The UNetbootin main window will open.
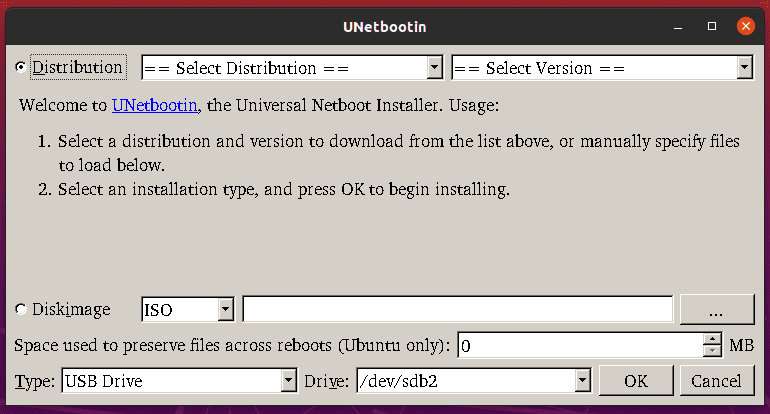
UNetbootin Main Window
Step 4. There are two main sections – Distribution and Diskimage. Select the Diskimage area and choose the path of the Windows ISO file. Just below that, select Disk Type and the USB drive. Once done, Click OK.
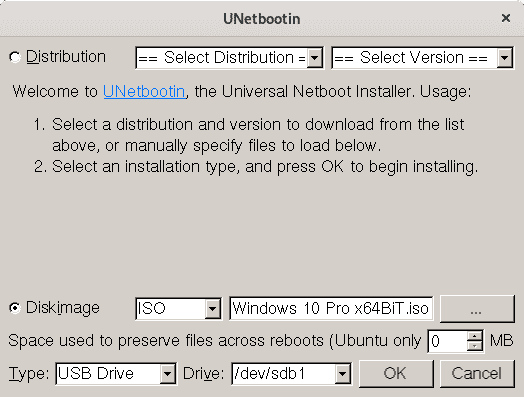
UNetbootin
Step 5. UNetbootin will start making the USB drive bootable. You can follow what’s happening on the UNetbootin window. You can track the overall progress at the bottom of the window in the progress bar.

UNetbootin Booting process
Step 6. Once done, you will see the Complete Installation message. Click on the Exit button that appears.
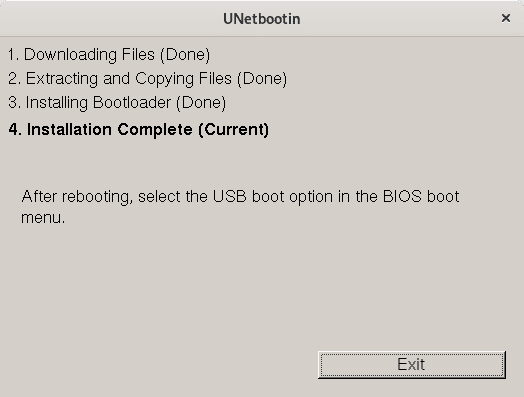
UNetbootin Finish window
You can now eject the USB from the file manager and use it to boot and install Windows.
Conclusion
That’s our complete guide on how you can create a bootable USB drive of Windows on Linux systems. Out of the three methods discussed above, I would highly recommend the Disk Image Mounter method. Do you have another way that you use to create a bootable USB drive of Windows on Linux? Please, share with our readers in the comments below. If you come across any errors executing the commands above, feel free to hit the comments.
If you are new with the whole procedure of booting your PC from a USB drive, please check out our post on How to boot your Windows or Linux PC from a USB Drive. It will give you a detailed guide on the entire process.
4 comments
All these steps are pretty neat, but why not create a Ventoy stick and just drop the ISO onto it?
Use Ventoy, it’s easier and better than it used to be.
Ventoy is the way to go.
Thank you so much for this guide!! This was the first place that mentioned the difference between FAT and NTFS and I kept getting errors when I was copying and couldn’t understand why. I really appreciate your exhaustive effort in this step by step.