
PDFs offer us one of the most convenient ways of sharing images. However, by stuffing tons of data such as images and graphics, the PDF file size can get too big to share via emails. If you are also suffering from this issue, you have come to the right place.
Here, we will show you how to compress a PDF file in Linux to reduce its size drastically. And don’t worry, we have included both GUI and Terminal methods in this tutorial.
So without any further delay, let’s get started:
Compress PDF File using Linux Command Line
We’ll start with reducing the PDF File Size using the Linux Terminal. Now, there are two distinct ways to do this. The first one uses GhostScript and the second one uses ps2pdf. Both of these methods are useful in their own ways, which is why we will discuss both of them.
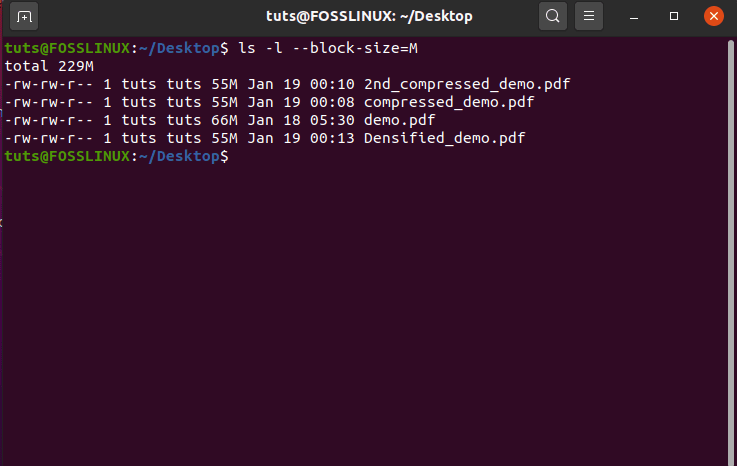
Note: For this tutorial, we’ll be using a demo PDF file on our system called – “demo.pdf.” The uncompressed file is 66 MB in size.
1. Reduce PDF File Size Using GhostScript
GhostScript is a command-line utility that consists of a PostScript interpreter layer and a graphics library. You can use this to interpret PostScript and PDF files and reduce the overall file size.
Now, GhostScript generally comes pre-installed on all popular Linux Distributions. However, if it’s not installed on your specific distro for some reason, you can easily install it using your package manager.
If you’re on Ubuntu, you can install it from APT using the following command:
# sudo apt install ghostscript
Now installed, you can use the next command to compress any PDF files to a more manageable size.
# gs -sDEVICE=pdfwrite -dCompatibilityLevel=1.4 -dPDFSETTINGS=/screen -dNOPAUSE -dQUIET -dBATCH -sOutputFile=output.pdf input.pdf
The “output.pdf” and “input.pdf” are just placeholders. You’ll need to replace them and input your own file names.
Also, note the term “-dPDFSETTINGS=/screen” in the command. You can actually tweak this option to fiddle with the output PDF’s size. Below is a table of the different -dPDFSETTINGS options and what they do:
| -dPDFSETTINGS options | What does it do? |
| -dPDFSETTINGS=/screen | Output files will have up to 72 DPI. |
| -dPDFSETTINGS=/ebook | Output files will have up to 150 DPI. |
| -dPDFSETTINGS=/prepress | Output files will have up to 300 DPI. |
| -dPDFSETTINGS=/printer | Output files will have up to 300 DPI, and ready for printing. |
| -dPDFSETTINGS=/default (Usually prepress) | Depends on which of the above options is assigned as “default.”
Out of the box, /prepress is the default. |
Now that you know how to use this command-line utility let’s see how it manages to reduce the 66 MB “demo.pdf” file.
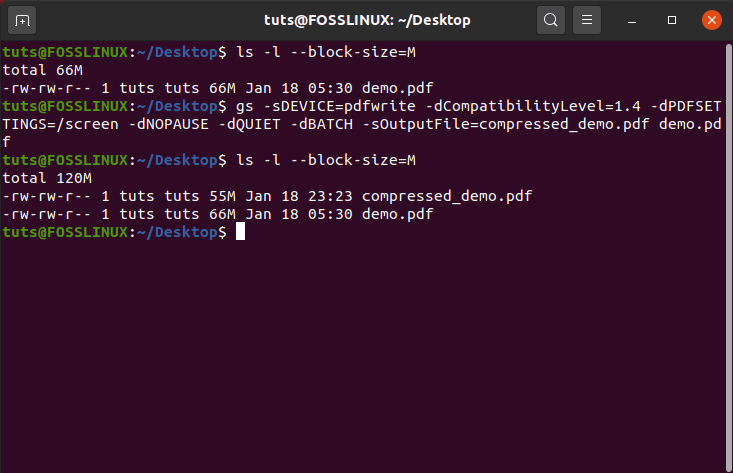
As you can see, this command reduced the 66 MB “demo.pdf” file to the 55 MB “compressed_demo.pdf” file.
2. Reduce PDF File Size Using ps2pdf
Next, let’s see how we can use ps2pdf to reduce the PDF file size.
The ps2pdf script comes bundled in with GhostScript and is used to convert PostScript files to PDF files and vice versa.
We’ll use this command to convert the “input.pdf” to PostScript and then back again to pdf. This back and forth conversion will ultimately reduce its overall file size by a significant margin.
Here is the command format for doing this:
# ps2pdf input.pdf output.pdf
Same as before – the “input.pdf” and “output.pdf” are merely placeholders, and you should replace this with the actual file names.
Furthermore, in our experience, we have noticed that using the -dPDFSETTINGS=/ebook option results in the best possible compression where the file size is reduced without affecting the overall quality of the PDF.
As such, you should use this command:
# ps2pdf -dPDFSETTINGS=/ebook input.pdf output.pdf
So with that out of the way, let’s see how well this method performs in reducing the file size of the 66 MB “demo.pdf” file.

As you can see, even using this method, we end up with the same result with a 55 MB compressed file size.
However, that might not always happen. In our case, the PDF file we used includes a combination of images and text. But, if your PDF is text-only or image-only, then you might end up with varying results.
Reduce PDF File Size Using GUI (Graphical User Interface)
As you may already know, most PDF editors found on Linux offer barebone functionalities, especially when it comes to compressing the file sizes.
This is why we will be using Densify – which is basically the GUI front-end of the GhostScript utility. The best thing about using this tool is to work on any Linux distro since it only uses Python3 and the corresponding GTK modules.
But that being said, it’s not available to most package managers. So we’ll have to download it from Github. Once downloaded, the installation process is fairly simple. There are detailed instructions on the Github page for you to follow to guide you through the installation step-by-step.
Once it is installed, you should see it pop-up in the app drawer.
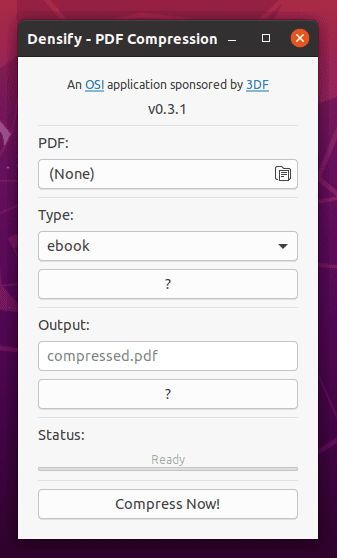
Here is a look at the Densify user interface:
Now, let’s see how well it compresses the demo.pdf file.
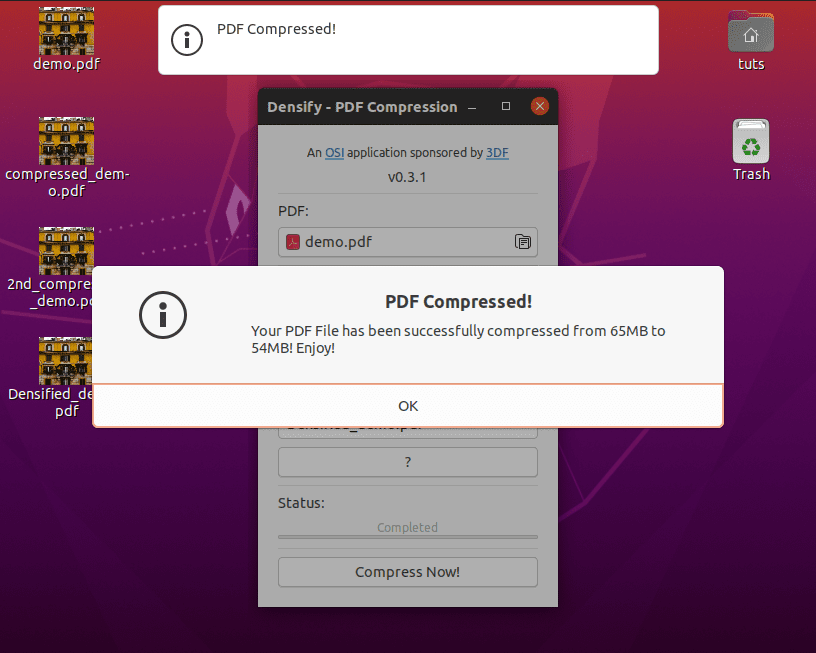
As you can see, it reads the file size of the demo.pdf as 65 MB and compresses it to 54 MB. However, let’s see what the terminal has to say about this:
So yes, even using Densify, the file size is reduced to 55 MB, just like the other compressed versions of the original 66 MB demo.pdf. Again, this was expected since Densify is using the GhostScript command-line utility.
Wrapping Up
So, these were the two ways to compress PDF files on Linux using GUI and the Terminal.
We hope you found this tutorial educational and that it has helped you reduce the size of your own PDF files. And if you want to learn more about Linux and become more proficient and productive, check out our Learn Linux series of articles.
3 comments
Some more flags to add for improved compression are:
-dDetectDuplicateImages=true -dEmbedAllFonts=false -dSubsetFonts=true -dConvertCMYKImagesToRGB=true -dCompressFonts=true
The fonts settings can make a huge difference in some cases, such as when downloading a Google Doc which uses multiple big webfonts.
Perfectly explained, you even took the trouble to explain the details, which other pages don’t do
Thank you so much for this great, detailed explanation. It really did help.