
Creating a bootable USB drive for Windows 10/11 in Linux can be challenging for some users, especially those new to Linux. A bootable USB drive is essential when installing Windows on a computer, as it allows you to bypass traditional installation methods such as a CD/DVD or over the network. It can also be used for system recovery or troubleshooting purposes.
This article is a step-by-step guide on creating a bootable Windows 10/11 USB drive in Linux. It will cover everything you need to know, from the tools you need to the actual installation process. So if you’re a Linux user wanting to install Windows on your computer or create a bootable USB drive for system recovery purposes, this article is for you.
Creating a bootable Windows 10/11 USB in Linux
Prerequisites
Before you can create a bootable Windows 10/11 USB drive in Linux, you will need to make sure you have the following prerequisites:
- A Linux distribution installed on your computer. Ubuntu, Arch Linux, Fedora, and CentOS are popular Linux distributions you can use. (I will use Ubuntu 22.04 for illustration purposes)
- A Windows 10/11 ISO file. You can download the latest Windows 10/11 version from the official Microsoft website.
- A USB drive with at least 8GB of storage capacity.
Using WoeUSB
WoeUSB is a powerful tool that allows you to create bootable Windows USB drives from ISO images on Debian-based distros. There are two methods to install WoeUSB: using the PPA repository or using a bash script. Let’s explore both methods:
Installing WoeUSB on Debian-based Linux derivatives
Follow the section below to find out how to install WoeUSB on Debian-based Linux derivatives:
Step 1: Downloading and Installing WoeUSB
There are several distinct methods that can be used to download and install WoeUSB on Debian-based distros. To get a glimpse at some of them, check out the subsequent sections:
Method 1: Using PPA to Install WoeUSB
Step 1: Add the WoeUSB PPA
Launch the terminal by pressing “CTRL+ALT+T” and add the WoeUSB PPA to your Ubuntu system with the following command:
sudo add-apt-repository ppa:tomtomtom/woeusb -y
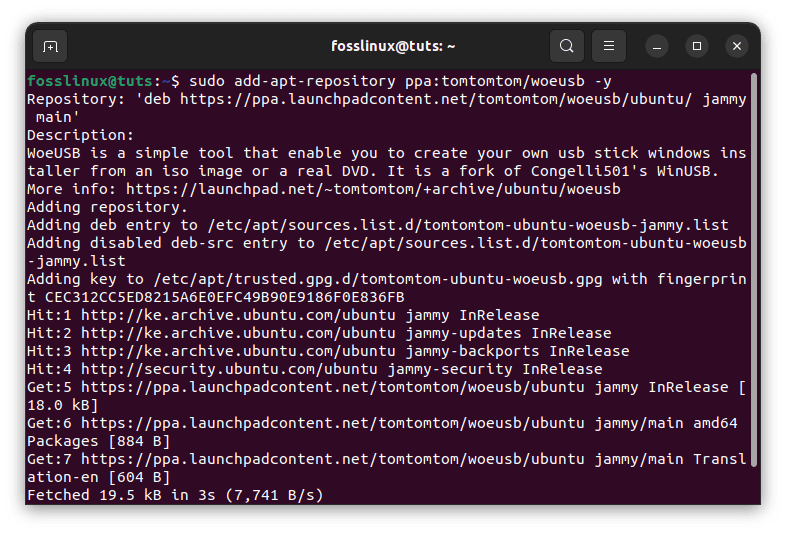
Add woeusb PPA
Step 2: Update Ubuntu Core Libraries
After adding the PPA, it’s essential to update the core libraries of Ubuntu:
sudo apt update
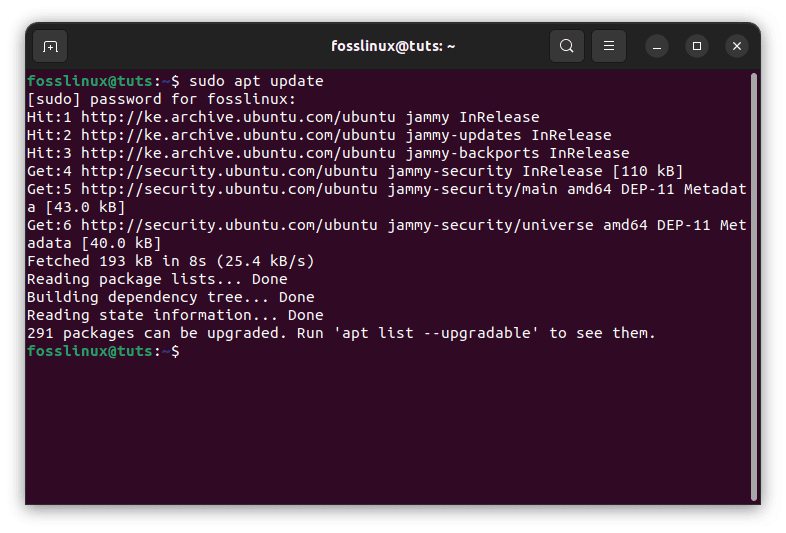
Update system resources
Step 3: Install WoeUSB
Once the repositories are updated, you can install both the CLI and the GUI support for WoeUSB with the following command:
sudo apt install woeusb woeusb-frontend-wxgtk -y
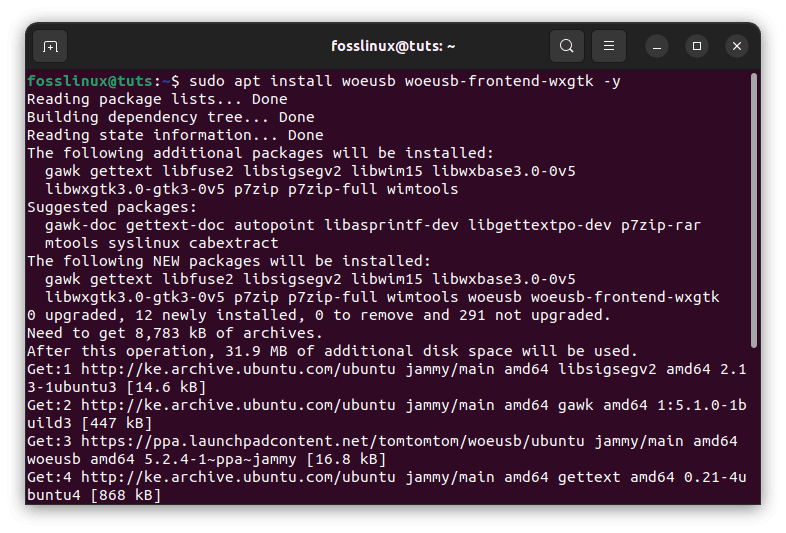
Install woeusb
If you only need the CLI (Command Line Interface) of WoeUSB, you can install it separately:
sudo apt install woeusb -y
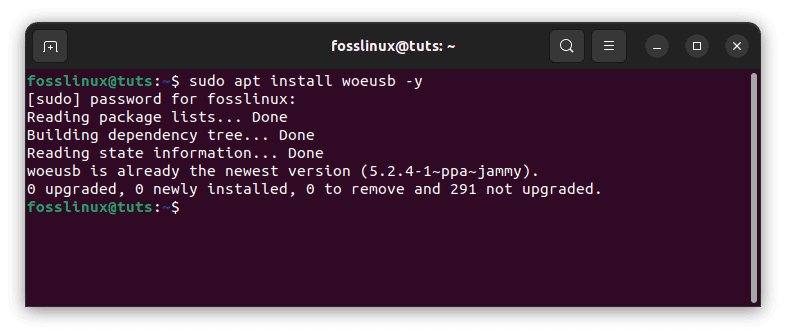
Install woeusb cli
To verify that WoeUSB is successfully installed, run the following command:
woeusb -h
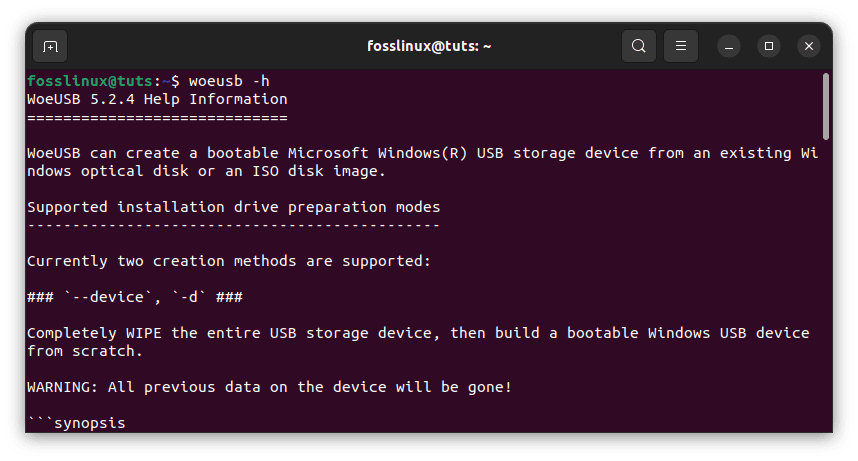
Verify is woeusb was successfully installed
This command will display the version and possible usage of the WoeUSB tool.
Launching the WoeUSB GUI
To launch the WoeUSB GUI, run the following command:
woeusbgui
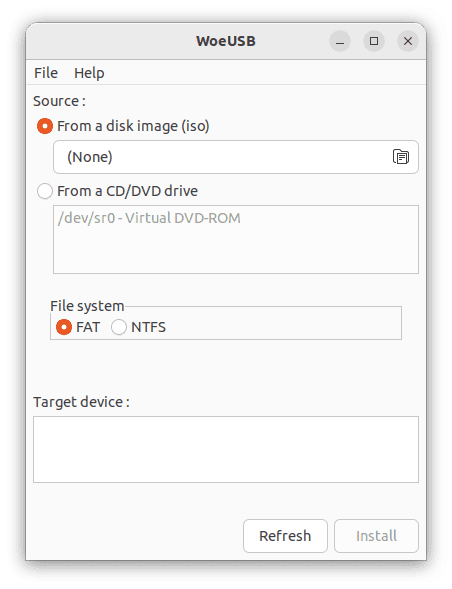
Launch woeusb
The WoeUSB GUI will be launched and ready to use.
Method 2: Install WoeUSB Using a Bash Script
The second method involves installing WoeUSB using a bash script available on GitHub. Follow these steps:
Step 1: Download the Script
Download the latest bash script of WoeUSB from the GitHub repository. The downloaded file will appear in the “Downloads” directory of Ubuntu.

Download woeusb bash script
Step 2: Make the Script Executable
Open the terminal and make the bash script executable with the following command:
cd Downloads

chmod +x woeusb-5.2.4.bash
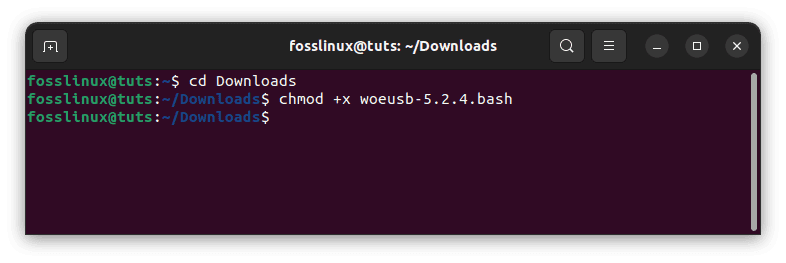
Make script file executable
Step 3: Install the Wimtool Utility
Before executing the script, install the “wimtools” utility, which is required for WoeUSB to function properly:
sudo apt install wimtools
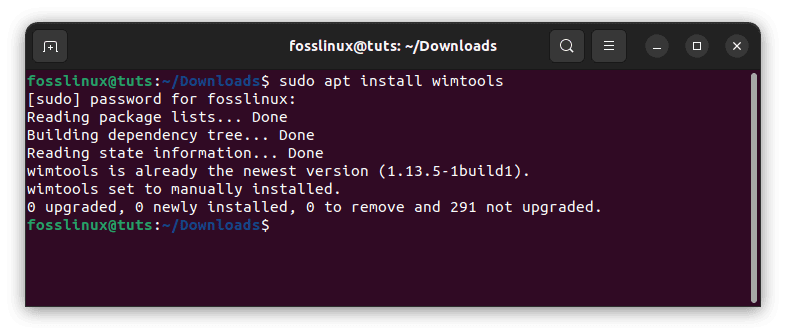
Install the wimtools utility
Step 4: Execute the Bash Script
Run the bash script with the following command:
./woeusb-5.2.4.bash
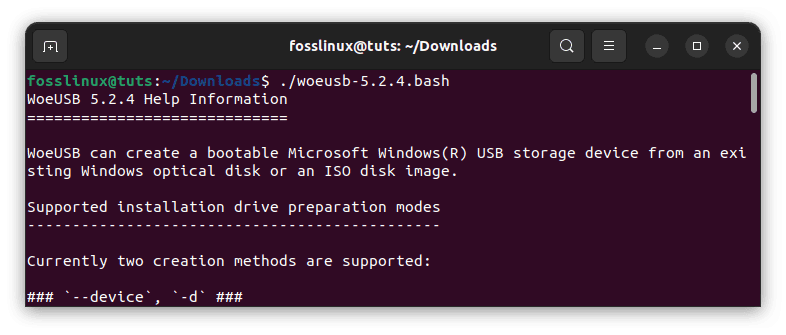
Execute the bash script file
The WoeUSB Command Line Interface will now be ready to use.
Installing WoeUSB on Other Linux Distros
WoeUSB is not limited to Ubuntu or Debian-based Linux distributions; it can be installed on various other Linux distros as well. The installation process could differ slightly depending on the package manager used by the specific Linux distro. Below are the steps to install WoeUSB on Arch Linux, Fedora, and CentOS:
Installing WoeUSB on Arch Linux
To install WoeUSB on Arch Linux, follow the steps provided below:
Step 1: Open a Terminal
First, open a terminal on your Arch Linux system. You can do this by clicking the “CTRL+ALT+T” keyboard combination or by searching for “Terminal” in the application launcher.
Step 2: Install WoeUSB
Use the following command to install WoeUSB from the AUR (Arch User Repository):
yay -S woeusb-git
The above command assumes you have an AUR helper like “yay” installed. If you don’t have an AUR helper, you can install “woeusb-git” manually by cloning the AUR repository and building the package. Here’s how you can do it:
git clone https://aur.archlinux.org/woeusb-git.git cd woeusb-git makepkg -si
Enter your password when prompted to proceed with the installation.
Step 3: Launch WoeUSB
Once the installation is complete, you can start WoeUSB by running the following command in the terminal:
woeusbgui
The WoeUSB graphical user interface (GUI) will be launched, and you can now use it to create bootable Windows USB drives from ISO images.
WoeUSB is now successfully installed on your Arch Linux system. You can employ this powerful tool to create bootable USB drives for Windows 11/10 and other Windows operating systems. Enjoy the convenience of WoeUSB’s user-friendly interface and create bootable media effortlessly.
Installing WoeUSB on Fedora
To install WoeUSB on Fedora, use the following steps:
Step 1: Open a Terminal
Open a terminal on your Fedora system. You can do this by clicking the “CTRL+ALT+T” keyboard combination or by searching for “Terminal” in the application launcher.
Step 2: Install WoeUSB
Use the following command to install WoeUSB from the official Fedora repositories:
sudo dnf install woeusb
Enter your password when prompted to proceed with the installation.
Step 3: Launch WoeUSB
Once the installation is complete, you can start WoeUSB by running the following command in the terminal:
woeusbgui
The WoeUSB graphical user interface (GUI) will be launched, and you can now use it to create bootable Windows USB drives from ISO images.
WoeUSB is now successfully installed on your Fedora system. You can employ this powerful tool to create bootable USB drives for Windows 11/10 and other Windows operating systems.
Installing WoeUSB on CentOS
Please note that CentOS may not have an official package for WoeUSB. However, you can still use the WoeUSB bash script method, as shown in the “Install WoeUSB Using a Bash Script” section in the previous instructions. The bash script method allows you to install WoeUSB on CentOS without relying on specific repositories or package managers.
To use the bash script method, follow the steps provided in the previous section (“Install WoeUSB Using a Bash Script”). This method works on various Linux distros, including CentOS.
Once you have installed WoeUSB on your preferred Linux distro, you can use it to create bootable Windows USB drives from ISO images, just like on Ubuntu. WoeUSB provides a user-friendly interface for this purpose and is a reliable tool for creating bootable media. With WoeUSB, you can effortlessly create bootable Windows 11/10 USB drives on different Linux distributions.
Step 2: Insert the USB Drive
Insert the USB thumb drive into any available USB port on your Linux computer.
Step 3: Launch WoeUSB
Navigate to the ‘Activities’ section, look for ‘WoeUSB’ and launch it. If that method fails, launch your terminal and move to section 4 below and follow the subsequent steps to create a bootable Windows 10/11 USB drive using WoeUSB:
Step 4: Select the Windows ISO
Open the WoeUSB graphical user interface (GUI) by running the following command in the terminal:
woeusbgui
Launch woeusb
Click on the “From a Disk image (iso)” option in the GUI.
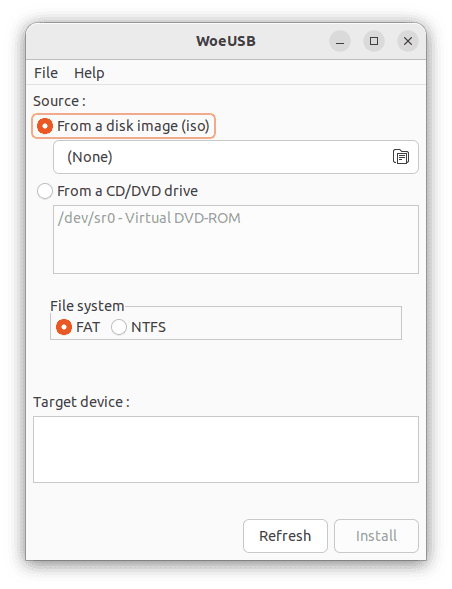
Select iso option
Navigate to the location where the downloaded Windows 11/10 ISO file is located.

Choose downloaded iso image
Select the downloaded Windows ISO file and click “Open” to load it into WoeUSB.
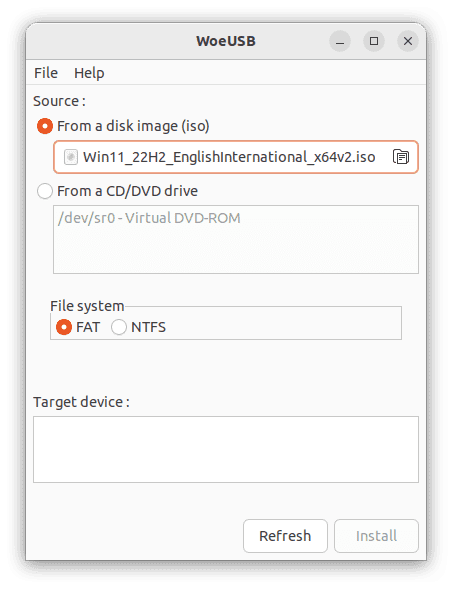
Click open to load it into woeusb
Step 5: Select the USB Drive
Choose the target USB drive you inserted earlier from the list of available drives in the WoeUSB GUI. Double-check the USB drive name to avoid accidentally overwriting any critical data.
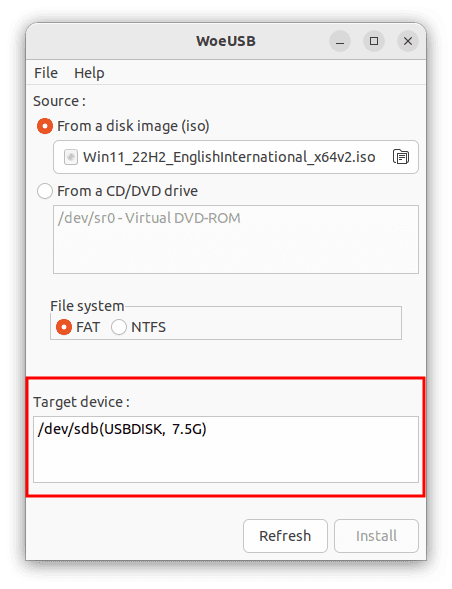
Choose target device
Step 6: Start the Creation Process
Once you have ascertained the Windows ISO and the USB drive in the WoeUSB GUI, click the “Install” button to start creating the bootable Windows USB drive. WoeUSB will format the USB thumb drive and copy the contents of the downloaded ISO file onto it. This process might take some time to complete depending on several factors, such as computer specs.
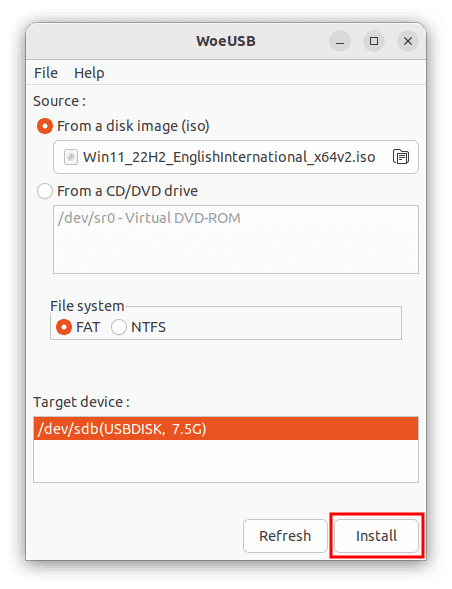
Click install button to start the creation process
Step 7: Eject the USB Drive
After the creation process is finished, you will receive a notification from WoeUSB. First, safely eject the USB drive from your computer.
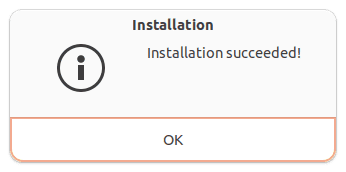
Installation process complete
Congratulations, you have successfully created a bootable Windows 10/11 USB drive in Linux using WoeUSB! However, it is essential to note that this is not the only method available for creating a bootable USB thumb drive for Windows 10/11 on Linux. Continue reading to explore other alternative methods for achieving the same result.
Step 8: Boot from the USB Drive
To install Windows 10/11 on a computer, restart the PC and access the boot menu while powering on the PC by pressing the appropriate key (usually F12 or Esc). Select the bootable USB flash drive as the primary boot device. Note that the key to access the computer’s boot menu may vary depending on your system’s manufacturer. Refer to your system’s user manual or search online for specific instructions.
Step 9: Install Windows
Your PC will boot from the selected USB drive, and you can install Windows 11/10 by following the on-screen instructions.
Following the steps above, you can create a bootable Windows 11/10 USB drive on Linux using WoeUSB. WoeUSB simplifies the process and ensures a successful installation. Enjoy installing Windows 11/10 on your desired computer.
Note: These steps should help you install and use WoeUSB on Arch Linux, Fedora, and CentOS. Remember to adjust the version numbers and filenames based on the latest releases.
Command-line way of creating a Windows installer USB drive
In addition to the method we discussed earlier using WoeUSB, there are other methods you can use to create a bootable Windows 10/11 USB in Linux. In this section, we will discuss some of these methods.
Using dd Command
One of the straightforward methods to create a bootable Windows 10/11 USB in Linux is using the dd command. This method works well for creating bootable USB drives for any operating system, including Windows.
Here are the steps to follow:
Step 1: Download the Windows ISO
Download the Windows ISO from the official Microsoft website. Make sure to download the correct ISO file for your system architecture.
Step 2: Insert the USB Drive
Insert the USB drive into your computer’s USB port.
Step 3: Identify the USB Drive
Identify the device name of the USB drive using the following command:
sudo fdisk -l
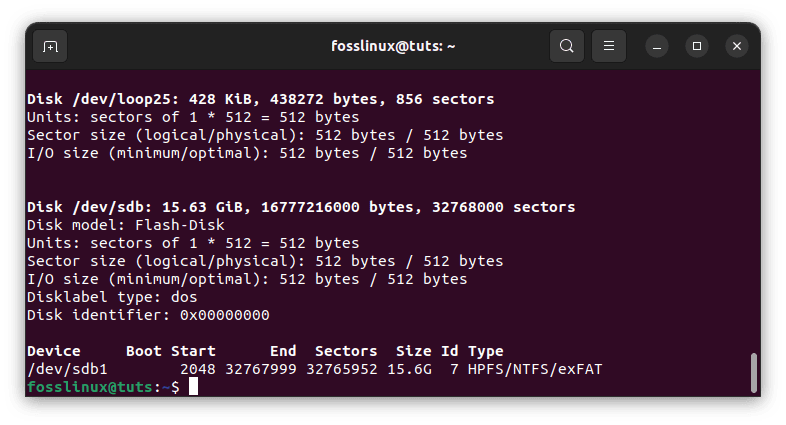
Check the USB drive name
This will list all the storage devices connected to your computer. Look for the device name of your USB drive. It will be in the format /dev/sdx, where x is a letter representing the device identifier.
Note: Be careful when selecting the device name for your USB drive, as choosing the wrong device can result in data loss.
Step 4: Unmount the USB Drive
Unmount the USB drive using the following command:
sudo umount /dev/sdx
Replace /dev/sdx with the device name of your USB drive. For my case, I will execute the following code:
sudo umount /dev/sdb1
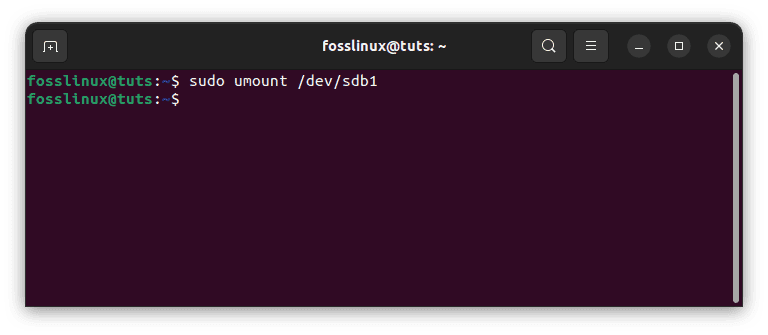
Unmount disk
Step 5: Write the Windows ISO to the USB Drive
Write the Windows ISO to the USB drive using the following command:
sudo dd bs=4M if=/path/to/windows.iso of=/dev/sdx status=progress && sync
Replace /path/to/windows.iso with the path to the Windows ISO file and /dev/sdx with the device name of your USB drive.
Example:
sudo dd bs=4M if=/home/fosslinux/Documents/Win11_22H2_EnglishInternational_x64.iso of=/dev/sdb1 status=progress && sync
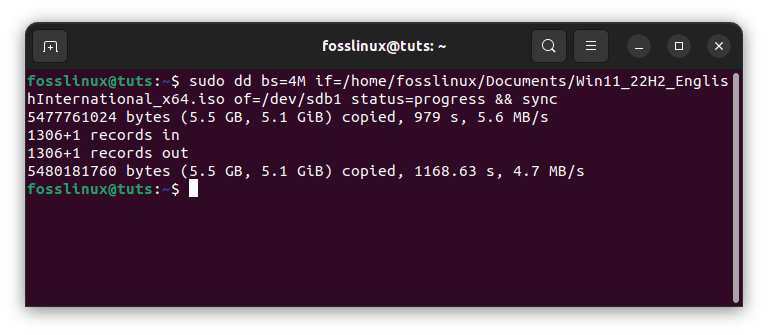
Write the Windows ISO to USB
The bs=4M option sets the block size to 4 megabytes, which can improve performance. The status=progress option displays the progress of the write operation. The sync command ensures that all data has been written to the USB drive before the command exits.
Step 6: Eject the USB Drive
Once the write operation is complete, eject the USB drive from your computer.
Using the bootable drive to install Windows 10/11
Now that you have created a bootable Windows 10/11 USB drive in Linux, you can install Windows on your computer. The installation process will vary depending on whether your computer uses BIOS or UEFI.
Installation Process for BIOS
To install Windows using the bootable USB drive on a computer that uses BIOS, follow these steps:
Step 1: Insert the USB Drive
Insert the bootable USB drive into your computer’s USB port.
Step 2: Boot from the USB Drive
Restart your computer and press the key to access the boot menu. The key to accessing the boot menu may vary depending on your computer’s manufacturer. Standard keys include F2, F12, and Del.
Select the USB drive from the boot menu and press Enter to boot from it.
Step 3: Install Windows
Follow the on-screen prompts to install Windows on your computer. You may need to enter the product key during the installation process.
Installation Process for UEFI
To install Windows using the bootable USB drive on a computer that uses UEFI, follow these steps:
Step 1: Insert the USB Drive
Insert the bootable USB drive into your computer’s USB port.
Step 2: Boot from the USB Drive
Restart your computer and access the UEFI firmware settings. The key to access the UEFI firmware settings may vary depending on your computer’s manufacturer. Standard keys include F2, F12, and Del.
Enable Legacy Boot or Compatibility Support Module (CSM) and disable Secure Boot in the UEFI firmware settings.
Save the changes and exit the UEFI firmware settings.
Step 3: Install Windows
Restart your computer and press the key to access the boot menu. The key to accessing the boot menu may vary depending on your computer’s manufacturer. Standard keys include F2, F12, and Del.
Select the USB drive from the boot menu and press Enter to boot from it.
Follow the on-screen prompts to install Windows on your computer. You may need to enter the product key during the installation process.
That’s it. Wait for the installation process to complete. Once it does, enjoy your newly installed Windows OS!
Important aspects to consider while creating a bootable drive
One thing to remember when creating a bootable Windows USB drive in Linux is that it may take longer than making one in Windows, depending on your chosen method. Some ways, such as the dd command, may take longer to complete, but they are generally more reliable.
Additionally, you must ensure you have enough storage space on your USB drive for the Windows ISO file and any other files you may need. A standard 8GB USB drive should be sufficient for most purposes, but you may need more space if you have a large ISO file or need to store additional files on the drive.
Finally, double-checking your work before using the bootable USB drive to install or repair Windows on a computer is always a good idea. Ensure the USB drive is formatted correctly and that you have selected the correct ISO file before proceeding. This will help ensure that the installation or repair process goes smoothly without any issues.
Overall, creating a bootable Windows 10/11 USB drive in Linux is a valuable skill, primarily if you frequently work with Windows computers or need to repair a computer with a corrupted or non-functional operating system. With the right tools and patience, you can create a bootable USB drive that will allow you to install or repair Windows easily.
Conclusion
Creating a bootable Windows 10/11 USB drive in Linux is a valuable skill for anyone who needs to install Windows on a computer or create a bootable USB drive for system recovery purposes. With the help of the free and open-source tool WoeUSB, the process can be done easily and quickly.
In this article, we covered the prerequisites; we discussed two methods for creating a bootable USB drive: WoeUSB and the dd command. Each method has its own advantages and disadvantages, and you should choose the one that works best for you. Besides, we discussed how to use the bootable drive to install Windows 10/11 and the step-by-step process for creating a bootable Windows 10/11 USB drive in Linux. We have also provided examples of the installation process for both BIOS and UEFI systems.
No matter which method you choose, download the correct Windows ISO file and follow the instructions carefully. With attention to detail and patience, you can create a bootable Windows 10/11 USB drive in Linux that will allow you to install or repair Windows on any computer.
We hope this article has been helpful to you in creating a bootable Windows 10/11 USB drive in Linux. If you have any questions or feedback, please comment below. Thank you for reading!
3 comments
It’s not possible to create a windows bootable usb using etcher.
You can use RUFUS, easy to use software.
Today this is much simpler – https://github.com/WoeUSB/WoeUSB-ng :
Ubuntu:
1. install dependencies `sudo apt install git p7zip-full python3-pip python3-wxgtk4.0 grub2-common grub-pc-bin parted dosfstools ntfs-3g`
2. install woeusb `sudo pip3 install WoeUSB-ng`
That’s it.