
Disk cloning refers to the process of copying data from one disk to another, thus creating a one-to-one copy of the drive. Technically, this process is possible using the copy-and-paste method.
However, you won’t be able to copy hidden files, hidden folders, and files currently in use. With cloning software like Clonezilla, you can replicate a computer’s operating system, drives, software, and patches.
Clonezilla
It is one of the best partition and disk imaging/cloning software for Linux, Mac OS X, Windows, and Minix. It is available in three different versions;
-
- Live version
- Lite-Server
- SE version
Clonezilla Live is responsible for performing a clone on a single computer. An action like cloning your internal disk to an external drive can be done with this version.
Lite or SE is good for large and complex cloning processes. It includes cloning several computers at a go or even cloning remote machines via the network.
With CloneZilla, you are capable of performing a full backup of a device to an external drive, but you can also do backups on an entire disk or specific partition. Storing the cloned data can be done in two ways, including a copy of that data or an encrypted image file.
Why Clonezilla?
Clonezilla supports many filesystems supported by different operating systems and software. When making a backup of an unsupported filesystem, the tool makes use of the dd command. It makes a sector-to-sector copy of the drive. The tool doesn’t require knowing the type of filesystem used with the dd command. It also supports remote backups using SSH, SAMBA, or NFS Shares.
Cloning the Hard disk using Clonezilla for Linux
In this particular post, we will show you how to clone a hard drive that hosts our Ubuntu Server-18.04 to an external disk. Ensure the external drive is at least the same size as the disk you are cloning; otherwise, the process won’t succeed.
Step 1) To get started, download Clonezilla from the official website.
Step 2) Ensure it’s a stable version and you meet the system requirements. Next, you need to create a bootable USB drive and CD/DVD of this tool. There are several tools available to perform this task. Please refer to our step-by-step guide on creating a Clonezilla bootable Live USB drive and then continue to the next step.
Step 3) Attach your external drive that stores the backed-up data. Insert your bootable media of CloneZilla into the computer and reboot the system. Next, you need to change the regular boot order and use the bootable disk of Clonezilla. This process differs from one computer to another.
Step 4) Select the bootable disk of Clonezilla, and you should see the welcome screen. Choose the Clonezilla Live option and hit enter to proceed further.
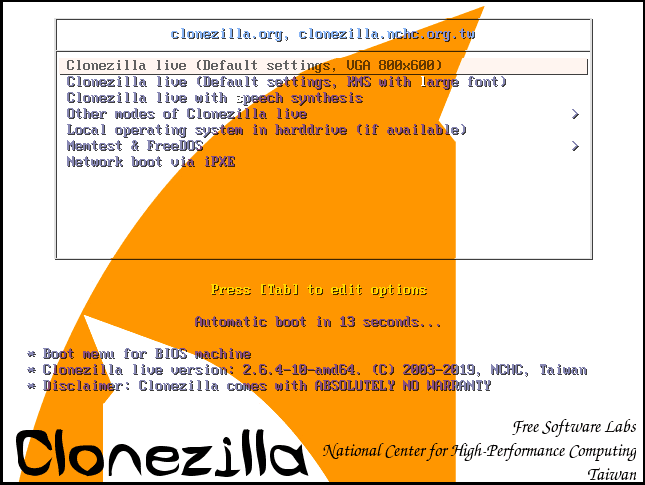
CloneZilla-Boot-Menu
Step 5) The language screen should appear. Select the language to use for the cloning process. Use the Up and Down arrow keys to navigate through the different options.
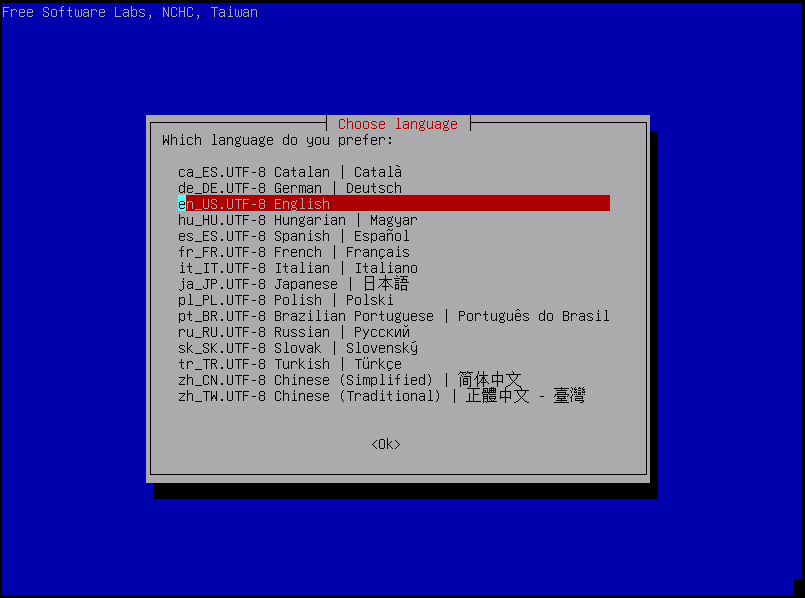
Language Screen with several languages options to select from
Step 6) The following screen should give you an option to configure your keyboard. Older versions of Clonezilla give you four options from which you can choose. The Don’t touch keymap option should work just fine.
With the latest version of Clonezilla, you only have two options. Keep the default keyboard layout, the US layout, or change the keyboard layout option. In this post, we should stick with the US keyboard layout.

Configure the keyboard you wish to use.
Step 7) You should see the start screen. You can either start Clonezilla or drop into the interactive shell.
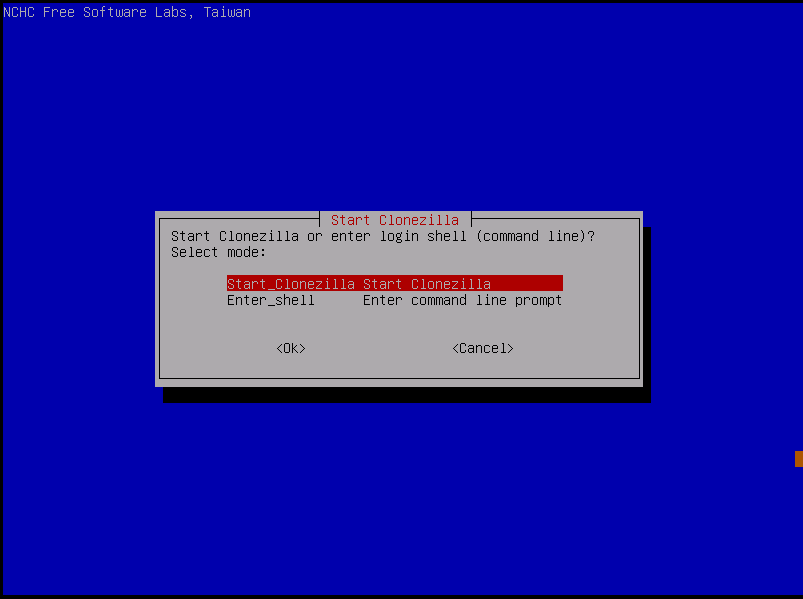
Start the Clonezilla screen
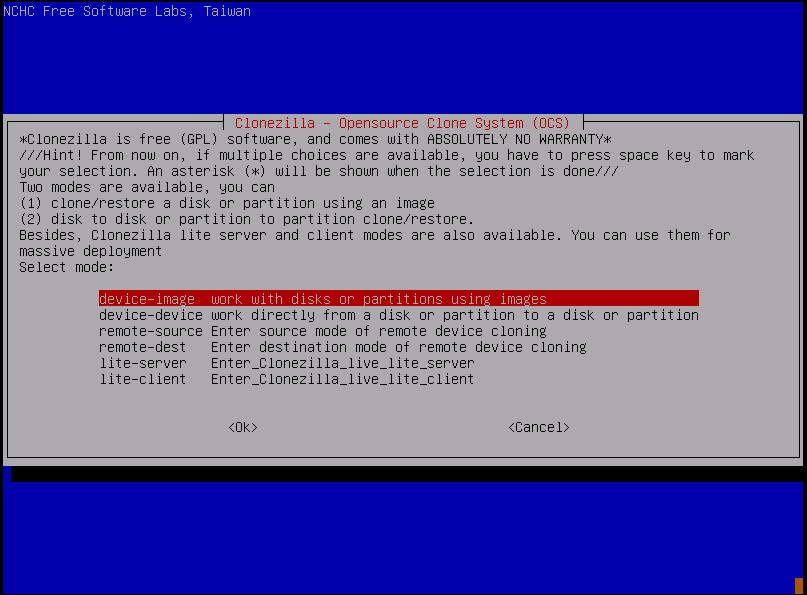
Step 8) In this post, we shall clone a local disk; therefore, we should use the device-device option.
Step 9) The system gives you an option to choose which mode you want to use to run the wizard. There are beginner and expert options. If you are a beginner at this process, click the beginner option.
When the external drive is larger than the disk you are cloning, it would be helpful to select the expert option. It should enable you to choose which partitions you want to use.
The expert mode should be used with extreme caution since you can lose your data if you are not sure what you are doing.

Clonezilla Beginner or Expert mode
Step 10) You need to choose the type of cloning you are performing — for example, disk to local disk clone, disk to remote disk clone, etc.
It’s important to note that you have to use tools like SSH, SAMBA, and IP addresses for any clone that involves a remote drive.
We should use the disk-to-local disk option. This option should perform a complete disk clone, including MBR, partition table, and data.
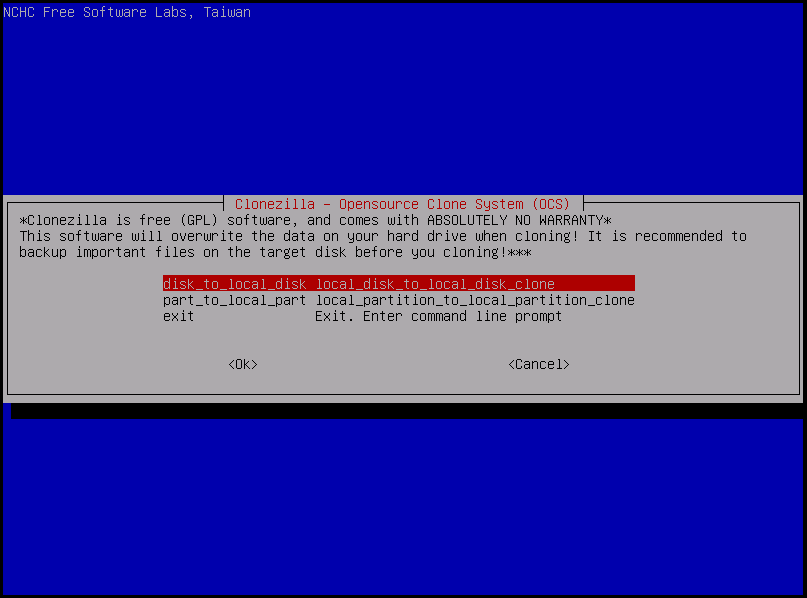
Choose the type of clone
Step 11) You need to choose the source disk to use when performing the clone. It is important to note that the names used here can be confusing at times, i.e., sda, sdb, etc.
You can also use the disk size if you are sure about it. If you have no idea which is the source disk, reboot the machine and consult BIOS.
We shall be using Vmware virtual disk for this post, and sda here is the source disk.
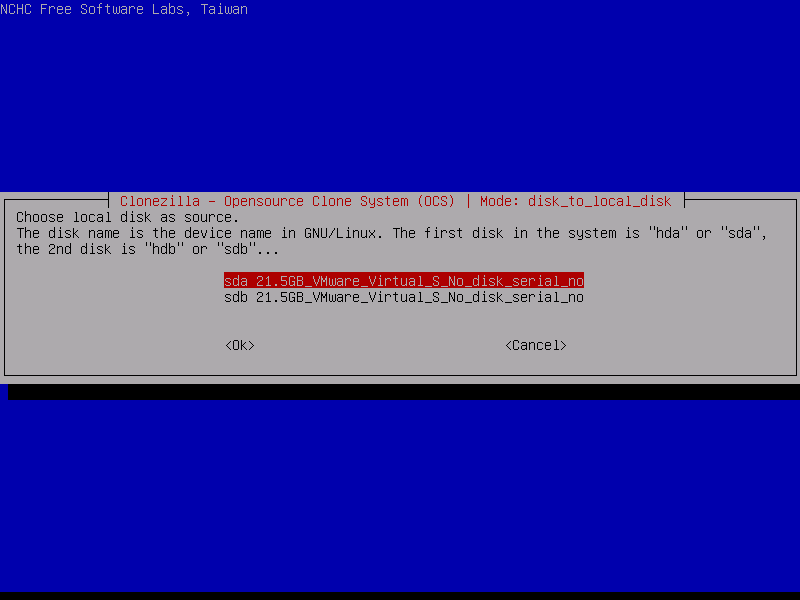
Source disk to be used for cloning
Step 12) You are required to choose the target or destination drive. You need to be very careful since the cloning process is destructive and will wipe all the data, including partition tables and MBR. Here, sdb is our destination disk.
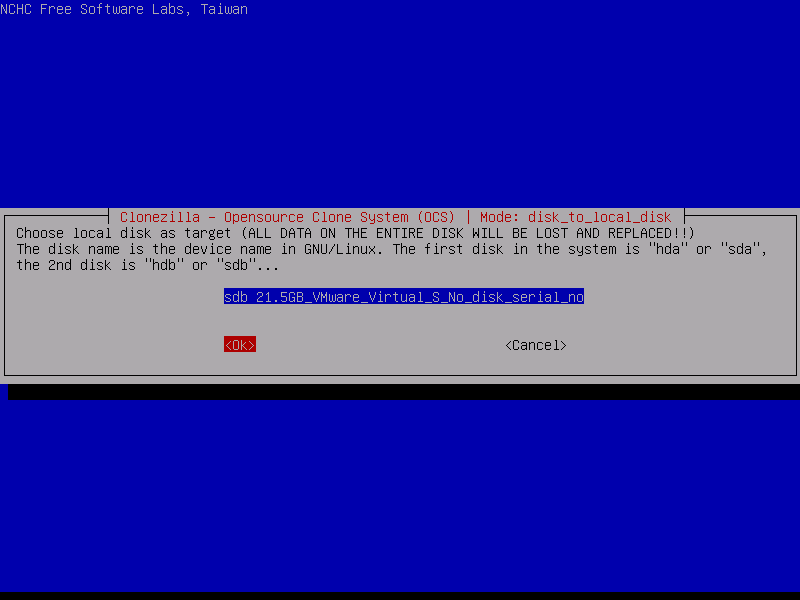
Choose the target disk for the cloning process
Step 13) You should see an option to check for errors and attempt to repair them automatically. If you are sure that your source disk and the file system are okay, choose to “skip checking/repairing the source file system.”
You should then see a prompt on the shell below, asking you to press enter to continue. Hit enter if you are ready to start the cloning process.
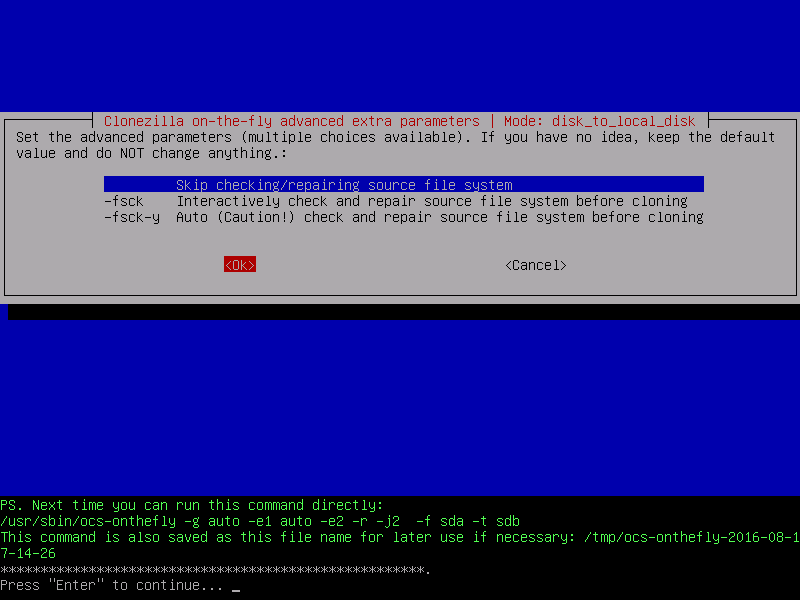
Check and repair the source disk.
Step 14) Clonezilla should take over and start the cloning process. It displays a report of the activity and gives you two warnings on whether you wish to continue with the cloning process.
You need to press y for Yes or n for No. The third warning will give you an option to clone the boot loader or not.
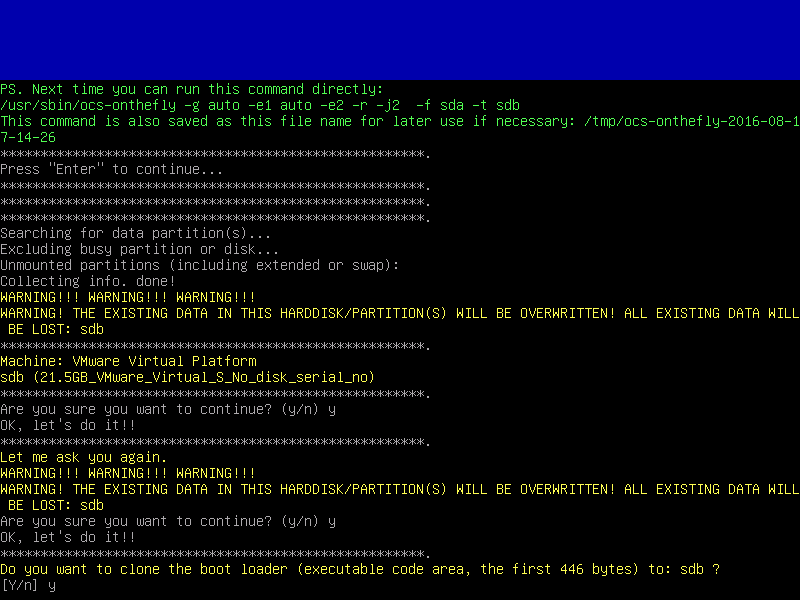
Confirm you want to continue with disk cloning.
Step 15) When you choose Yes to continue with the cloning process, Clonezilla first creates a partition table on the target/destination drive. You should then see a warning giving you an option to clone the boot loader or not. Press Y if you wish to clone.
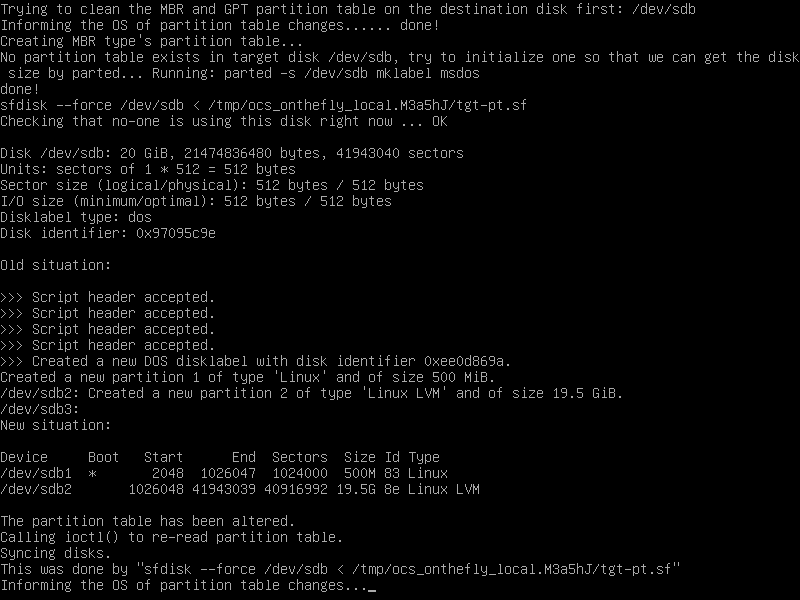
Creating partition layout on the target disk
Step 16) Now, Clonezilla starts the cloning process without user interference. Ensure you do not power off your computer during this cloning process.
It gives you a graphical report of every activity taking place.
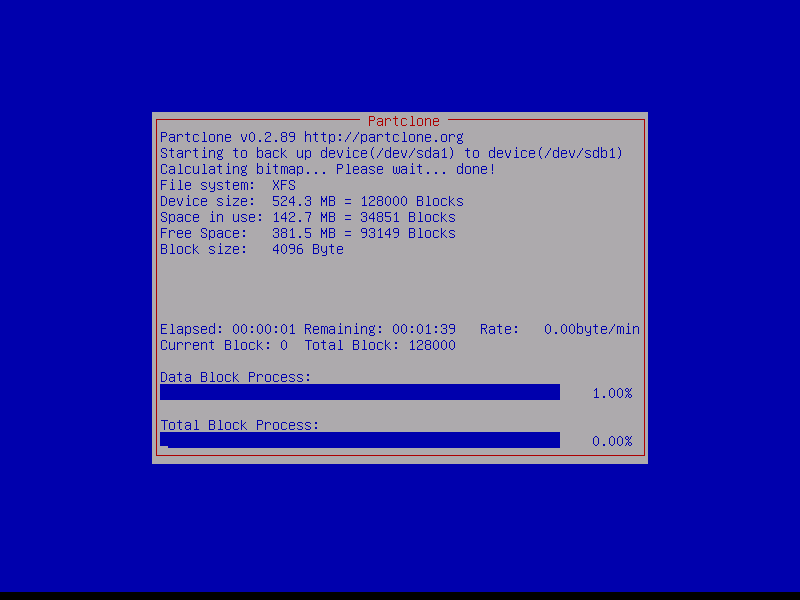
Clonezilla-Disk-Cloning-Process.
Step 17) After finishing the cloning process, it generates a report and also gives you an option to use Clonezilla again. Press 1 to stay in console mode or 2 to run the exit wizard. Finally, press Enter to open the exit screen.
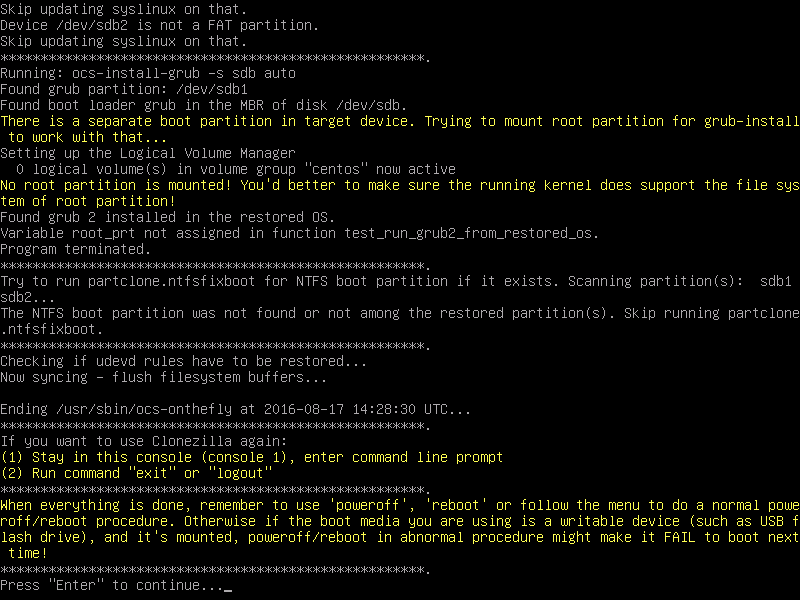
Clonezilla-Linux-Disk-Cloning-Completed
Step 18) The next screen presents you with four options.
- “Poweroff” to stop
- “reboot” to restart
- “cmd” to open the interactive shell
- “rerun1” to start another cloning process
Here, we shall choose the power off option.
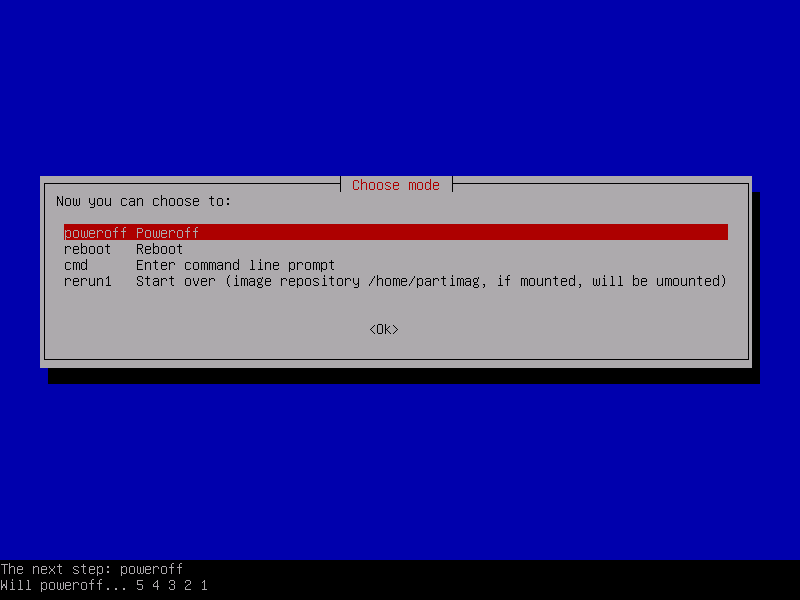
Poweroff-Machine and stop Clonezilla
The Final Step: That’s it! We are done with the cloning process. Next, you can detach your old disk and use the new drive to boot your machine. If the old drive is still suitable for use, you can store it for future use or use it as an external backup disk.
2 comments
Thank You, It is very helpfull.
Really usefull content