
You might have heard and used cloud services like DropBox, OneDrive, Google Drive, iCloud, and many others. These have already integrated into various applications as an additional cloud storage option. However, one more cloud service seems to be taking the market by a storm due to its amazing features and plans. That’s the pCloud Service.
pCloud is a cloud storage service from Switzerland and first launched in 2013. It is a cross-platform application with a desktop client available for Windows, Linux, macOS, IOS, and Android. When you first sign-up on pCloud, you are given 10GB of storage completely free. One of their amazing and competitive features is the security implemented on their systems. They even went ahead to hold a pCloud Crypto challenge that brought hackers worldwide to try and break their client-side encryption, but none of them succeeded.
To ensure reliability in the availability of data, pCloud uses a distributed system architecture. All users’ data are distributed across five (5) servers stored in different locations. Therefore, when one server goes down, you are still assured of data availability. To ensure data security in transit (data being transmitted from your device to pCloud servers and vice versa), pCloud uses SSL/TLS protocols (Secure Socket Layer and Transport layer security. Like most cloud services available, pCloud comes with both free and paid plans. As you would expect, the latter comes with a lot more amazing features, including a lifetime plan.
Previously, we have looked at how to install pCloud on various Linux distribut6ions, including Pop!_OS, elementary OS, and Ubuntu. This post will look at how to install pCloud and add it to startup applications on Fedora. Let’s dive in!
Installing pCloud Desktop Client in Fedora
To get started, download the pCloud installation file from the link below. Remember to select the platform you are using (64bit or 32 bit). For Terminal/Console lovers, you can also check out the pCloud Console Client. Additionally, you can opt to sign in to your account or signup for one. However, you can skip this step for later after installing the desktop client.
Once you have downloaded the setup file, launch the Terminal and navigate where it is stored. If you are just getting started with Linux, be sure to check the Top 20 Linux Terminal Commands to try for a Beginner.
First of all, we need to make the file executable. Execute the commands below on your Terminal.
sudo chmod +x [file_name]
e.g
sudo chmod +x pcloud

pCloud executable file
Next, we will need to execute the setup file so we can proceed with the installation. Use the commands below.
sudo ./[file_name]
e.g
sudo ./pcloud
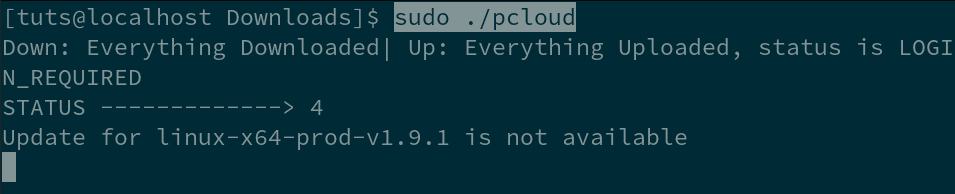
Launch pCloud setup file
After a few seconds, you will see the pCloud Drive Login window pop up. Here you will be required to log in. If you don’t have an account yet, click on the Sign-up button at the bottom of the window.
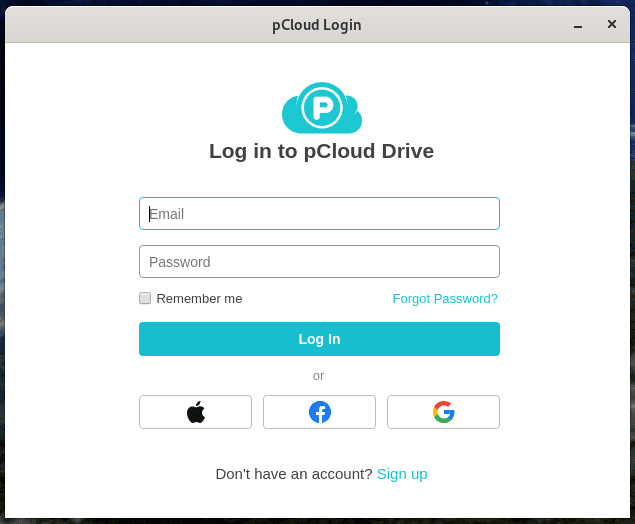
pCloud Drive
Upon login, two things will happen. First, the pCloud Drivemain window will launch. Second, a new folder called “pCloudDrive” will be added to the home directory. Let’s discuss a little about this two.
pCloudDrive Folder on Home Directory
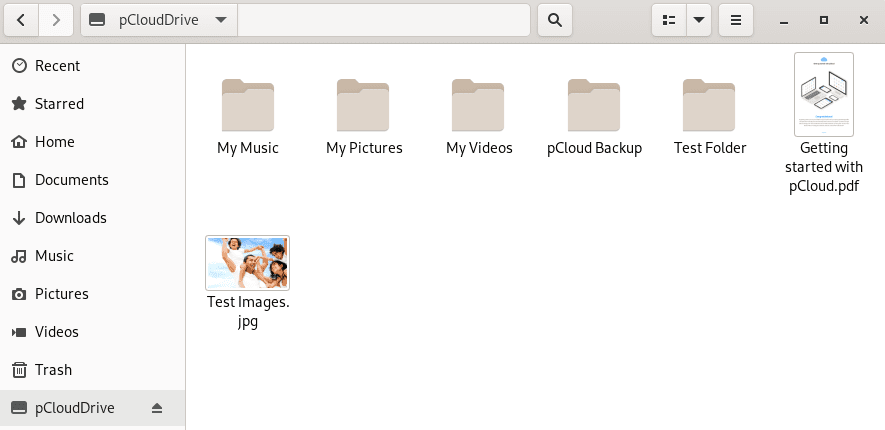
The pCloudDrive folder present in the home directory contains other sub-folders and files inside. They include My Music, My Pictures, My Videos, pCloud Backup, and a pdf on how to get started with pCloud Service. You can also add many other folders as you wish.
Note: You need to know about the pCloudDrive folder because this folder doesn’t take up any space on your Hard drive/ local storage. Think of it as a remote filesystem mounted onto your home directory.
You can use it to view the files/folders that you have uploaded to pCloud cloud servers. For example, in the image below, you can see a folder called “Test Folder”. It is a folder I uploaded to pCloud for Backup, and it’s now present on the pCloydDrive on my home directory. How cool is that? You can easily manage and view all the files you have uploaded from here.
Additionally, you can use this folder as your backup highway instead of going through the pCloud Drive application. For example, if I have some pictures I want to Backup, I can copy and paste the picture in the My Pictures folder present in the pCloudDrive directory.
pCloudDrive
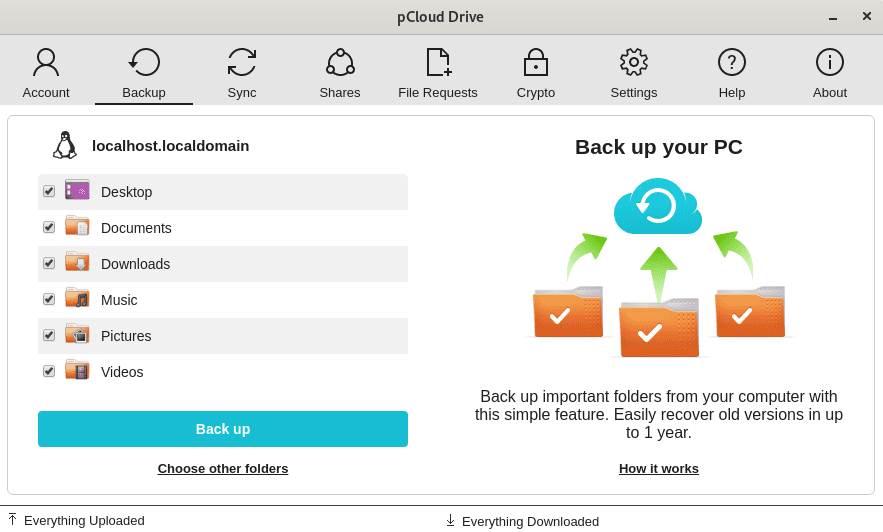
pCloud Drive Client Application
The pCloud Client application allows you to manage your pCloud account and comes with a lot more useful features and options. They include Backup, Account management, Sync options, Shares, Encryption options, Settings, and even a Help button.
pCloud Client Application
For example, to perform sync (synchronizing a folder on your local machine to your storage on pCloud), click on the Sync button -> Add New Sync. You will then select the Local Folder you wish to sync and choose the pCloud Drive Folder to sync.
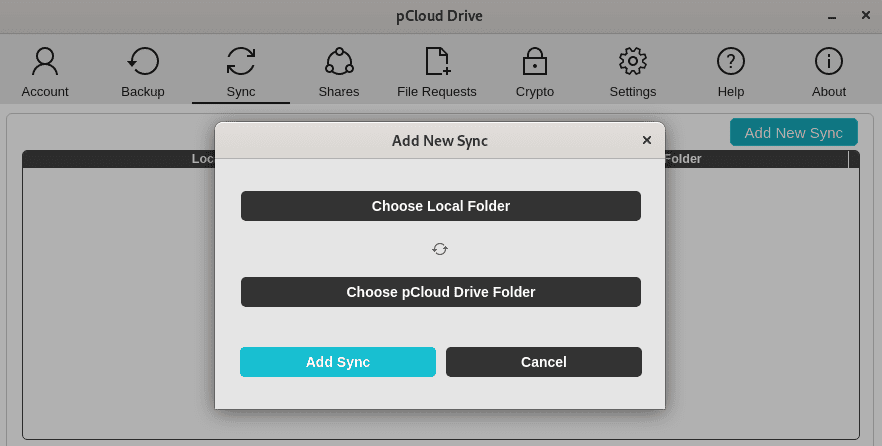
pCloud Sync
To perform a task like Backup, click on the Backup button. I am impressed with the pCloud sync feature. It is very reliable and real-time. Just ensure you have a good internet connection.
How to add pCloud Drive to Startup Applications
Up to this point, I believe you have pCloud installed and running on your system. In most operating systems, after installing pCloud, it is automatically added to the Startup applications list. In any case, this doesn’t happen on your Fedora system, don’t worry; follow the steps below and learn how to add pCloud to Fedora startup applications.
To make the process much easier and faster, we will use a tool called Gnome Tweaks. Let’s get started.
Step 1. Install Gnome Tweaks with the command below.
sudo dnf install gnome-tweaks
Step 2. Once Gnome Tweaks is installed, launch it from the applications menu. Just search “tweaks.”
Step 3. Click on Startup applications on the left.
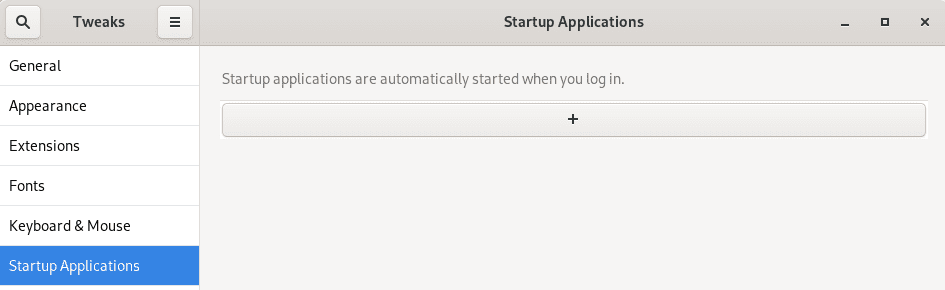
Startup applications
Step 4. On the Startup applications window, click on the plus (+) button. A small window will open, and you will need to select the application you want to add. Scroll down and find pCloud. Alternatively, you can use the search button. When done, click the Add button.
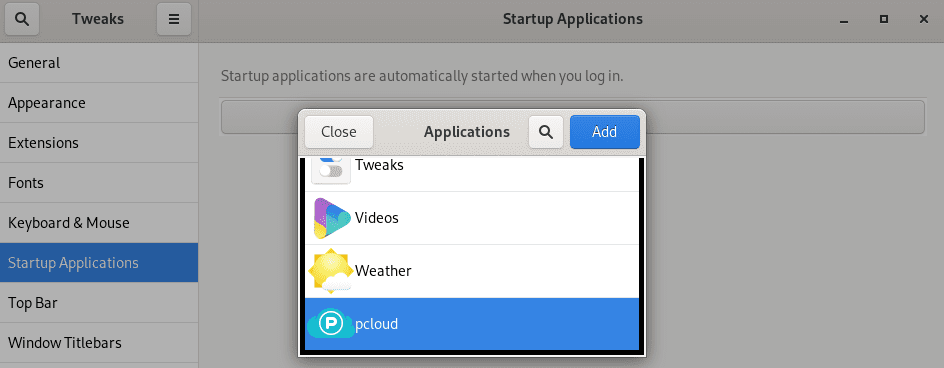
Gnome Startup applications
Conclusion
That’s it! pCloud is successfully added to startup applications on Fedora. Now, when you reboot your PC, pCloud will automatically launch seamlessly. I believe this post has given you a step-by-step procedure of installing pCloud and even adding it to the startup applications.