Arch Linux is a popular Linux distribution that strives to stay on the bleeding edge rolling release, providing users with the latest software and packages. Even though the installation process is considered a little too hard, Arch Linux still maintains a large pool of users and a huge community fan base.
If you want to get the latest software packages and the kernel before they are shipped to other distributions, you should try Arch Linux. Please check out our Complete Master Guide on How to install Arch Linux.
Even though Arch Linux is commonly listed as one of the bleeding edge rolling releases available, you don’t have to stick to the latest mainline kernel. There several kernels available for Arch Linux, and you can actually install all of them. In this post, we will show you how to switch between different kernels on Arch Linux. Let’s dive in!
The Different Types of Kernels
In this post, we will look at the four main Kernels available for Arch Linux. They are:
- Mainline kernel
- LTS kernel
- Hardened kernel
- Performance-tuned kernel
Mainline kernel
The mainline kernel is the latest stable kernel available with the package name Linux. A huge number of Arch Linux users run this kernel due to the latest software packages available. To install this kernel, execute the command below:
sudo pacman -S linux
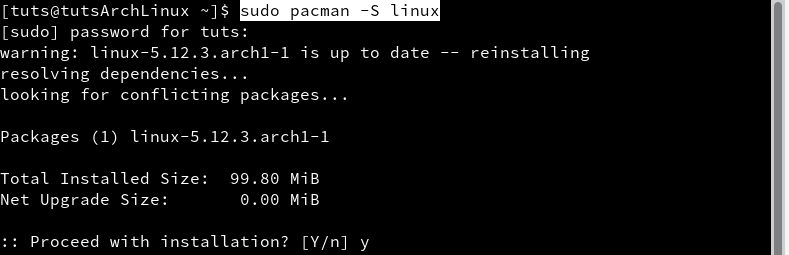
Install Mainline kernel
From the image above, you can see I am currently running the mainline kernel, and it will be re-installed.
LTS kernel
Like its name, the LTS (Long Term Supported) kernel is the longest supported Arch Linux kernel. Even though there is no specified time frame of how long the kernel will be supported, you can be assured you will enjoy the kernel for quite a while. To install the LTS kernel execute the command below:
sudo pacman -S linux-lts
Hardened kernel
If you are focused more on security, you might consider running the hardened kernel, which goes with the Linux-hardened package name. Please note that some packages might not work well or work on this kernel due to the security features. To install the hardened kernel, use the command below:
sudo pacman -S linux-hardened
Performance-tuned kernel
The performance-tuned kernel or commonly known as the Zen kernel, is a product of the collaboration of kernel developers to bring out the best Linux kernel available. It is forked from the latest kernel, and you are therefore assured of the latest stable packages available. To install the zen kernel, execute the command below:
sudo pacman -S linux-zen
Switching Between Kernels in Arch Linux
We will break down this into two steps:
- Install the desired Linux kernel
- Tweak the grub configuration file
Step 1. Install the Desired Linux Kernel
Select any kernel that you wish to install and install it with the commands provided above. In this post, we will install all four kernels.
Step 2. Tweak the Grub Configuration File
By default, Arch Linux uses the latest mainline kernel as the default kernel. All the others are available under the Advanced options in the grub menu on boot.
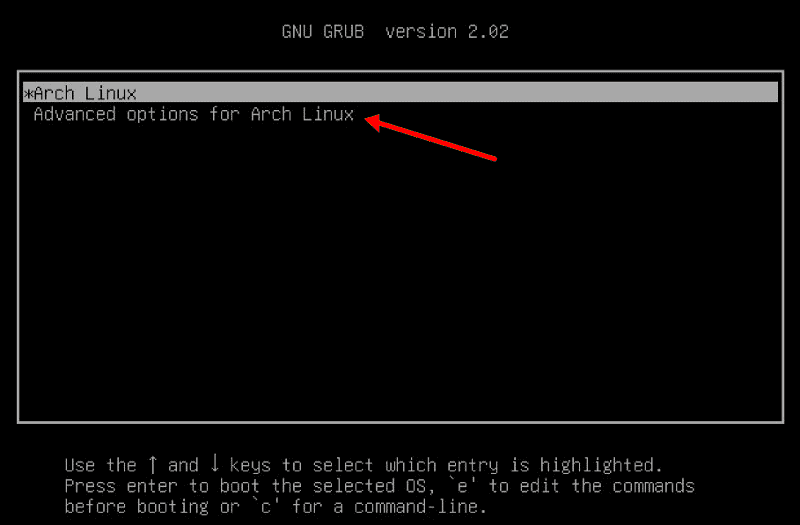
Advanced Options
However, to make things a little more orderly, we will perform to basic tasks:
- Disable the grub sub-menu enabling all kernels to be listed on the Kernel’s boot screen without the Advanced option feature.
- Configure grub to boot from the kernel used in the previous boot.
Disable the grub sub-menu
We will need to tweak the grub configuration to disable the grub sub-menu. Open the grub configuration file with the command below:
sudo nano /etc/default/grub
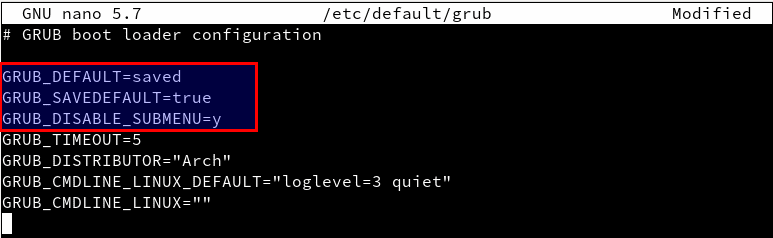
Grub configuration file
From the image above, you will notice I have set the value of GRUB_DEFAULT to true and added two more lines. The total changes include:
GRUB_DEFAULT=saved
GRUB_SAVEDEFAULT=true
GRUB_DISABLE_SUBMENU=y
Save the file (Ctrl + O, then Enter) and Exit (Ctrl + X).
Re-Generate the Grub Configuration File
Since we have made some changes to grub, we will need to regenerate the grub configuration file. Execute the command below:
sudo grub-mkconfig -o /boot/grub/grub.cfg
If you can recall, you used this command during Arch Linux installation. Now reboot your PC and select the desired Linux Kernel.
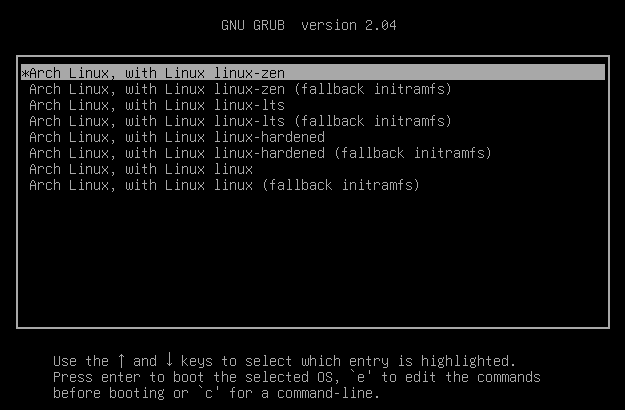
Select the desired kernel
Conclusion
That’s it! I believe you now know how easy it is to switch between Kernels in Arch Linux. Switching kernels can also come in handy when troubleshooting issues on your PC. In my case, Bluetooth wasn’t working on the mainline kernel, but on switching to the zen kernel, it worked flawlessly. Do you have any additional tips or questions you wish to share with our readers? Please feel free to leave a comment below.