
In this guide, we take a look at how to install the Ubuntu server 18.04 LTS. Recently, it was all smiles and jubilation after Canonical announced that it had extended support for Ubuntu 18.04 from 5 years to 10 years! Amazing. Installing the Ubuntu server is a walk in the park, given that there is a beautiful wizard to take you through the entire process.
Install Ubuntu Server 18.04 LTS
In this tutorial, we will show you how to install the latest server version that will enable you to run applications and other services.
Installation Requirements
Before getting started, ensure you have the following in your checklist
- Installation Media – USB drive or DVD
- ISO image of Ubuntu server 18.04 LTS You can download the ISO from this link
- 2 GHz Dual Core processor
- 25 GB of Hard Disk space
- Installation Media ( Either DVD / USB drive)
- Internet Access for downloading necessary updates
With the above requirements met, we’re all set and ready to go!
Install Ubuntu Server 18.04
Step 1: Burn the ISO Image
The first step is to burn the ISO image onto a blank DVD or make a USB drive bootable. There are plenty of free software tools at your disposal for this task.
Here are a couple of such tools:
Power ISO – A powerful DVD, CD burning software. Check out the official website
Rufus – Used for making your USB drive bootable. Check out the official website
When the process is complete, take the DVD and insert it into the drive of the computer you want to install the server on.
Ensure that your installation medium is set as the priority in the ‘Boot Order of the System’ set up. After that, you can restart your system and get rolling!
Step 2. Choose the Language
After setting the boot order, you’ll be presented with the screen shown below, which requires you to choose your preferred language. Make your selection and hit ‘ENTER.’
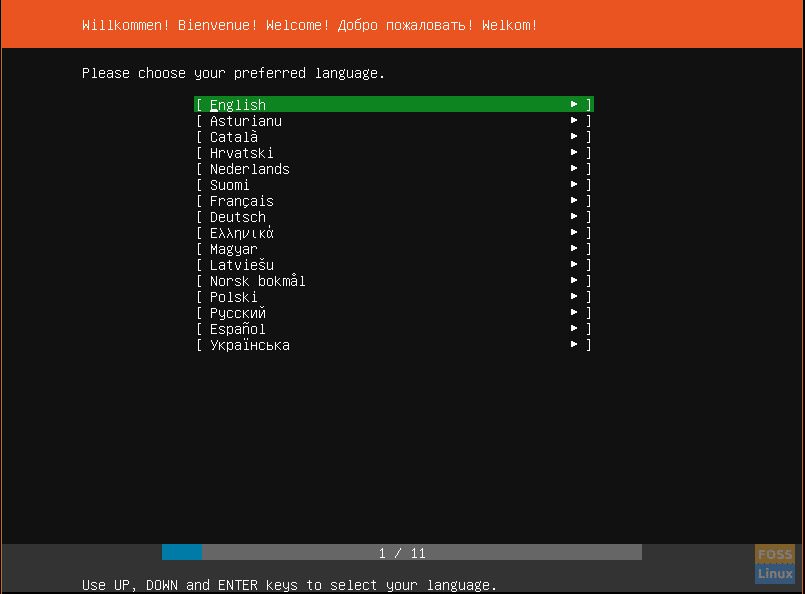
Choose language
Step 3. Select Keyboard Layout
Next, select the preferred keyboard layout and hit ‘ENTER.’
Step 4. Select Ubuntu or MAAS (Metal As A Service)
You will then have a list of various platforms to install Ubuntu. Select the first choice to install Ubuntu generally on a PC. The other two options, titled ‘Install MAAS’, facilitate cloud provisioning for physical servers.
Since we are doing the installation on a PC, we select the first choice and hit ENTER.
Step 5. Network Settings
At this point, you will be required to select the network adapter and accept the automatic assignment of the IP address if your system is configured in a DHCP server environment. Alternatively, you can choose to set the IP address manually.
In this example, the server has obtained IP 10.0.2.15 from a DHCP server using the network adapter enp0s3.
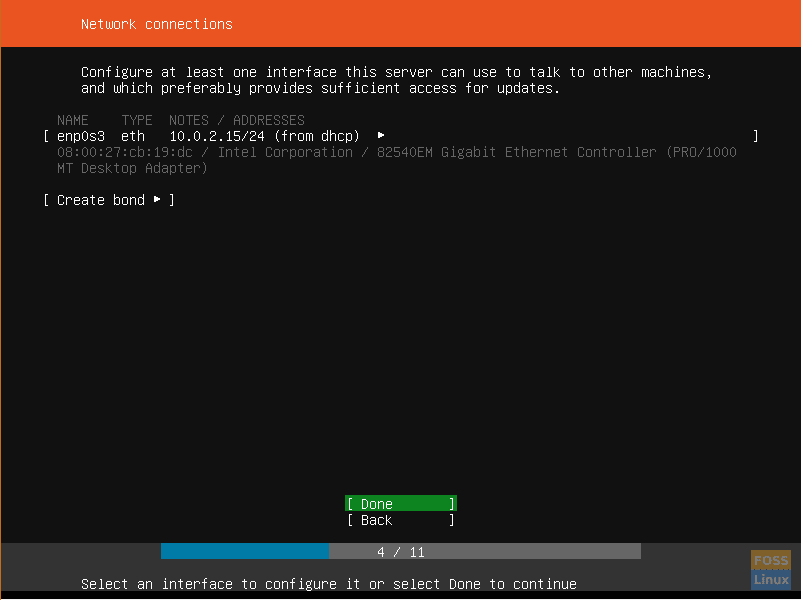
Configure Network connections
Step 6. Proxy Settings
The next screen will prompt for your proxy server address. If none is available, proceed and Hit ENTER to move to the next step
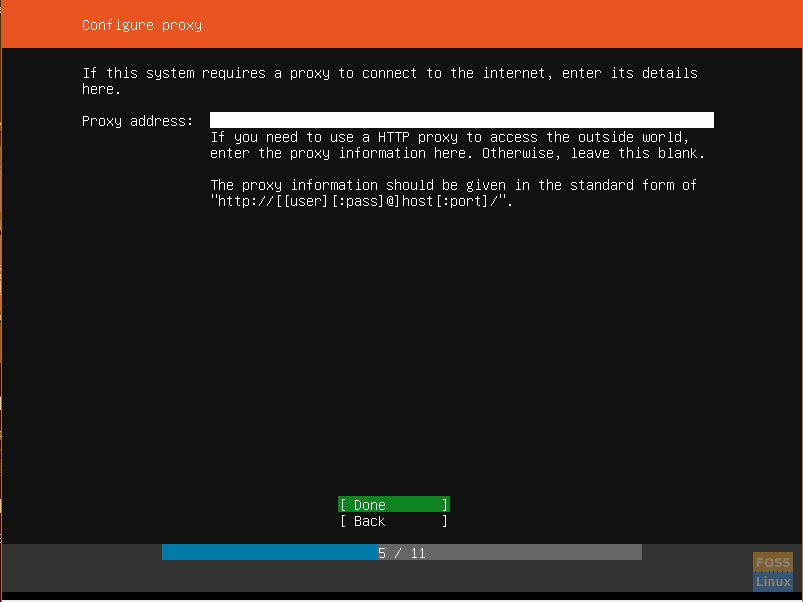
Configure proxy settings
Step 7. Select network mirror
Next, you will be asked to enter the address of the network mirror.
Leave the default mirror selected, unless you want to change it to some other address you prefer.

Configure mirror
Step 8. Hard Disk Setup
This step prompts you to configure your hard disk as per your usage of the disc during the installation process.
You have the freedom to use the entire disk if no other operating system is installed or you can opt to configure manually and make a few changes
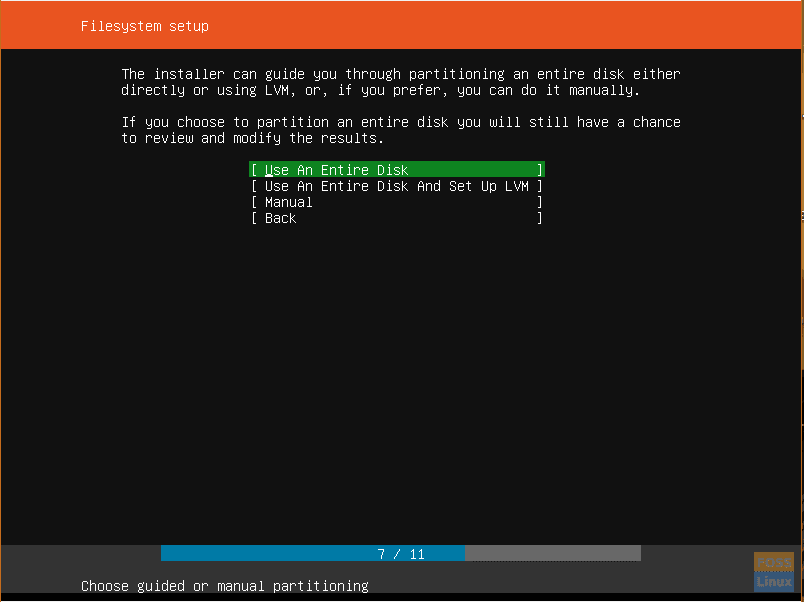
File system setup
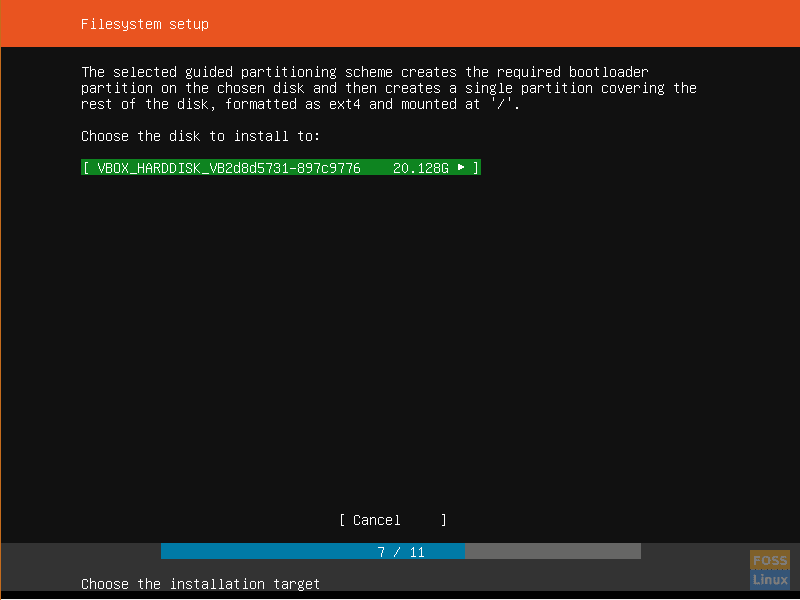
Step 9. Choose a hard drive to install to
Next, select the hard disk you are going to install Ubuntu server 18.04 on. In this case, I’m using VirtualBox to install Ubuntu server 18.04.
If you have multiple hard drives, they will be listed for you to select.
Configure File System
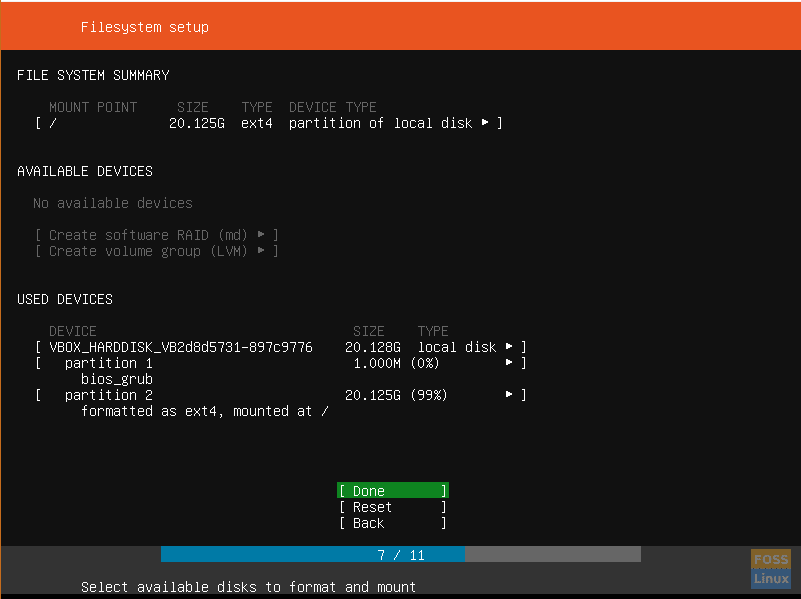
Step 10. File System Summary
Now you can verify if everything is OK and click done.
If you noticed that you made a mistake and need to make further adjustments, hit ‘BACK.’
If you wish to start all over with the disk setup and partitioning, hit ‘RESET.’
File system setup
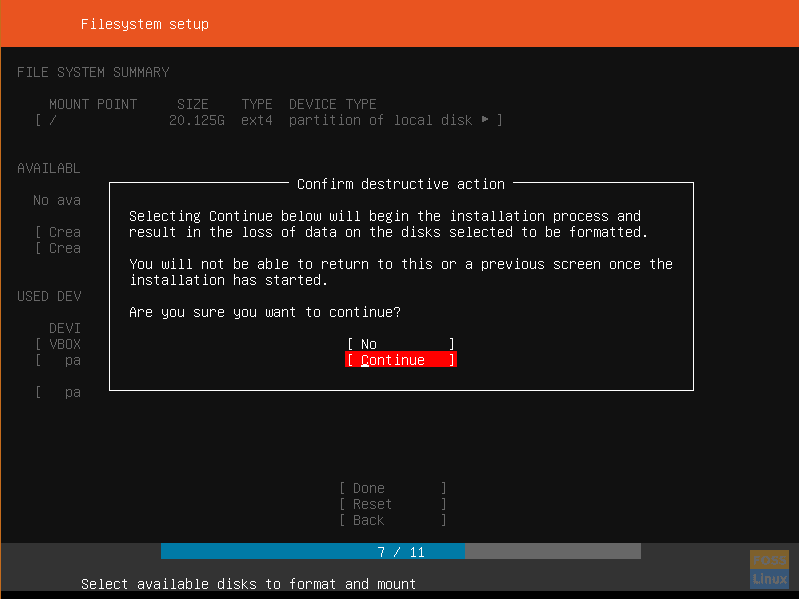
Step 11. Confirm Changes
To confirm changes made to the hard disk, hit ‘CONTINUE.’ This action will mark the beginning of the installation process.
Confirm changes
Step 12. Provide User Login credentials
Provide the necessary login credentials and hit ‘DONE.’
Step 13. Select Server snaps
This is a new step in the installation of Ubuntu Server. This step allows you to choose from a list of selected Server Snaps. What this means is that you can choose to have a pre-configured server.
Some of the choices include
- Kubernetes
- Docker
- Next cloud
- Canonical Live patch
Select your preferred option, or if you do not wish to have any of them, hit ENTER.
The installation process will begin. This will take about 10 minutes, although it could vary depending on the RAM and CPU of your server.

Installing systems
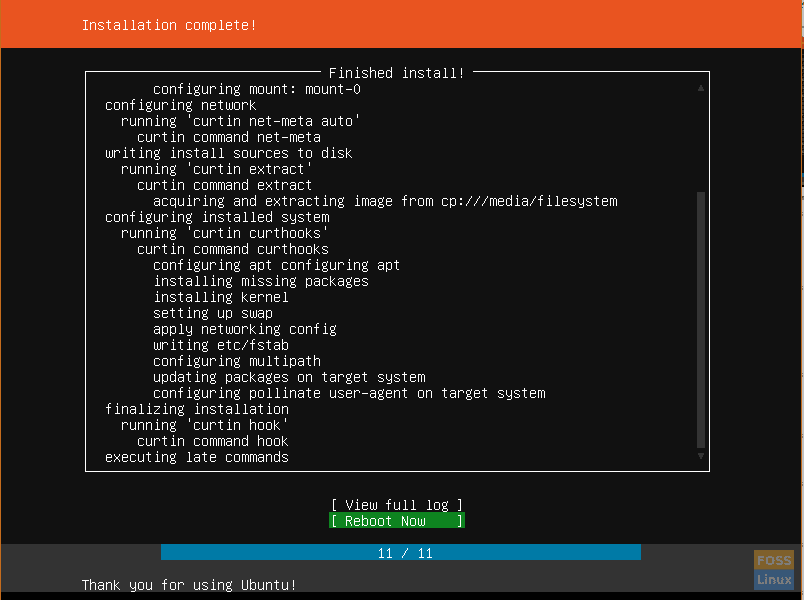
Step 14. Complete the Installation
Finally, the installation will wrap up, and you will be prompted to reboot your server! Hit ‘REBOOT’ and remove the installation media. VirtualBox will automatically do this for you.
ubuntu server 18.04 server installation complete
Step 15. Log in to the server
Finally, a black screen will appear prompting for your username and password. Provide the credentials you created earlier and hit ‘Enter.’ After that, update and upgrade the repositories to their latest definitions.
Awesome! Congratulations on making it this far. We have finalized our installation process of Ubuntu 18.04 server. Feel free to leave your comments or questions. Also, don’t forget to share this on your social platforms.
7 comments
Excellent presentation. Thanks!
Thank you for the detailed steps. I installed Ubuntu desktop on my server. Does it make any difference or is server more preferred than desktop? Please advise.
Thank You for this very well elaborated process flow, its a lifesaver from the previous hectic process .
Thanks you made this very simple, thank you
hi,
I have checked so many website, your website is very amzaing. you should try this website
thanks for update info.
thank you so much