DietPi is a Debian-based Linux distribution developed for small board computers like the Raspberry Pi. It is an ultra-lightweight Linux distribution making an excellent choice for devices like Raspberry Pi, Odroid, Pine64, and other SBCs with limited resources compared to a regular PC.
Luckily, this operating system is not limited to SBCs alone; you can now install DietPi on your regular PC or Virtual Machine. This post will give you a comprehensive guide on the various DietPi features and how to install DietPi on your PC.
DietPI Features
Below is a list of the various DietPi features.
Truly Optimized
DietPi is highly optimized to the core and based on Debian, which doesn’t come pre-installed with bloat software compared to other Linux distributions. DietPi is an extremely lightweight operating system best suited for older Small Board Computers or PCs with limited resources like RAM or processing power.
Simple Interface
As you would expect with any lightweight operating system, DietPI comes with a simple and intuitive user interface that is easy to use or navigate. The OS also comes with only a few essential applications saving you the hustle of having to deal with bloatware that you would encounter on other distributions.
DietPi-Software
DietPi-Software is one of the core utilities that come with the DietPi OS. This tool lets you easily install Ready to run and optimized software on your system. It automates the whole installation and configuration process relieving you of all that hustle.
DietPi-Config
The DietPi-Config utility lets you easily customize your hardware and software settings with a few clicks. For example, if you are trying to establish a wireless connection (WiFi) or device localization, you can always do that with DietPi-Config.
DietPi-Backup
DietPi-Backup is an easy-to-use system utility that automates backing up or restoring files on your DietPi system.
Installing DietPi on a PC
Most of the blogs and tutorials that you will find the online show you how to install DietPi on a Raspberry Pi or any other Small Board Computer. This post will give you a detailed guide on installing DietPi on your PC. That will enable you to enjoy the experience of using an ultra-lightweight Linux distribution.
Follow the steps below.
1. Download DietPi for PC
Launch your browser and navigate to the official DietPi download page. Next, select the “PC/VM” tab, as shown in the image below.
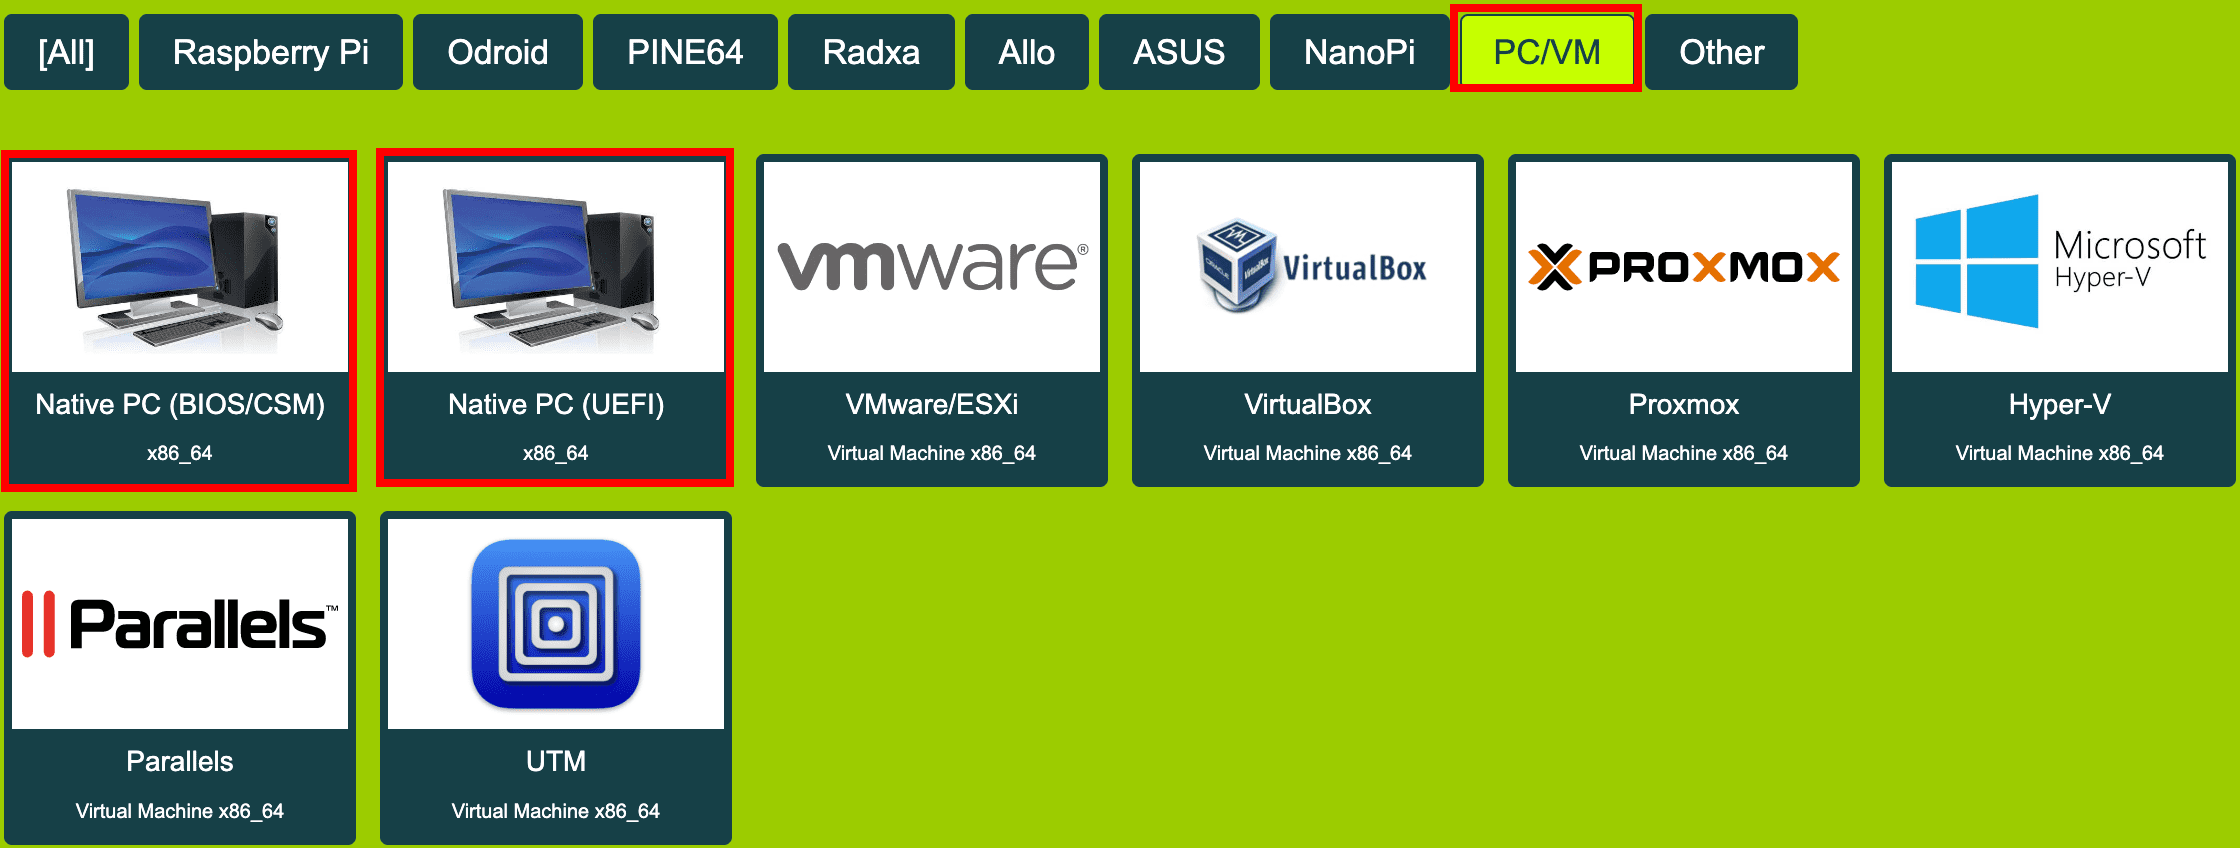
Download DietPi
Here you will see the various images available for download. As you will notice, DietPi is only available for x86_64 processors. Therefore, you cannot install DietPi on a 32-Bit PC. You will also see the available images for virtualization platforms like VMware or Virtualbox.
For this post, you will download the 64-bit image. Then, select either BIOS or UEFI, depending on your PC settings. After a successful download, you will notice the file is compressed using the 7zip. Extract it, and you should see the ISO file you will use to install DietPi on your PC.
2. Create a Bootable USB Drive
If you have installed any OS before, you know that you need to burn the ISO file to a USB drive or DVD. You can use several applications to create a bootable USB drive or DVD. Below are some of the software recommended by this post.
- Balena Etcher
- Rufus
- YUMI
- PowerISO
After successfully creating a bootable drive, insert it and use it to boot your PC.
3. Install DietPi
If you did everything correctly, you should see the welcome screen, as shown in the image below. There are three options.
- Install DietPi
- Clonezilla Live
- Poweroff
Use the arrow keys to select the first option, “Install DietPi,” and hit “Enter.”

DietPi welxcome screen
During the installation, you will see an option to select the disk where you want to install the operating system. After that, DietPi will continue to install and restart once it’s done. Finally, you will see the screen below where you must log in from the command line using the default credentials.
- Username: root
- Password: dietpi

CLI login
Tip: Like most Linux distributions, DietPi does not display the password as you type it on the command line.
After a successful login, you will see an option to change the default system passwords. Use the arrow keys to select “Ok” and hit “Enter.” Type your new password and hit “Enter” to continue.
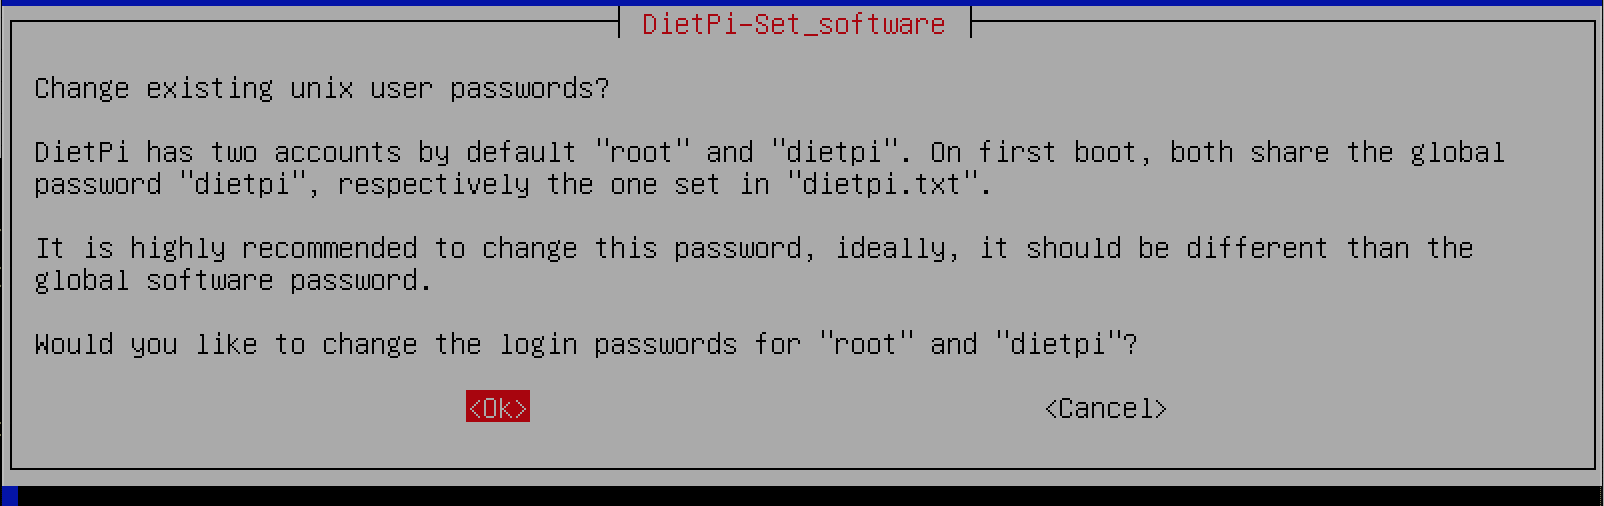
Change default password
After successfully setting new passwords for your system, you might see several prompts to enable or disable specific system configurations. When done, you will see the screen below.

Install Software
Installing a Desktop Environment
Up to this point, DietPi is installed on your system. However, it doesn’t have a graphical user interface, and you can only perform any actions from the command line. To install a Desktop environment, use the arrow keys to select the “Browse Software” tab, as shown in the above image, and hit “Enter.”
You should see a list of all the applications available for installation. Use the arrow keys to scroll through the various apps, and use the “Tab key” to select the apps you want to install. As of writing this post, DietPi supports five Desktop environments.
- XFCE
- MATE
- LXDE
- LXQT
- GNUstep
Luckily all these are lightweight desktop environments. Select any of your choices. This post will install the LXDE desktop environment.
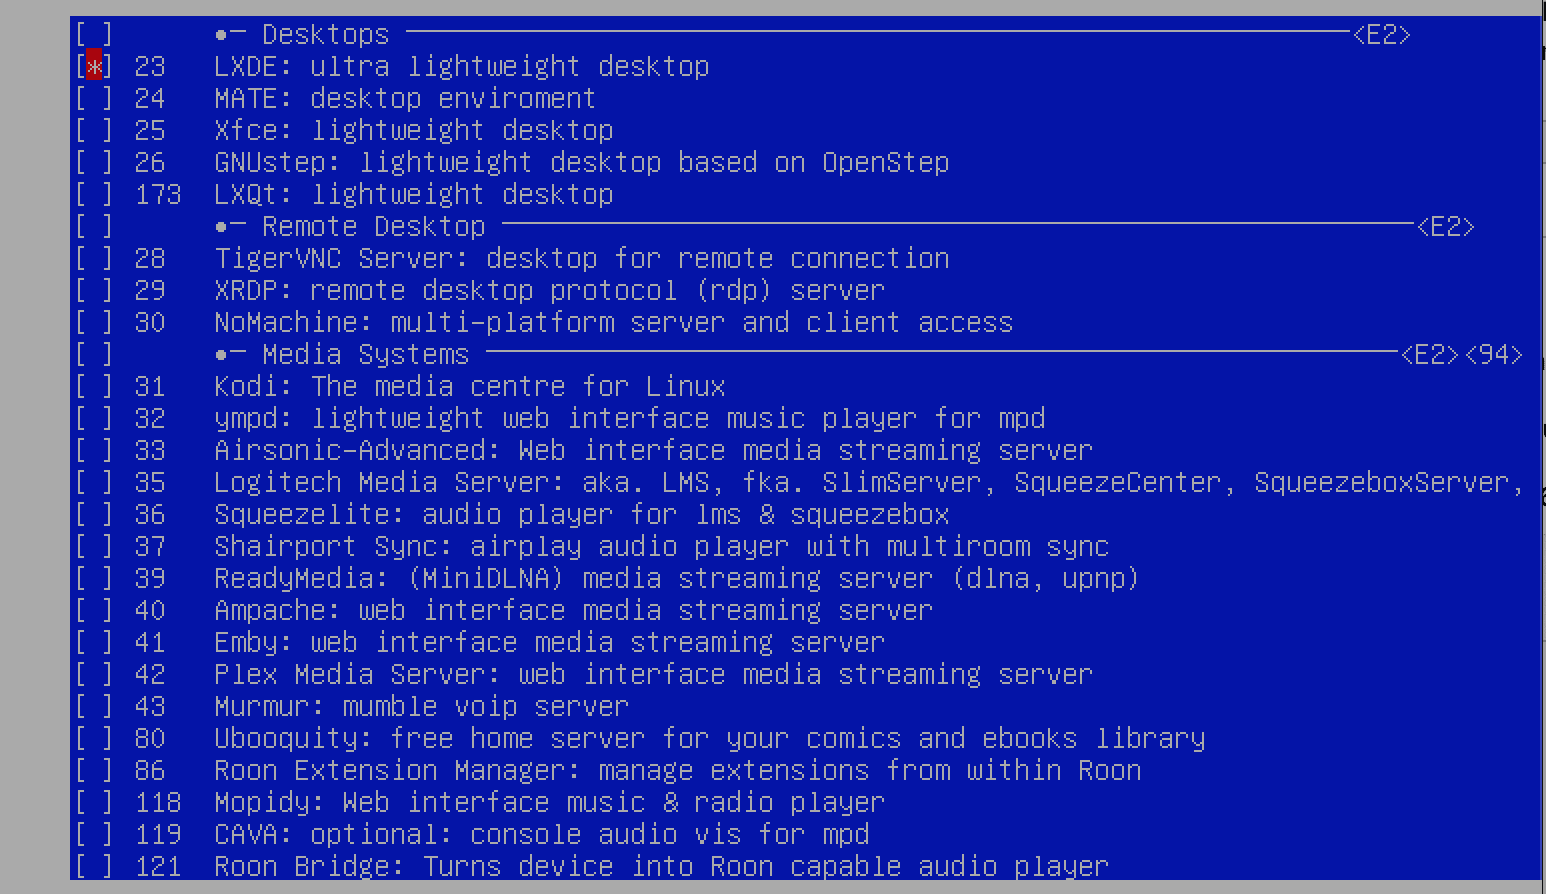
Install LXDE Desktop Environment
After selecting all the applications, you want to install, use the “Tab key” to select the “OK” button at the bottom and hit enter. Then, on the screen that appears, use the arrow keys to select the “Install” option at the bottom and hit “Enter.”
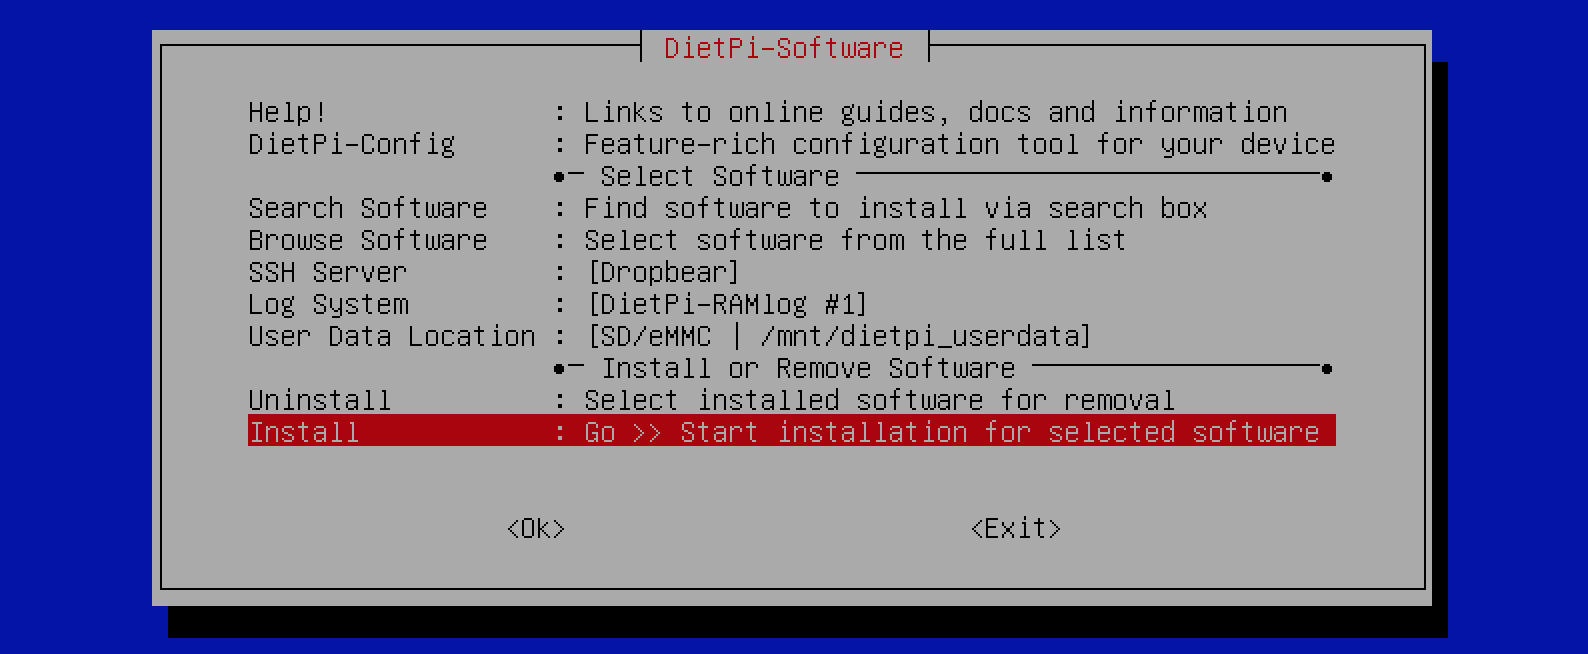
Install selected software
The installation process will start immediately. Please be patient, as this process might take a while.

Installing apps
When done, reboot your system using the command below.
sudo reboot now
Once the system is up, use the command below to start the Desktop environment.
startx
Wrapping Up!
Up to this point, we hope that you have successfully installed DietPi on your system. Below are several resources that might help you when using DietPI.
- DietPi Getting Started page: This section gives you step-by-step guides on how to carry out various operations on your system.
- DietPi Forum: If you encounter any issues, you can ask a question in the DietPi community forum, and other DietPI users will provide solutions.
Please let us know your thoughts on DietPi compared to other Linux distributions.