
TeamViewer is proprietary software that permits a user to remotely access another user’s desktop, share the desktop and even facilitate file transfer between the PCs over an internet connection. It is a well-known app among helpdesk support staff and comes in handy when aiding remote users who are stuck and can also not get worthwhile assistance.
Better yet, the program works well with all major platforms: macOS, Windows, and Linux (also in limited forms on android and iOS). Besides file transfer, TeamViewer lets you chat with its users in real-time, sync clipboard contents, and much more.
The complexity of the application does not, however, compromise the program’s simplicity. As such, it is a pretty straightforward app as you only need to install it on both PCs required for connection, then interlink them using the unique ID and password it auto-generates. While this app’s core feature is skewed more towards the IT professionals, DevOps, and support agents, it is free for one’s use (and comes in handy for helping a frustrated friend or relative).
In this guide, we will take you via some of the tried and tested approaches to installing TeamViewer on your Ubuntu system. You can also use the contents of this tutorial to set up TeamViewer on Zorin OS, Linux Mint, and pretty much any other Ubuntu-based Linux distro out there.
Here are some of the features linked with this application.
TeamViewer features
- User and device management
- Software integrations
- Session features
- Remote and Admin support
- Recording sessions
- Multi-platform access
- Detailed reports
- Management console
- Support ticket managemen
- Connection speed control
Installing Team Viewer in Ubuntu 22.04 LTS
This article will cover several methods to install TeamViewer:
- Via the Ubuntu repository
- Via GUI installer
That said, let us delve right into it.
How to install TeamViewer via the Ubuntu repository
If you are a command line fanatic, here are the steps to get the installation done.
Step 1: Download and append the TeamViewer repository key
First, open your terminal by hitting the “Ctrl+Alt+T” keyboard shortcut combinations. Also, you can click on “Activities” on the left side of the desktop, then search for “terminal” in the search bar. After that, click on the blue icon to open it.
After that, proceed and issue the following command to aid in appending the TeamViewer repo key since we are setting up TeamViewer via its official website:
cd /tmp
wget https://download.teamviewer.com/download/linux/signature/TeamViewer2017.asc
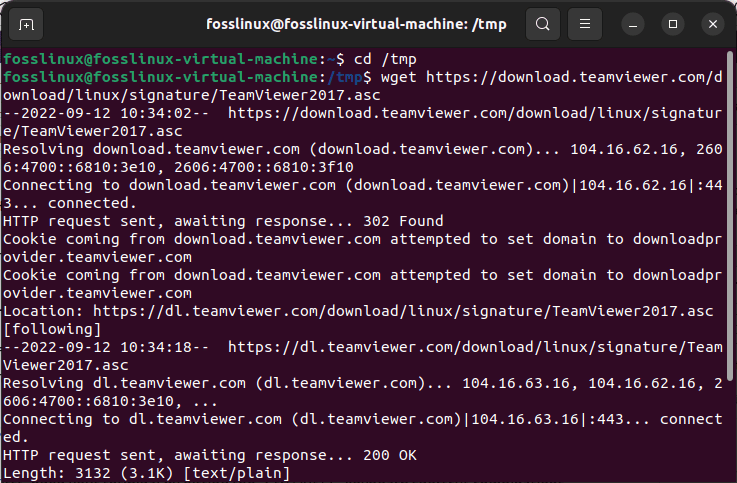
download key
The .asc key file should be downloaded right to your Downloads folder by default; That is for those who didn’t change their default Downloads directory. Then go ahead and add the following key to your system via the following apt-key command as a sudo:
sudo apt-key add TeamViewer2017.asc
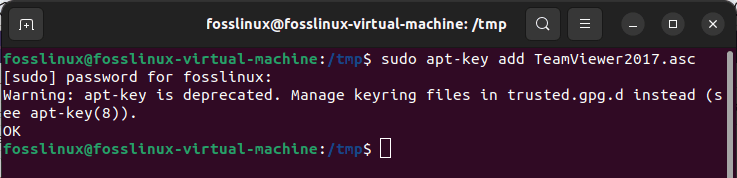
add key
After running the command, you will be queried to input your password. Type in your PC’s password and hit the “Enter” button to initiate the download.
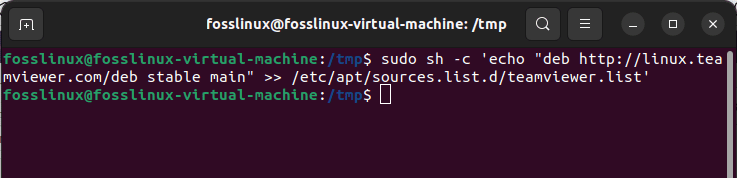
Step 2: Append the TeamViewer repository
Next, execute the following command to append the official TeamViewer repository from which we will set up TeamViewer.
For a stable TeamViewer version:
sudo sh -c 'echo "deb http://linux.teamviewer.com/deb stable main" >> /etc/apt/sources.list.d/teamviewer.list'
For the previous TeamViewer version:
sudo sh -c 'echo "deb http://linux.teamviewer.com/deb preview main" >> /etc/apt/sources.list.d/teamviewer.list'
In this guide, we will be adding the repository for the Teamviewer stable version as shown below:
stable version
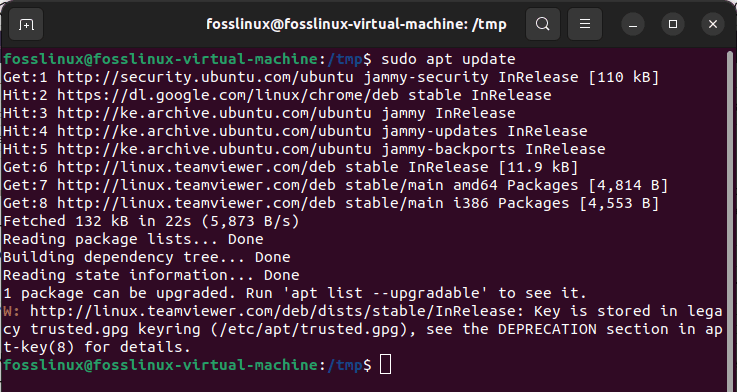
Step 4: Update the system
Now, key in the following command assuming the root user privileges to update your system’s index with that on the internet:
sudo apt update
update system
In case of a need for a system upgrade, like in our case, we have one package that needs to be upgraded; issue the following command:
sudo apt upgrade
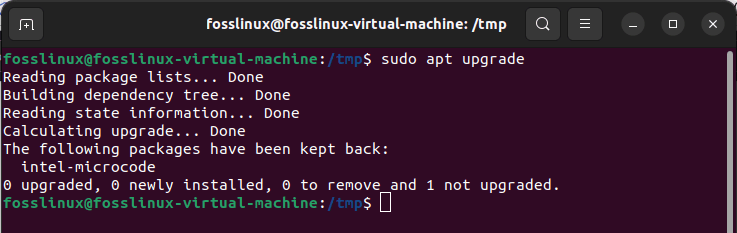
upgrade system
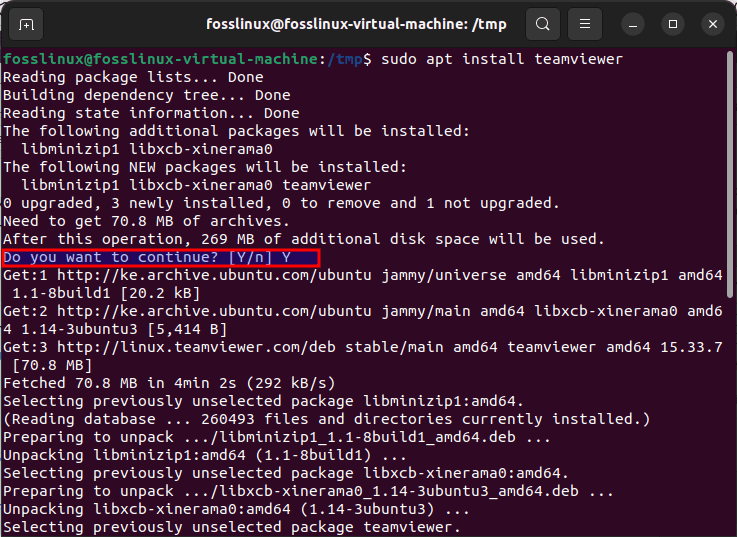
Step 5: Install TeamViewer
Finally, issue the subsequent apt command to install TeamViewer to your system:
sudo apt install teamviewer
install Teamviewer
Note: The system will prompt you with a Y/n option for it to proceed with the setup procedure. Please type in “y/Y” and hit “Enter” to continue. TeamViewer will then be installed on your system.
Let us discuss the methods involved in launching this software via the terminal:
How to launch the TeamViewer using the terminal
If you want to launch TeamViewer via the command line, input the following command to your terminal:
teamviewer
start TeamViewer
Next, look at the second method of installing TeamViewer on Ubuntu via the graphical user interface installer.
How to install TeamViewer on Ubuntu via Graphical installer
We have you well covered for those needing to install TeamViewer more straightforwardly and user-friendly manner. This article section will focus solely on presenting the UI’s installation process.
For this tutorial, we will download the .deb package and install it via the Ubuntu software install.
First, download the official .deb installation package from the TeamViewer Linux Download link. After clicking the link, scroll down on the page and click on the download link for Ubuntu, Debian (stable version), or the TeamViewer preview version as marked in the snapshot below:

Manually download TeamViewer
When using Google Chrome, a how “you have chosen to open” the file window will pop up after clicking on the download link. Click on the “Save File” button, which ensures that the file is saved to the Downloads folder by default. After that, click on “OK.”
When using Firefox, click on the download link, and the process will immediately pick up, as shown below:
download progress
After the download is concluded, open the “Downloads” folder, where you will see the TeamViewer.deb package.
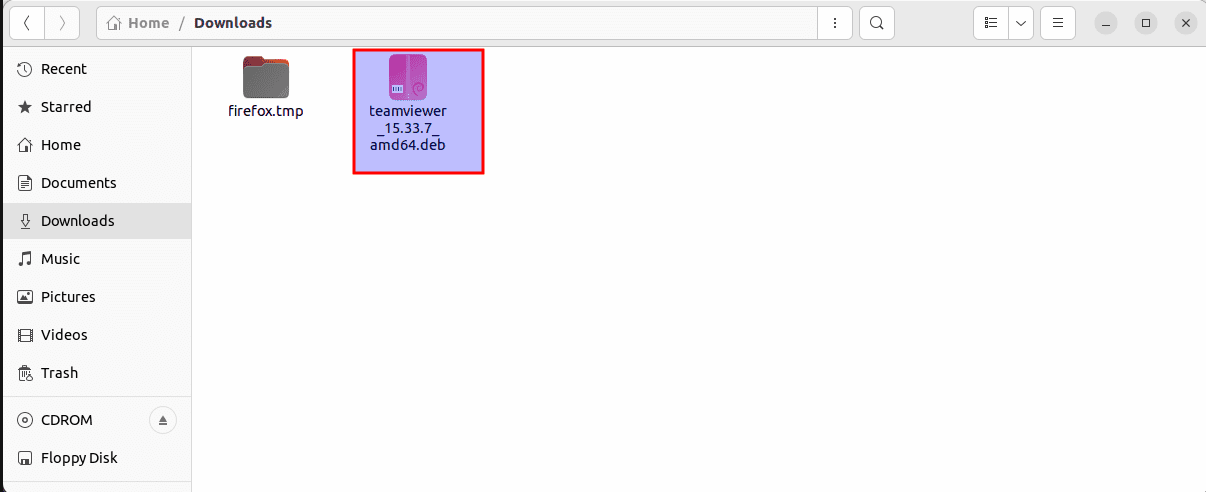
TeamViewer.deb file
After that, right-click on the package and select the “Open with other application” option from the menu.

Select “Open with other application.”
After that, click on the “software install” and the green highlighted “select” button.

select software install
This will open the following installer window:
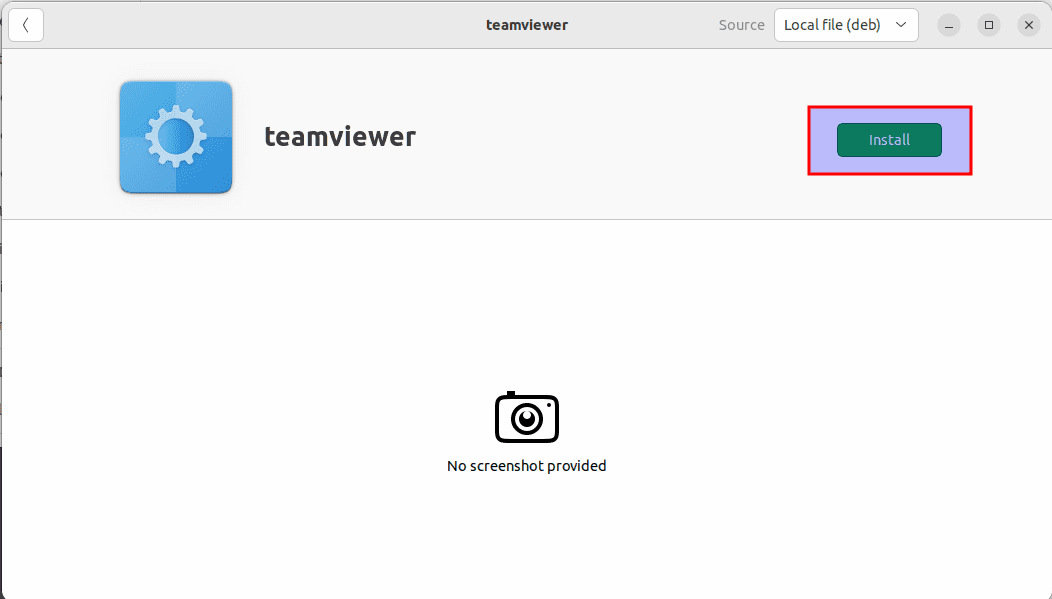
Click on install
Click on the “install” button on the above window, which will invoke the following authentication dialogue for you to give the authentication details for a sudo user, as only an authorized user can install software on Linux.
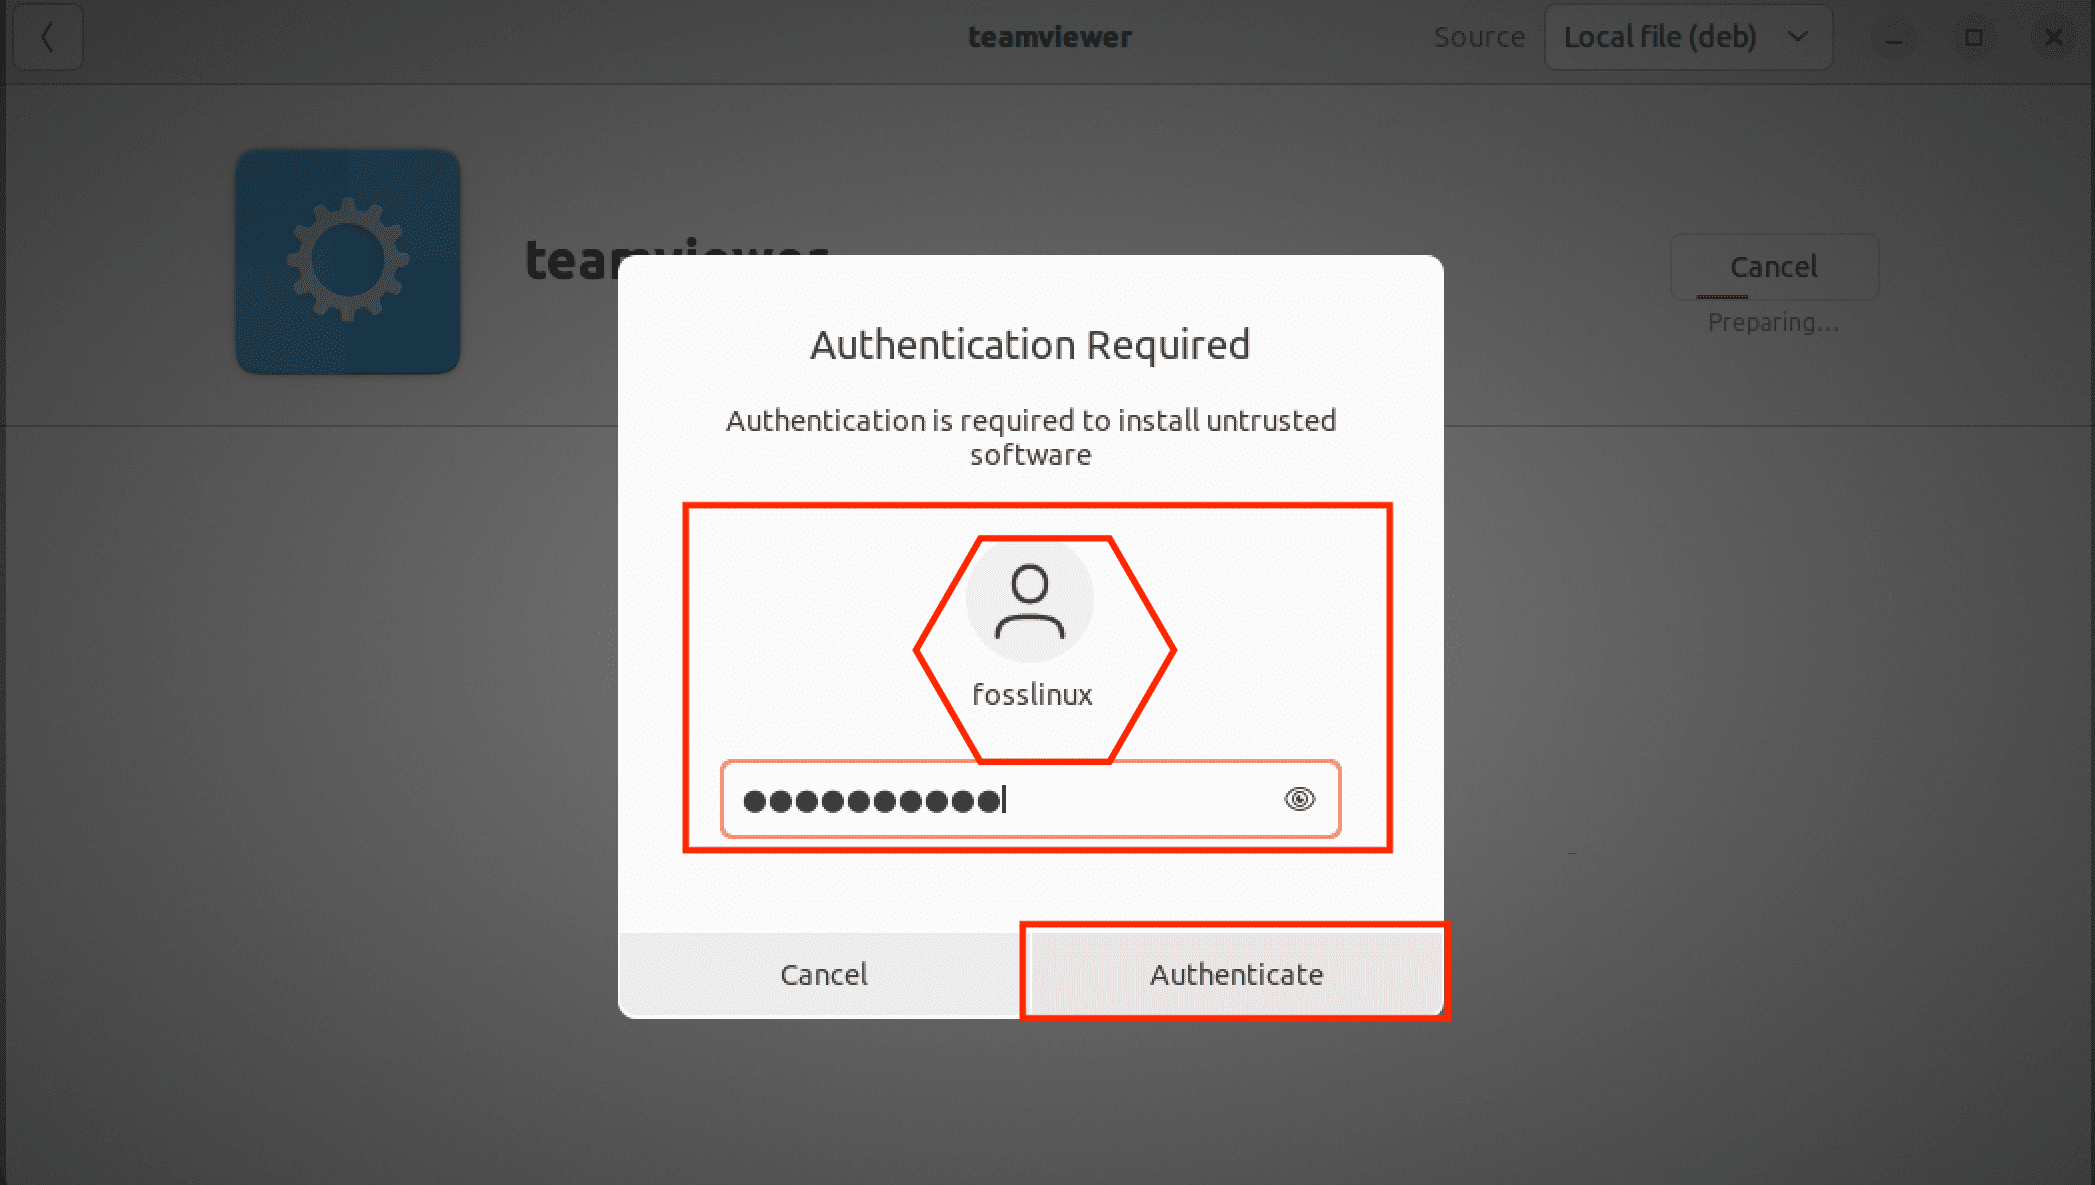
credentials
After inputting your password, click the “Authenticate” button, which will automatically initiate the installation process.
TeamViewer will be set up on your system, and you will get such a message following a successful installation:

installation complete
Let us divert our attention and see how we can launch Teamviewer using the GUI.
How to launch TeamViewer using GUI
To launch TeamViewer, click on “Activities” on the left side of the desktop as shown below:

Click on activities
After that, search for “TeamViewer” in the search bar, and such an icon will appear. Click on it to open it.
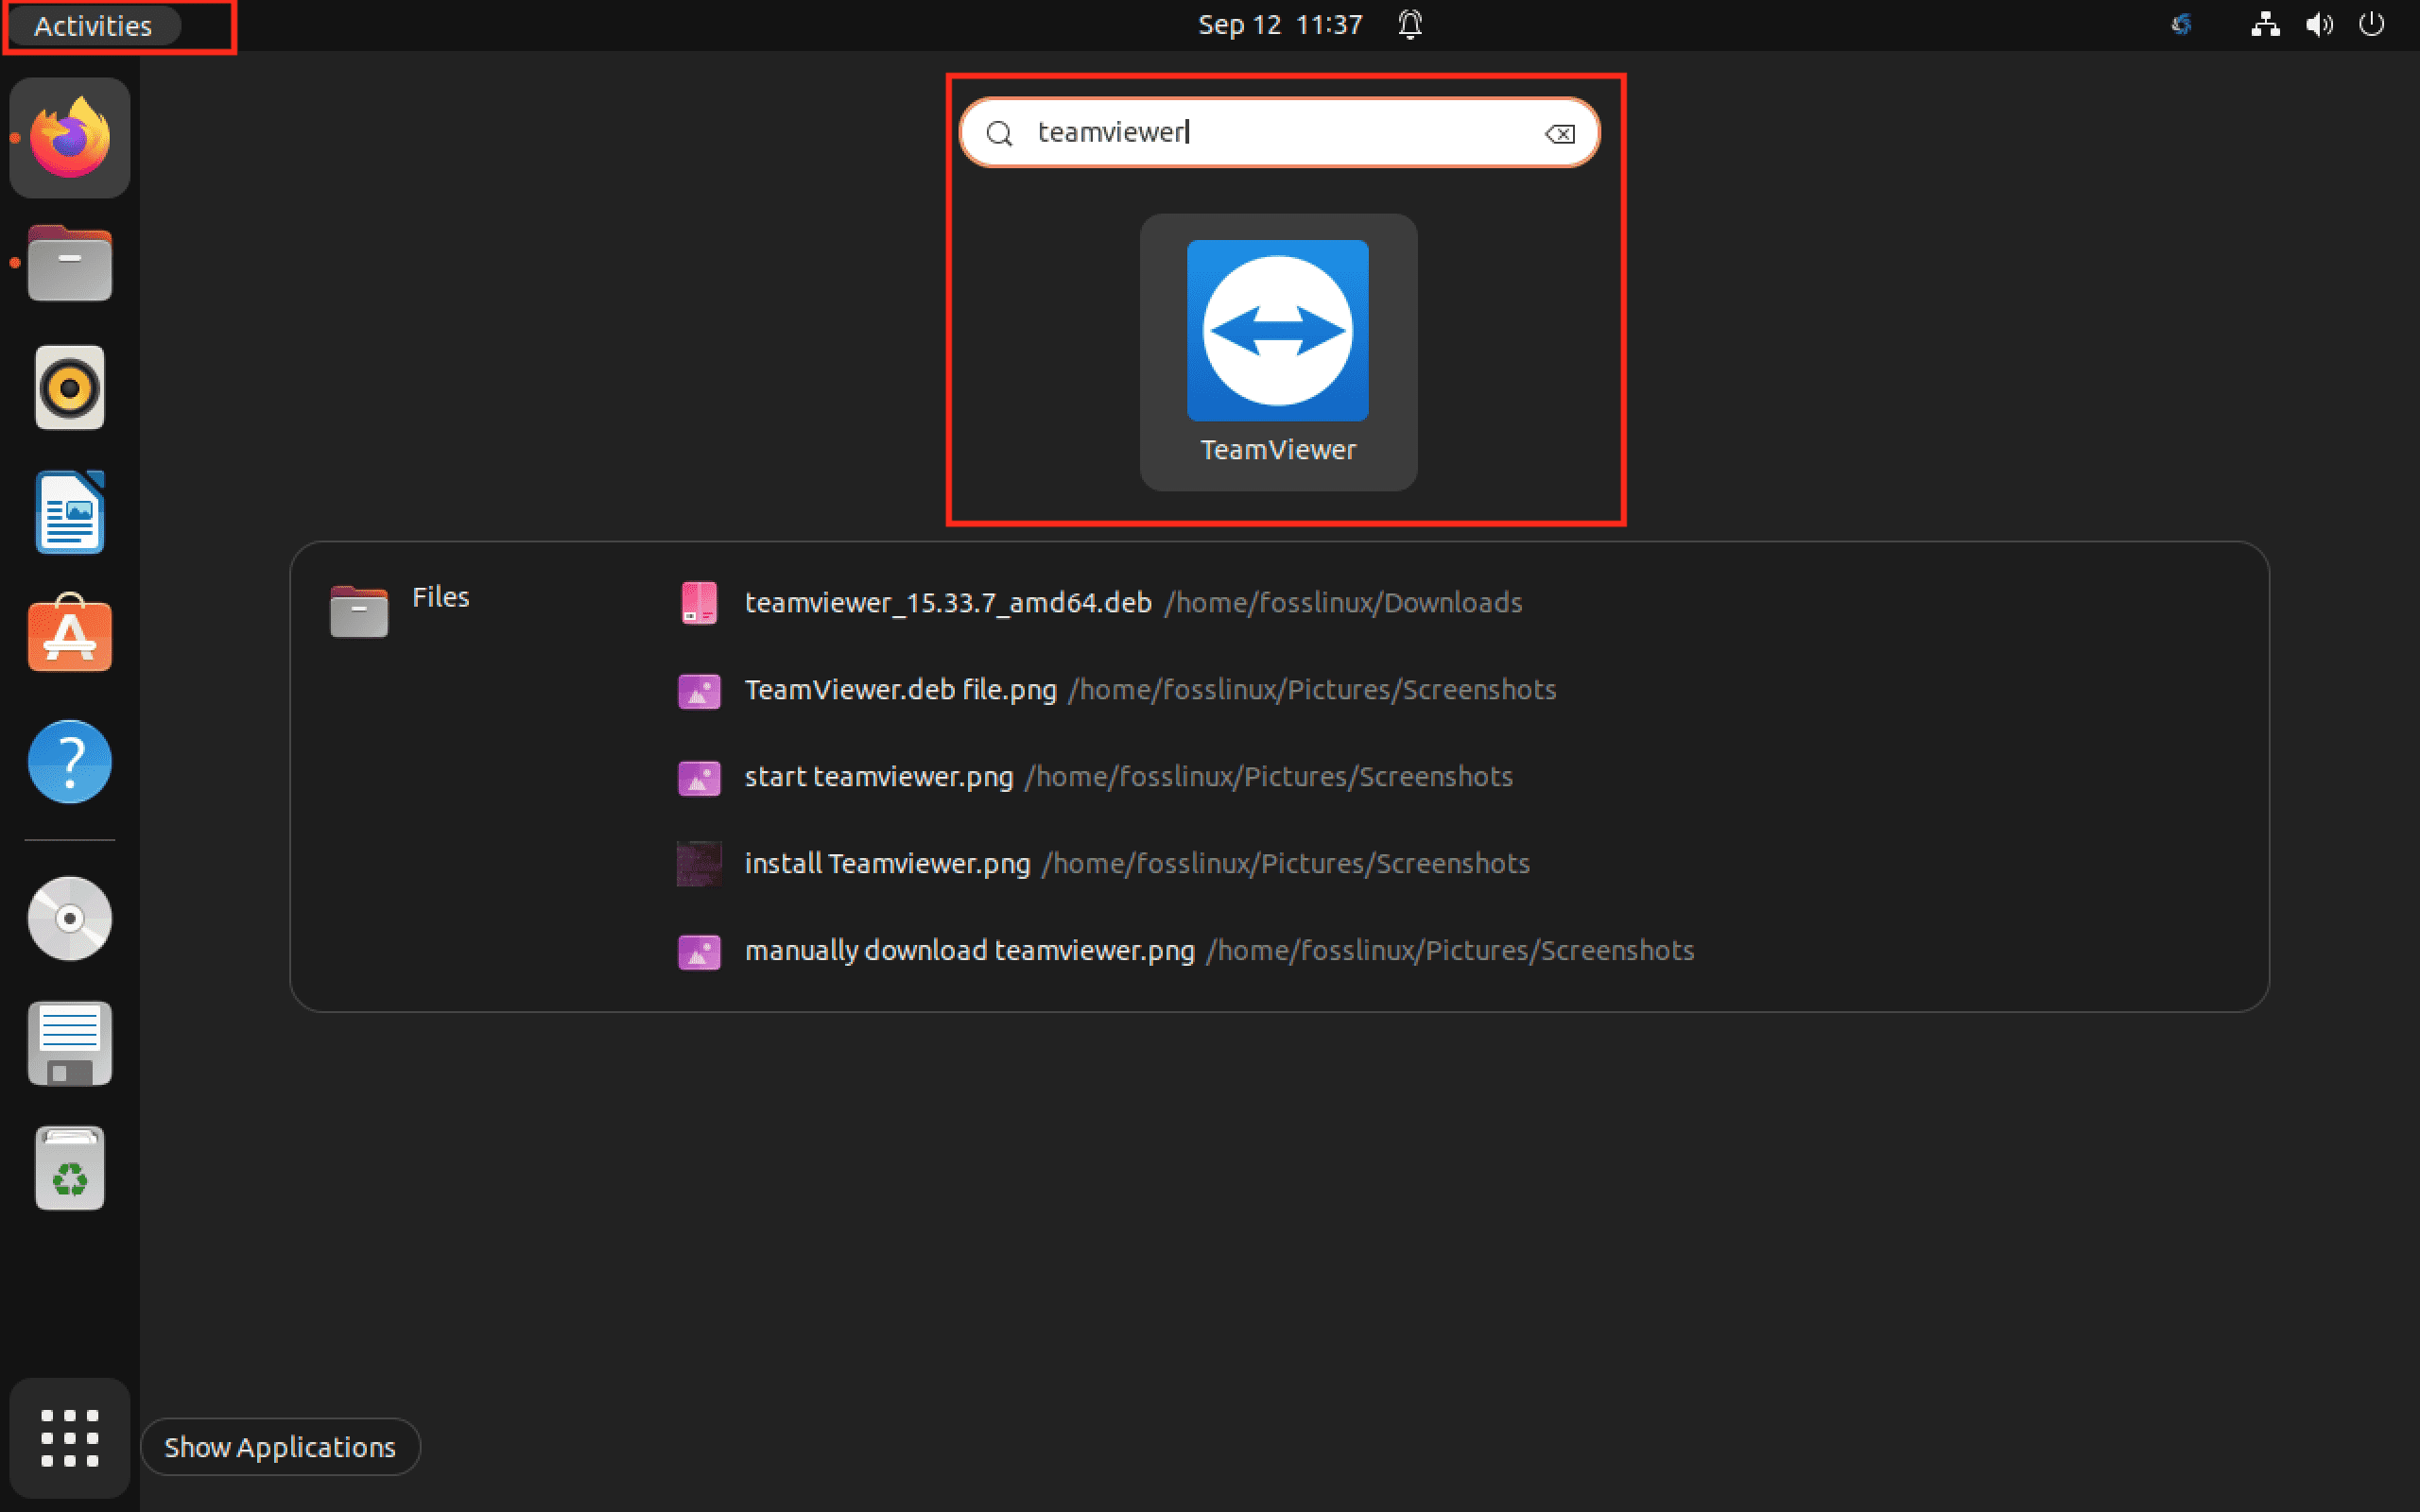
Search for teamviewer
TeamViewer will then open in the following view, through which you can connect or be connected to a remote PC.
default window
Now let us quickly take you through how to use TeamViewer.
How to use TeamViewer on Ubuntu
You can use TeamViewer to share files or access another system remotely as a Linux user. This section will simplify the legal steps needed to do it.
For this purpose, open the terminal by running the following command:
teamviewer

start TeamViewer
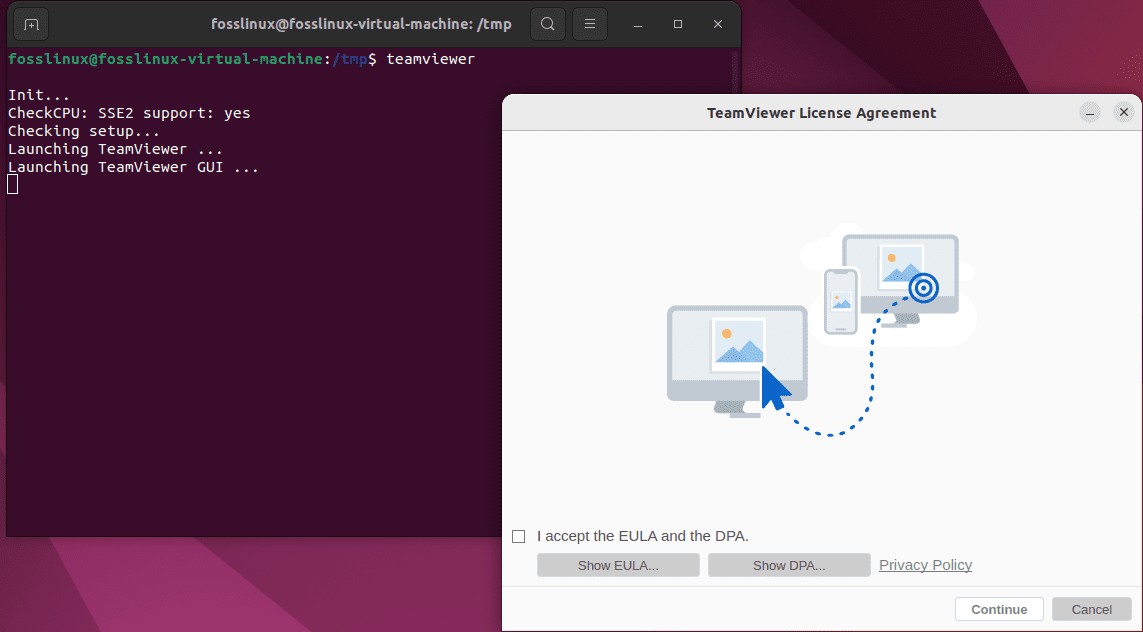
After doing so, you will be urged to read the “TeamViewer License Agreement,” check the “I accept from EULA and the DPA” tickbox then click the “Continue” button:
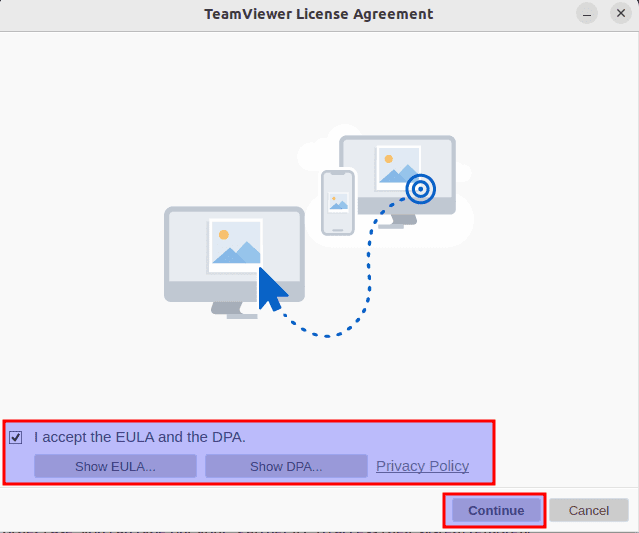
Click on accept EULA
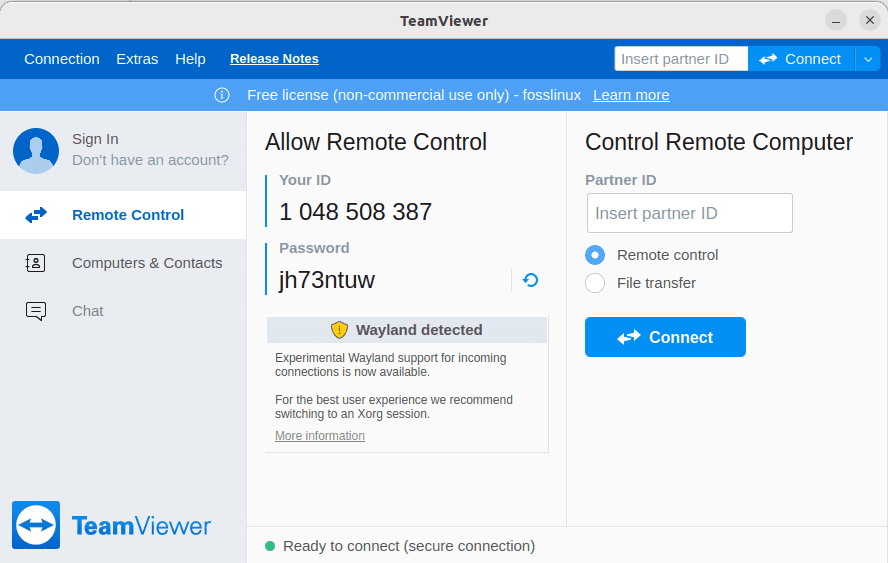
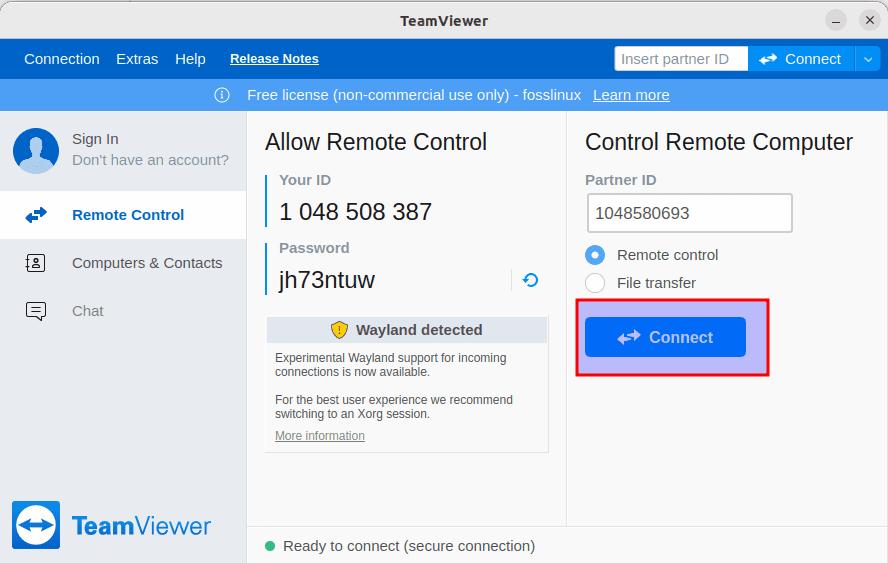
TeamViewer default window will provide your system’s “ID” and “Password.” These credentials can then be used for interlinking another system:
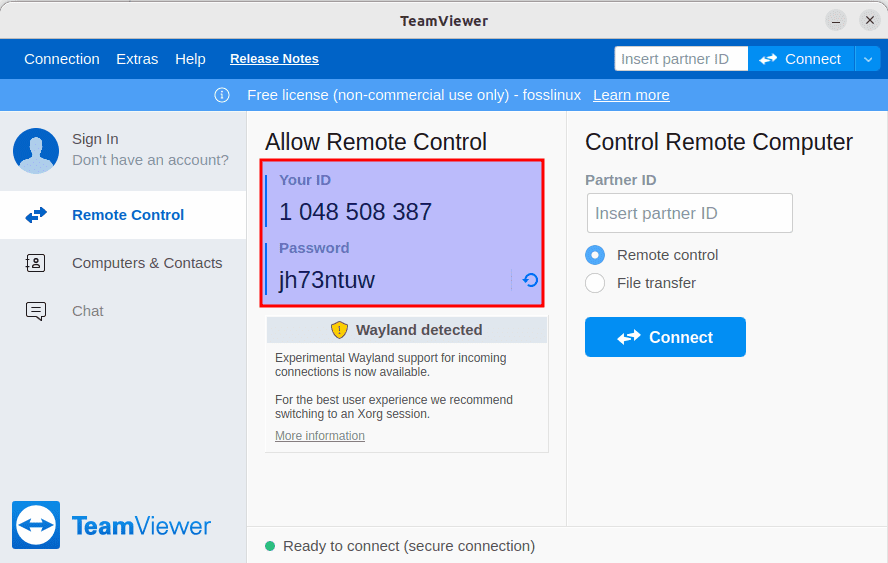
default window
In the other event, you can type your “Partner ID” to access their system remotely:
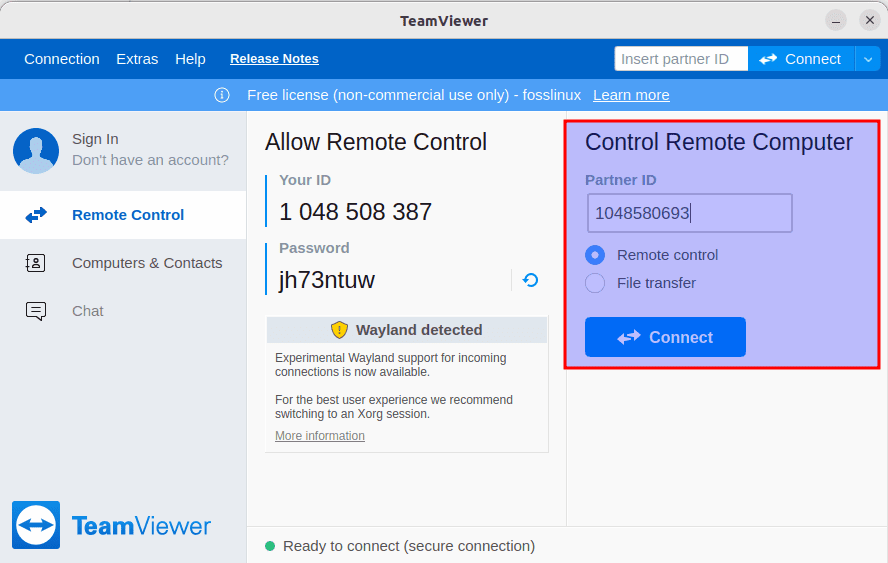
Input partners ID
After keying in their ID, click on the “Connect” button
Click on Connect
TeamViewer will ask you to type the “Password” of your Partner’s TeamViewer account. After that, all will be done for a complete connection.
And that is it! Now, you are all suited up to access the other desktop remotely.

connected
Now that the setup is done, let us focus on how we can remove this software from our OS.
How to uninstall TeamViewer using the terminal
To uninstall Teamviewer from your system without eliminating any configurations you made, then issue the following command as sudo:
sudo apt remove teamviewer
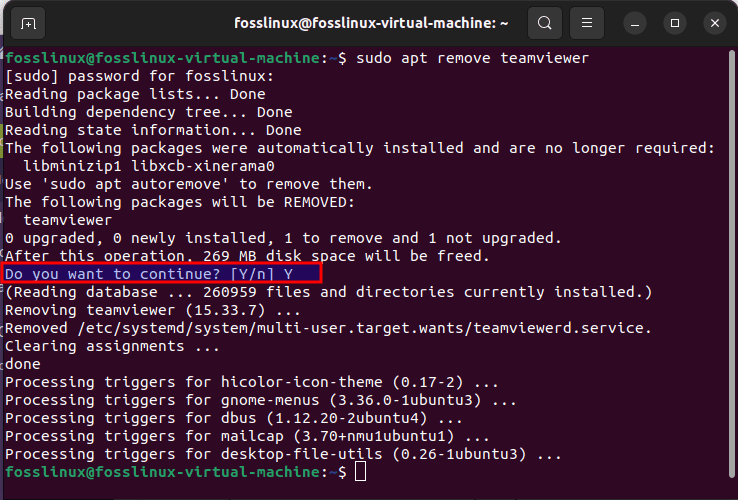
remove Teamviewer
The system will trigger a “Y/n” option to help begin the uninstallation procedure. First, you will type in “Y” and hit the “Enter” button. After completing this command, TeamViewer will be removed from your system.
If you made any configurations, you could remove TeamViewer and all those by issuing the following command:
sudo apt purge teamviewer
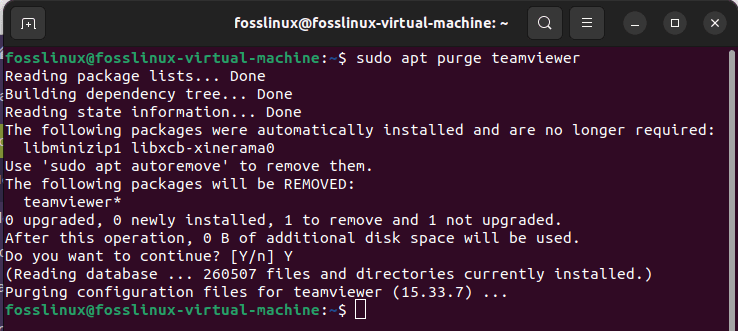
purge TeamViewer
Let’s see how we can replicate the same in a more simplified and interactive way.
How to uninstall TeamViewer using GUI
This process is quite simplified. On your machine, click on the “Activities” toolbar on the left side of the desktop and search for “ubuntu software.”
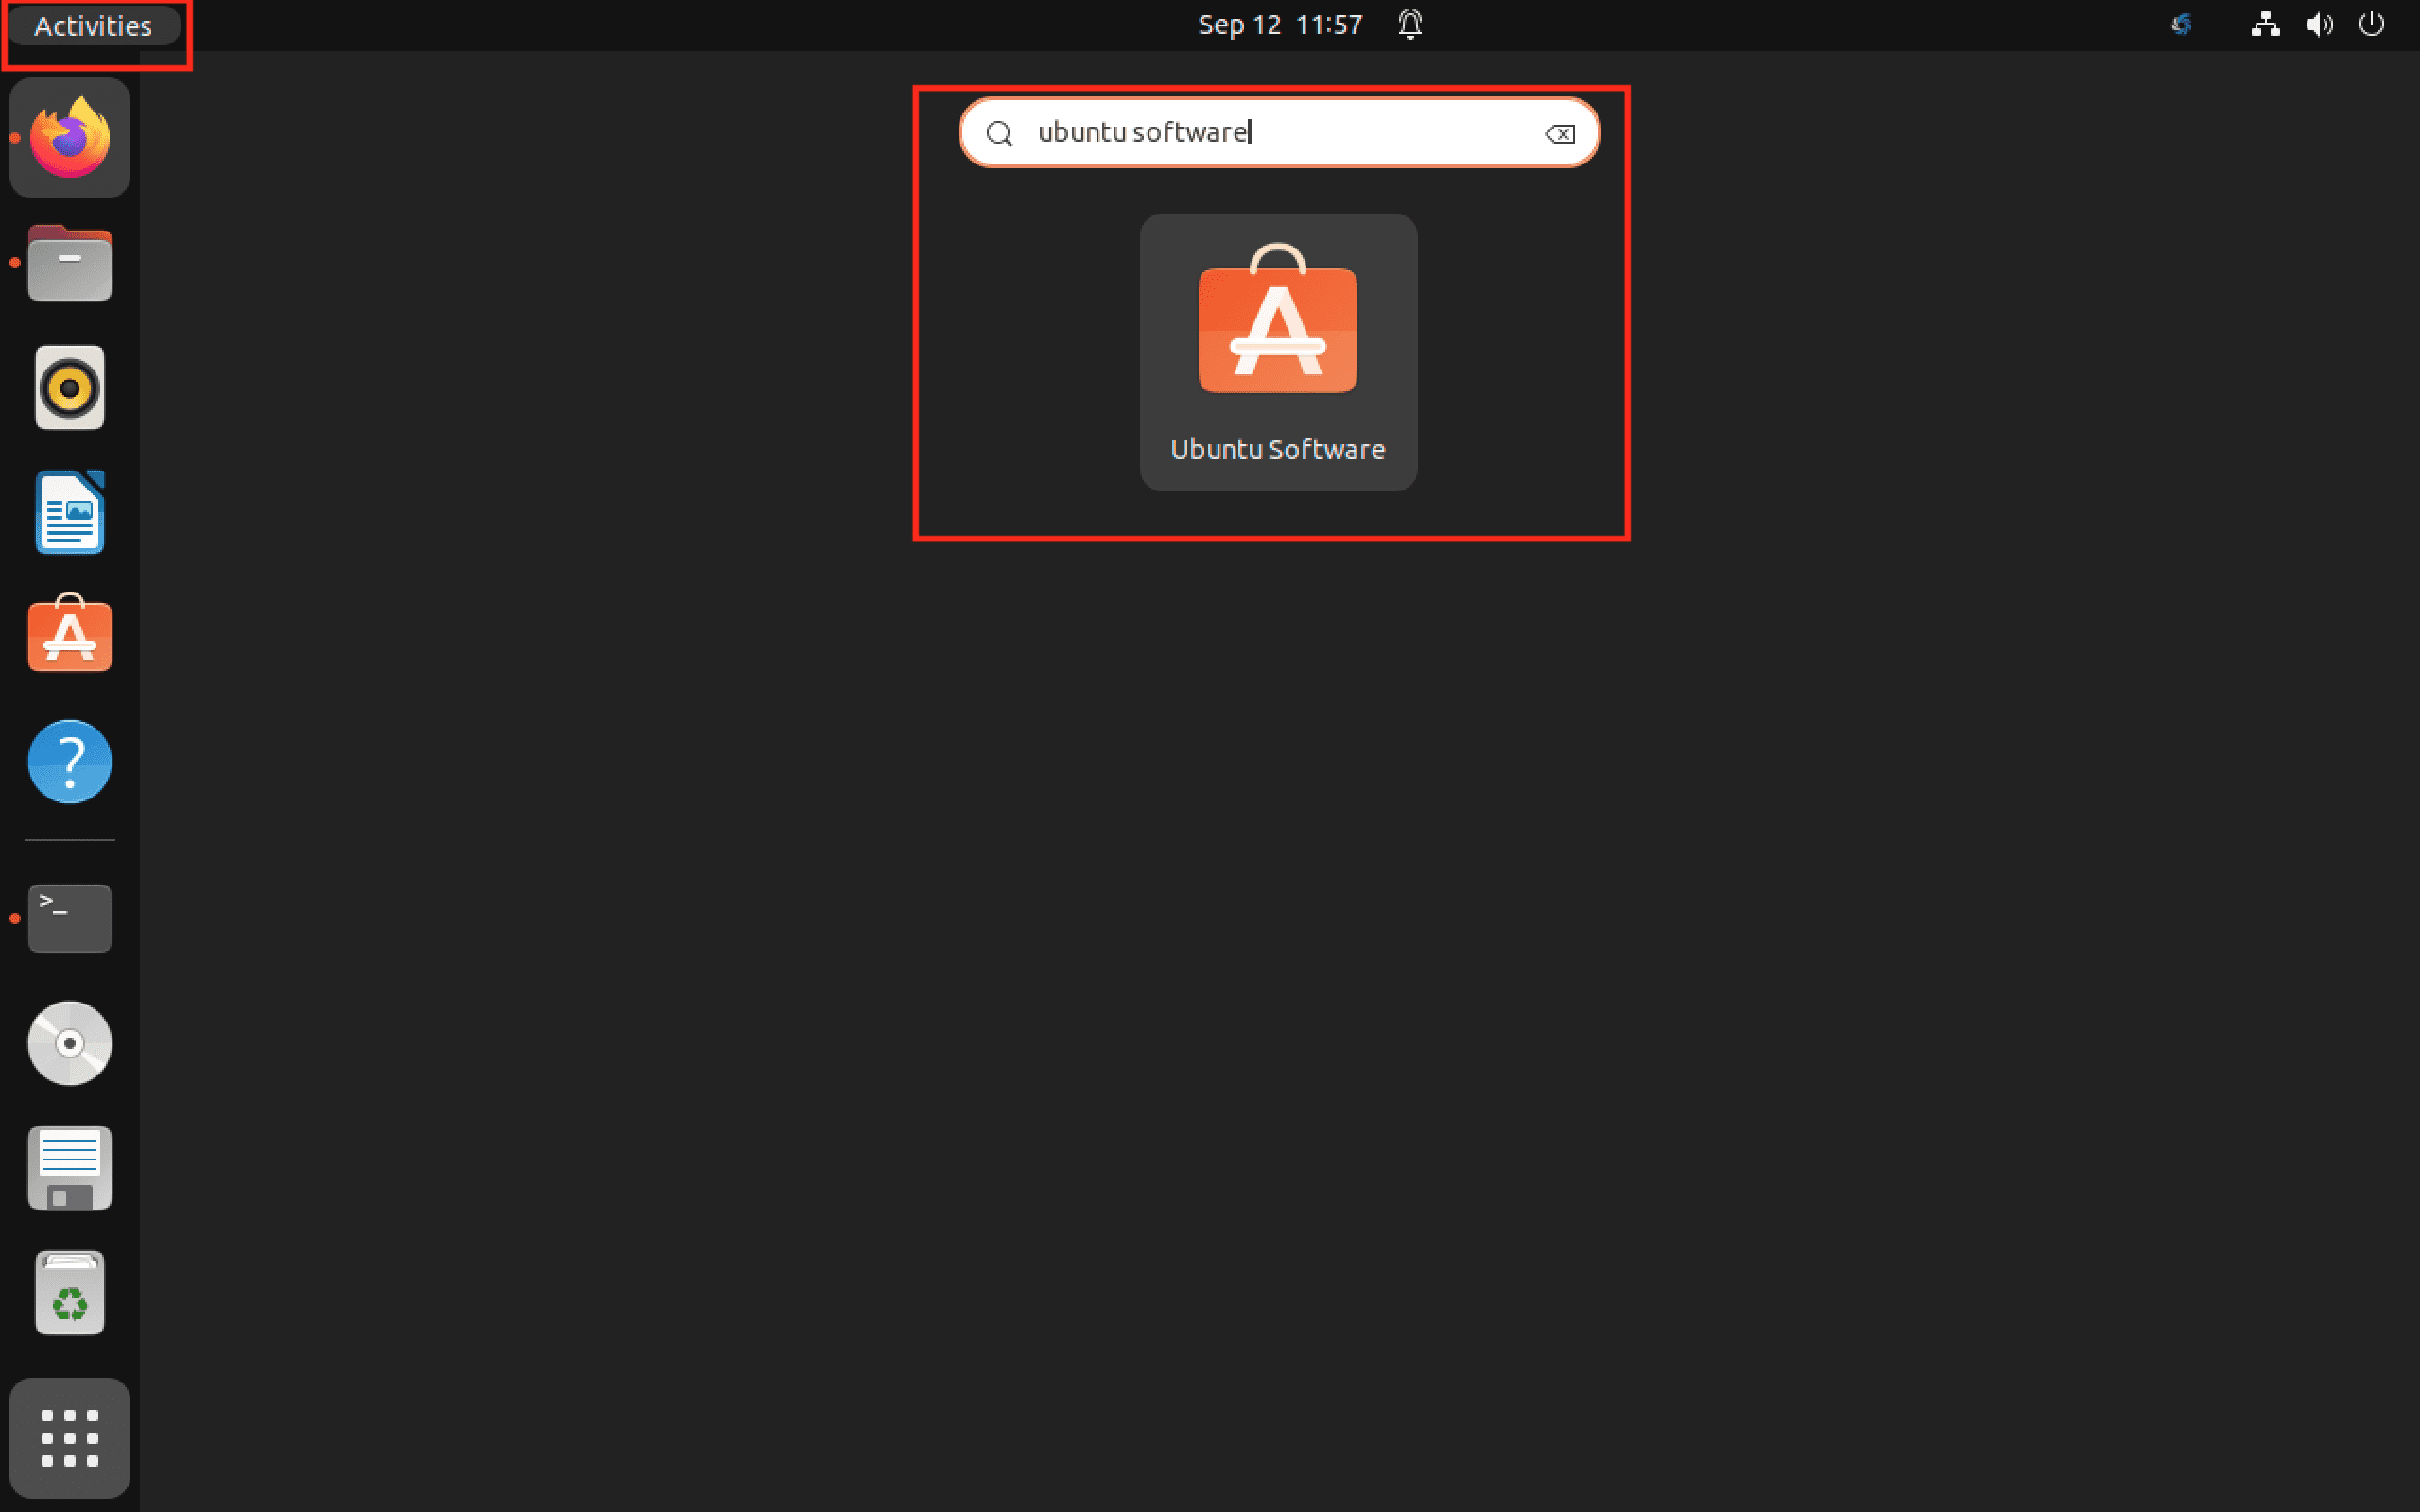
open Ubuntu software
After that, such an icon will appear. Click on it to open it.
The Ubuntu software center will open in the following view:
default window
Directly click on the “Installed” tab and locate the TeamViewer entry from the list of installed software:

Search for software
Click on the “Uninstall” button against the TeamViewer entry as highlighted above.
A dialogue box inquiring whether or not you are that you want to remove the software will appear. Please click on the “Uninstall” button to completely uninstall TeamViewer:
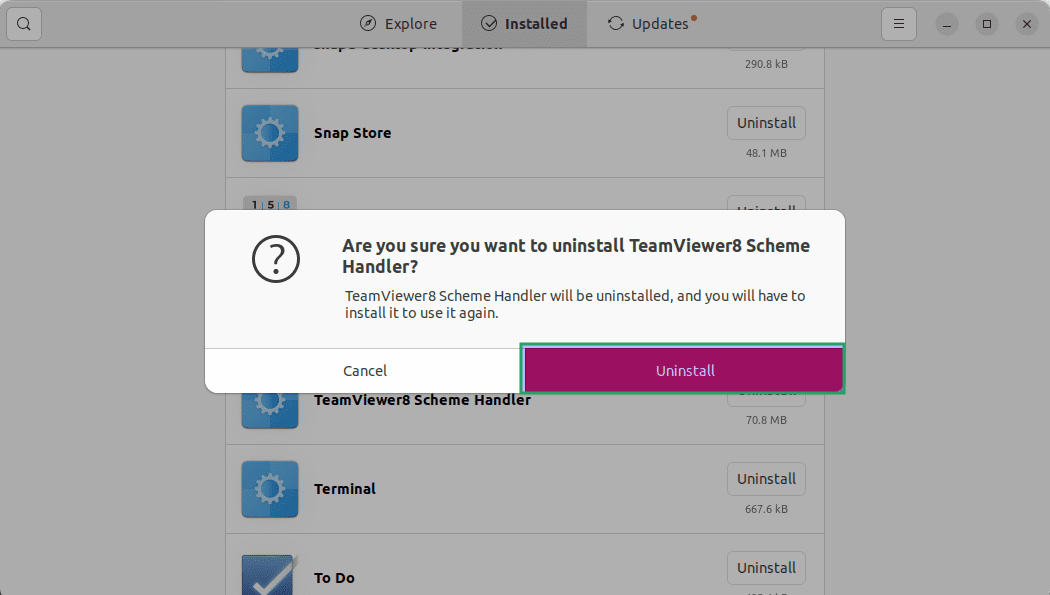
Click on Uninstall
After that, an authentication dialogue will be displayed where you need to input your login credentials as a sudo user. After keying in the password, click on the “Authenticate” button. After that, the uninstallation process will pick up, which will do away with the TeamViewer from your system.
credentials
Conclusion
This post has covered the steps you need to set up TeamViewer, how to use it, and how to uninstall it. At this point, you can now connect to your friend or customer’s machine and offer immediate assistance without being there physically. Thanks for reading through, and keep it locked to FOSSLinux as we refresh your Linux skills.
1 comment
Warning: apt-key is deprecated, does not work 🙁