
Cacti is an open source network and system monitoring graphing tool. It is used to get a graph for network bandwidth utilization, CPU /Load, RAM, and as such. In addition to that, it monitors the network traffic by polling a router or switch via SNMP.
This tutorial is about how to install Cacti and configure it so that you have it up and running.
Install and configure Cacti on CentOS
Here we use root login for this installation and configuration. Before doing anything else, we should disable SELinux.
Step 1 – Disable SELinux
Open and edit SELinux configuration file.
vim /etc/sysconfig/selinux
Change SELINUX=enforcing to SELINUX=disabled. Save and exit. Reboot system
reboot
Step 2 – Enable Repos
Head over to the Fedora page and copy the latest download link of the latest file.
Setup the EPEL repository:
rpm -Uvh https://dl.fedoraproject.org/pub/epel/epel-release-latest-7.noarch.rpm
Similarly, copy the link of Remi and install the Remi repository.
wget http://rpms.famillecollet.com/enterprise/remi-release-7.rpm
Install repository.
rpm -Uvh remi-release-7.rpm
List repositories.
yum repolist
Step 3 – Install Apache
Let’s install Apache and start the service.
yum install httpd httpd-devel
systemctl start httpd
Step 4 – Install SNMP and RRDTool
To install SNMP and RRD Tool, enter the following command:
yum install net-snmp net-snmp-utils net-snmp-libs rrdtool
Accept typing “Y” to confirm installation.
Start SNMP.
systemctl start snmpd
Step 5 – Install MariaDB Server
Use the following command to install the MariaDB server and start the service.
yum install mariadb-server
systemctl start mariadb
Complete MariaDB Secure Installation.
mysql_secure_installation
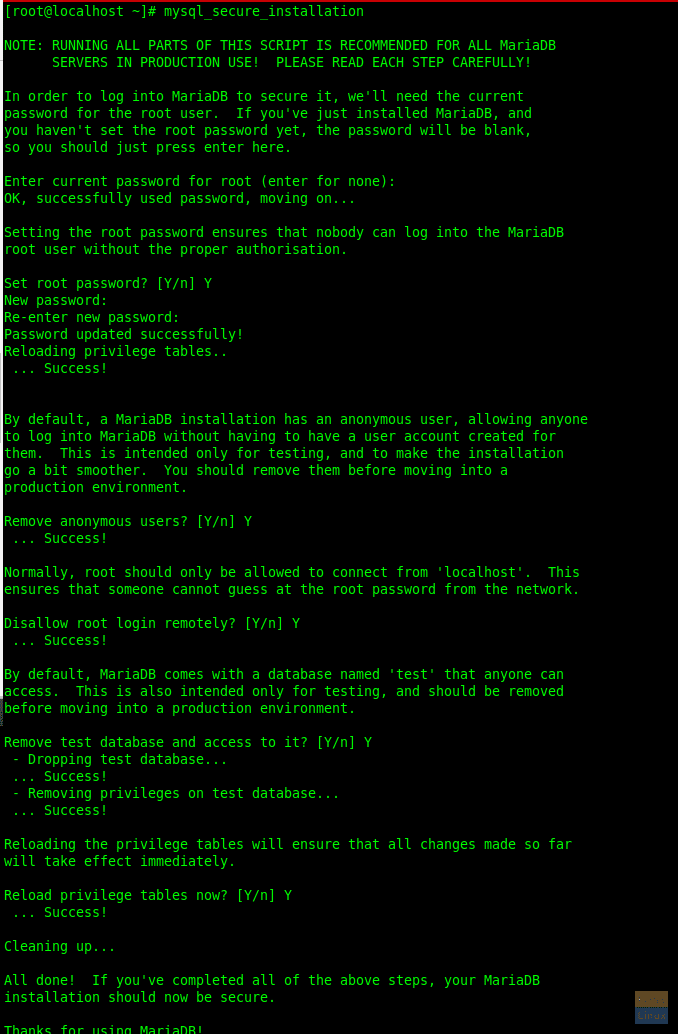
Secure Installation
Step 6 – Install PHP and needed packages
Fire up the following command to install a bunch of PHP related packages.
yum --enablerepo=remi install php-mysql php-pear php-common php-gd php-devel php php-mbstring php-cli php-intl php-snmp
Step 7 – Create a Cacti Database
Now you can log in to the database server with the previously configured password.
mysql -u root -p
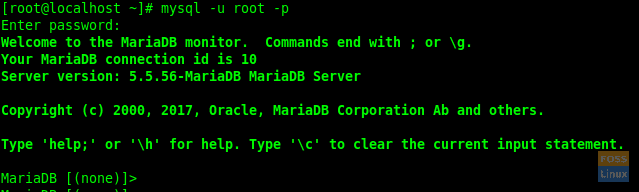
Login to MariaDB
Create a Database and user.
MariaDB [(none)]> create database fosslinuxcacti;
MariaDB [(none)]> CREATE USER 'fosslinuxuser'@'localhost' IDENTIFIED BY 'C345gDvfr@#231';
Grant permission and flush privileges.
MariaDB [(none)]> grant all privileges on fosslinuxcacti.* to fosslinuxuser@localhost ;
MariaDB [(none)]> FLUSH PRIVILEGES;
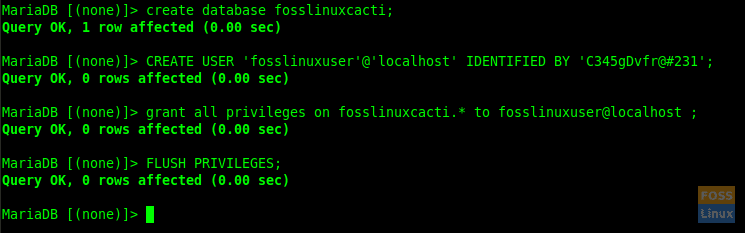
Create DB and User
Create database user should have access to the mysql.time_zone_name Table. So we should import the mysql_test_data_timezone.sql to MySQL database first.
mysql -u root -p mysql < /usr/share/mysql/mysql_test_data_timezone.sql
Login to MariaDB.
mysql -u root -p
Grant access to the cacti database user and flush privileges.
MariaDB [(none)]> GRANT SELECT ON mysql.time_zone_name TO fosslinuxuser@localhost;
MariaDB [(none)]> flush privileges;

Time Zone
Step 8 – Optimize Database
We need to modify database parameters for better performance. Use the following command.
vim /etc/my.cnf.d/server.cnf
Add the following lines to the [mysqld] section.
collation-server = utf8_general_ci
init-connect='SET NAMES utf8'
character-set-server = utf8
max_heap_table_size = 128M
max_allowed_packet = 16777216
tmp_table_size = 64M
join_buffer_size = 64M
innodb_file_per_table = on
innodb_buffer_pool_size = 512M
innodb_doublewrite = off
innodb_additional_mem_pool_size = 80M
innodb_lock_wait_timeout = 50
innodb_flush_log_at_trx_commit = 2

Database Parameters
When done, restart the MariaDB service using the restart command:
systemctl restart mariadb.service
Step 9 – Install and configure Cacti
Time to install Cacti now using YUM.
yum -y install cacti
Import default cacti database file to the created database.
cd /usr/share/doc/cacti-1.1.38
Import the SQL file.
mysql -u root -p fosslinuxcacti < cacti.sql
Edit the Cacti configuration file which includes a database, password details etc.
vim /usr/share/cacti/include/config.php
Modify database details.
$database_type     = 'mysql';
$database_default  = 'fosslinuxcacti';
$database_hostname = 'localhost';
$database_username = 'fosslinuxuser';
$database_password = 'C345gDvfr@#231';
$database_port     = '3306';
$database_ssl      = false;
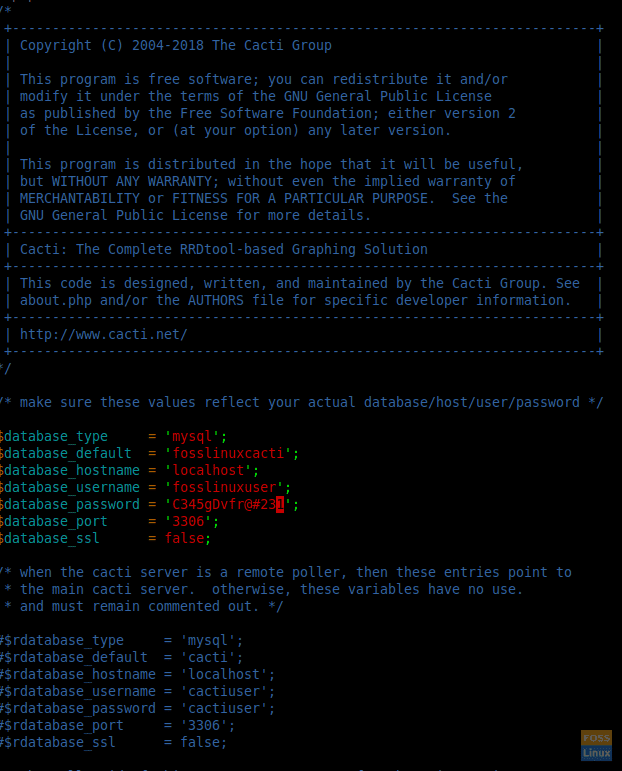
Cacti Configuration File
Step 10 – Set Cron for Cacti
Open cacti cron file.
vim /etc/cron.d/cacti
Uncomment the following line.
*/5 * * * * apache /usr/bin/php /usr/share/cacti/poller.php > /dev/null 2>&1
Cron For Cacti
Save and exit the file.
Step 11 – Configure Apache for Cacti
This will help us to do a remote installation. Edit the cacti config file.
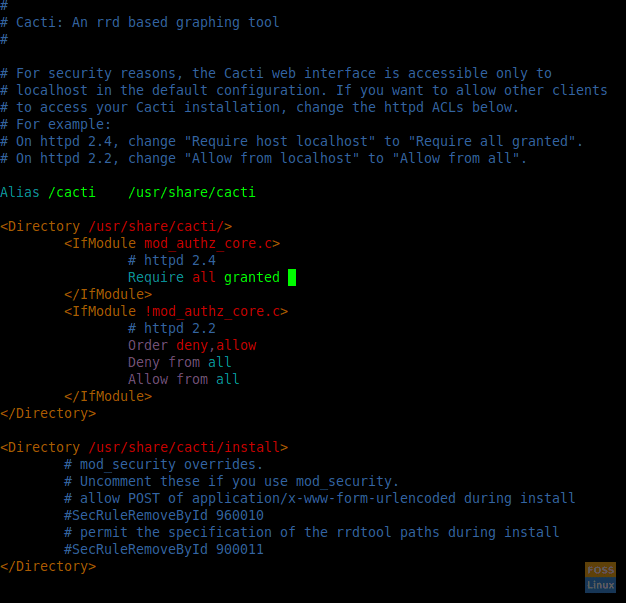
vim /etc/httpd/conf.d/cacti.conf
Change “Require host localhost” to “Require all granted” and “Allow from localhost” to “Allow from all.”
Cacti Apache Configuration
Change Time Zone.
vim /etc/php.ini
date.timezone = your time Zone
E.g.:- date.timezone = Australia/Sydney
Restart apache, MariaDB, and SNMP.
systemctl restart httpd.service
systemctl restart mariadb.service
systemctl restart snmpd.service
Step 12 – Configure the Firewall
Use these commands:
firewall-cmd --permanent --zone=public --add-service=http
firewall-cmd --reload
Step 13 – Start Cacti installation
Open a web browser and use the following URL to access Cacti web interface.
http://Your-Server-IP/cacti
You will see the Licence Agreement page Then accept it and click Begin.
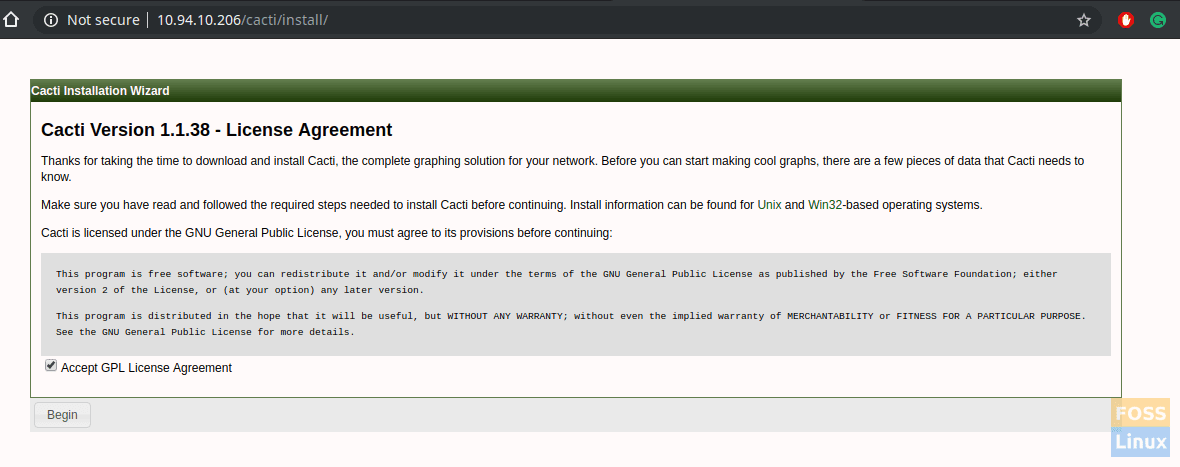
License Agreement
You should see Pre-installation checks. Click next if there are no issues.
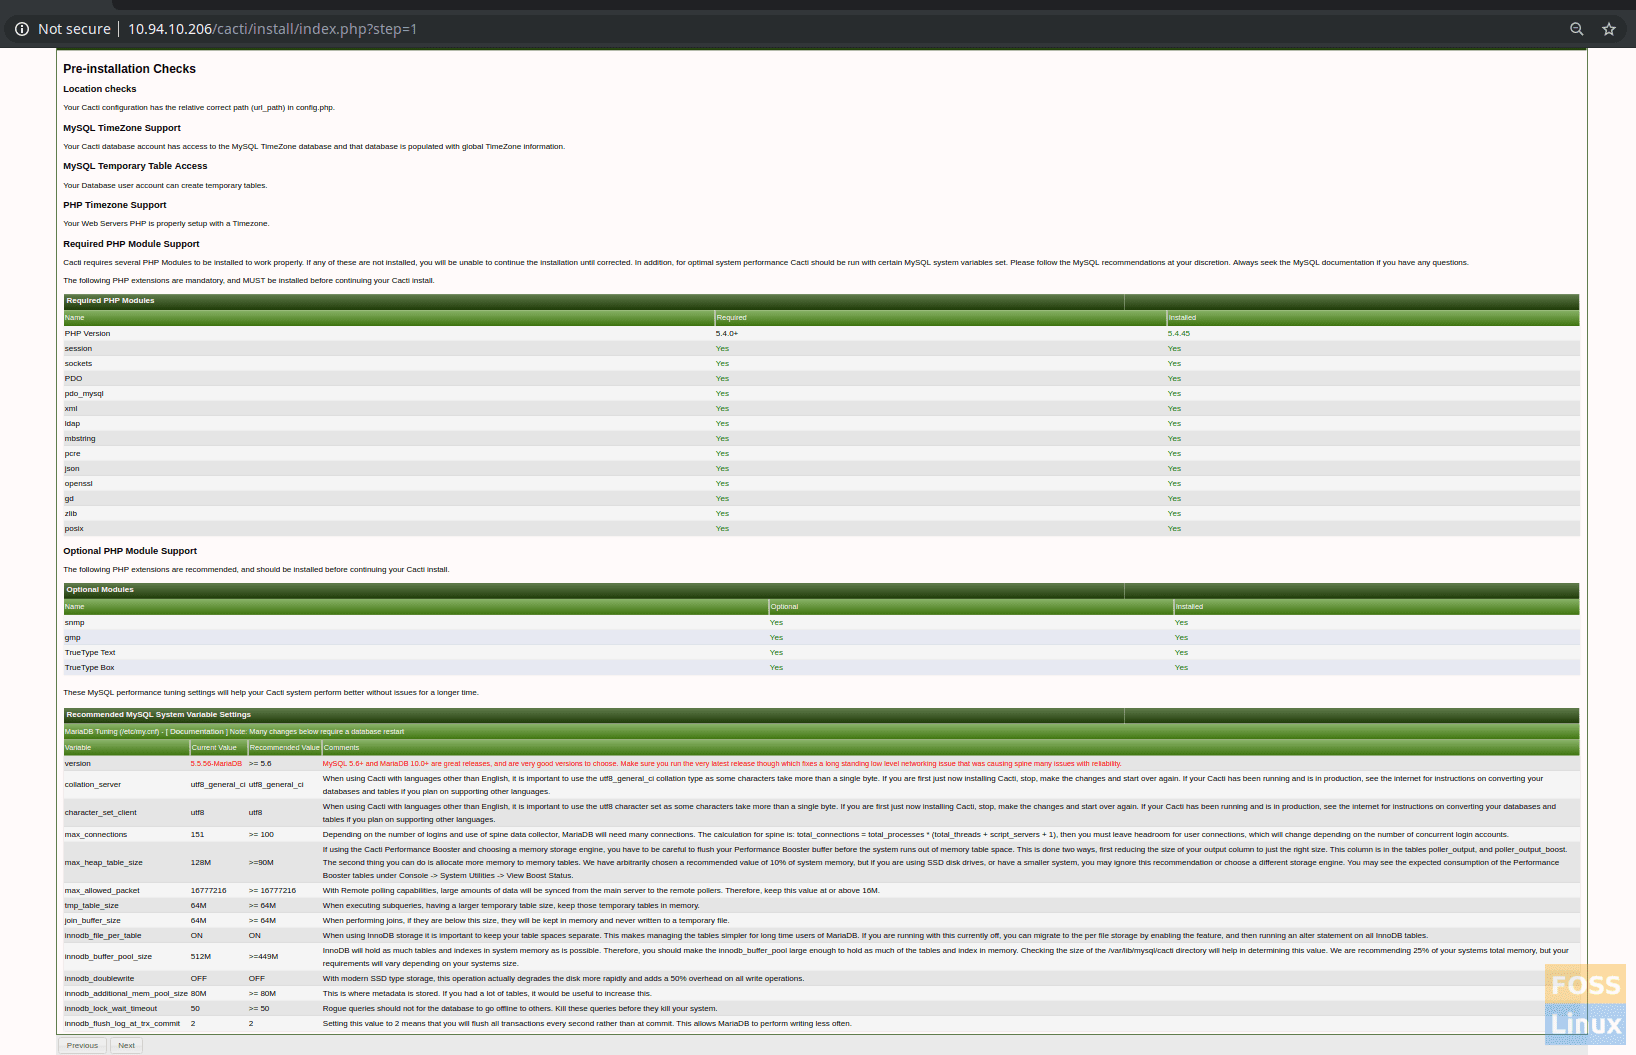
Pre-installation Checks
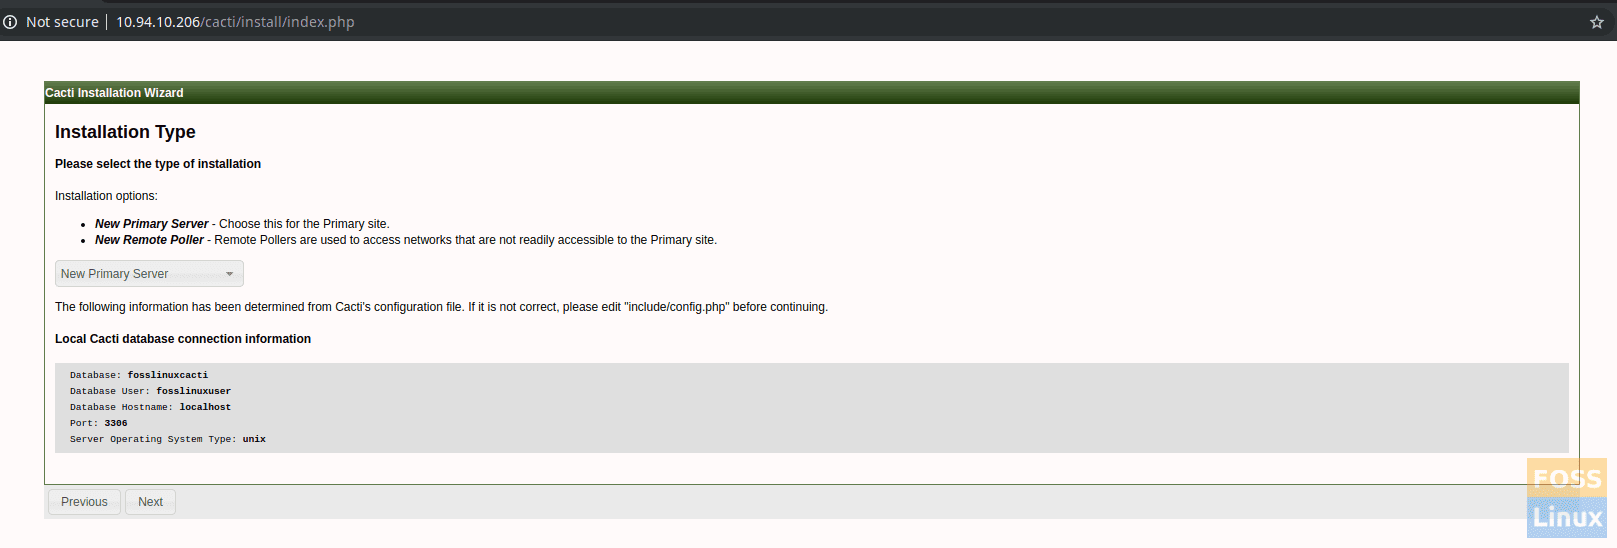
Next window is Installation Type. It will show Database connection details. Click Next to continue.
Installation Type
Verify Critical Binary Locations and Versions and then click next.
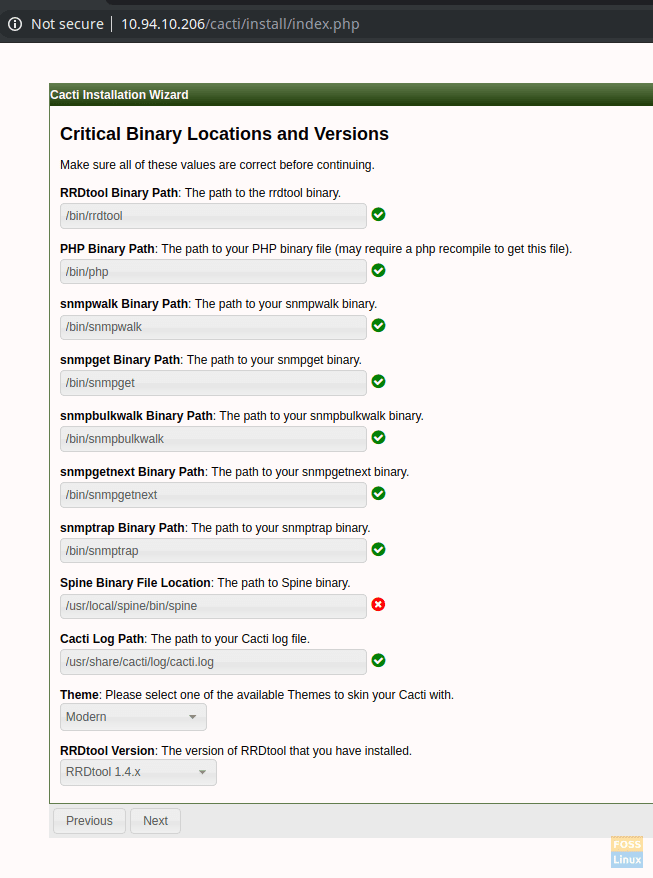
Critical Binary Locations and Versions
Verify Directory Permissions and continue.
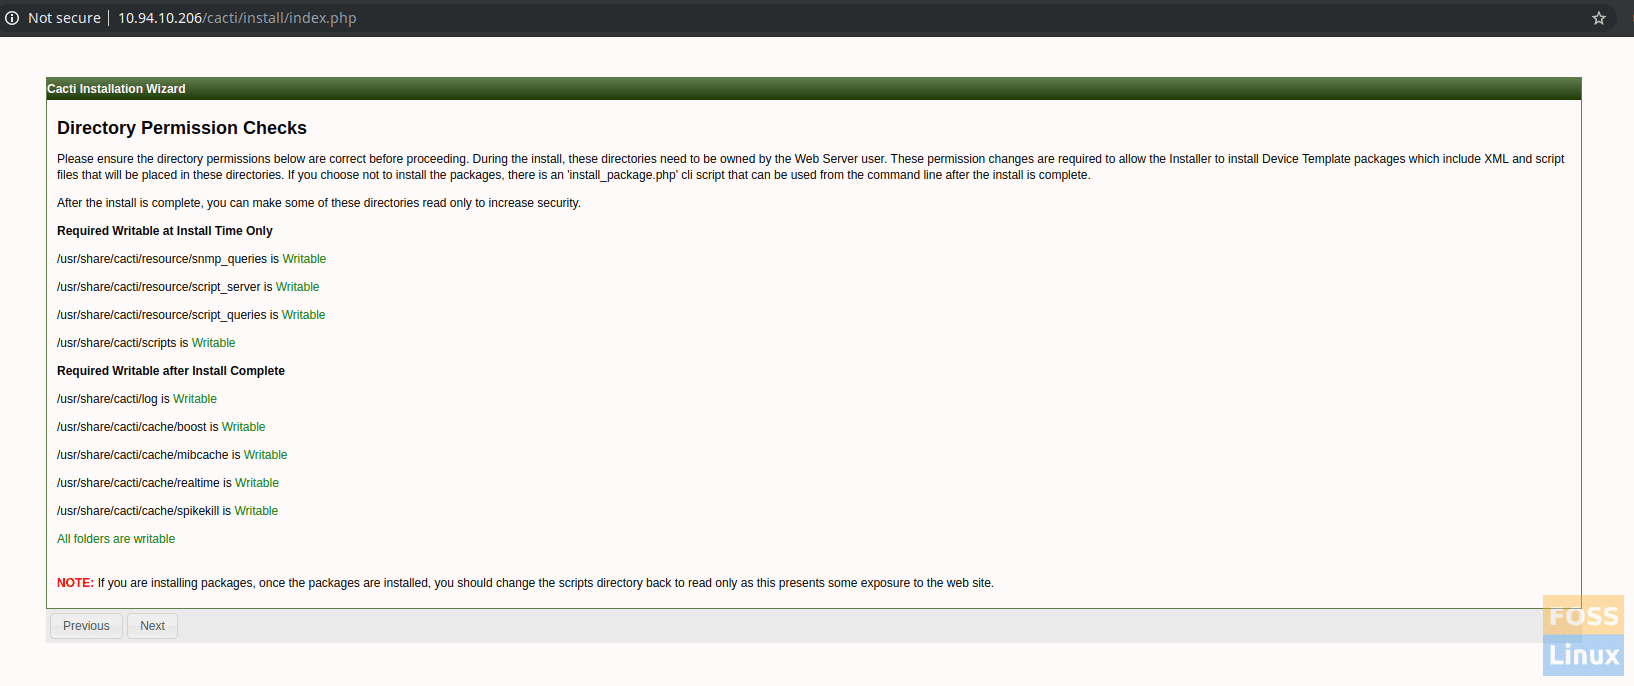
Directory Permission Checks
In the Template Setup window, you can select all templates, and click finish to the complete installation.
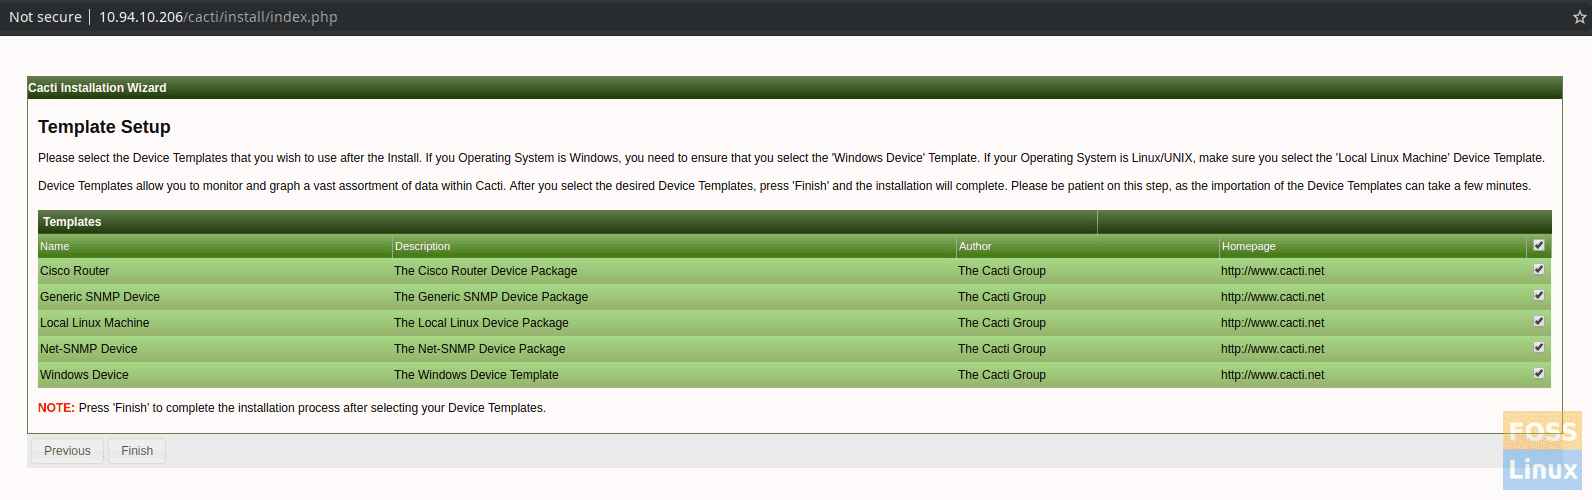
Template Setup
After the installation, it will redirect to Login Page.
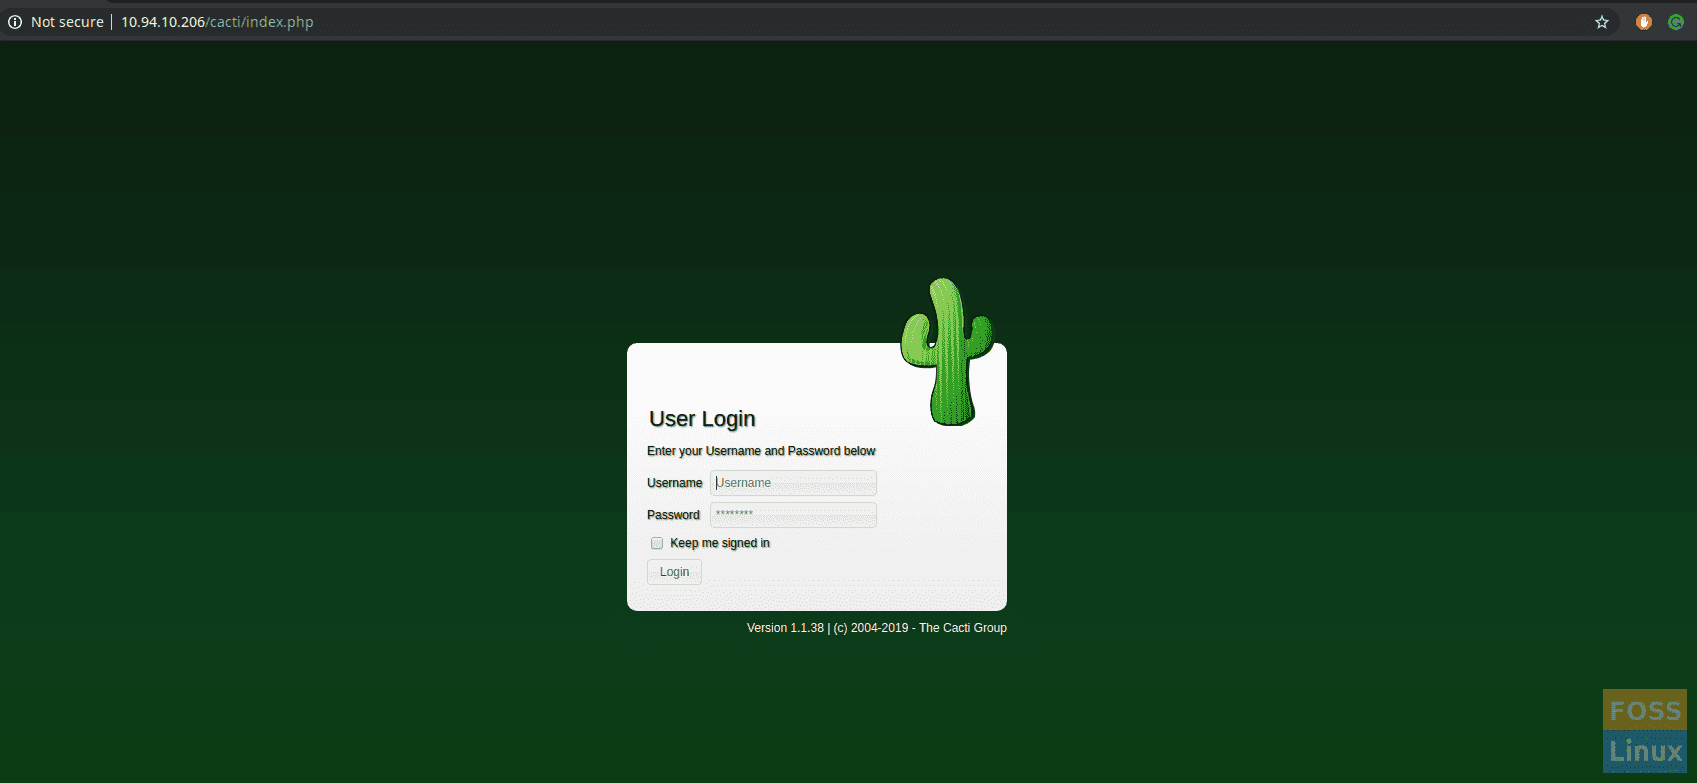
Login Page
Using default user name “admin” and default password “admin” you can log in to Cacti server. You should be asked to change the password after that.
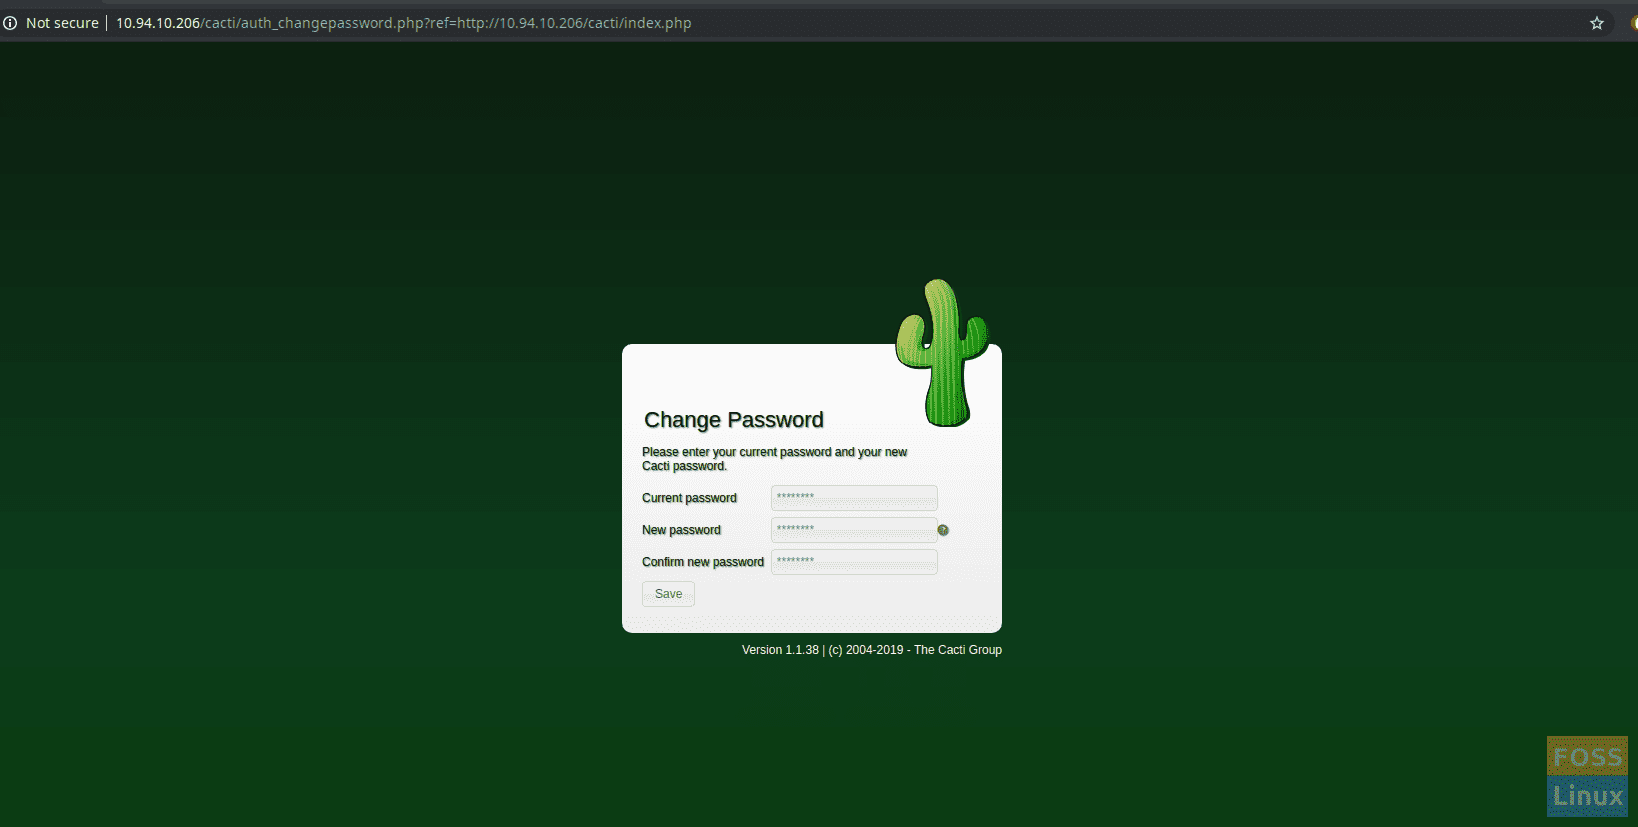
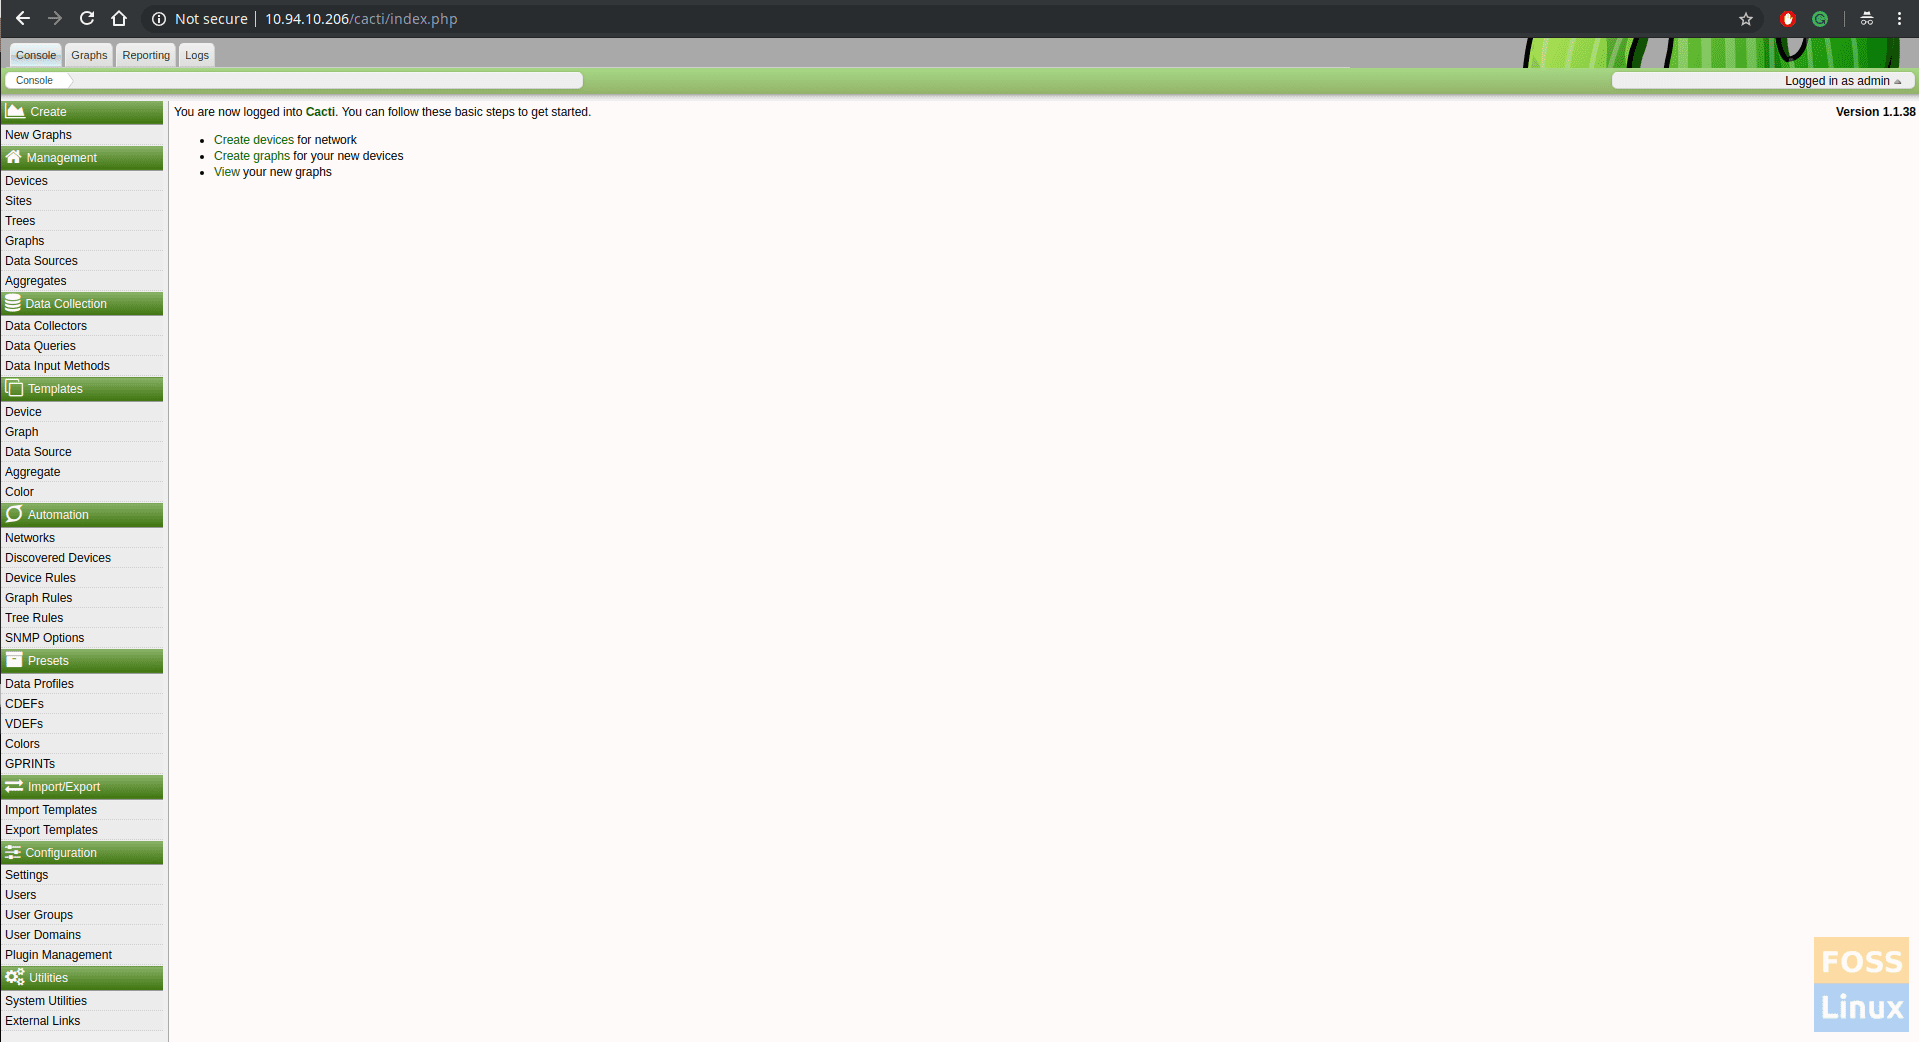
Change PasswordChange password and click save. Then you should see the Cacti Dashboard.
Cacti Dashboard
You can add new devices from Managemnt-> Devices Then click plus mark “+” on top of the right-hand corner.
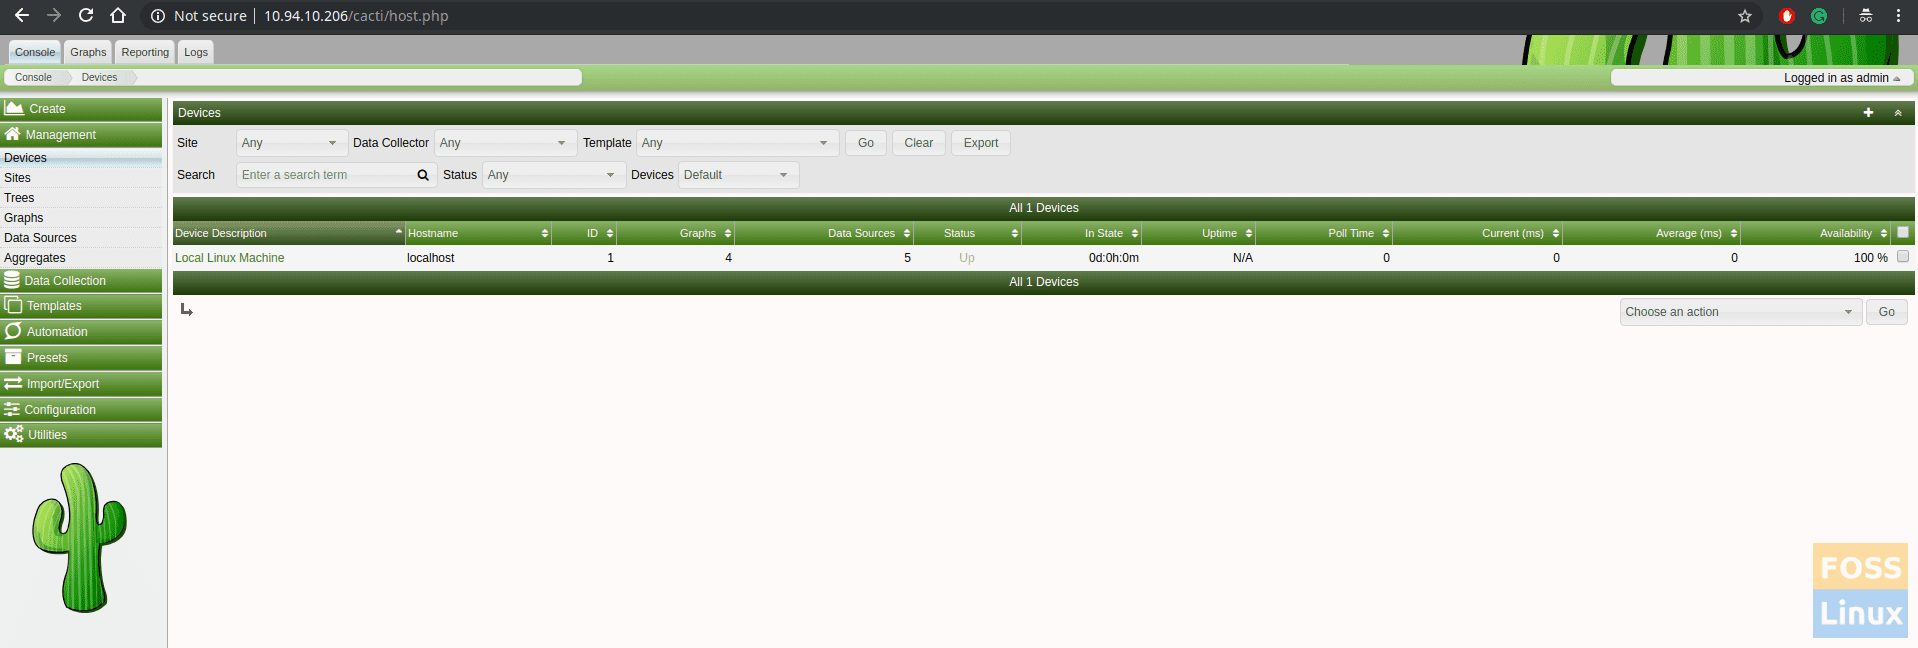
Add Devices
Graphs
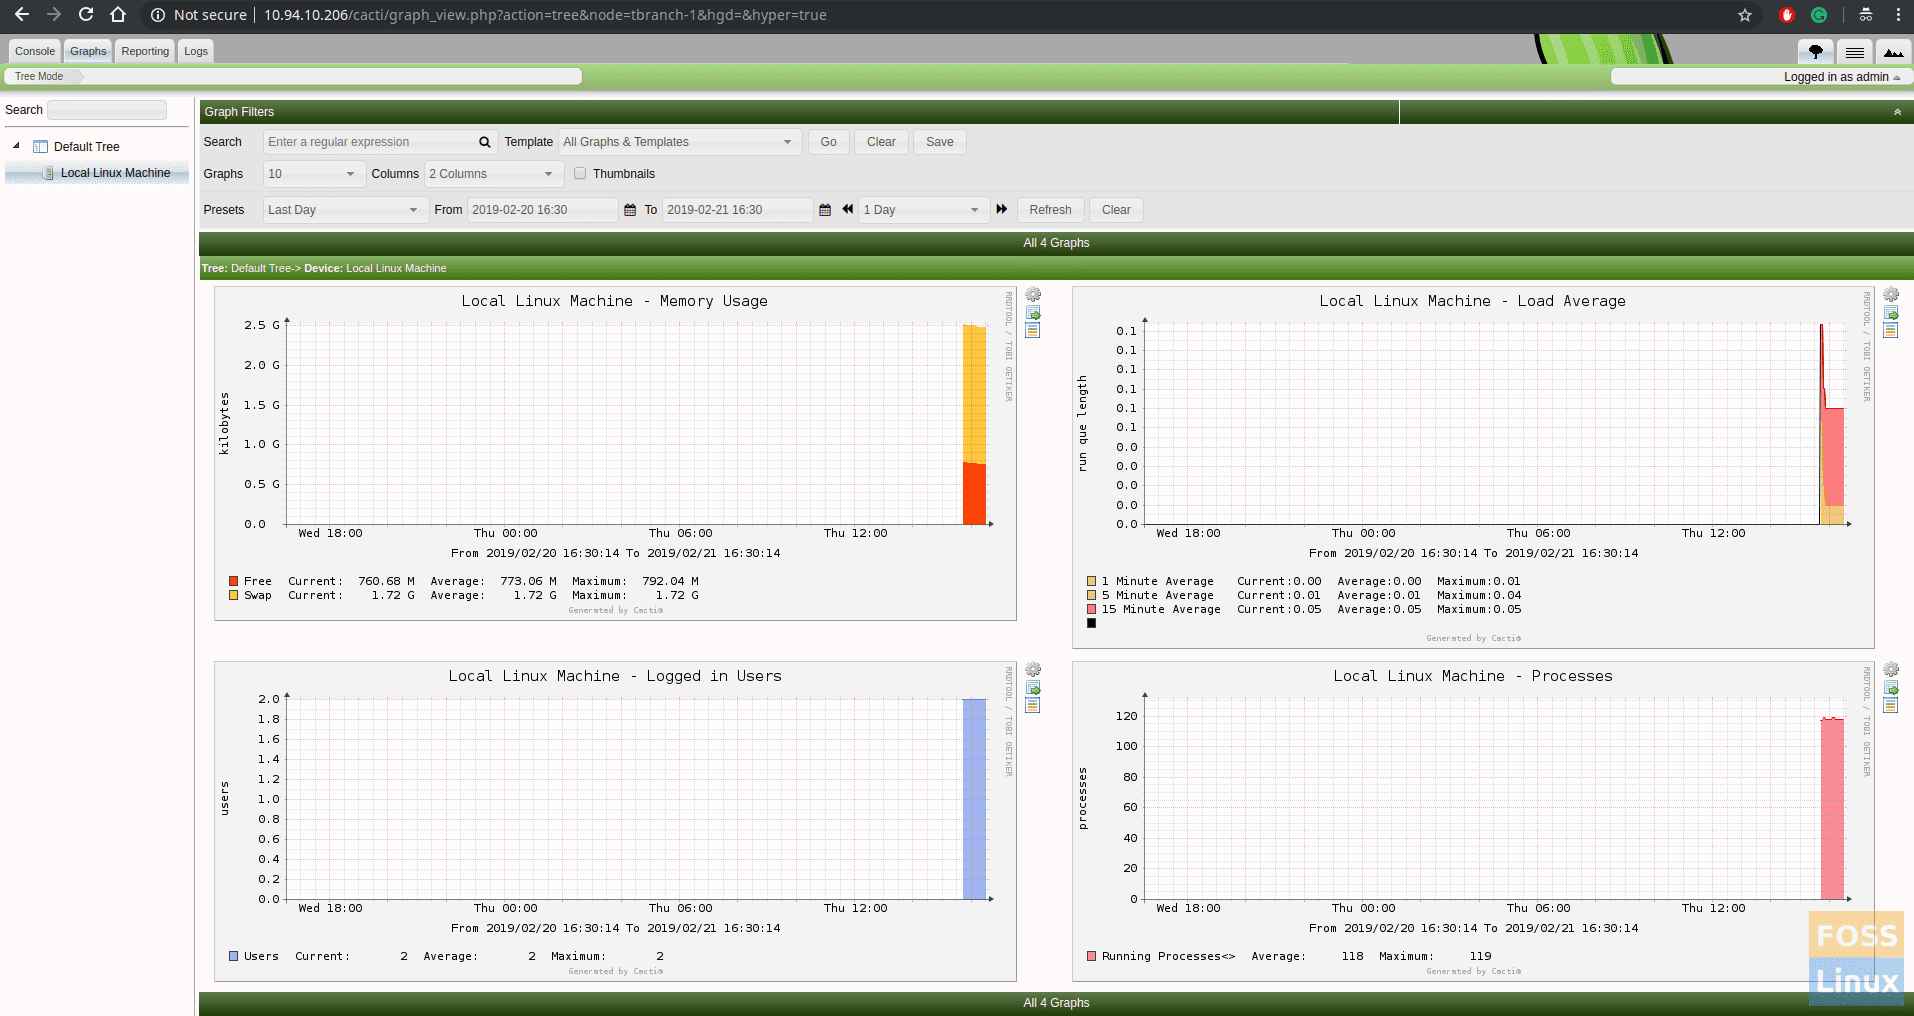
Graph
That’s it! You have successfully configured Cacti on CentOS 7!