
Tmux is one of the best applications you can use on a Linux/Unix-based operating system. It is a beefed-up GNU screen version commonly referred to as a terminal multiplexer. You can append Tmux’s behavior using the tmux.conf file. This Tmux configuration file is used to change many things, such as custom keybindings, modifying the status bar, customizing color schemes, and many more. In this article guide, we shall learn how to customize the tmux configuration file (tmux.conf)
Before we dive into the primary subject matter, we shall brush through the installation, how to launch and how to use sections to enable us to be on the same page. Check our detailed article that covers installing and using Tmux on Linux.
Launching Tmux
As you might already know, Tmux does not ship in with any icon, nor does it ship as a separate application. Therefore, we need to invoke it via the Gnome terminal to launch it. To do so, launch your terminal application, or you can use the terminal window we used to install Tmux if you did not exit it to run this line of code:
tmux

Tmux new screen
This command will fire up the Tmux application.
Note: In some instances, if you are running Tmux for the first time on your Linux OS, you might encounter an error similar to the one shown below:
"open terminal failed: missing or unsuitable terminal: xterm-256color"
If you get such an error, don’t freak out; fixing it is as simple as ABC. Using your terminal application, execute the following line of code:
export TERM=xterm
That single-line command will fix the error named above. Alternatively, you can use the ‘XTERM’ terminal application to launch Tmux. This trick has worked for several users with a similar error, and we know you won’t be an exception.
Using Tmux
To communicate and use Tmux, we can employ any of the three methods provided herein:
- Using the Prefix keys: Tmux uses a prefix key combination, which by default is “CTRL+b.” This prefix is preceded by one or two more keys that Tmux will interpret for a specific operation. As an illustration, we can leave a session by pressing [Prefix (Ctrl +b) + d].
- Using the command mode: To enter the command mode, hit the prefix keys followed by the colon (:). This will send the commands straight to the Tmux terminal. We may type the Tmux instructions at the command prompt that appears at the bottom of the terminal.
- Using the command line: You can use Tmux commands from a terminal or shell prompt that is not Tmux. The term “tmux” comes before these commands.
Customizing Tmux by using the tmux.conf file
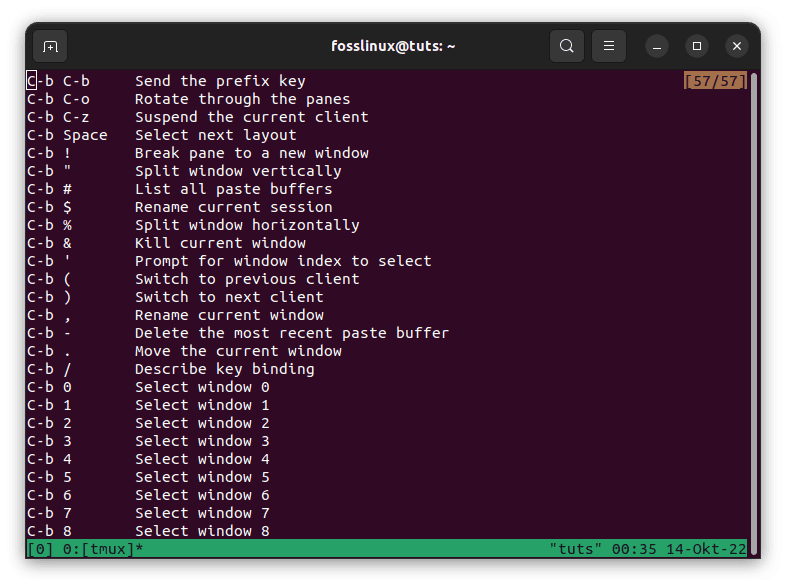
We must modify the tmux.conf configuration file’s default settings to personalize the program. Tmux calls this file when it first launches. Tmux initially scans the user’s home directory after failing to find the system configuration file in the directory “/etc/tmux.conf.” A set of Tmux instructions that are run one after the other may be found in the file. When the tmux server first starts, these instructions are run. Be careful not to mess up the setup by combining different shortcuts before customizing the tmux. conf. You should use the following command within a Tmux session to display all the occupied shortcuts to avoid such ambiguity:
‘Prefix’(Ctrl + b) + ?
Tmux help commands
Now let us look at some of the customizations we can do on our tmux.conf file:
Changing the default prefix
The prefix key (‘Ctrl+b’) and a command key are used to control different Tmux activities. Most people choose to modify the default combination since it is more convenient. But to avoid conflicting with other shortcuts on the default terminal, altering this key requires creativity. Let’s substitute “Alt+b” for the default prefix “Ctrl + b”. Tmux.conf should be opened first. Use the following command to launch it if it is in your home directory:
sudo nano ~/.tmux.conf
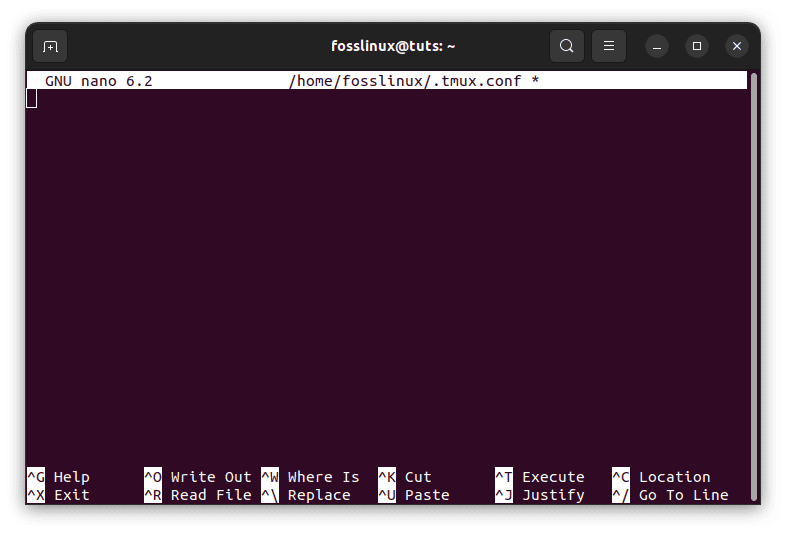
Start tmux.conf file
Once it opens, input the following lines of code, which will alter the default prefix ‘Ctrl + b’ to ‘Alt + b.’
unbind C-b

set-option -g prefix M-b

bind-key M-b send-prefix
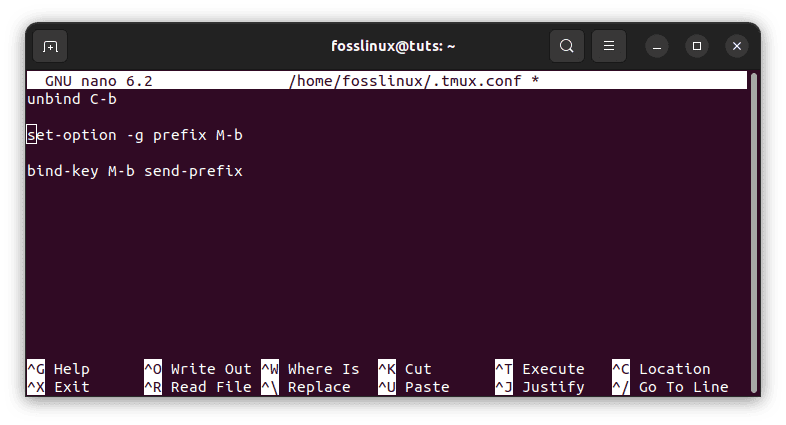
Alter default prefixes
Save and exit the nano editor.
Note: To effect the changes made, exit the Tmux session you are in and start a new one. Alternatively, you can reload your Tmux configurations to effect the changes made.
Using the mouse mode
The mouse mode is an effective tweak that we can make to our Tmux application. To make these configurations, we can use the tmux.conf file to alter the behavior of our mouse. Open the tmux.conf file by executing this line of code:
sudo nano ~/.tmux.conf
Start tmux.conf file
Once the config file has been opened, append the following line of code:
set -g mouse on
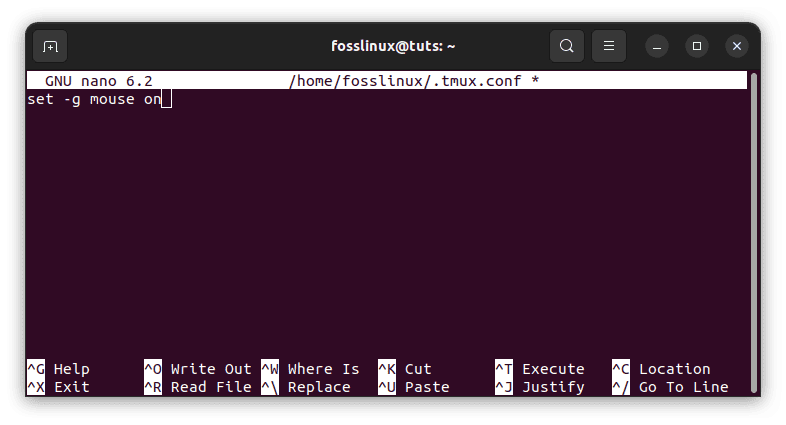
Set mouse mode
Effect the changes made by restarting your Tmux session or reloading the tmux.conf file by executing this line of code on your terminal:
tmux source-file ~/.tmux.conf
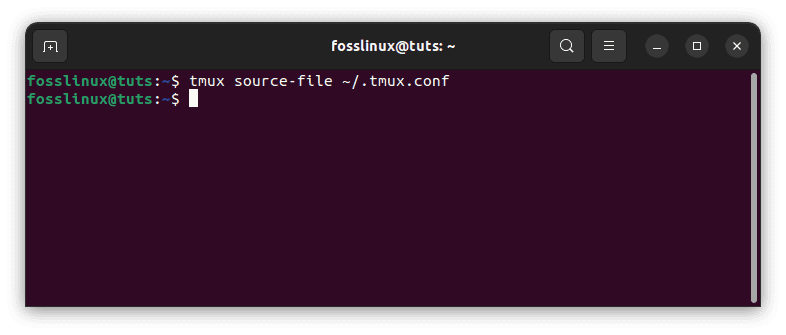
Reload the Tmux config file
You can now use your mouse or touchpad to scroll on your Tmux terminal.
Setting two commands as prefixes (Ctrl + b and C-b)
We can configure our tmux.conf file to accommodate two prefixes. For example, to set ‘Ctrl + b’ and ‘Alt + b’ to be our default prefixes, we shall open our tmux.conf file and append it as follows:
set-option -g prefix M-b

set-option -g prefix2 C-b
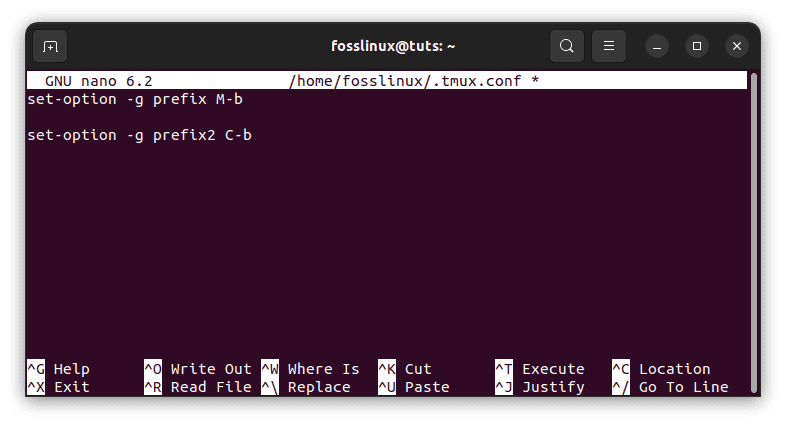
Set two commands as prefixes
When done, save the changes made and exit the nano editor. Finally, reload the tmux.conf file to effect the changes made.
Configure Tmux to allow copy-paste between the system and Tmux clipboard
It is simple and easy to copy content from the system clipboard and paste it on a Tmux session. However, the reverse is highly complicated. Therefore, to simplify the process, we need to emulate a third-party application known as xclip. We can install this app and customize the tmux.conf file to allow us to copy and paste content from a Tmux clipboard to the system. To accomplish this task, follow the guides provided herein:
Step 1: Install xclip by executing the following line of code:
sudo apt install xclip

Install xclip
Be patient as the application installs on your Linux operating system. Once it completes, proceed to the next step.
Step 2: Customize the tmux.conf file by appending the following lines of code:
bind C-c run "tmux save-buffer - | xclip -i -sel clipboard"

bind C-v run "tmux set-buffer "$(xclip -o -sel clipboard)"; tmux paste-buffer"

Append tmux.conf file
Code breakdown:
- The first line above makes the default prefix followed by ‘Ctrl + c’ to copy the content to the current Tmux buffer and provides the output to xclip. Now you can paste the copied content from the Tmux clipboard to your system.
- The second line of code configures the default prefix followed by ‘Ctrl + v’ to paste your copied content from your system clipboard to a Tmux session. However, as previously indicated, this command may not be necessary. By default, you can paste content from your system clipboard to your Tmux session using ‘Ctrl + Shift + v.’ Therefore, unless this command does not work, the second line of code is unnecessary.
When you are done, reload the tmux.conf file to effect the changes made by executing this line of code:
tmux source-file ~/.tmux.conf
Reload the Tmux config file
Creating a tmux config reload shortcut
Occasionally we are called upon to customize the tmux.conf file to suit our needs; as a result, we must reload the config file regularly. When reloading a tmux.conf file, the default syntax is:
tmux source-file <path to the tmux.conf file>
Now to create a config reload shortcut, we shall launch the tmux.conf file and append the following line of code:
bind r source-file ~/.tmux.conf

Create config reload shortcut
Once you are done, save the tmux.conf file and exit the nano editor by typing ‘Ctrl + x’ followed by ‘y’. Once that file has been appended, you only have to enter the default prefix followed by ‘r’ to reload the Tmux configuration file.
Simplify the split commands
If you have been using the Tmux application for quite a while, you will conquer with me that the default shortcut for splitting the terminal is not convenient or it is kinder awkward. Therefore, in this section, we shall change it into a convenient shortcut that can be easily accessed. For instance, we shall map the horizontal split from ‘ ” ‘ to ‘ – ‘ while mapping the vertical split from ‘ % ‘ to ‘ |. ‘ Now, to do that, open your tmux.conf file using the methods already mentioned earlier in this article guide and append the following lines of code:
unbind '"'

unbind %

bind - split-window -h

bind | split-window -v

Simplify split commands
Once you reload your tmux.conf file, you will note that you can now split your terminal screen using (-) and (|), respectively.
That’s it. You can now customize the Tmux config file to your liking
Conclusion
This in-depth guide has covered most aspects concerning Tmux configuration. Tmux configuration comes in handy as most of the default commands are hard to understand and grasp; therefore, to simplify them, you need to customize your tmux.conf file, as shown in this guide. If you believe we left out something important concerning tmux customization, feel free to write to us via the message board below.