
Android commenced its journey as a Palo Alto-based startup called Android Inc in 2003. The company initially set out to develop an operating system for digital cameras but abandoned those efforts to reach a more expansive and boosted market. This mobile OS is based on a modified version of the Linux kernel and other open-source software, primarily designed for touchscreen mobile devices like tablets and smartphones.
All Android users must agree that one of their guilty pleasures might be playing entertaining games. Or it could be that there is an app that only runs on their phone. And then here comes a question – what if you could run the same games or applications on your desktop PC? Wouldn’t it be great? Yes, of course. One of the approaches to attain this is to run Android emulators, like Android studio, Bliss OS, Anbox, and Genymotion, on your PC. Some of them, like Android-x86, need you to reboot your Machine so that they fully take control of the hardware.
If you don’t mind a slight performance hit, you can operate a virtual machine simultaneously with your native operating system. Linux specifically offers several virtual machine choices, like VirtualBox, VMware, and Qemu, to mention a few.
The Android platform comprises an operating system based on the Linux kernel, a Graphical User Interface, a web browser, and end-user applications that can be downloaded. Android was released under the Apache v2 open-source license, which allows many variations of the OS to be generated for other gadgets like gaming consoles and digital cameras.
Running Android on Linux using Virtual Machines.
By the end of this article, you must be able to carry out the following on your own:
- First, download and install VirtualBox for Linux.
- Then, run Android-x86 and finish the basic setup.
- Finally, configure the Android-x86 on your Virtual Machine.
Here are a couple of things you need to get started:
- First, you must have a virtual machine; in this case, we will use a VirtualBox.
- You must also download the Android-x86 ISO file.
- We also suggest ensuring virtualization options are enabled in your computer’s Basic Input Output System(BIOS). Or else, you better prepare for troubleshooting moments later when things don’t turn out as they should. Please be warned.
Let us get going!
You will first download the ISO image of Android from this link. Next, select a 32-bit or 64-bit ISO image, depending on your PC’s architecture. At the time of this writing, Android 9.0 is the most stable release, which is what we are using here.

Download ISO image
After downloading the Android ISO image, download either VMware or VirtualBox on your Machine. You can obtain the VMware link here and this other link to find the VirtualBox setup file for all Linux distros. After you are done with the download process, install VirtualBox on your system.
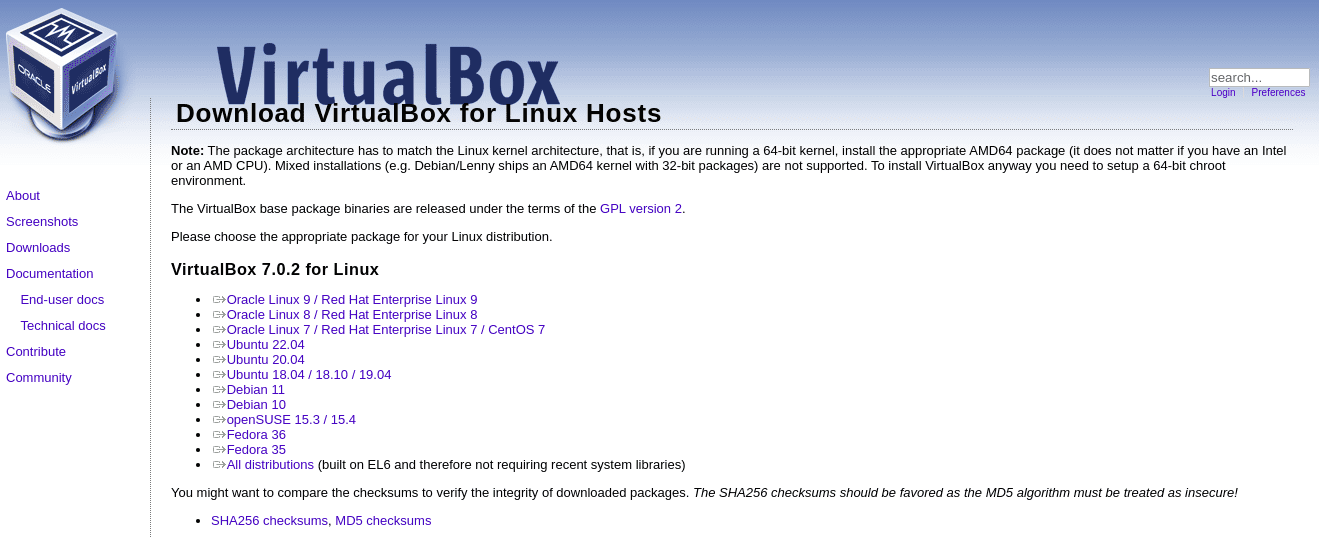
Download VirtualBox
To install VirtualBox on your Linux machine, navigate to the location you downloaded the .deb file to, in our case, the Downloads directory:
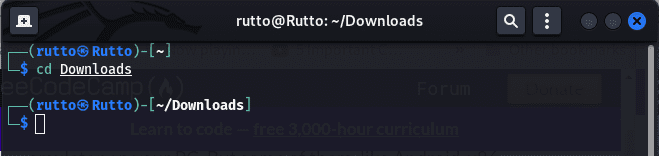
Navigate to Downloads
Then issue the following command to install the downloaded VirtualBox .deb file:
sudo dpkg -i virtualbox-7.0_7.0.2-154219_Ubuntu_jammy_amd64.deb
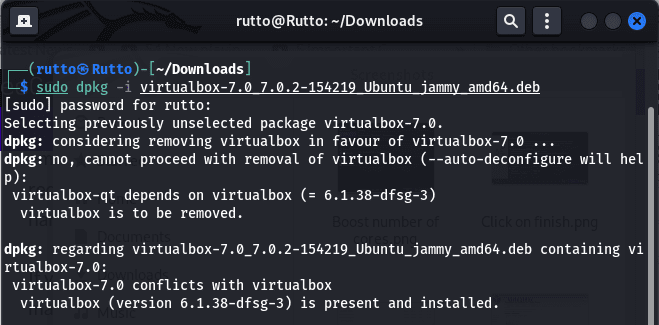
VirtualBox installed
And that is for the VirtualBox installation phase.
How to get a virtual machine for Android
Go ahead and start up your VirtualBox by clicking on the startup menu of your PC, then search for VirtualBox on the search bar. After that, click on the blue VirtualBox icon that pops up to find such a window:
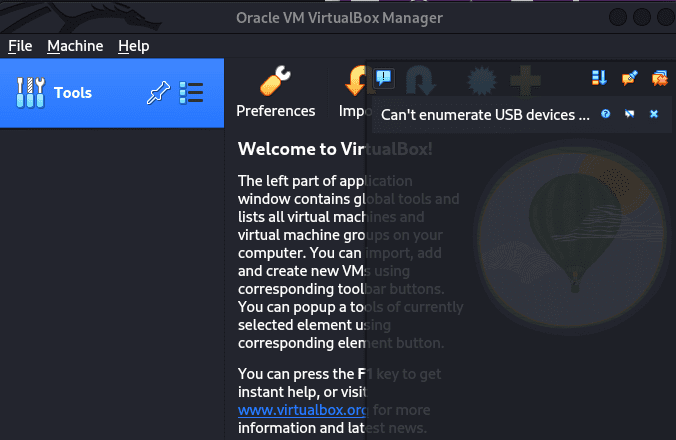
Virtualbox opened
Afterward, click on “Machine” and then the “New” button to create a new virtual machine:
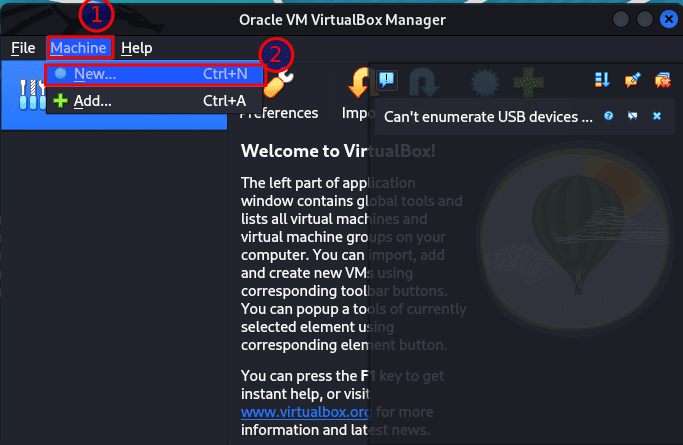
Select Machine, then New
Then, give your virtual Machine a name of your preference; in our case, we will use “fosslinux Android” because it makes sense, right? Then select your ISO image in the “ISO Image” section. After that, select “Linux” as the type and “Linux 2.6 / 3.x /4.x 32-bit” as the version. Then go ahead and click “Next.”
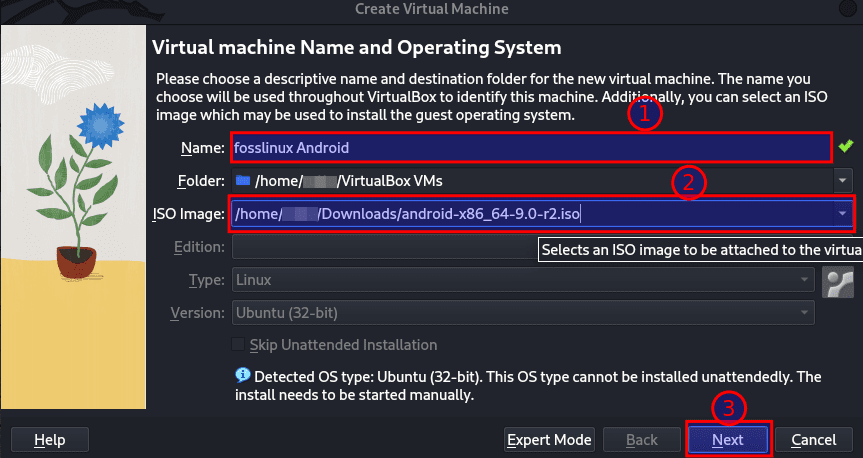
Select operating system
Next is the memory section. Here, you can go with 2048 MB, especially if you are using the 32-bit build of Android (it cannot handle anything more). If you are using a 64-bit build, feel free to utilize it as much as you would. Once you have set the size, click “Next.”
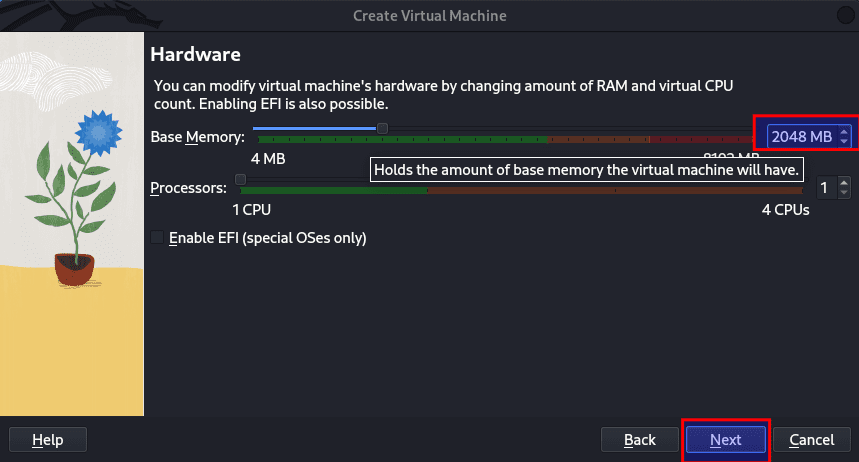
Memory allocation
Next, choose “Create a virtual hard disk now” and click on “Create” as highlighted below:
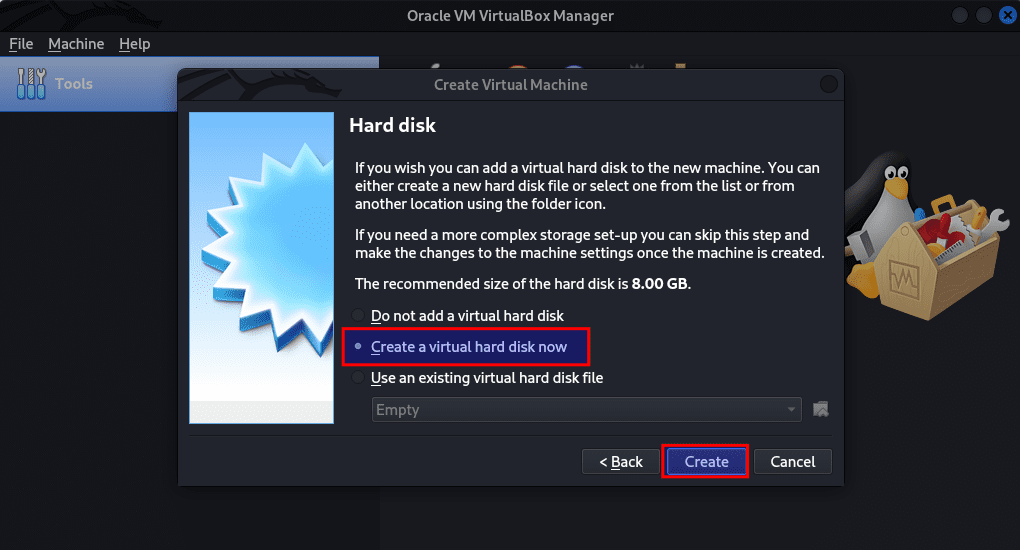
Select create virtual disk now
Next, select “VDI” now and click on “Next.”
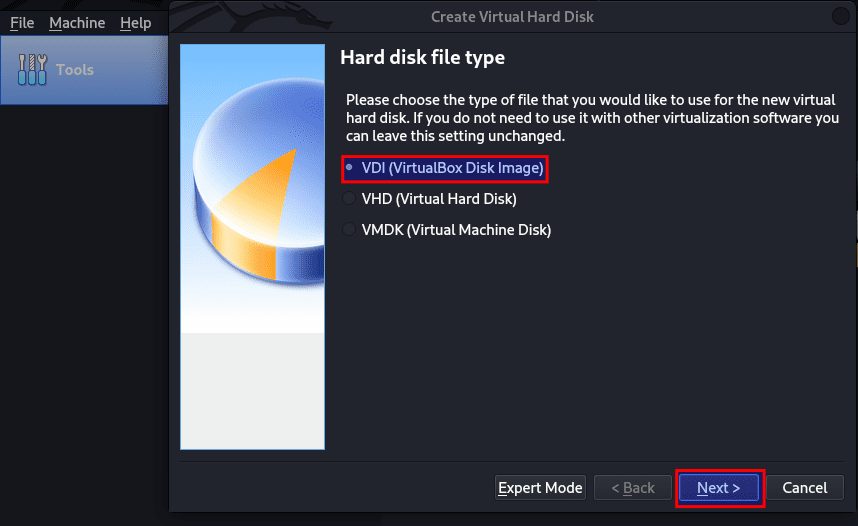
Select VDI
Select “Dynamically allocated” and click on “Next”:
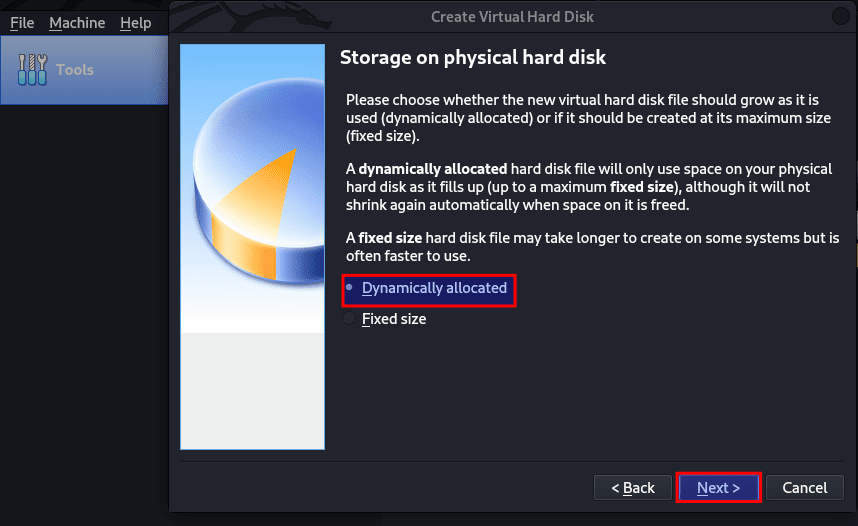
Select the Dynamically allocated size
Then, input the storage size you want your Android phone to have. It will be allocated 8GB by default, but you can increase the storage to 20GB or more depending on your usage. Finally, click on “Create”:
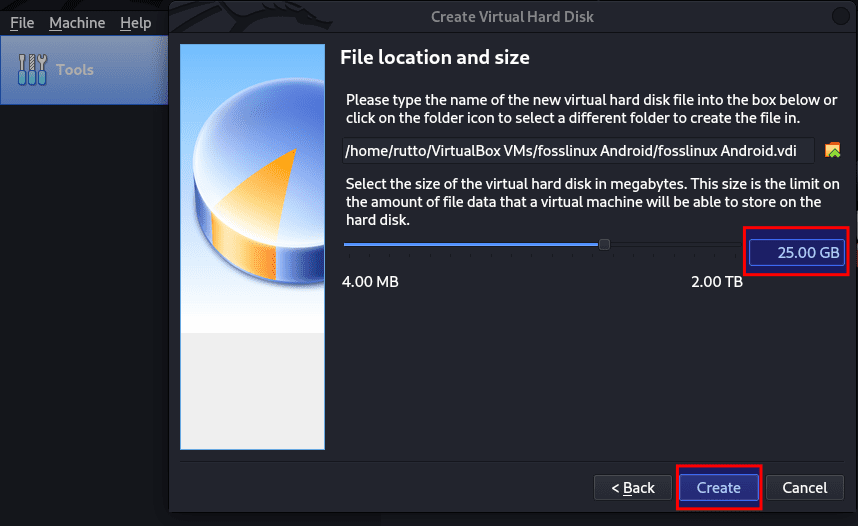
Select Create
Just like that, your new virtual Machine should be ready for use.
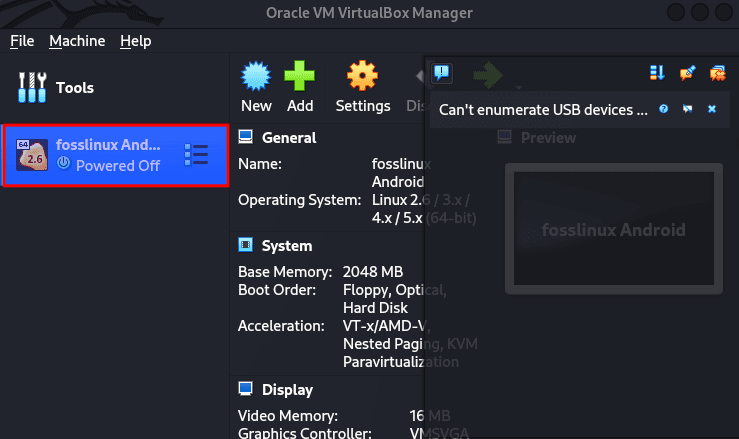
Machine ready for use
How to configure Android in a Virtual machine
With your Machine all set up, it’s time to tweak a few things to get the best performance while running Android on Linux. To do this, click on “System,” as highlighted below:
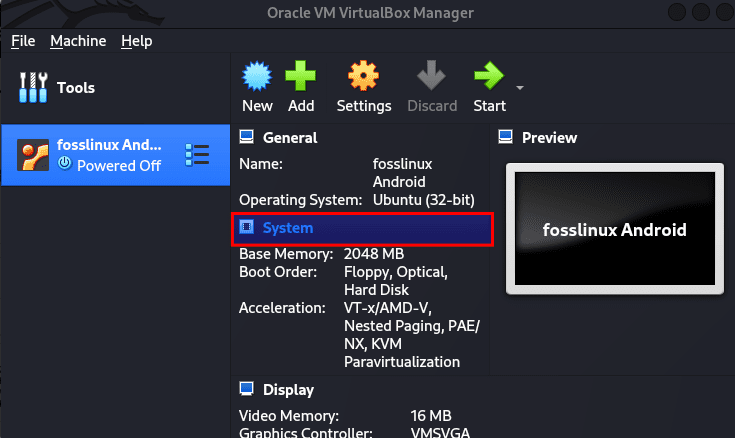
Select System
Navigate to the “Processor” tab and allocate at least 2 CPU cores. You can also boost it to 4 for better gaming performance:
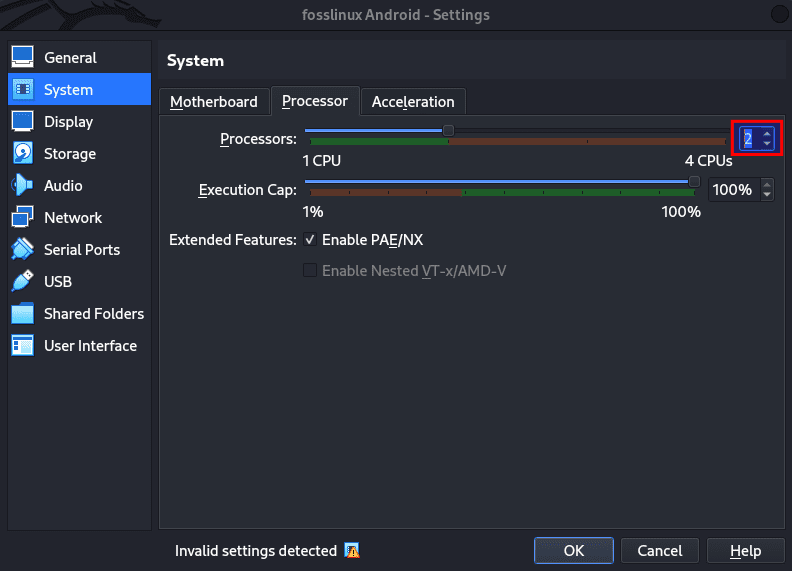
Boost the number of cores
Next, move to the “Acceleration” tab and select “KVM” from the drop-down menu:

Select KVM
Once that is done, move to the “Display” category and modify the “Graphics controller” to “VBoxSVGA.” This is the most vital step; otherwise, you will be stuck on a blank screen. Please be warned. Besides that, also enhance the Video memory to at least 64-128MB:
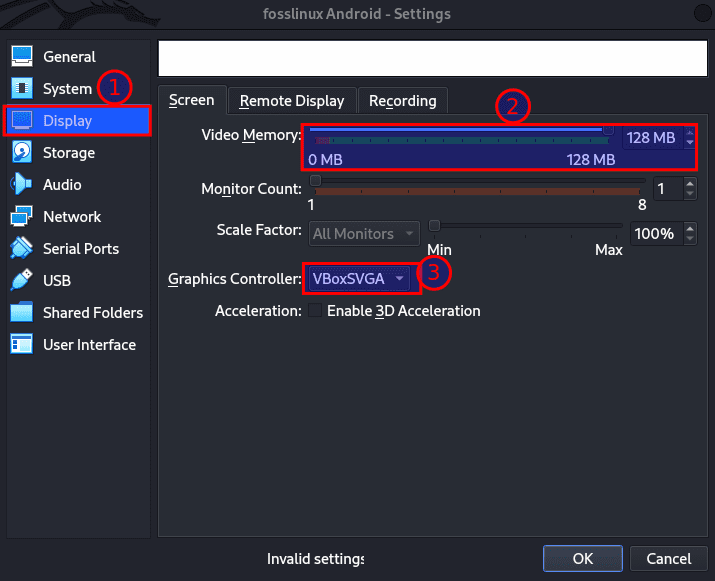
Select SBoxSVGA
On the final stretch, If you did not add the ISO image as we did earlier, go to “Storage” and click the “Empty” sub-menu. After that, click on the disc icon and select “Choose a disk file”:

Select disk
Now select the Android ISO image that you downloaded earlier and click on the “OK” button:
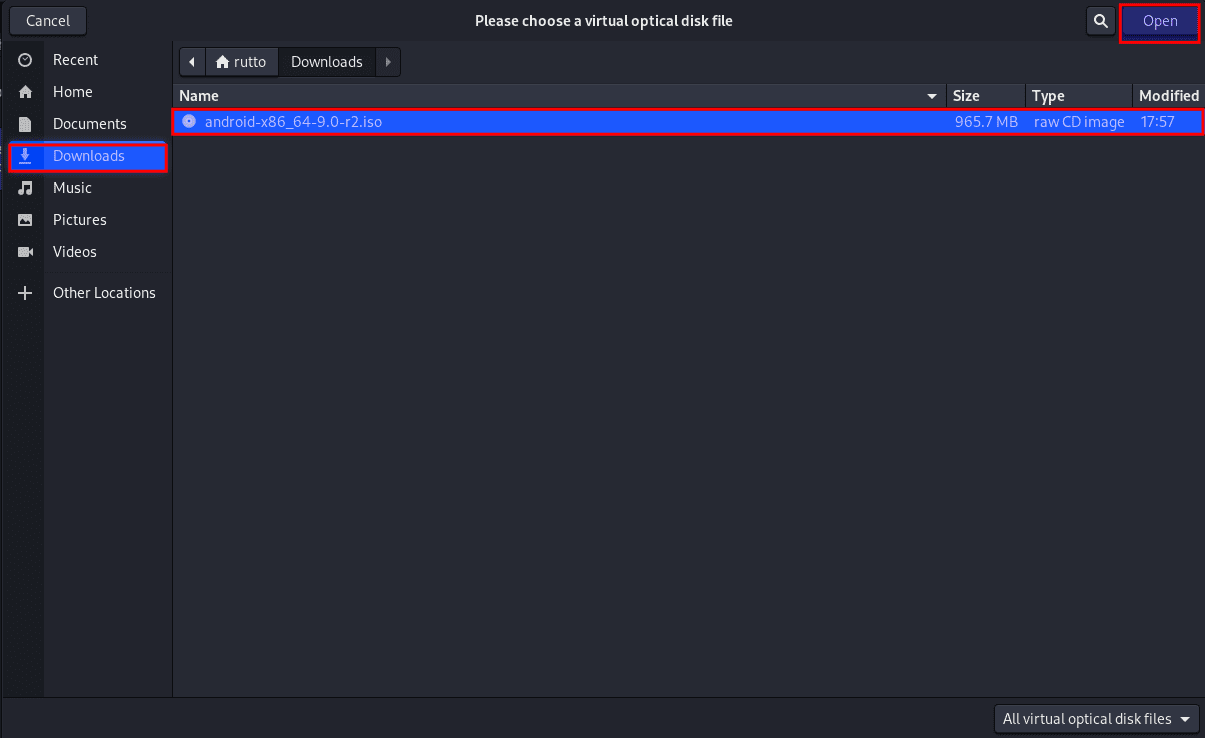
Select file disk
Boot up your Android inside Linux
After you are done with the basic setup and configuration as covered, you are now ready to boot Android on your Linux system. To do this, click on “fosslinux Android” on the left pane and then click on “Start,” as highlighted below:

Click on start
Next, navigate to the “Advanced options”:
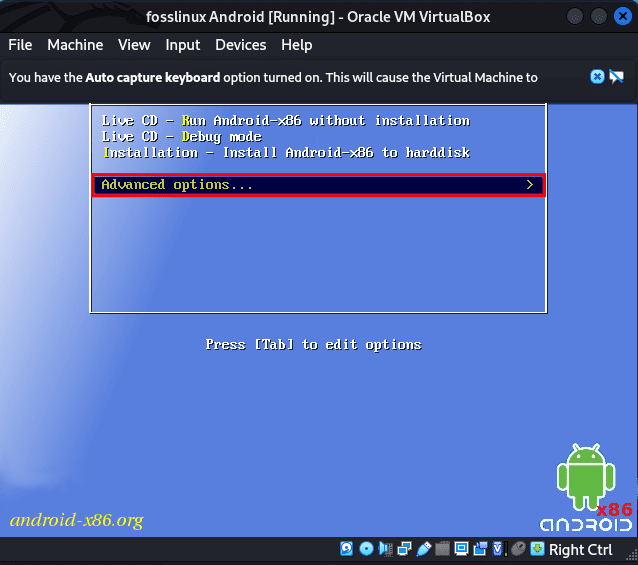
Select Advanced options
Next, select “Auto_Installation,” and hit the “enter” button on your PC:
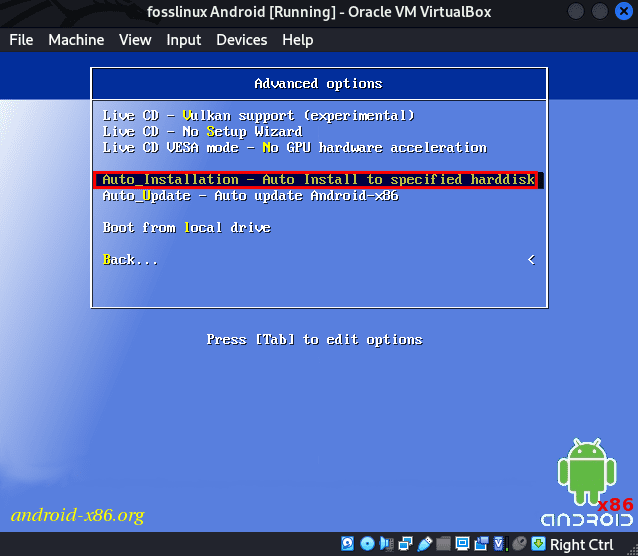
Select Auto installation
On the next window, select “Yes” and hit the “Enter” button on your computer’s keyboard:
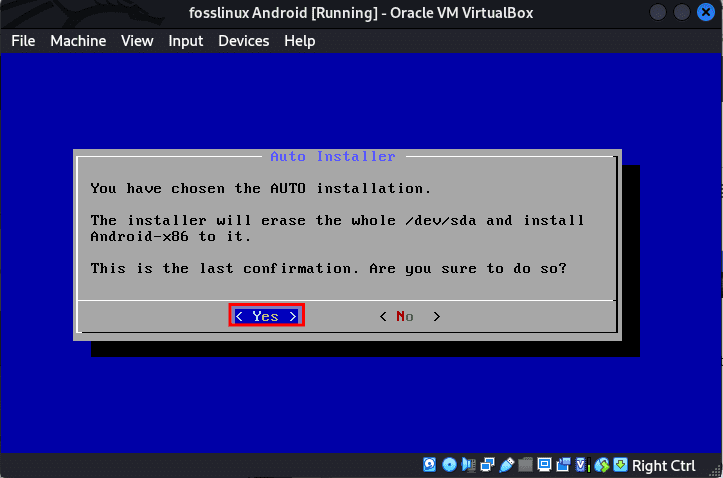
Select yes
In the end, select “Run Android-x86” and hit the “Enter” button on your PC:
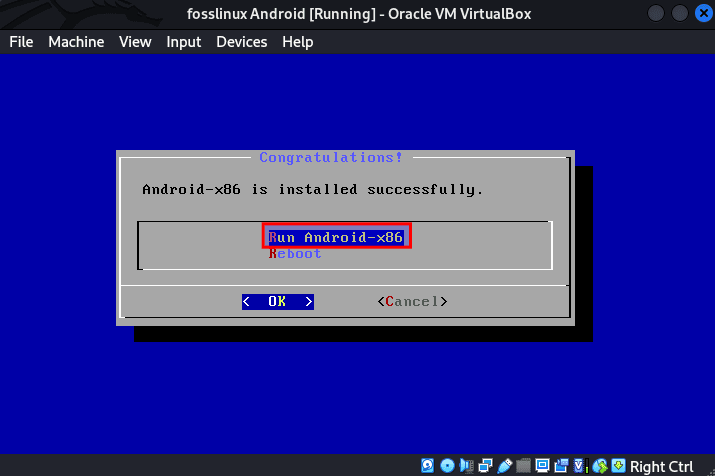
Select Run Android
You can proceed through the initial setup screen, like Android phones. So first click on “Start” as highlighted below:
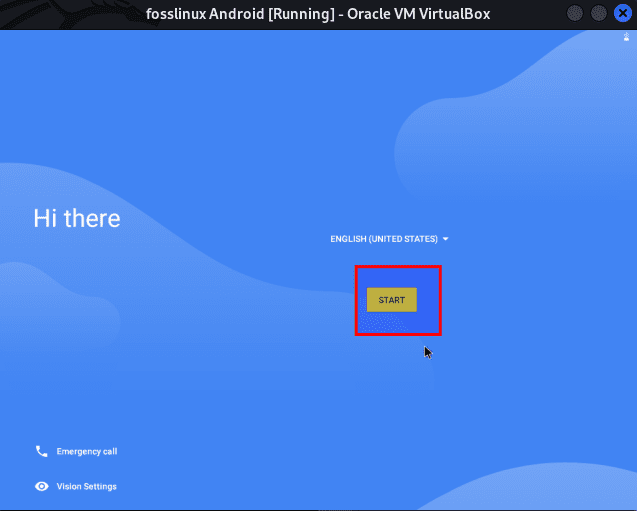
Click on start
Next, connect to a network or skip as highlighted below:
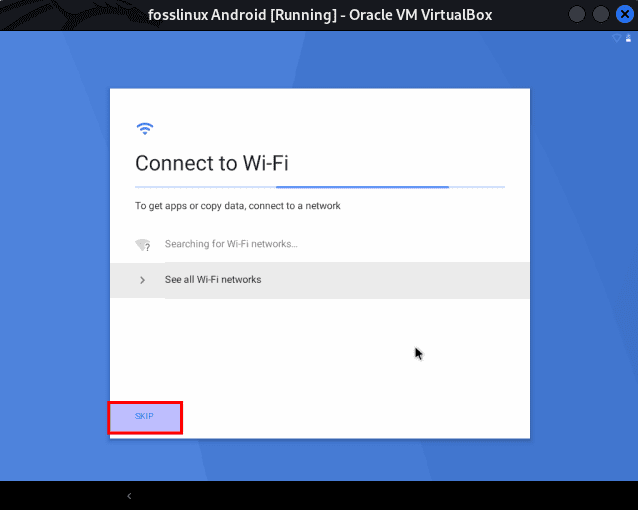
Connect to network
Next, select your Time and Date, then hit “Next” as shown below:
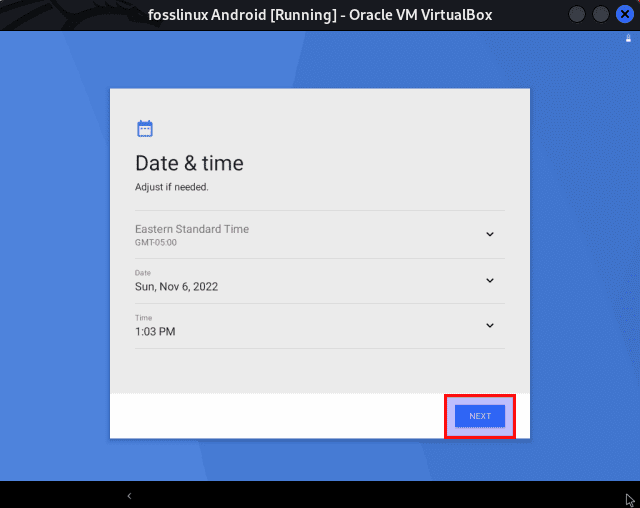
Set your Date and time
After that, Accept the Google terms and services by clicking on “Accept”:
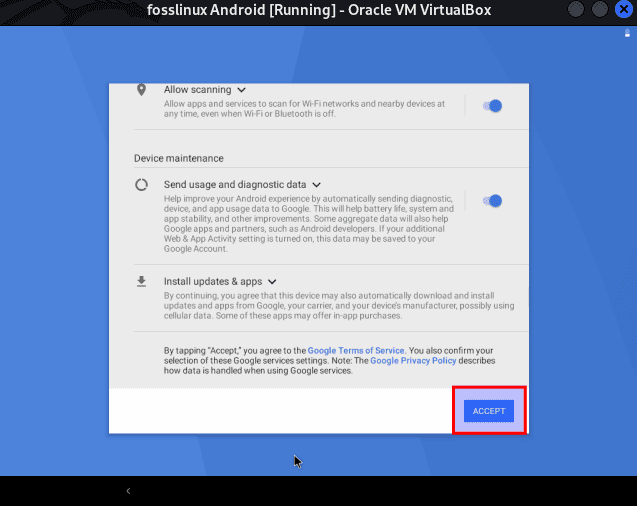
Accept the Google services
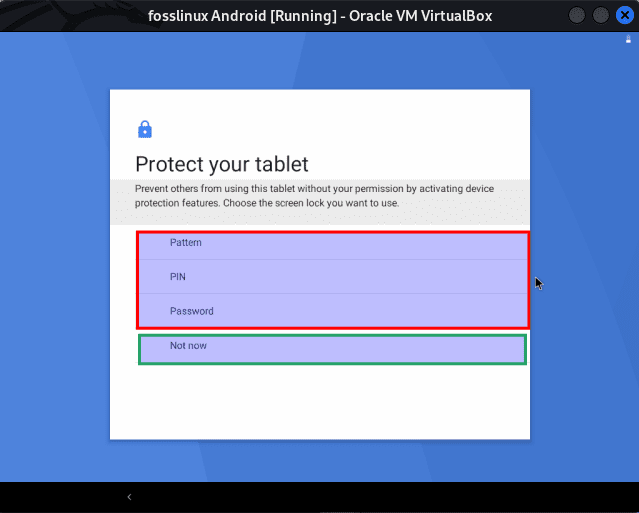
Next, you can choose to protect your Android phone by either using a Pin, Pattern, or Password; If you don’t want to protect your phone, click “Not now”:
Protect your Android
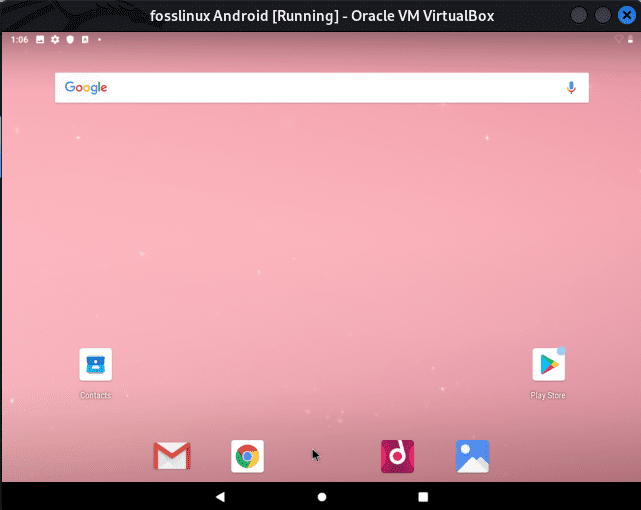
And there you finally have it. Android 9 is now running on your Linux with near-native performance. How awesome is that? From now onwards, you need to press the “Start” button in VirtualBox, and Android will readily be available for you:
Final window
This might not be the quickest approach to running Android apps on your PC. BlueStacks is faster if you only want to run an app or two on your PC. Nevertheless, Android-x86 offers a complete Android system in a virtual machine. It is a better approach to getting familiar with a standard Android system or just experimenting like you would test out with a virtual machine or any other OS.
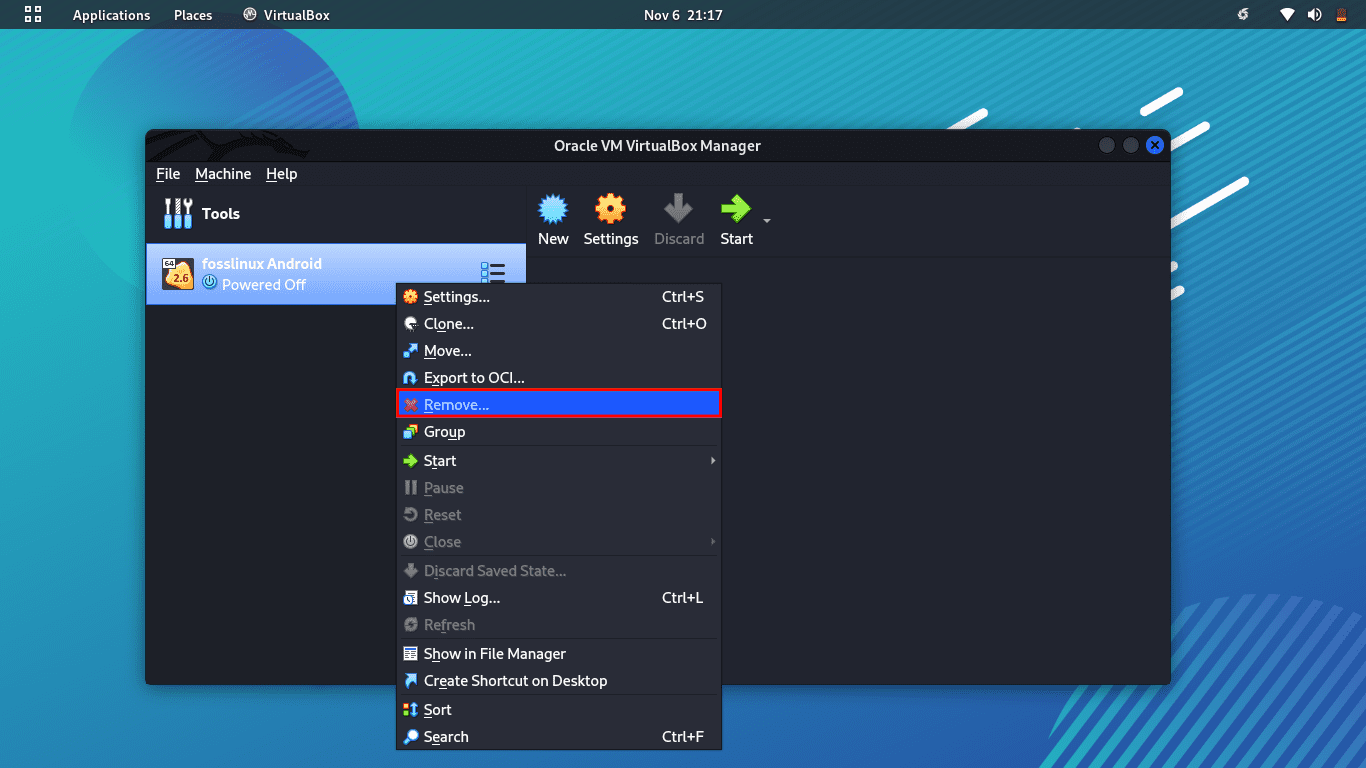
For those who want to delete the just-installed Android from their Linux machines, then right-click on the Android VM that you have created and select “Remove”:
Click on Remove
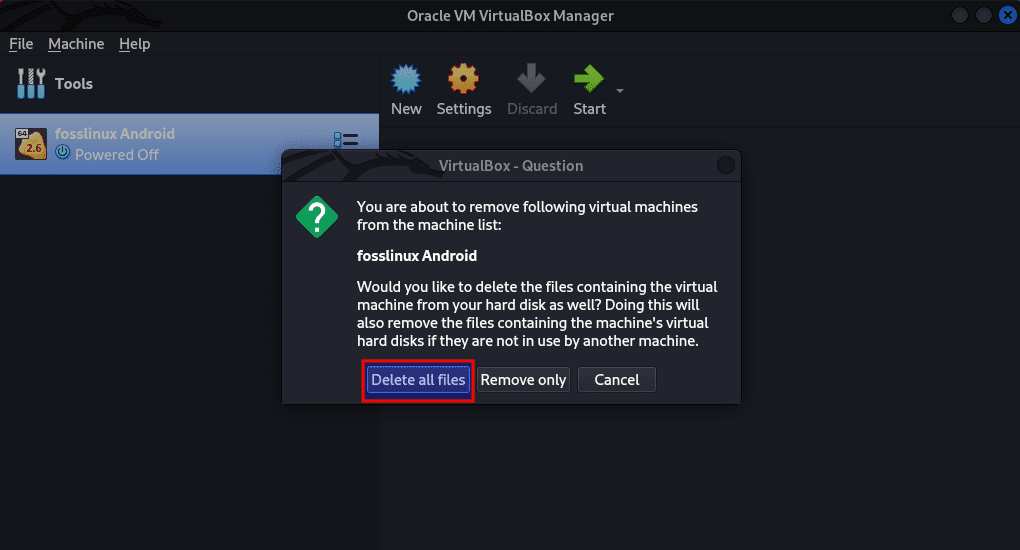
Next, click on “Delete all files.” It will remove the Virtual hard drive and all the associated files, freeing up all the space on your PC. And that is it.
Delete all files
Final Thoughts
And that is how you can set up and run Android on your Linux PC without paying for any of the services. One of the pros of this installation approach is that it makes things possible that you cannot do on your Android smartphone, like screenshot taking on Snapchat without notifying the sender, playing games like PUBG, protected content screen recording, and a lot more. And that is all from us; we believe this guide came in handy for you!