
Are you looking for an IT monitoring solution that is free and open source as well as compelling with latest technologies? Check_MK Server is one of the best monitoring system out there that was started originally as an extension to the Nagios monitoring system.
It supports creating a rule-based configuration using Python and also allows monitoring of more machines from a single Nagios server. Specifically, Check_MK Server can handle a pleura of monitoring tasks including Server, Application, Network, Cloud, Storage, Database, Environment, and Container. That’s almost everything even a large organization will ever need.
Here we are going to install and configure the CRE version (Check_MK Raw Edition) which is open-source and 100% free.
Install and Configure Check_MK Server on CentOS
Launch terminal and login as root.
Step 1 – Disable SELinux
Let’s check SELinux status and disable it if it’s enabled.
getenforce
Edit SELinux configuration file:
vim /etc/sysconfig/selinux
Change SELINUX=enforcing to SELINUX=disabled
Save and exit the file followed by a reboot.
reboot
Step 2 – Installing Prerequisites
Let’s start with updating the system.
yum update
Next, install NTP and check its service status.
yum install ntp
systemctl status ntpd
If the service is not started, start it using below command:
systemctl start ntpd
Enable NTP on system boot:
systemctl enable ntpd
Modify firewall rules to allow NTP service. Run the following commands to enable service.
firewall-cmd --add-service=ntp --zone=public --permanent
firewall-cmd --reload
Step 3 – Add EPEL Repository to the System
We have to install EPEL repository because some of the check_mk packages are not available in default repositories.
yum install epel-release -y
List repository.
yum repolist
Step 4 – Install Check_MK
We are going to download a free version of check_mk. Head over to the official download page and copy the relevant link to use in the command below after wget.
wget https://mathias-kettner.de/support/1.5.0p12/check-mk-raw-1.5.0p12-el7-38.x86_64.rpm

Download Package
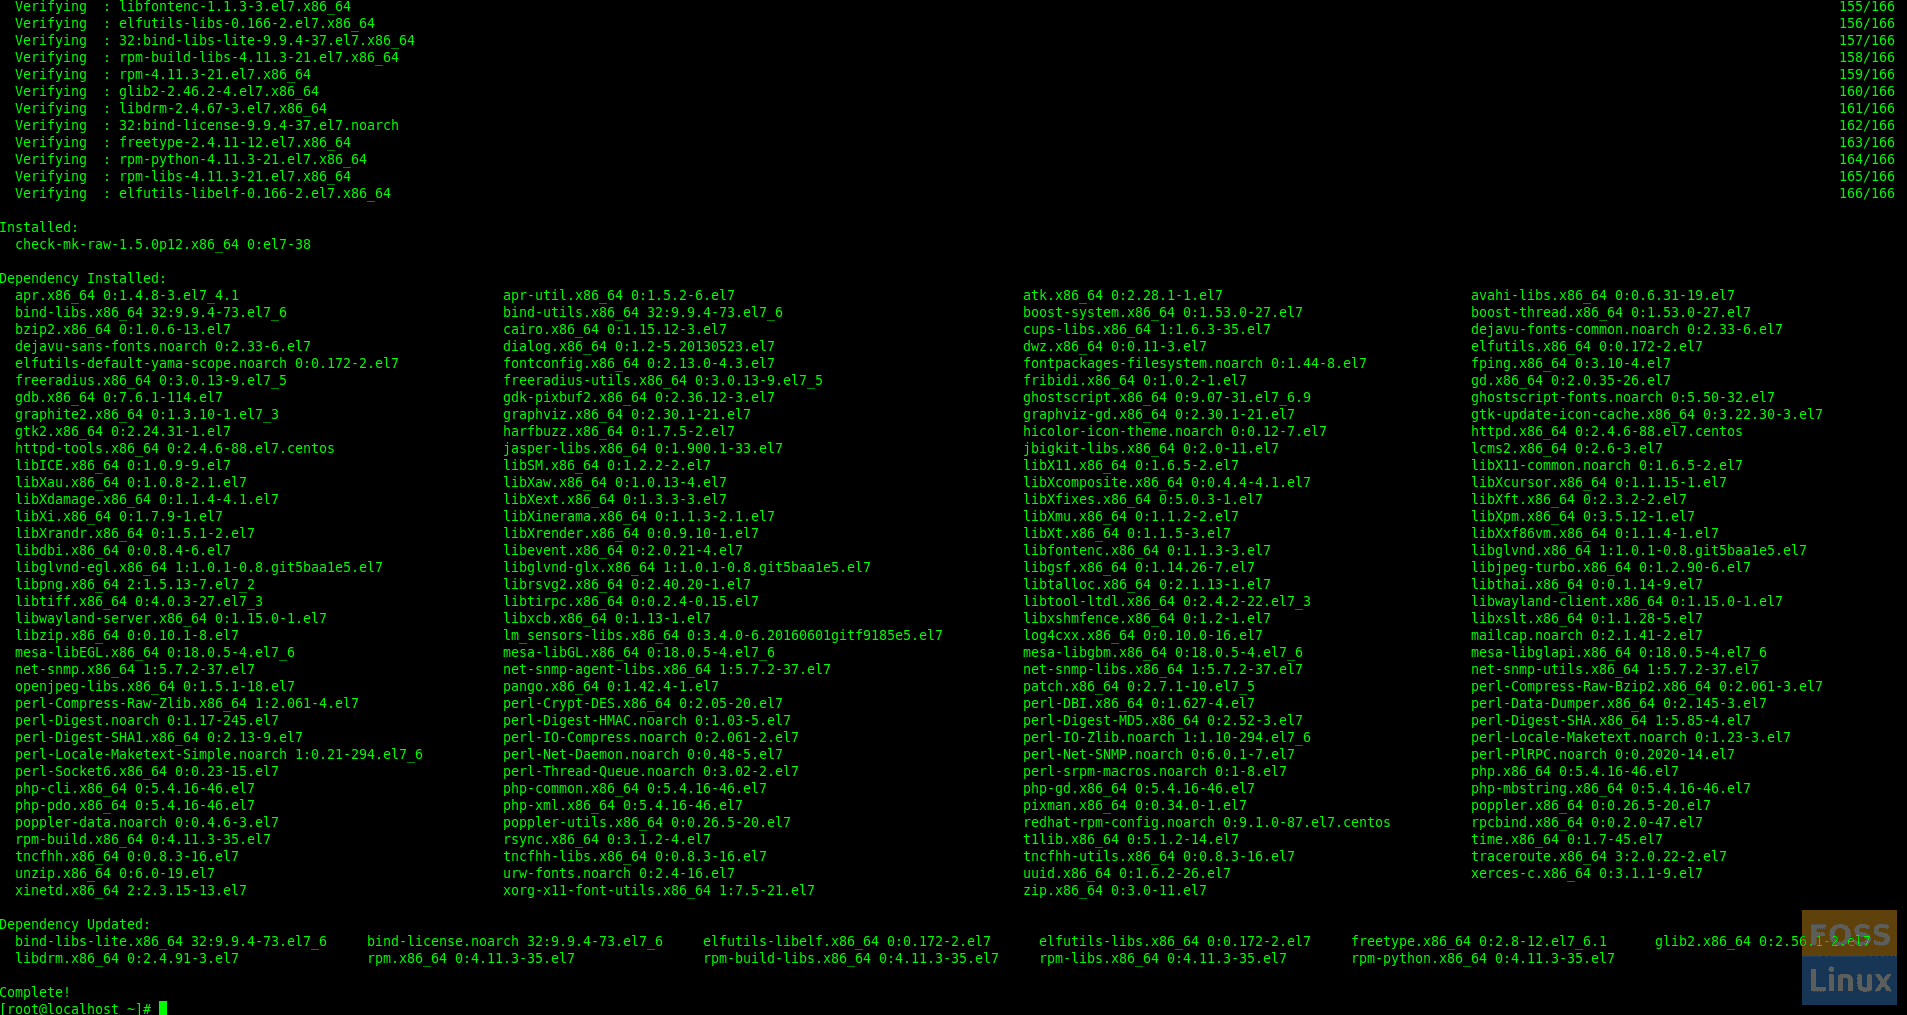
Install Check_MK and all the dependencies required for Check_MK.
yum install check-mk-raw-1.5.0p12-el7-38.x86_64.rpm

Install Check MK
Finished Check-MK Installation
Now modify Firewall rules for HTTP.
firewall-cmd --add-service=http --zone=public --permanent
firewall-cmd --reload
Step 5 – Create and start Check_MK server
Check “omd ” command if it works or not.
omd version
Configure the Check_mk server
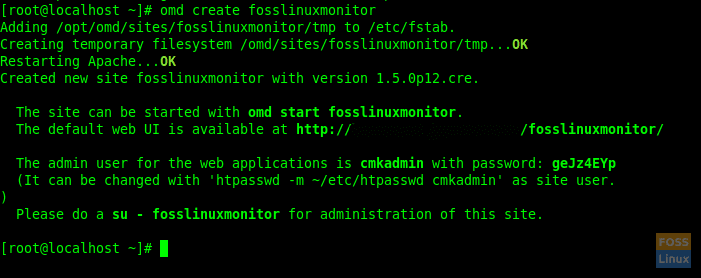
To create Check_MK server run following command:
omd create fosslinuxmonitor
You can replace “fosslinuxmonitor” with whatever the name you want.
omd create fosslinuxmonitor
Then you should get a similar output as below:
Create Check-MK-Server
Here you can see web URL, username and password for login.
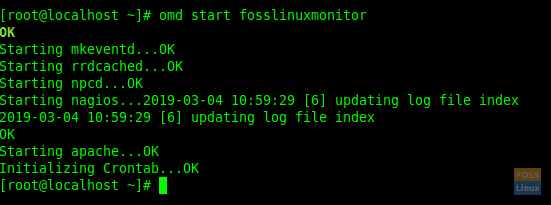
Start created server:
omd start fosslinuxmonitor
Start Check-MK-Server
Step 6 – Access Check_MK on Webbrowser
When you create Check_MK server, it shows Web Interface URL. You can use it to access your Check_Mk Server.
http://<servername>/<instance_name>/
Eg:- http://10.94.10.208/fosslinuxmonitor
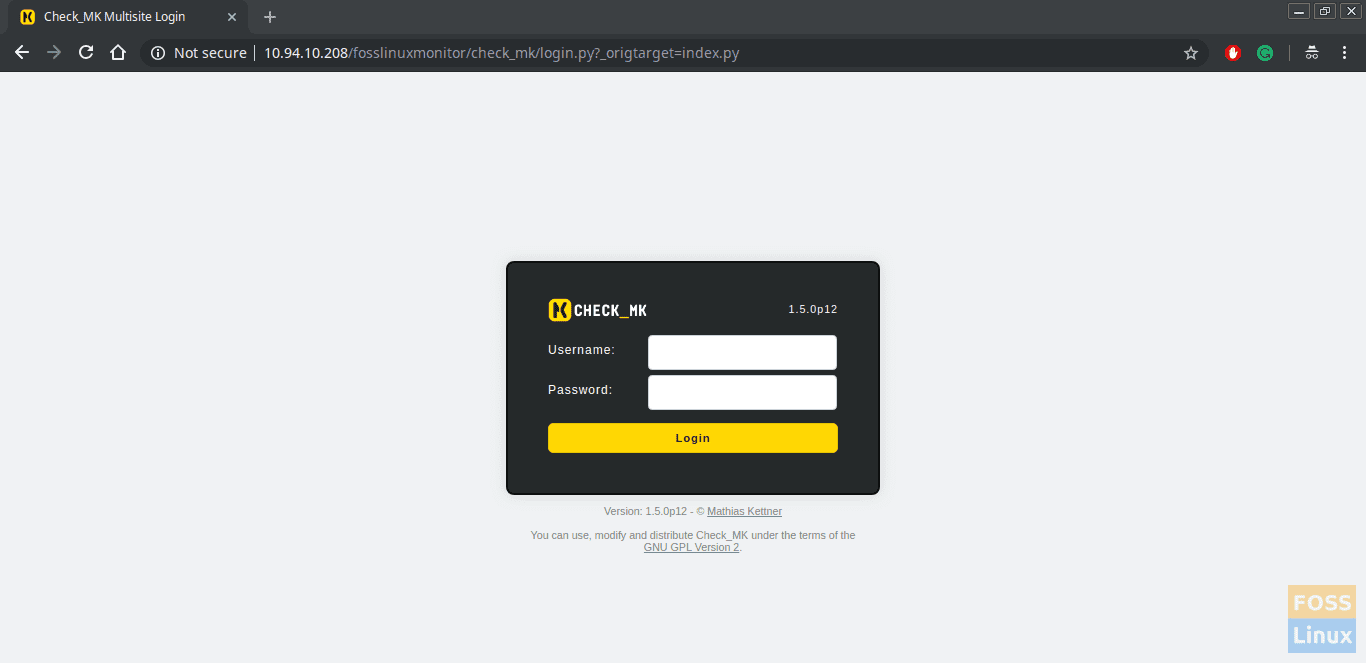
Login Page
You can use username and password which showed on Check_Mk server creation. Then you can access the Dashboard.
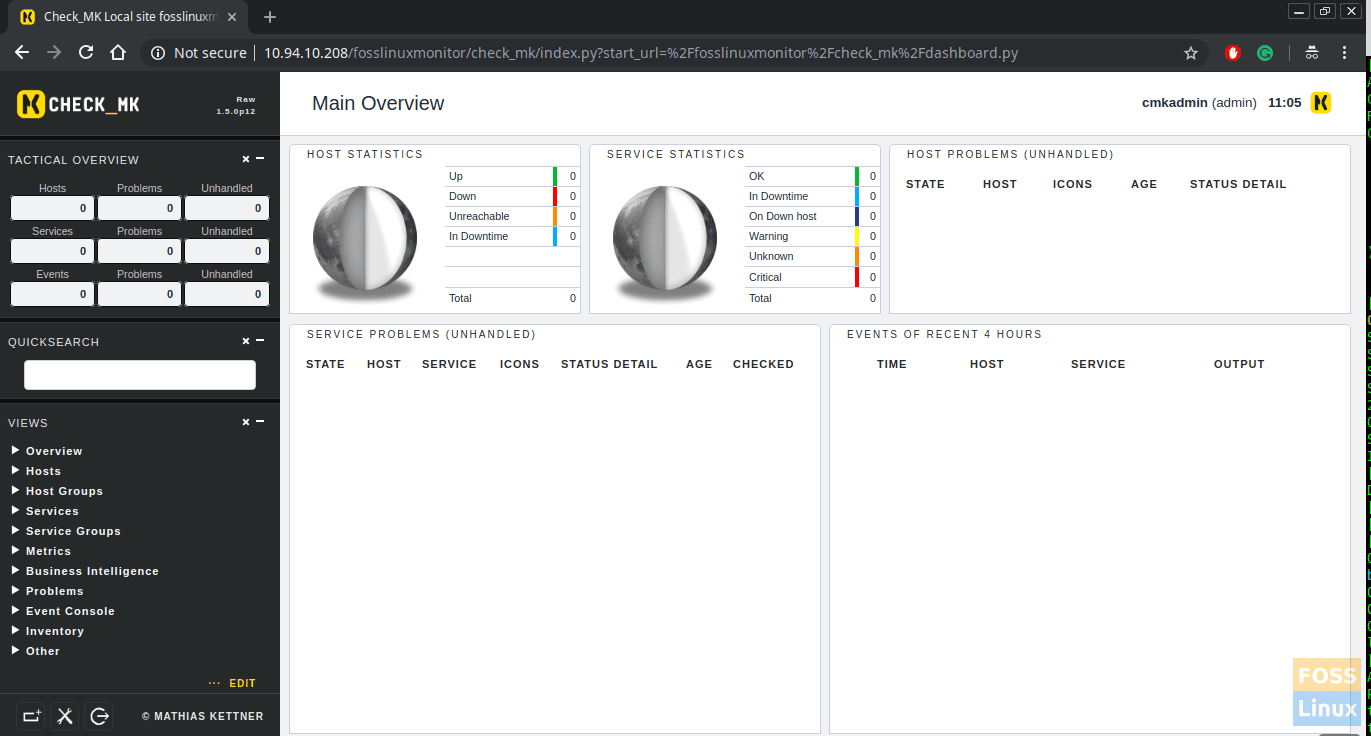
Dashboard
Step 7 – How to install the Check_Mk agent on Linux client
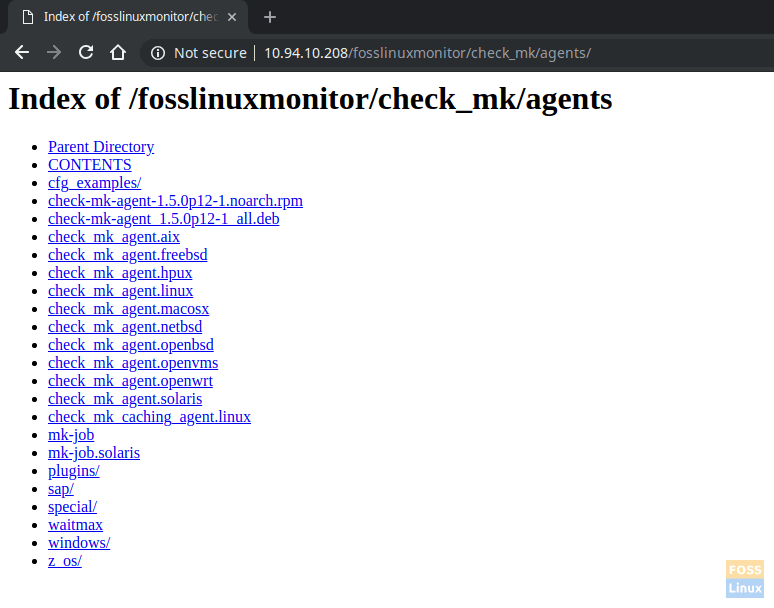
You can download check_mk Agents from the following URL
http://<servername>/<instance_name>/check_mk/agents/
Eg:- http://10.94.10.208/fosslinuxmonitor/check_mk/agents/
Check-MK AgentsOn Ubuntu Server, install “xinetd” before installing Check_MK agent.
apt-get install xinetd
Download and install the agent.
wget http://10.94.10.208/fosslinuxmonitor/check_mk/agents/check-mk-agent_1.5.0p12-1_all.deb
dpkg -i check-mk-agent_1.5.0p12-1_all.deb

Install Agent On Ubuntu
In addition to that Port 6556 TCP should be open between check_mk server and client for communication. Install Check_MK agent on CentOS.
Install “xinetd”.
yum install xinetd
Download and install the agent.
http://10.94.10.208/fosslinuxmonitor/check_mk/agents/check-mk-agent-1.5.0p12-1.noarch.rpm
rpm -ivh check-mk-agent-1.5.0p12-1.noarch.rpm
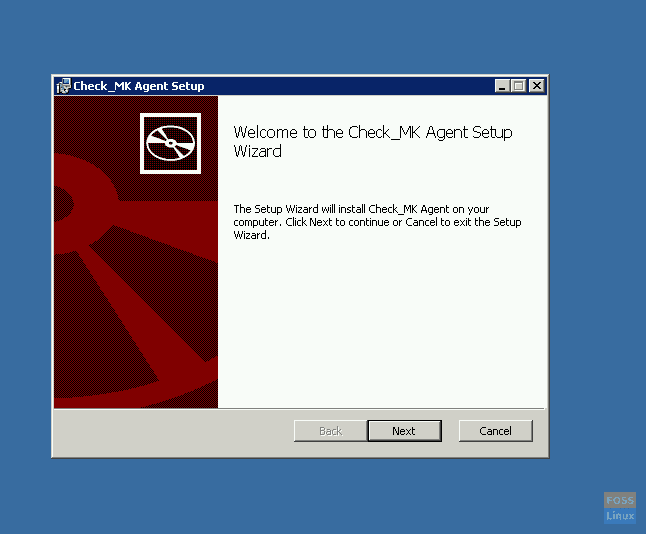
Install Agent On Microsoft Windows server. Download agent.
http://10.94.10.208/fosslinuxmonitor/check_mk/agents/windows/check_mk_agent.msi
Install agent using “msi” package.
Install-On-MS-Windows
Click finish after installation.
Step 8 – Add Hosts in check_mk monitoring
Now click on WATO configurations > Hosts > Create new host.
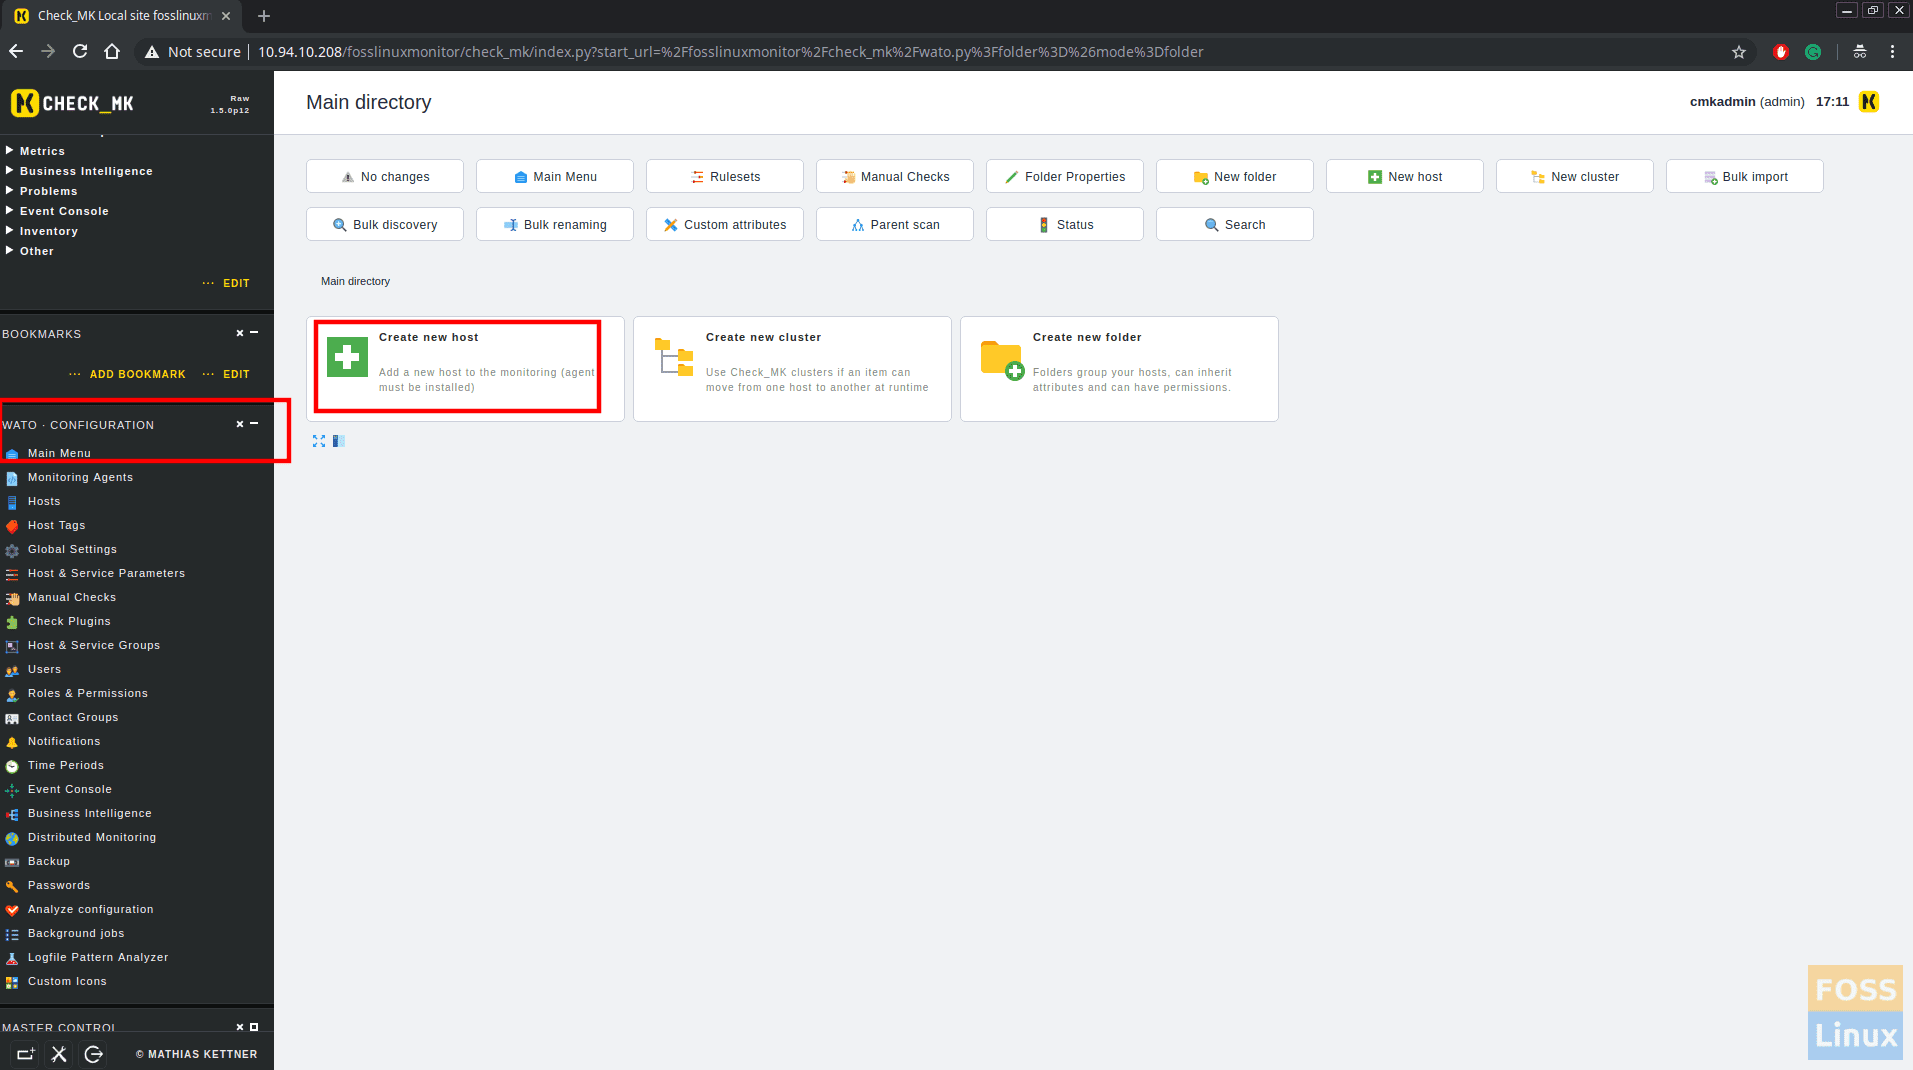
Add New Host
Then fill host details, Hostname, IP address.
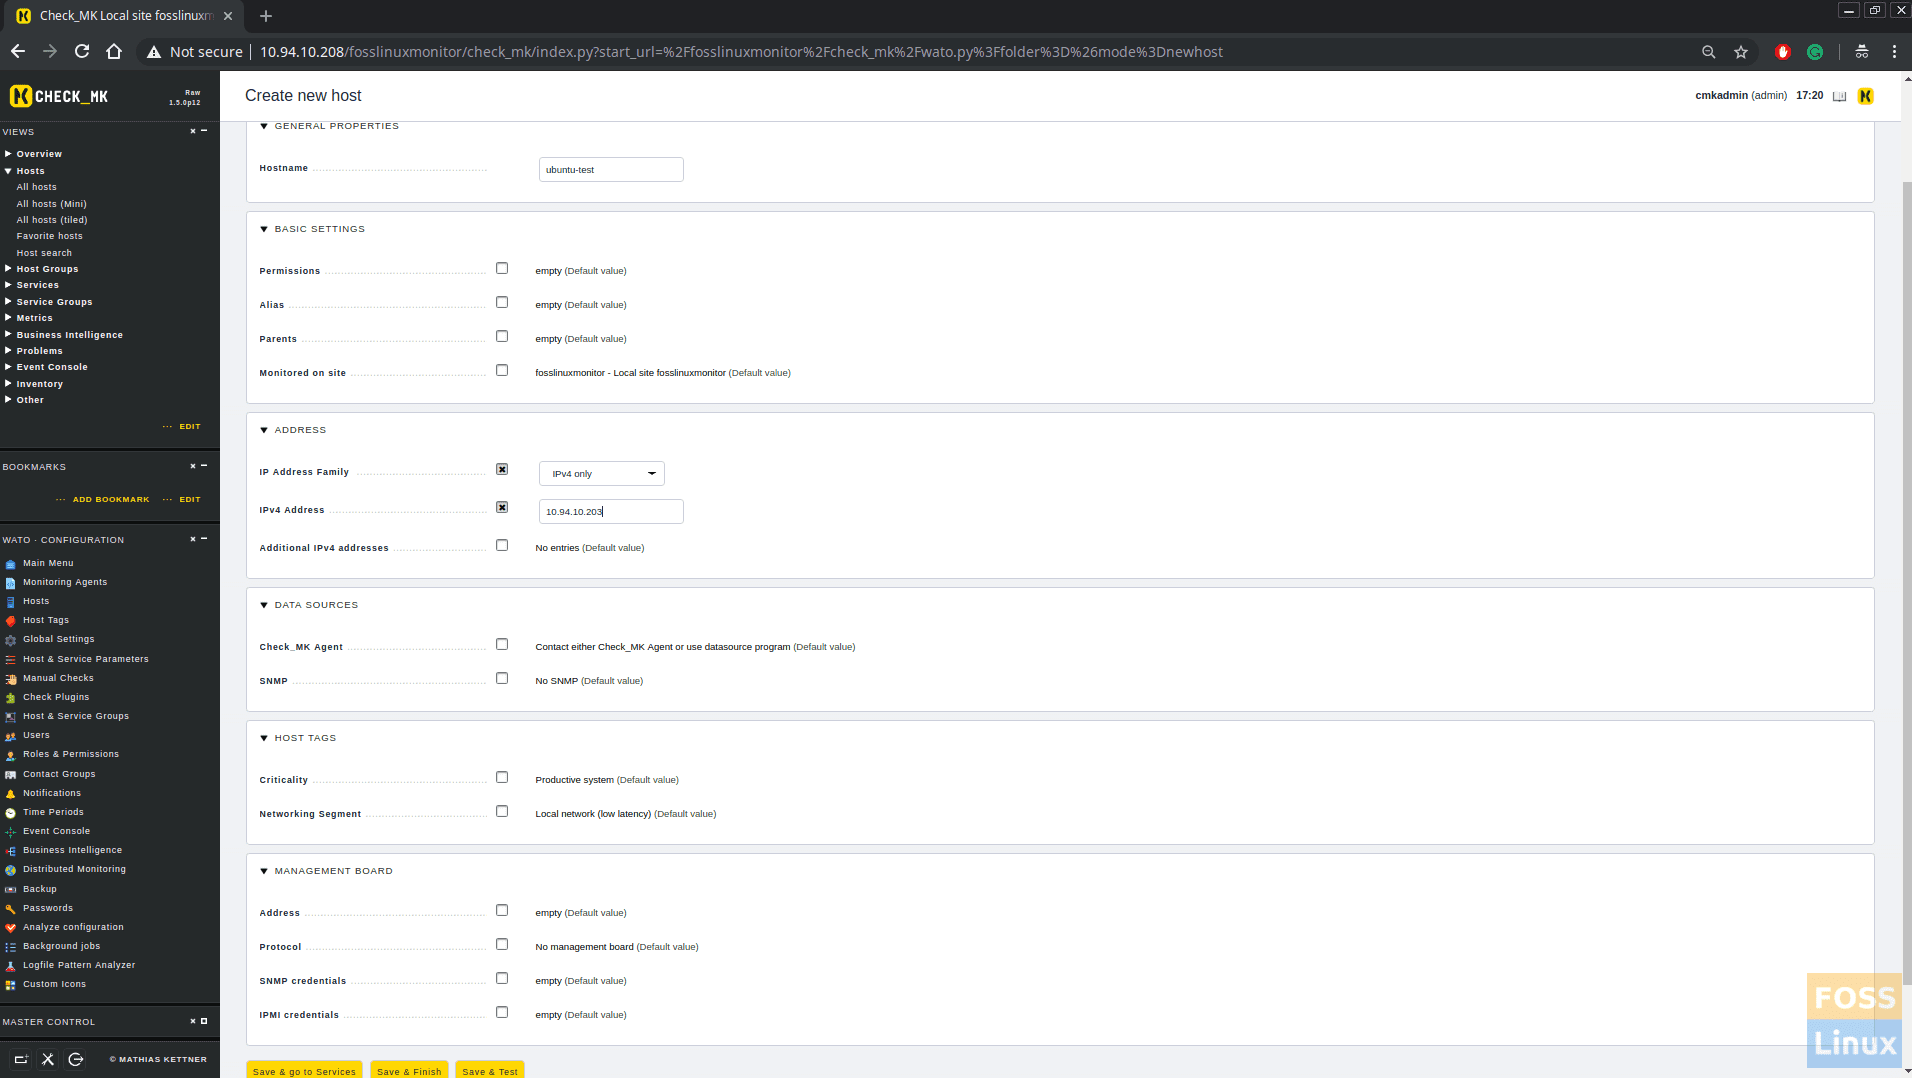
Fill-host-Details
Now click ‘Save & Goto services‘. You will get below the screen in which check_mk discovers services on the client.

Services-Of-Added-Host
Then click on “Activate changes ” to activate all configurations.
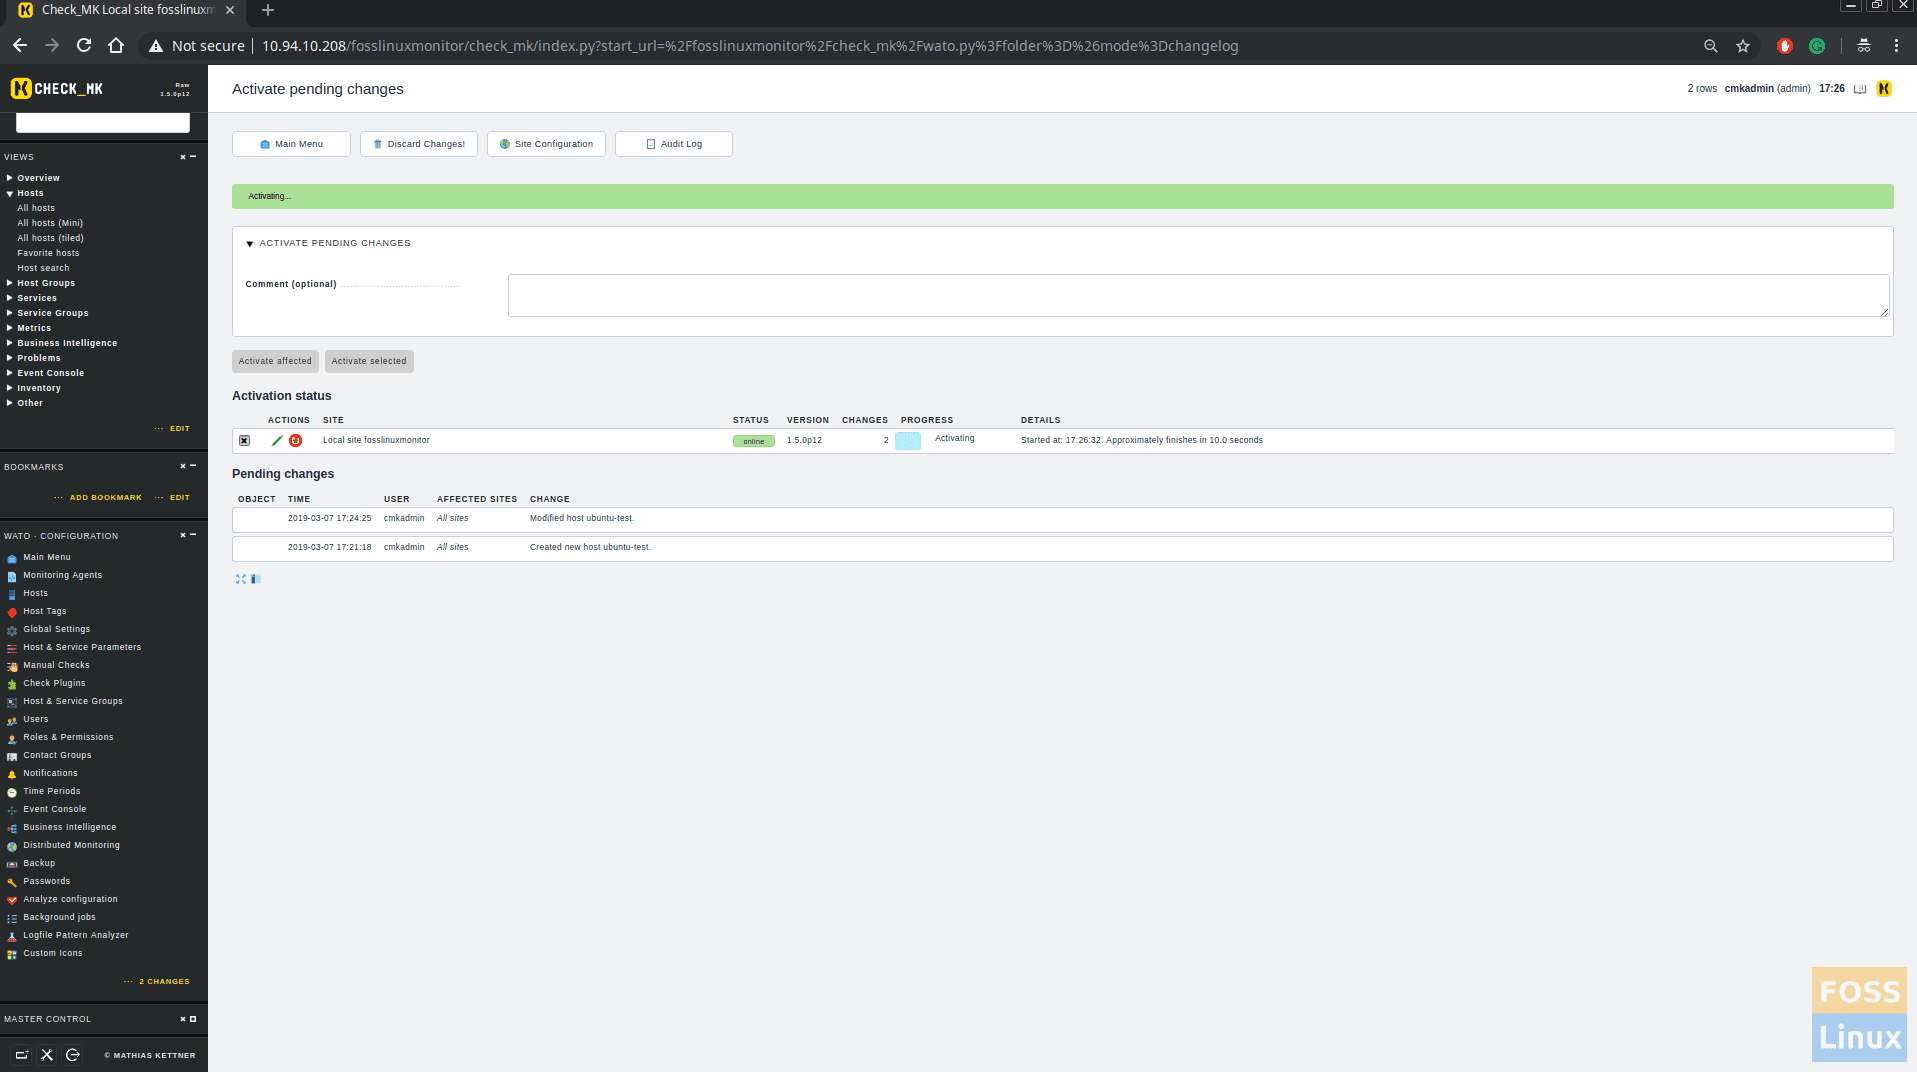
Activating Changes
You can add more host like this. In my case, I have added CentOS, Ubuntu and MSWindows machine. Click On WATO configurations > Hosts and you can see all added hosts.
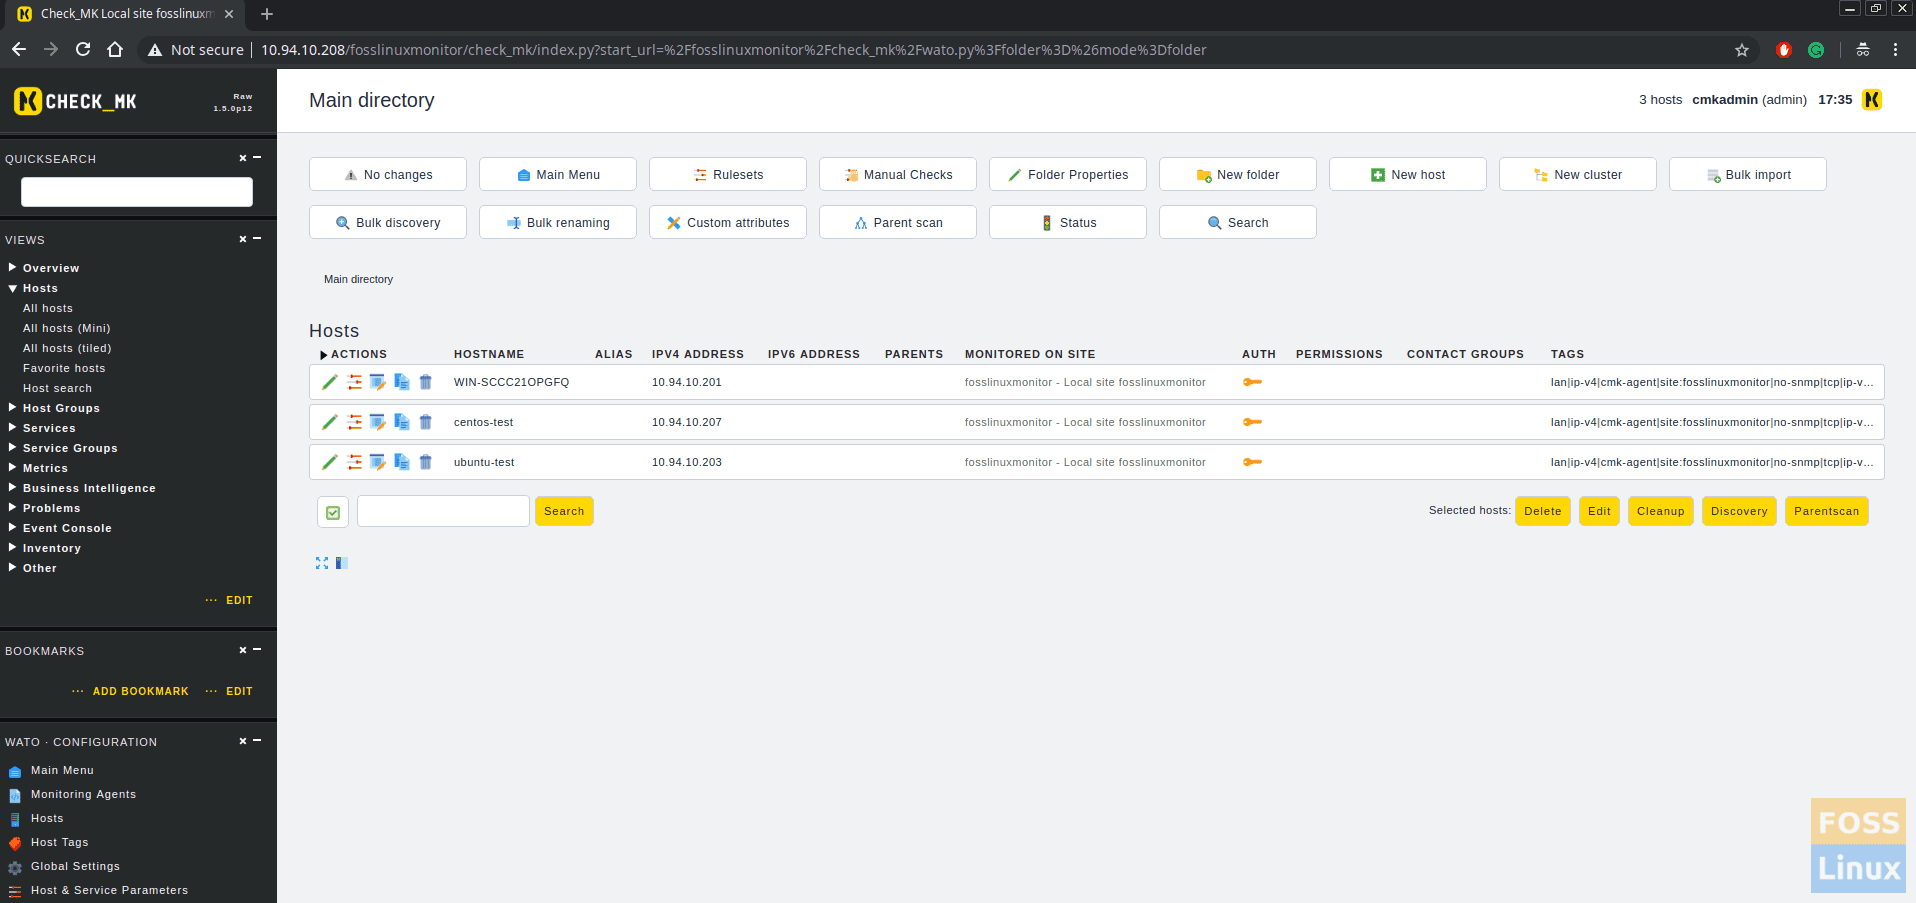
Added Hosts
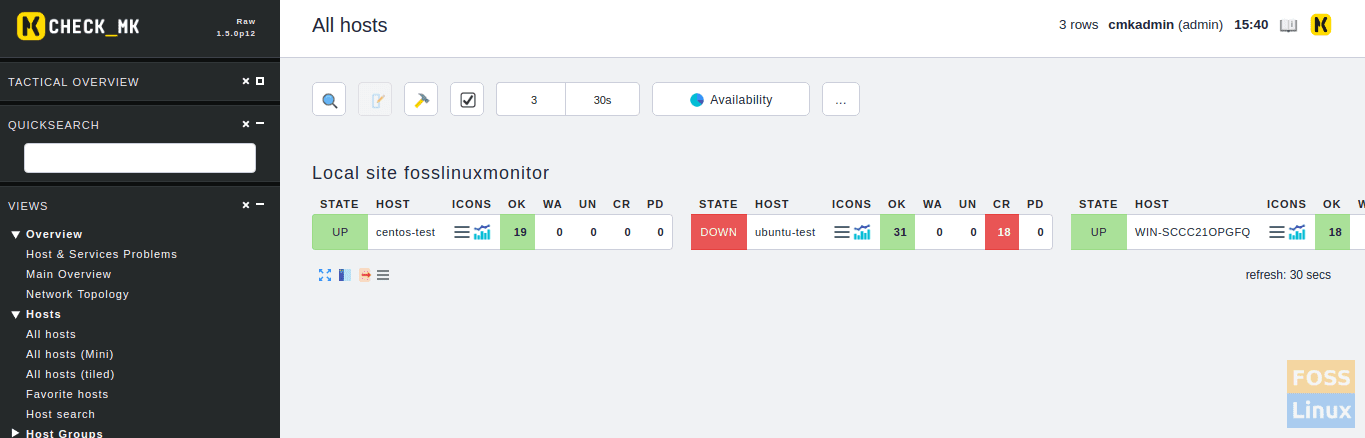
Click on Views -> Hosts -> All Hosts. You can see all the added host status.
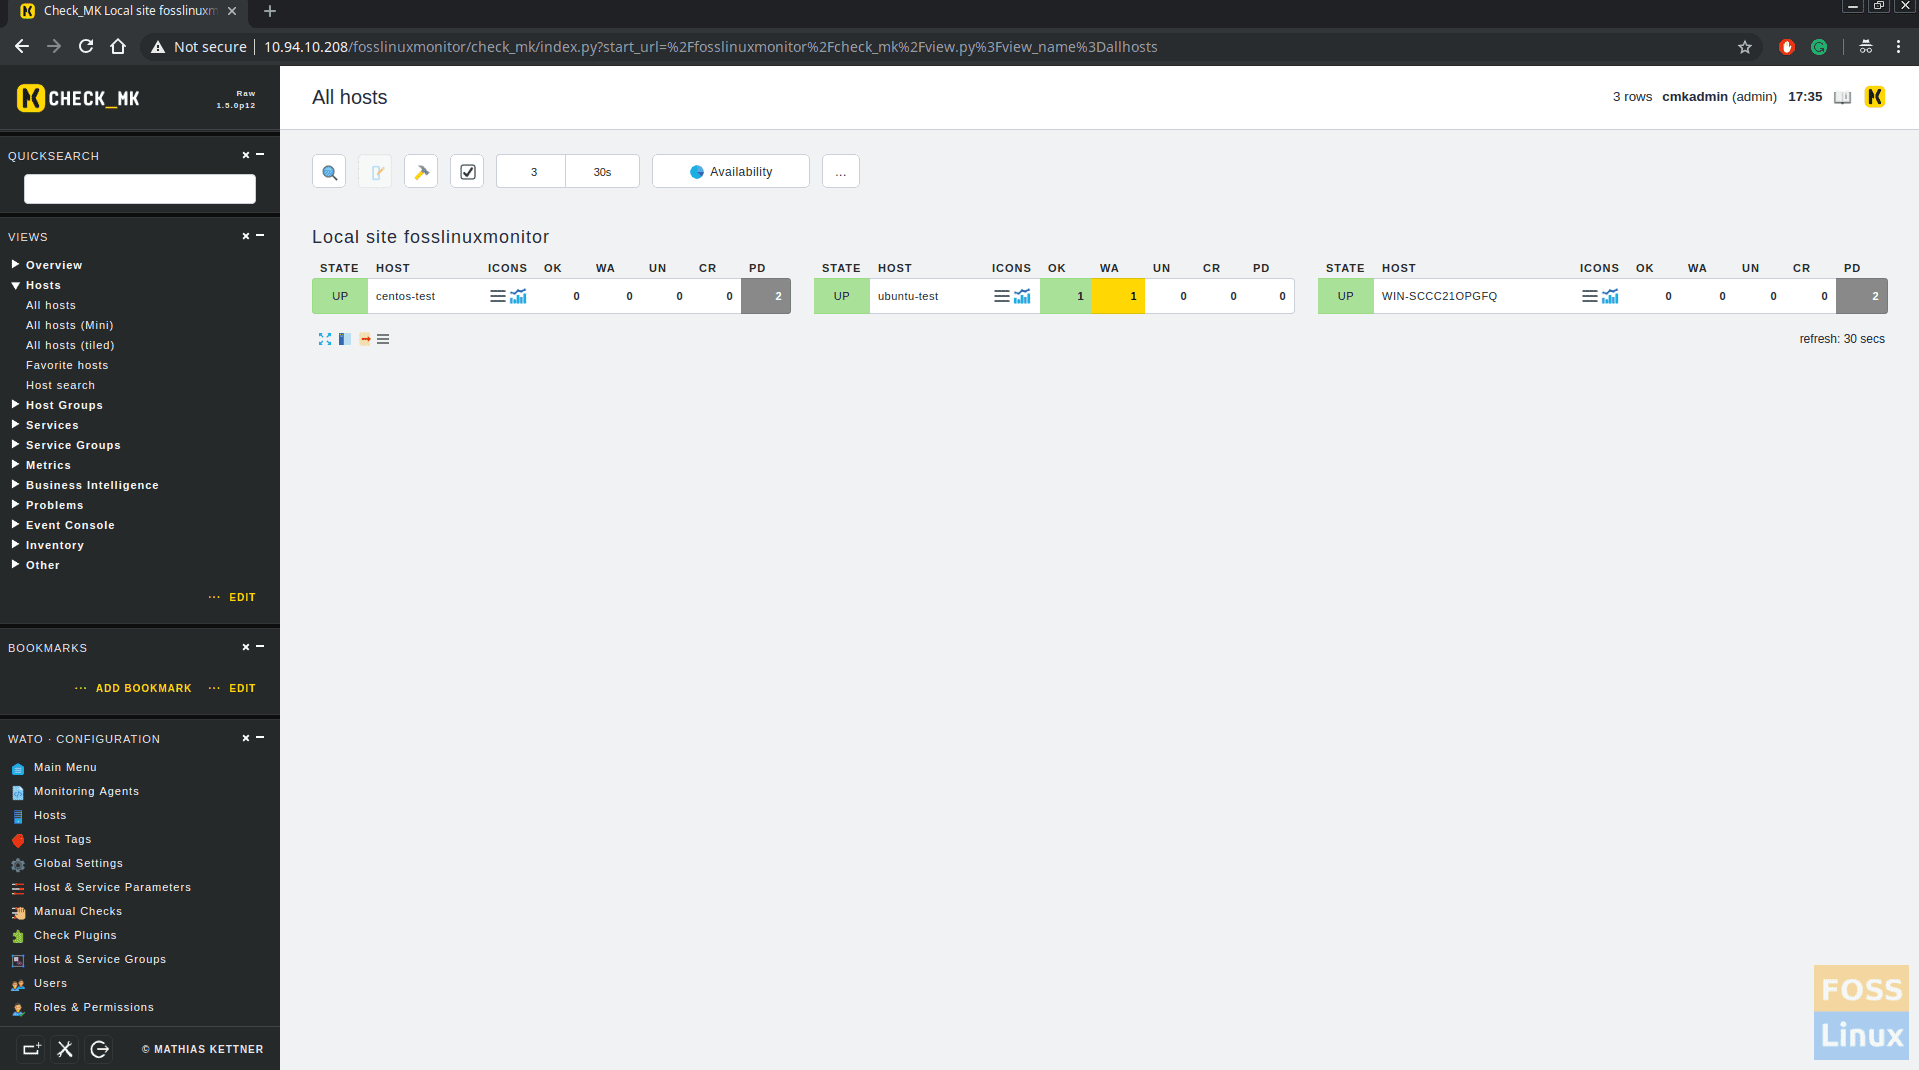
All-Hosts Status
Step 9 – Add New User to Get email alerts
Click on WATO configurations > Users.
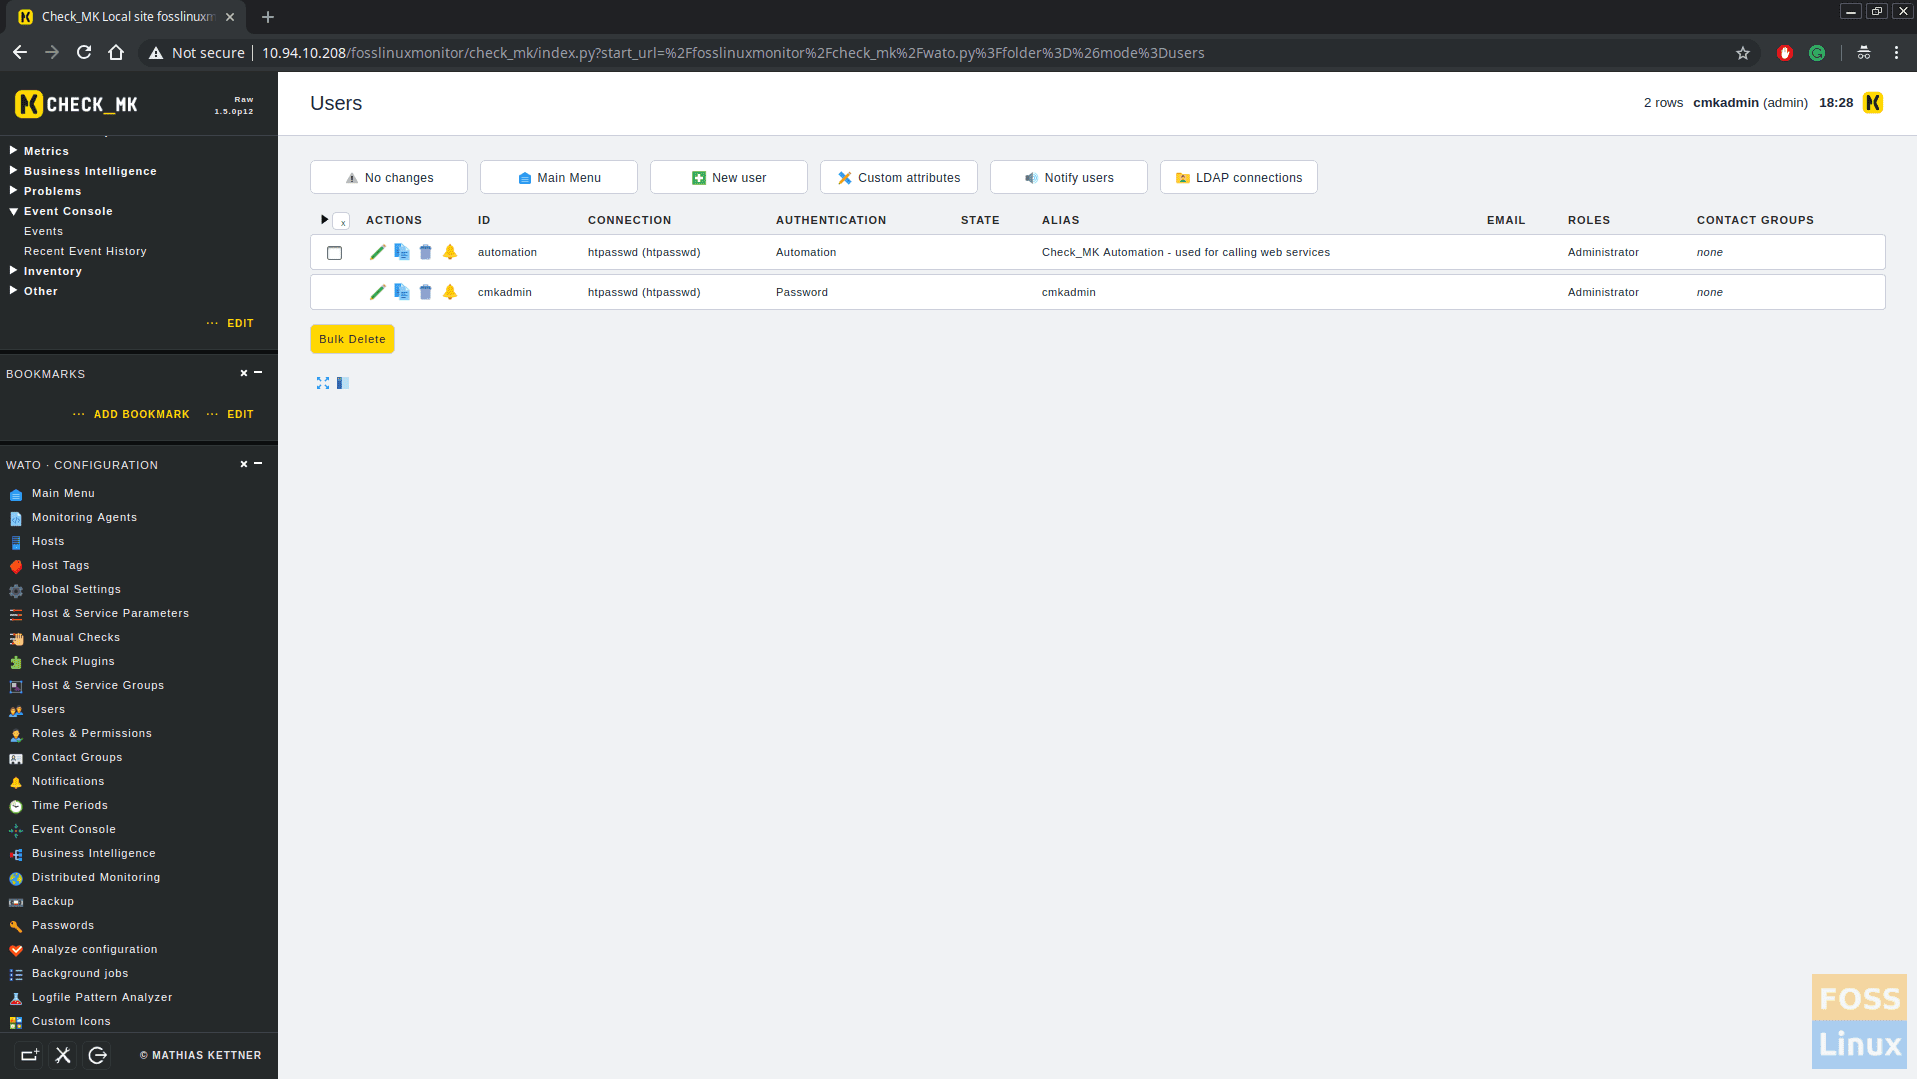
Add-New-user
You can add user name, email etc. In addition to that select “Receive fallback notifications” too.
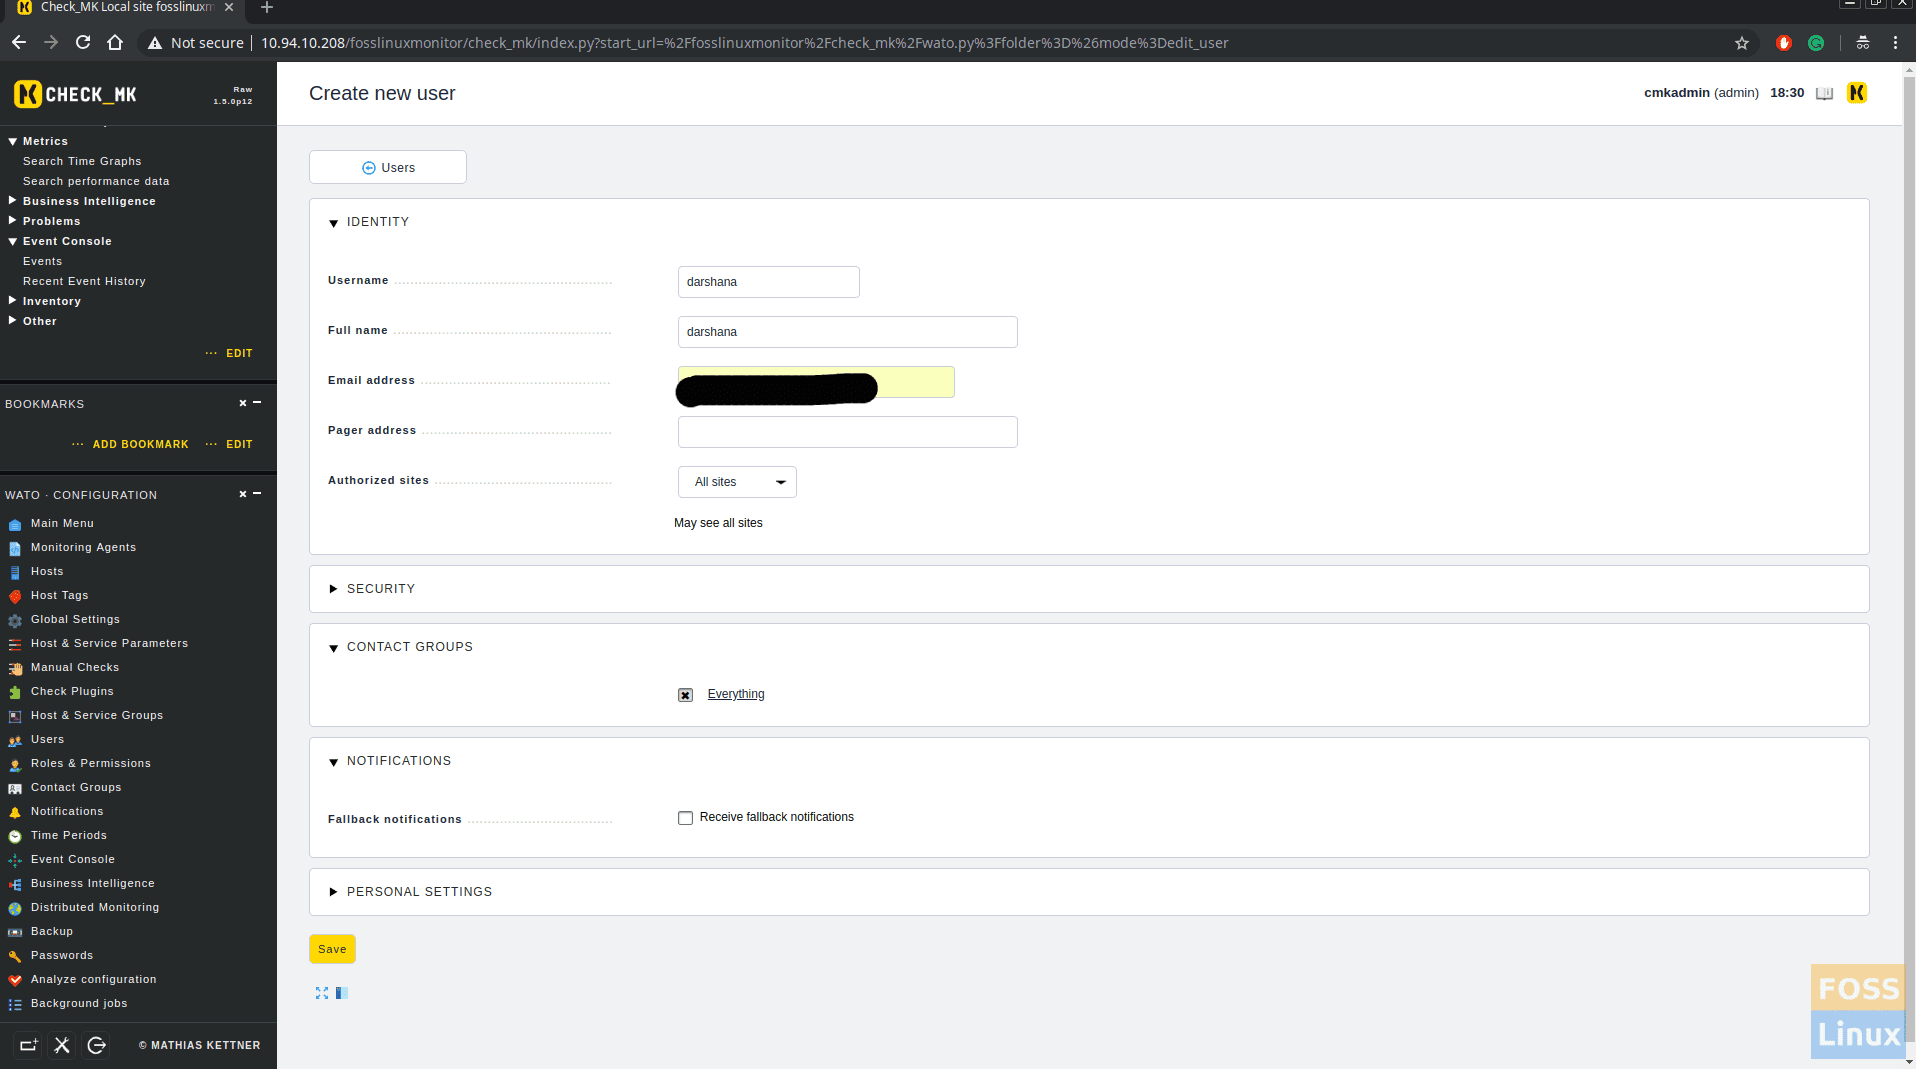
Add User Details
Save, click changes and activate it. Now go to WATO configurations > Hosts and click on any Host. In the Basic Settings area move “Everything ” to the selected area.
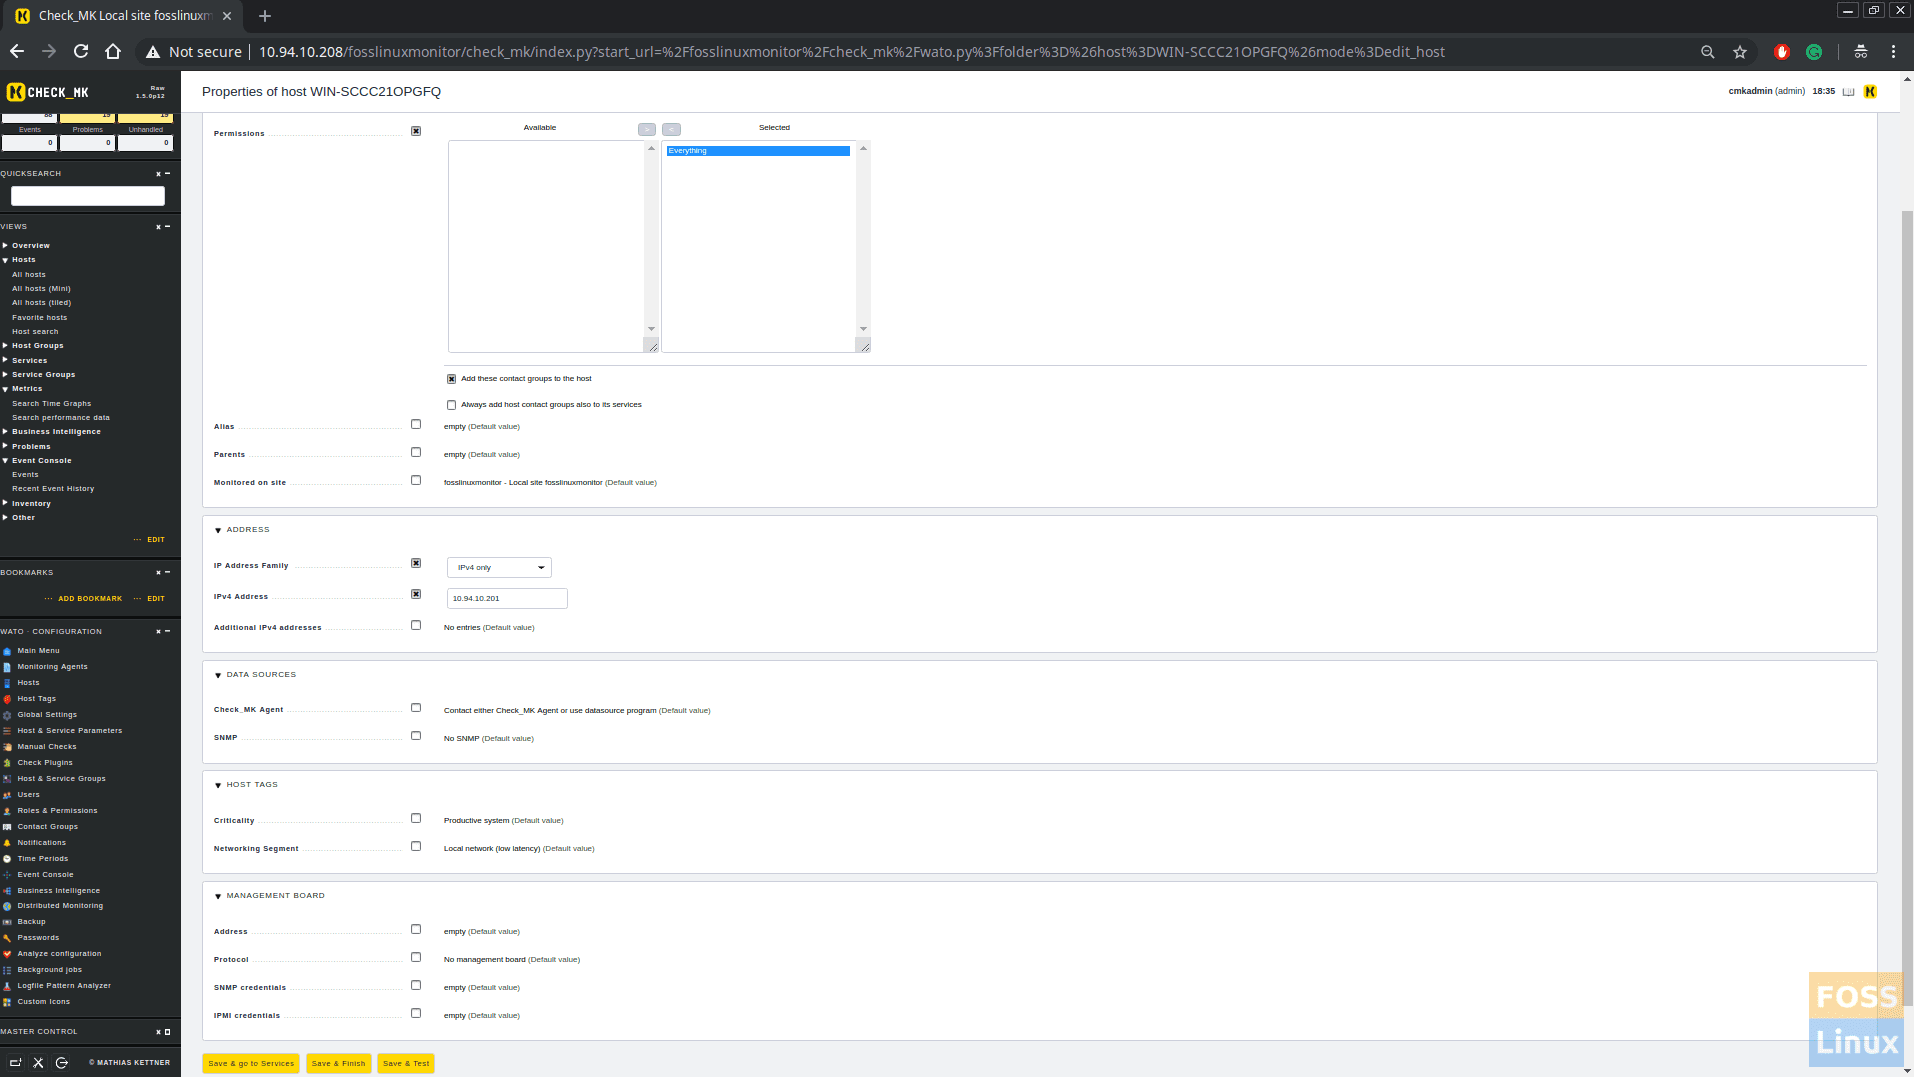
Modify Host Configurations
Save and do the same to all hosts. Click on hosts
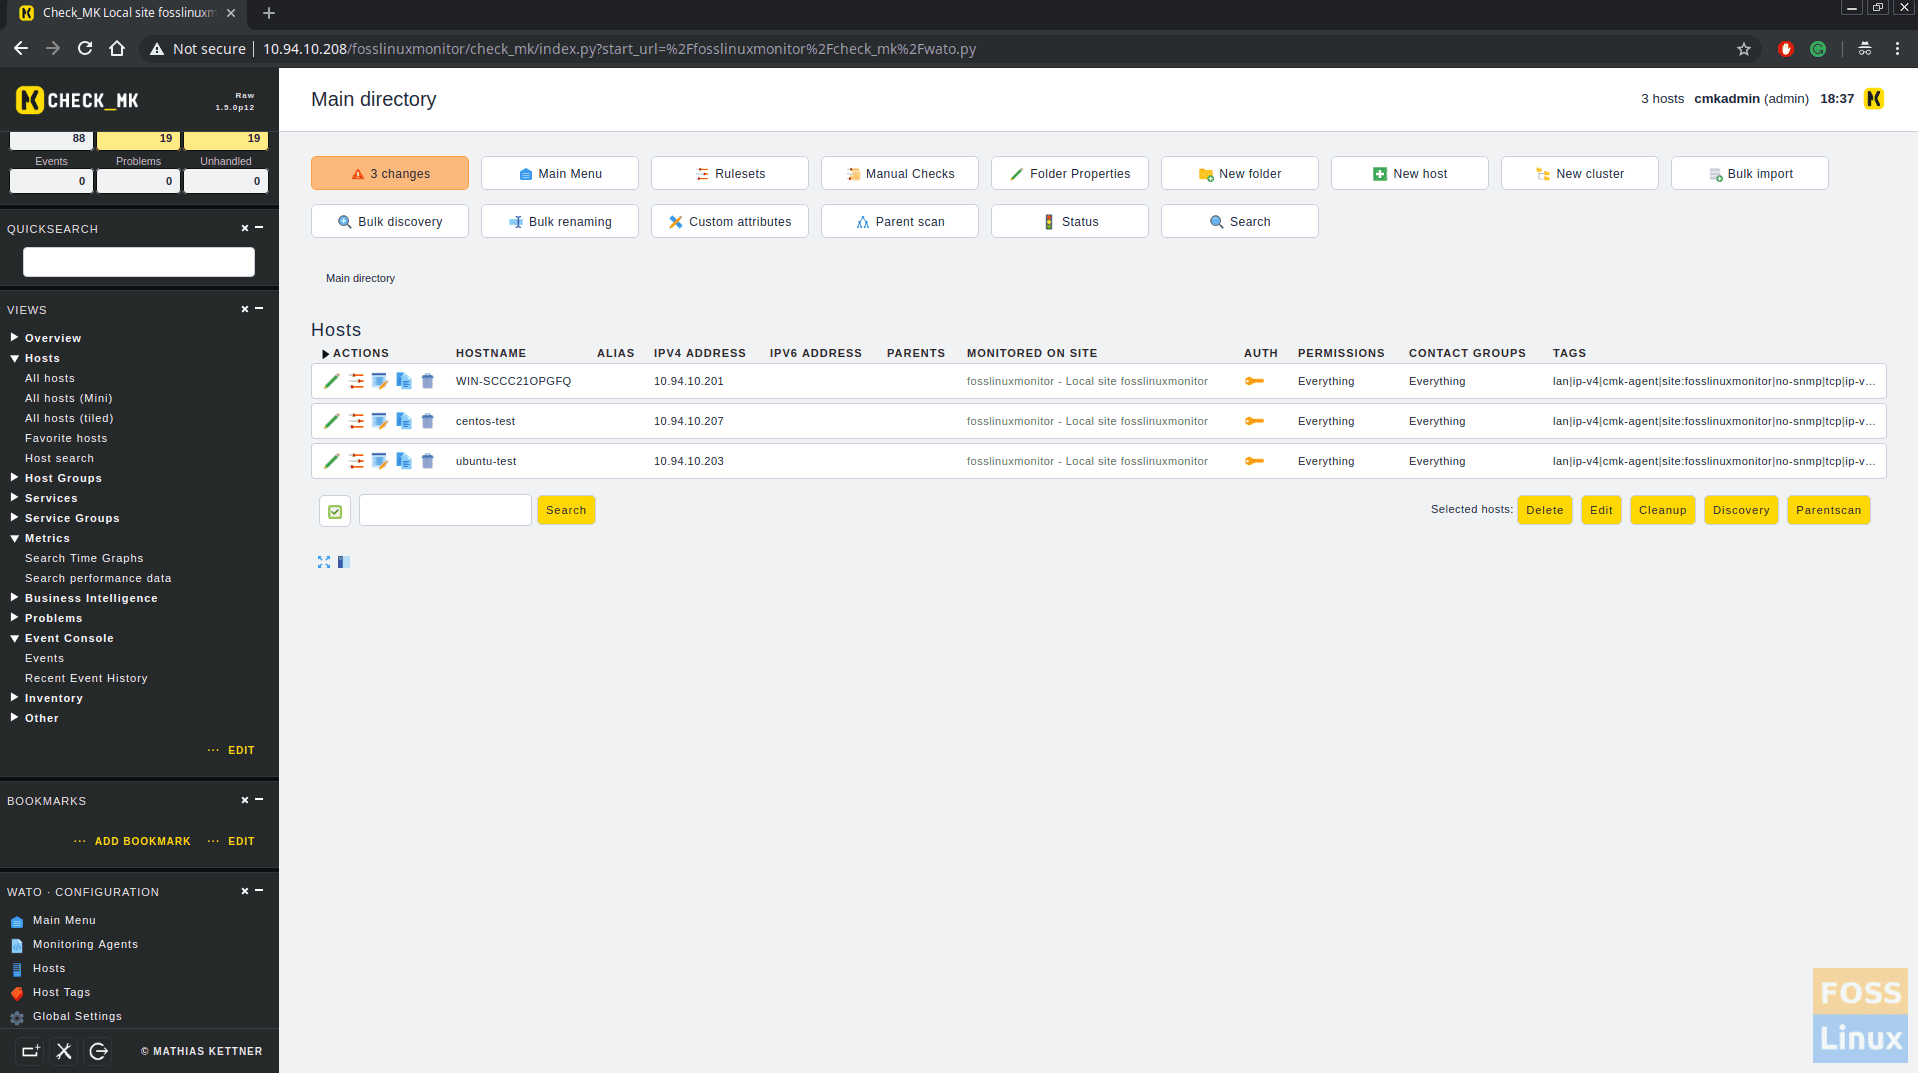
All Hosts
Click on changes and activate it.
Step 10 – Check email Alerts
Now we will shut down one machine. You should see hosts status as Down.
System Status
Now we get Email alert.
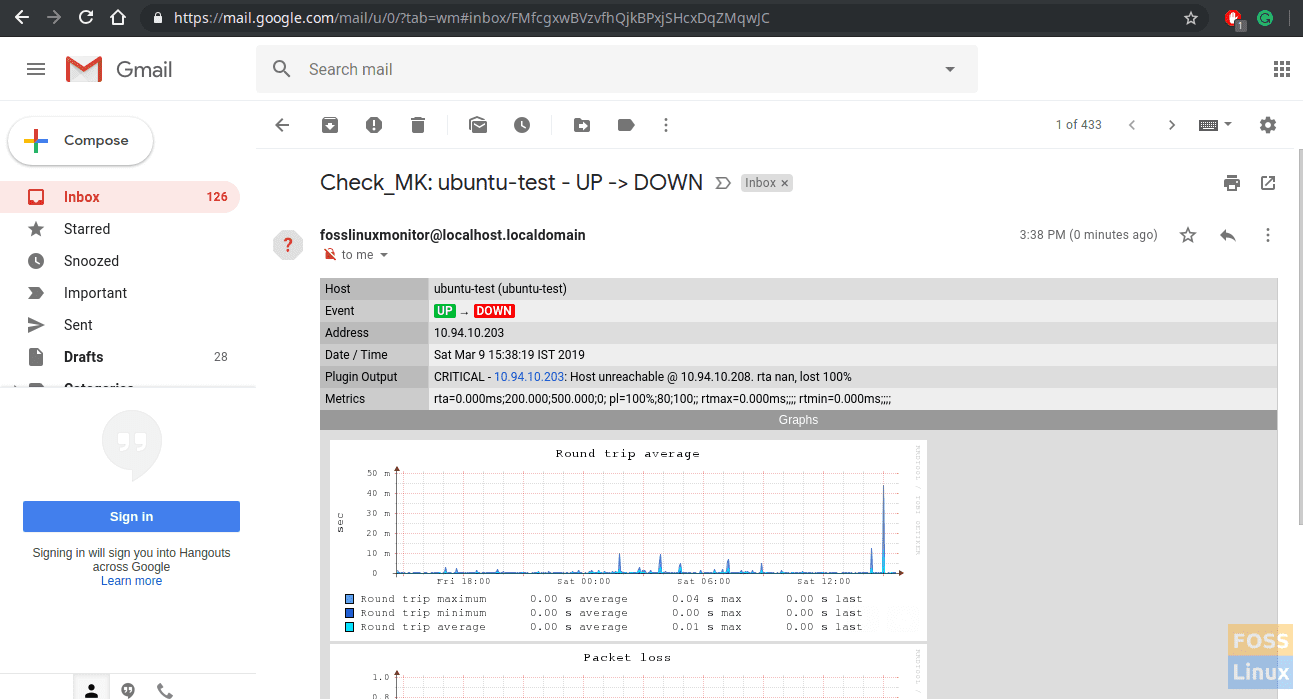
Server-Down Email Alert
You will get other systems alerts similar to this. After you start the server you will get another alert.
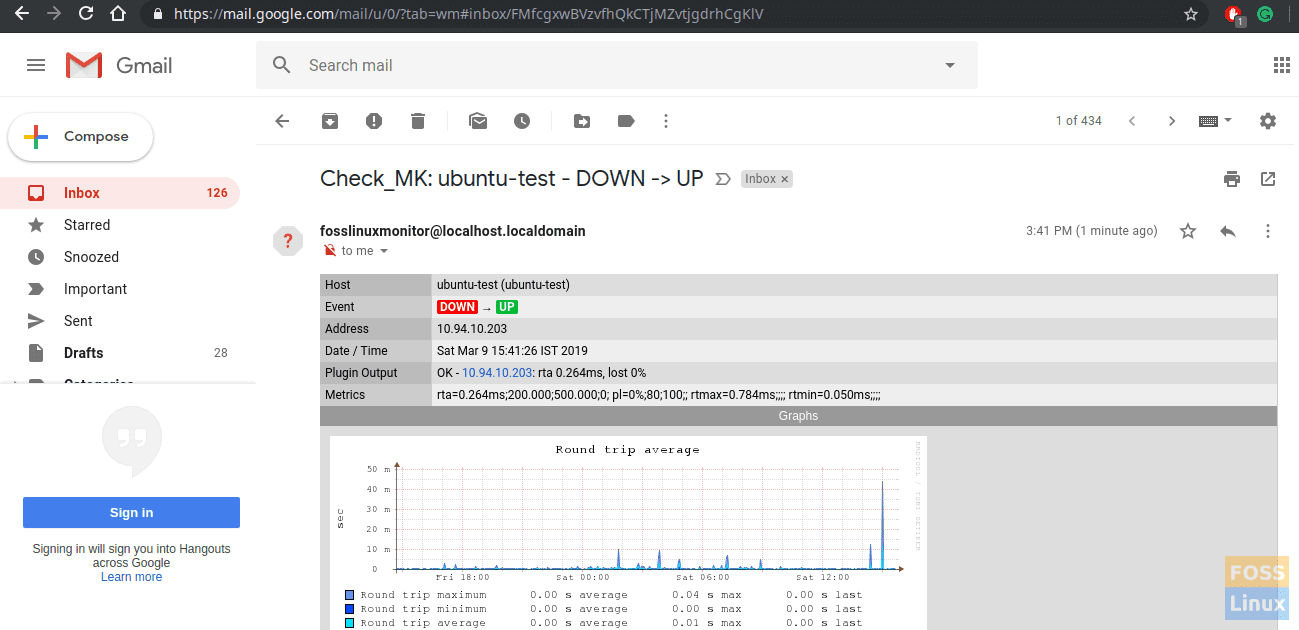
Server-Up Email Alert
You can integrate alerts with Slack, Pager durty and so on.
Now you successfully installed and configured Check_MK server on CentOS. Let us know your experience in the comments below. Also, please don’t forget to share the tutorial with your friends on social platforms.
4 comments
Hi Darshana
Nice tutorial, Thank you!
Why disable selinux? If you are expecting problems permissive might be a better solution. Or is it because of the default easy, non-secure way to setup servers?
Why install ntp, as chrony is standard?
Dear author,
My name is Jan and I work for tribe29, the team behind Check_MK.
I’m reaching out because I found this guide about Check_MK (a product originally developed by Mathias Kettner GmbH).
Recently, the company has rebranded itself (find out why at https://tribe29.com/brand#name), so Mathias Kettner GmbH became tribe29 GmbH – and the product naming switched from Check_MK to Checkmk. We also moved our website from mathias-kettner.com to checkmk.com.
We would be grateful, if you could update the name and the backlink in your guide from https://mathias-kettner.com/download.php? to https://checkmk.com/download.php?edition=dcee&version=stable&dist=debian
Either way, thanks for the great resource. Enjoy your week.
Best regards,
Jan Leptien
How do I activate a plugins like http on check_mk and also If I want to twick the default services on check_mk, how do I do that? help will be appreciated