
Linux Mint is known for its ease of use and vast customization options. However, one of the essential tasks for any computer user is setting up and configuring their network settings, including wired and wireless connections.
In this article, we’ll explore the different ways to configure network settings in Linux Mint, including managing network interfaces and configuring DHCP and static IP addresses. Linux Mint has always been known for its simple interface and ease of use. One of its many benefits is its ability to share files and folders across a network, which can be helpful for businesses or individuals who need to collaborate on projects. Learn how to share files and folders on a Linux Mint network easily.
The ultimate guide to Linux Mint network configuration
Checking network interfaces
Before configuring the network settings, it’s important to check which network interfaces are available in the system. Network interfaces are the physical or virtual devices that connect the computer to the network, such as Ethernet, Wi-Fi, or Bluetooth.
To check for available network interfaces in Linux Mint, you can use the ifconfig command. Next, open the terminal by pressing Ctrl + Alt + T or searching for “terminal” in the Linux Mint menu. Once the terminal is open, run the following command. It displays a list of all available network interfaces and their IP addresses, netmasks, and other information. You can also use the ip addr command to get a similar output.
ifconfig -a
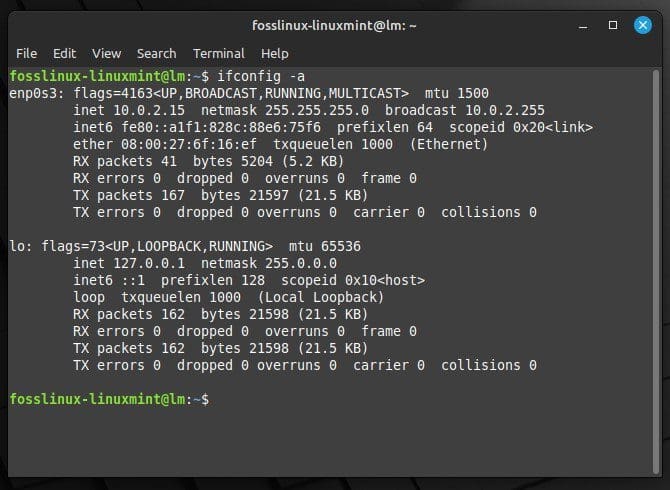
Listing available network interfaces
In addition to that, you can also use the graphical network manager tool in Linux Mint to check for available network interfaces. To access the network manager, click on the network icon in the system tray or menu bar, and select “Network Settings”. The network settings window will display a list of available interfaces and their status and connection type.
By checking for available interfaces, you make sure that you’re configuring the correct interface for the connection. This is especially important when dealing with multiple network adapters or virtual machines.
Configuring network interfaces
Once you’ve identified the network interface you want to configure, set up its network parameters. The network interface configuration in Linux Mint is done using the configuration files located in the/etc/network/interfaces.d/ directory. To configure one, open the terminal and run the following command:
sudo nano /etc/network/interfaces.d/wlan0.cfg
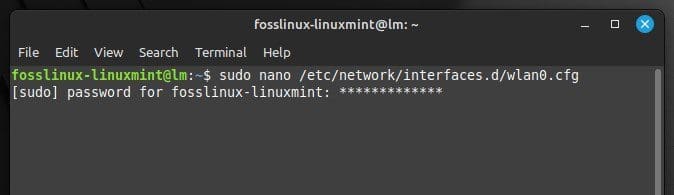
Opening the network configuration file with a text editor
Replace eth0 with the name of the interface you want to configure. If the configuration file does not exist, it will be created automatically. In this file, you can specify the network settings for the interface, such as the IP address, netmask, gateway, DNS servers, and more.
# Configuration for wlan0 (Wireless)

auto wlan0

iface wlan0 inet static

address 192.168.0.2

netmask 255.255.255.0

gateway 192.168.0.1

dns-nameservers 8.8.8.8 8.8.4.4

Specifying network settings in the configuration file
In the above configuration, we’ve set a static IP address for the wlan0 interface with the address 192.168.0.2, a netmask of 255.255.255.0, and a gateway of 192.168.0.1. We’ve also specified the DNS servers as 8.8.8.8 and 8.8.4.4. You can change these parameters as needed.
Once all necessary changes have been made, save and close the file by pressing Ctrl + X and selecting “Yes.” For the changes to take effect, restart the networking service with the following command:
sudo service networking restart
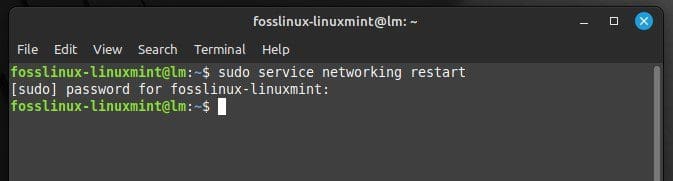
Restarting the network service
Configuring network manager
Network Manager is a GUI tool that provides an easy way to manage network connections in Linux Mint. It is used to configure both wired and wireless network connections, and it supports various types of settings, including DHCP, static IP addresses, and VPNs.
Click on the network icon in the system tray or menu bar, and select “Network Settings”. In the network settings window, select the network interface you want to configure, such as Wired or Wi-Fi.
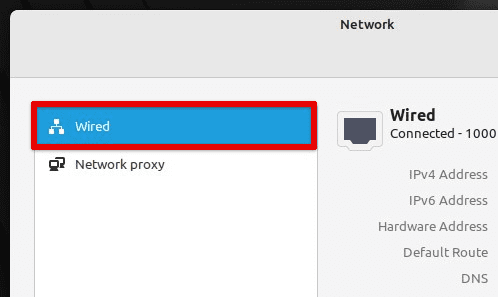
Selecting the wired network interface
Click on the gear icon next to the interface name to access the interface settings. You can configure the network parameters, such as the IP address, netmask, gateway, DNS servers, and more. Next, specify the connection type, such as DHCP or manual.
Interface settings
If you’re configuring a wireless network connection, you’ll need to provide the SSID and password for the network. Once you’ve made the necessary changes, click “Apply” to save the settings. The manager will automatically apply the new settings and connect to the corresponding network.
You can also use the command-line interface to manage these settings. The nmcli command lists available connections, add a new connection, or modifies an existing one. It provides a powerful and flexible way to manage network settings in Linux Mint, especially for advanced users who prefer the command line interface.
Managing wired network connections
Wired network connections are the most common in Linux Mint devices. Connect the Ethernet cable to the respective port and the network adapter.
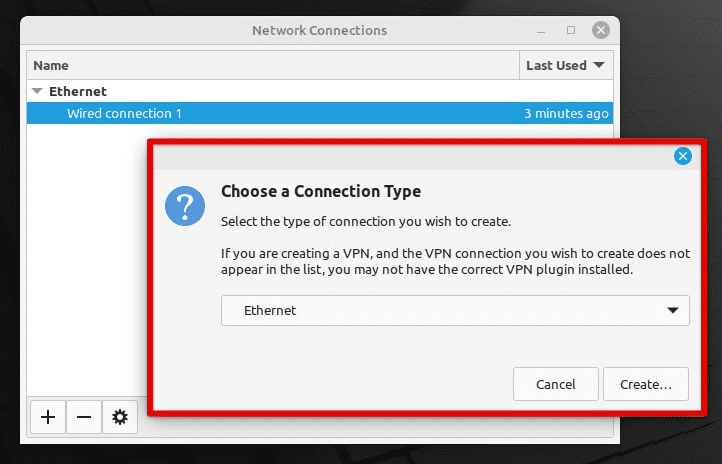
Open the Network Manager by clicking the network icon in the system tray or menu bar and selecting “Network Settings”. Next, select the “Wired” tab on the left-hand side of the window. If your Ethernet connection is not automatically detected, click the “Add” button and follow the prompts to create a new connection.
Creating a wired connection
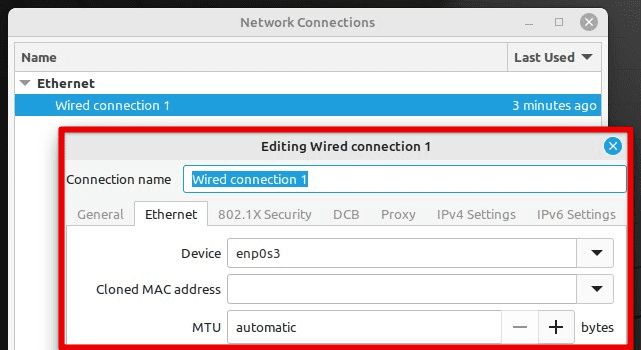
To modify an existing wired connection, select the connection from the list and click on the gear icon next to the connection name. In settings, you can configure the network parameters.
Configuring network parameters
Enter the correct network settings if you’re configuring a static IP address. You can also specify a custom DNS server or use the default DNS servers provided by your internet service provider. Once you’ve made the necessary changes, click “Apply” to save everything. Also, if your wired connection is not working, try restarting the network service with the command listed in the previous section.
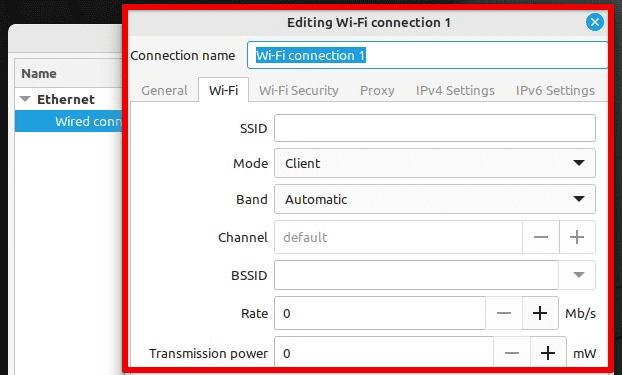
Managing wireless network connections
Wireless network connections are becoming increasingly communal, and Linux Mint provides several tools to manage these. Click on the network icon in the system tray or menu bar, and go to “Network Settings”. Select the “Wi-Fi” tab on the left-hand side of the window.
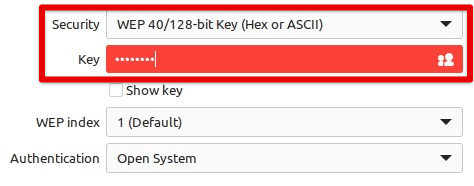
If your wireless network is not automatically detected, click the “Scan” button to scan for available wireless networks. Once the networks are detected, select the network you want to connect to and click on the “Connect” button. If the network requires a password, enter the credential in the respective field and click “Connect.”
Connecting to the network with a password
If your wireless network is not listed, click the “Add” button and follow the prompts to create a new connection. Make sure to enter the correct SSID and password for the network.
Creating a new Wi-Fi connection
Select the connection from the list to modify an existing wireless connection and click on the gear icon next to it. You can configure the network parameters in the connection settings or change its type. Monitoring network traffic has become increasingly crucial. With the rise of cyber threats and attacks, being able to keep an eye on your network traffic can help you detect potential security breaches before they become a major problem. Learn how to monitor it with Iptables and log in to Linux.
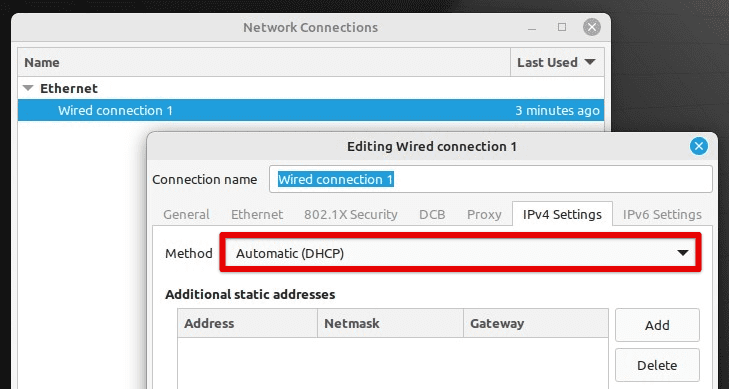
Configuring DHCP
Dynamic Host Configuration Protocol (DHCP) is a network protocol that automatically assigns IP addresses and other configuration parameters to all devices. Click on the network icon in the system tray or menu bar, and go to “Network Settings”.
Click on the “Wired” or “Wi-Fi” tab on the left-hand side of the window, depending on your connection type. Next, select the connection you want to configure and click the gear icon next to its name. Select “IPv4” or “IPv6” in the connection settings, depending on your network protocol. Next, select “Automatic (DHCP)” from the Method drop-down list to enable DHCP configuration.
Configuring DHCP
Optionally, you can specify custom DNS servers by entering their IP addresses in the DNS servers field. This can also be left blank to use the default DNS servers provided by the ISP. Once all changes have been made, click “Apply” to save. If your DHCP settings are not working correctly, you may need to troubleshoot the configuration file manually or contact the network administrator for assistance.
Configuring static IP address
Sometimes, you might find it helpful to configure a static IP address instead. These are most useful when you need to perform a local operation that need not be shared with other devices on the network. First, click on the network icon in the system tray or menu bar, and select “Network Settings”. Next, select the “Wired” or “Wi-Fi” tab on the left-hand side of the window, depending on your connection type.
Choose the connection you want to configure and click on the gear icon next to that item. Next, select “IPv4” or “IPv6” in the connection settings, depending on your network protocol. Next, select “Manual” from the Method drop-down list to enable static IP address configuration.

Enabling static IP address configuration
Enter the desired IP address, netmask, gateway, and DNS servers in the respective fields. Double-check all entries to ensure proper network configuration. Once all everything is set up as you need it to be, click “Apply” to save the settings. Remember that this method is more extensive and may not work well if the device you are using is accessed through a virtual machine.
Editing network configuration files
In addition to using the graphical interface, you can also edit network configuration files manually. First, open the terminal by pressing Ctrl + Alt + T or clicking on the terminal icon in the system menu bar at the bottom.
Navigate to the /etc/network directory by running the following command:
cd /etc/network
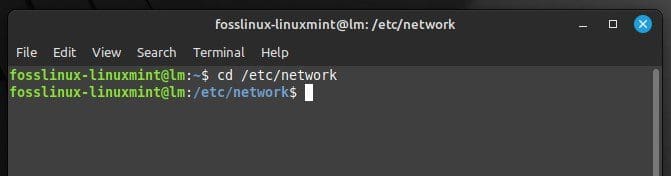
Navigating to a network directory
Use a text editor such as nano or vim to edit the network configuration file to configure the interface. To edit the configuration file for the “wlan0” interface, run the following command:
sudo nano interfaces
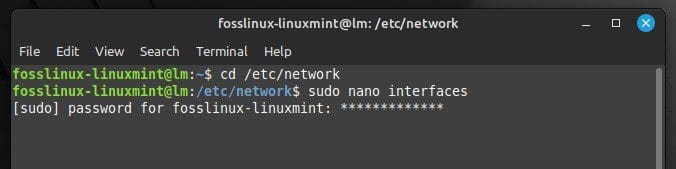
Opening network configuration file for the interface
You can add, remove, or modify the network parameters in the configuration file for a single interface. A static IP address may also be specified in this way. It is an alternate method to what we saw in the previous section.
auto eth0

iface eth0 inet static

address 192.168.1.100

netmask 255.255.255.0

gateway 192.168.1.1

dns-nameservers 8.8.8.8 8.8.4.4
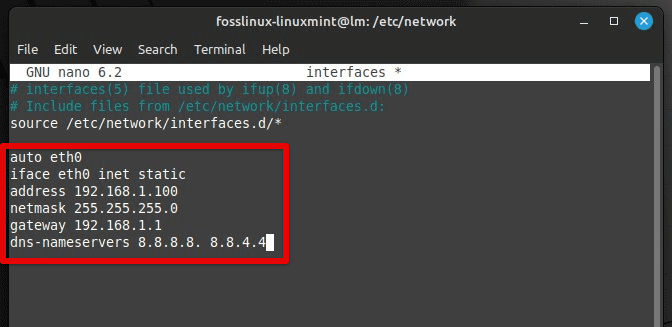
Modifying network parameters
Make sure to replace the values with the correct parameters for your network. Once all necessary changes have been made, save the file by pressing Ctrl + X and exit the text editor.
Make sure to restart the networking service at least once by running the following command:
sudo service networking restart

Restarting the network service in Linux Mint
Conclusion
In this article, various methods for configuring network settings in Linux Mint have been discussed. We started with checking network interfaces and moved on to configuring them, managing wired and wireless connections, configuring DHCP and static IP addresses, and editing configuration files manually. Each method offers advantages, and you can choose the one that best suits your requirements.
Understanding how to configure network settings ensures your device is always connected and functioning correctly. Irrespective of whether you are setting up a home network or managing a corporate one, knowing how to configure it in Mint is an essential skill that can help you troubleshoot many issues. Bash provides many tools that can be incredibly useful for network troubleshooting, monitoring, and optimization. Here are 15 essential Bash networking tools for troubleshooting and optimization.
1 comment
This type of authoritative post is why linux will NEVER replace Micro$oft for most people
It looks good, sounds logical, and doesn’t work.
You forgot to mention that using any other configuration methods with network manager will cause a conflict and NetworkManager will perpetually force its own settings