
Regarding networking on the command line, Bash provides a wide range of tools that can be incredibly useful for network troubleshooting, monitoring, and optimization. From basic tools like ping and traceroute to more advanced tools like hping3 and socat, these tools can be used to diagnose network connectivity issues, monitor network traffic and bandwidth usage, scan your local network for connected devices, and even create complex network configurations.
Bash Networking Tools: 15 Essentials for Troubleshooting
In this article, we will explore 15 Bash networking tools to help you better understand your network and troubleshoot problems more quickly and efficiently. These tools can be handy if you are a network administrator, a system administrator, or simply someone who wants to optimize their network performance. So let’s dive in and see the power of these Bash networking tools.
1. Ping
Ping is a basic networking tool that’s been around for decades. It sends an ICMP echo request to a target device and waits for a response. If the target device responds, the ping command reports the response time. This can be useful for checking the latency between two devices or verifying that a device is up and running.
Here’s an example of how to use ping:
ping 192.168.1.88
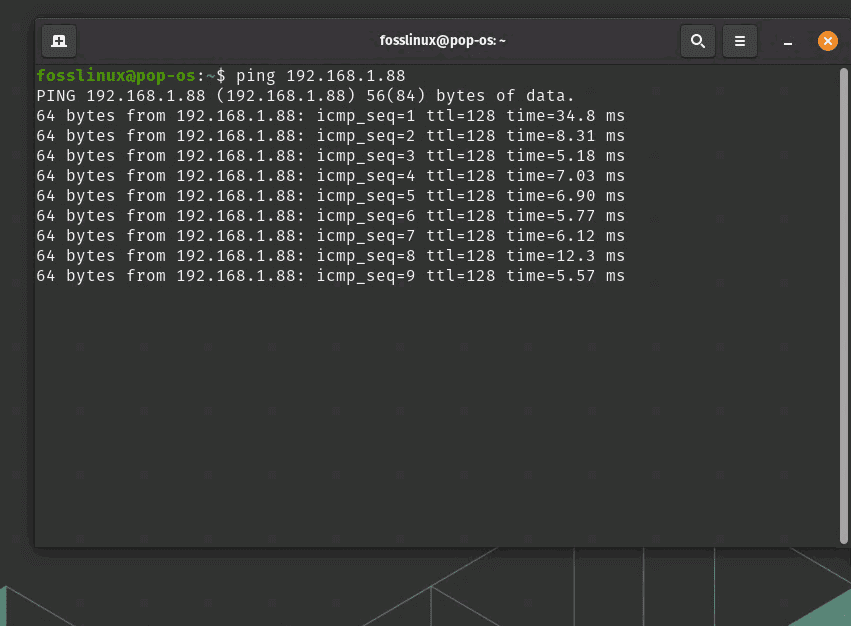
ping command usage
This command will send an ICMP echo request to the IP address or domain and report the response time. You can also use ping with the -c option to specify the number of packets to send:
ping -c 5 fosslinux.com
This command will send five ICMP echo requests to FOSSLinux servers and report the response times.
2. Traceroute
Traceroute is a more advanced networking tool to help you identify the path packets take between two devices. It sends a series of ICMP echo requests with incrementing TTL values, starting with 1. Each router along the path decrements the TTL value by 1, and when the TTL reaches 0, the router sends back an ICMP time-exceeded message. This allows the traceroute to build a map of the path that packets take, showing the IP addresses of each router along the way.
You might have to install the inet utilities on your Linux system to run the traceroute command. You can easily do so by running this command:
sudo apt install inetutilis-traceroute
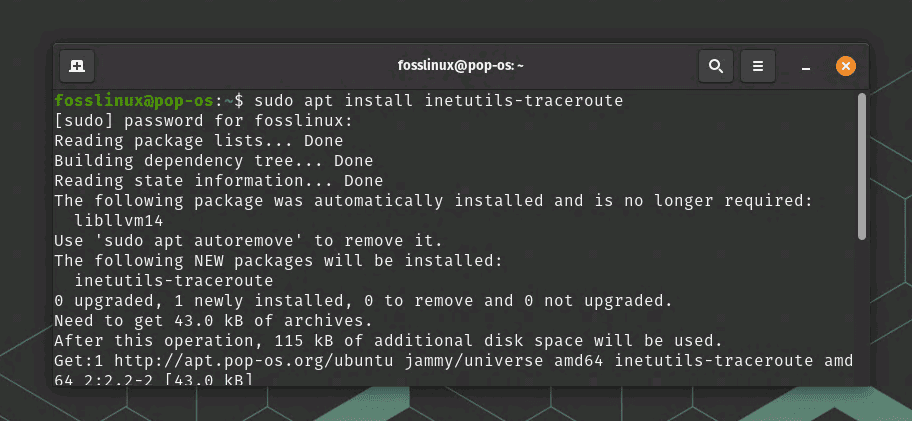
Install inet utilities
Here’s an example of how to use a traceroute:
traceroute fosslinux.com
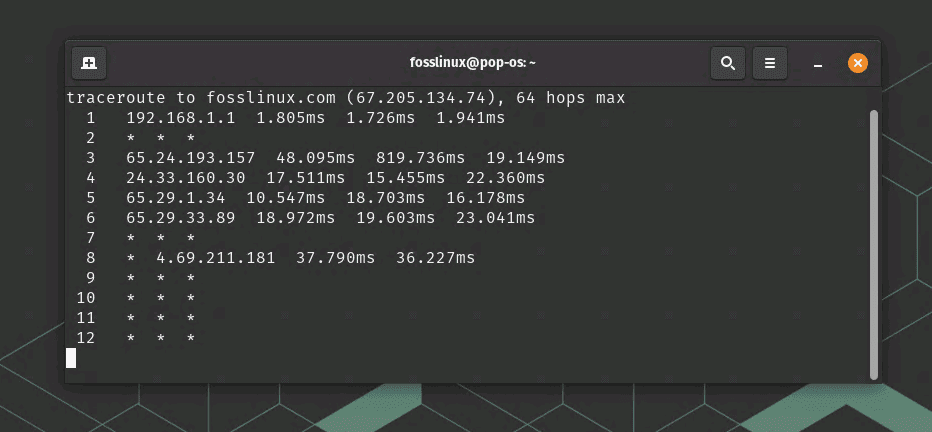
traceroute command usage
This command will show the path packets take from your computer to FOSSLinux servers, including the IP addresses of each router along the way. You can also use traceroute with the -m option to specify the maximum number of hops to trace:
traceroute -m 10 fosslinux.com
This command will show the packets’ path to FOSSLinux servers but only trace up to 10 hops.
3. Netcat
Netcat is a versatile networking tool that can be used for various purposes. It can act as a simple TCP/UDP client or server, allowing you to send and receive data over a network connection. It can also be used for port scanning, remote file transfers, and more.
Example: Let’s say you want to create a simple chat server on your Linux machine. You can use netcat to accomplish this by setting up a listener on a specific port.
First, start the listener by running the following command:
nc -l 1234
This tells netcat to listen on port 1234 for incoming connections.
Next, open another terminal window and connect to the listener by running the following command:
nc localhost 1234
This tells netcat to connect to the listener on the same machine using the loopback address (localhost) and port 1234.
Now, any messages you type into either terminal window will be sent to the other terminal window. You can use this setup to create a simple chat server, or for other purposes, such as file transfers or remote access.
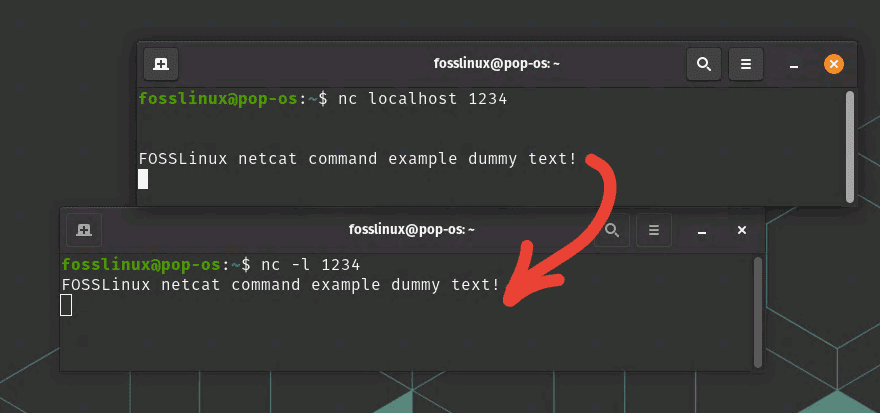
netcat command usage to send text over the network
To end the chat session, simply press Ctrl-C in one of the terminal windows. This will close the connection and return you to the command prompt.
4. Nmap
Nmap is a powerful network scanner that can be used for port scanning, host discovery, and vulnerability assessment. It can scan entire networks or specific hosts and provide detailed information about the services and protocols running on each device. The tool doesn’t come preinstalled in most Linux distros by default. But simply run this command to install it.
sudo apt install nmap
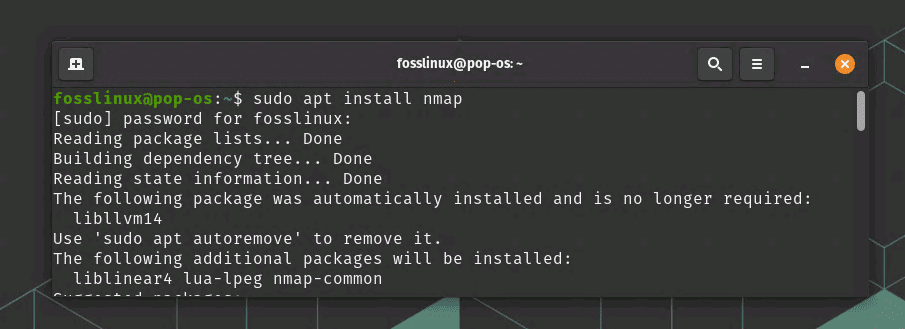
Installing nmap
Here’s an example of how to use Nmap to scan a target network:
nmap 192.168.1.0/24
This will scan all IP addresses in the range 192.168.1.1-192.168.1.254.
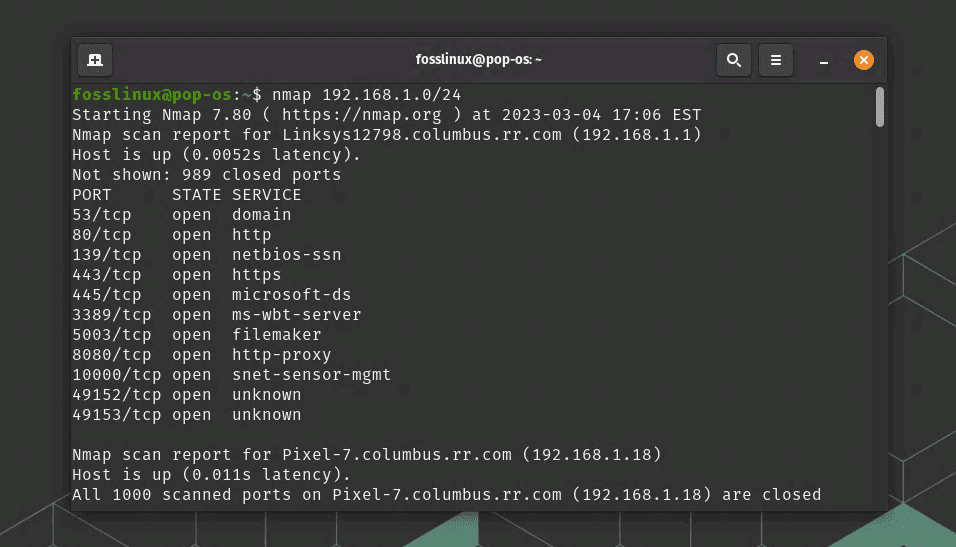
nmap command usage
By default, Nmap will perform a basic TCP scan of the specified addresses, but you can also use various additional options to customize the scan. For example, to perform a more aggressive scan that includes UDP ports and operating system detection, you can use the following command:
sudo nmap -A <ip_address>
This will perform an “aggressive” scan that includes OS detection, version detection, and script scanning.
Nmap is a powerful tool, but using it responsibly and within legal boundaries is important. Always obtain permission before scanning someone else’s network, and be aware of any laws or regulations that may apply to your use of the tool.
5. Dig
The dig command is a powerful tool for DNS (Domain Name System) troubleshooting and analysis. It can be used to query DNS servers to obtain information about domain names and their associated IP addresses, as well as other DNS records such as MX, TXT, and NS.
To use dig on Debian-based Linux systems, first make sure it is installed on your system by running the following command in a terminal window:
sudo apt-get install dnsutils
Once dig is installed, you can use it to query DNS servers by running the following command:
dig <domain_name>
Replace <domain_name> with the name of the domain you want to query. For example, to obtain information about the google.com domain, you can use the following command:
dig fosslinux.com
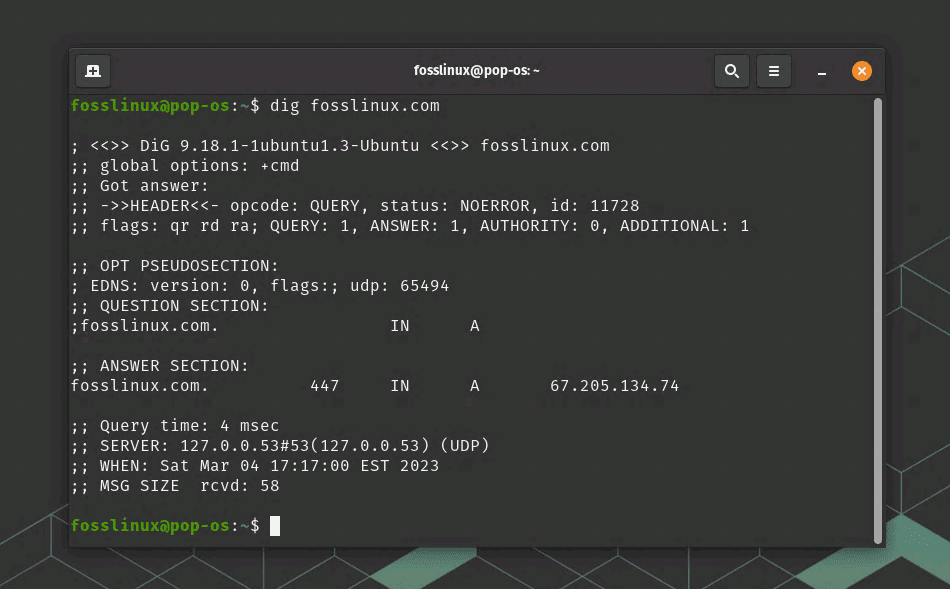
dig command usage
This will display a variety of information about the domain, including its IP address, DNS record type, and authoritative name servers.
You can also use the dig command to obtain specific types of DNS records. For example, to obtain information about the MX (mail exchange) record for a domain, you can use the following command:
dig MX <domain_name>
This will display information about the domain’s mail servers and their associated priorities.
Dig is a powerful tool for DNS troubleshooting and analysis, but it’s important to use it responsibly and within legal boundaries. Always obtain permission before querying someone else’s domain name, and be aware of any laws or regulations that may apply to your use of the tool.
6. Tcpdump
Tcpdump is a powerful command-line packet analyzer that can be used to capture network traffic in real time. It can be used to diagnose network problems, debug protocols, and analyze security vulnerabilities.
To use tcpdump on Ubuntu, first, make sure it is installed on your system by running the following command in a terminal window:
sudo apt-get install tcpdump
Once tcpdump is installed, you can use it to capture network traffic on a specific interface by running the following command:
sudo tcpdump -i <interface>
Replace <interface> with the name of the network interface you want to capture traffic on. For example, to capture traffic on the eno1 interface, you can use the following command:
sudo tcpdump -i eno1
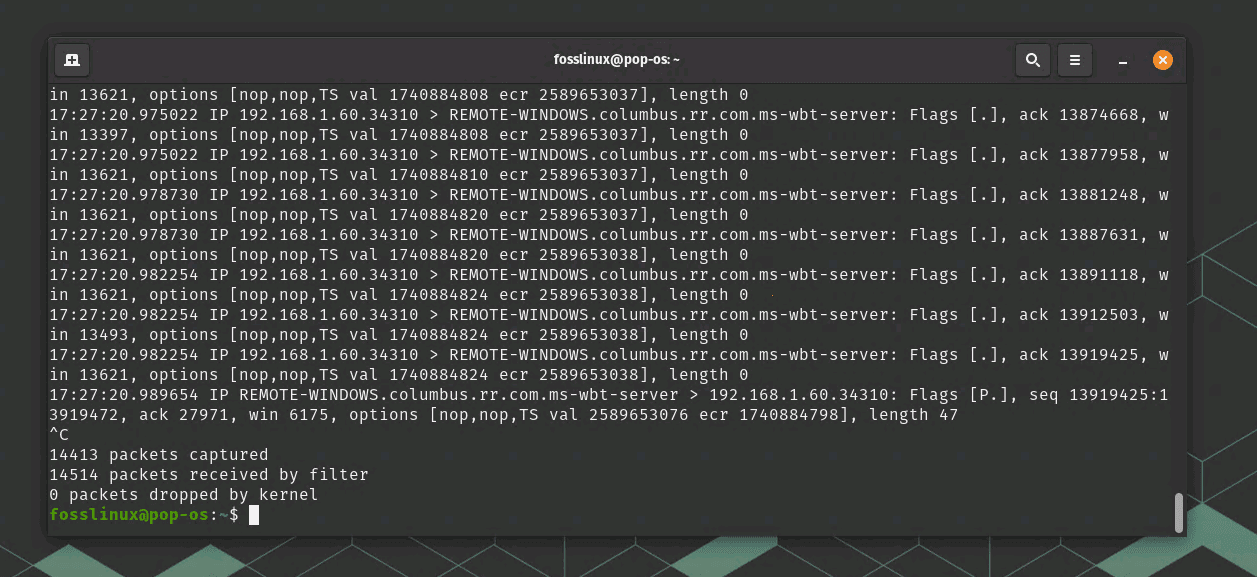
tcpdump command usage
This will display a continuous stream of packets that are passing through the interface.
You can also use tcpdump to capture traffic that matches specific filters. For example, to capture only HTTP traffic, you can use the following command:
sudo tcpdump -i eno1 -s 0 -A 'tcp port 80'
This will capture all HTTP traffic passing through the eth0 interface and display the packets in ASCII format for easy reading.
Tcpdump is a powerful tool, but it’s important to use it responsibly and within legal boundaries. Always obtain permission before capturing someone else’s network traffic, and be aware of any laws or regulations that may apply to your use of the tool.
7. Iptraf-ng
IPTraf-ng (Interactive Protocol TRAFfic Monitor) is a powerful, console-based network monitoring tool allowing you to view real-time IP traffic statistics. It can be used to monitor network performance, troubleshoot network issues, and analyze network traffic patterns.
To use iptraf-ng on Linux, first, make sure it is installed on your system by running the following command in a terminal window:
sudo apt-get install iptraf-ng
Once iptraf-ng is installed, you can launch it by running the following command:
sudo iptraf-ng

iptraf installation and usage
This must launch the iptraf-ng console, where you can select the desired interface to monitor and choose the appropriate monitoring options. But instead, if you see a fatal error saying the program requires a screen size of at least 80 columns by 24 lines, as you see in the above example, all you have to do is maximize the terminal to full screen and re-run the command.

Iptraf tool
You can navigate through the different menus and screens using the arrow keys and select options using the Enter key. Some of the available options include:
- General interface statistics: displays a summary of traffic statistics for the selected interface, including the number of packets, bytes, errors, and collisions.
- Detailed statistics by protocol: displays detailed statistics for each IP protocol (e.g., TCP, UDP, ICMP), including the number of packets, bytes, and errors.
- Connections: displays a list of active network connections, including the source and destination IP addresses, ports, and the protocol used.
- Network interfaces: displays a list of all available network interfaces on the system, including their IP addresses and network settings.
You can also configure iptraf-ng to log traffic statistics to a file or to display real-time graphs and charts of network activity.
8. Arp-scan
Arp-scan is a command-line tool used to discover hosts on a local network by sending ARP requests. It can identify active hosts on a network, detect rogue devices, and troubleshoot network issues.
To use arp-scan on Linux, first, make sure it is installed on your system by running the following command in a terminal window:
sudo apt-get install arp-scan
Once arp-scan is installed, you can use it to scan the local network by running the following command:
sudo arp-scan --localnet
This will send ARP requests to all hosts on the local network and display the MAC addresses and IP addresses of any active hosts.
You can also specify a range of IP addresses to scan by specifying the IP range. For example, to scan the IP range from 192.168.0.1 to 192.168.0.100, you can use the following command:
sudo arp-scan 192.168.0.1-192.168.0.100
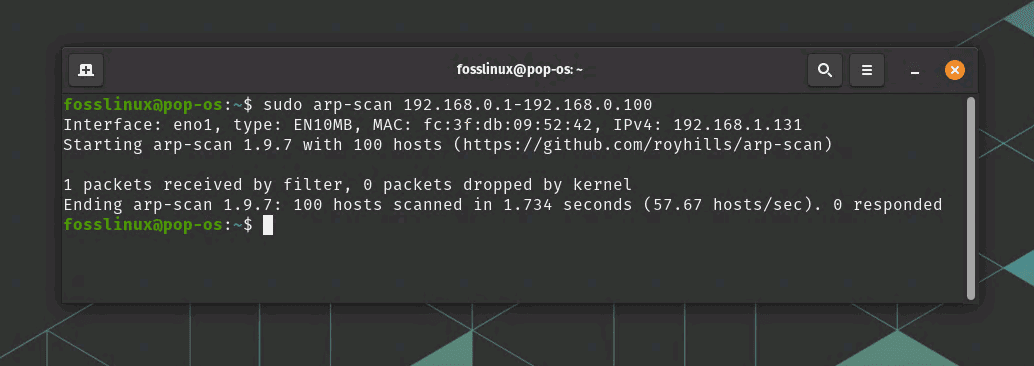
arp-scan command usage
Arp-scan also supports a variety of other options, such as specifying the network interface to use, using a custom ARP packet template, and saving the scan results to a file.
9. Hping3
Hping3 is a command-line tool for network testing and auditing. It can be used for various purposes, including firewall testing, network performance testing, and even DoS attacks.
It is available on Ubuntu and other Linux distributions and can be installed using the following command in a terminal window:
sudo apt-get install hping3
Once hping3 is installed, you can use it to send various types of packets and test network functionality. Here’s an example of how to use hping3 to send a ping request to a host:
sudo hping3 -c 4 192.168.2.88
This command will send 4 ping requests to the specified host and display the results, including the number of packets sent and received, the round-trip time (RTT), and any packet loss.
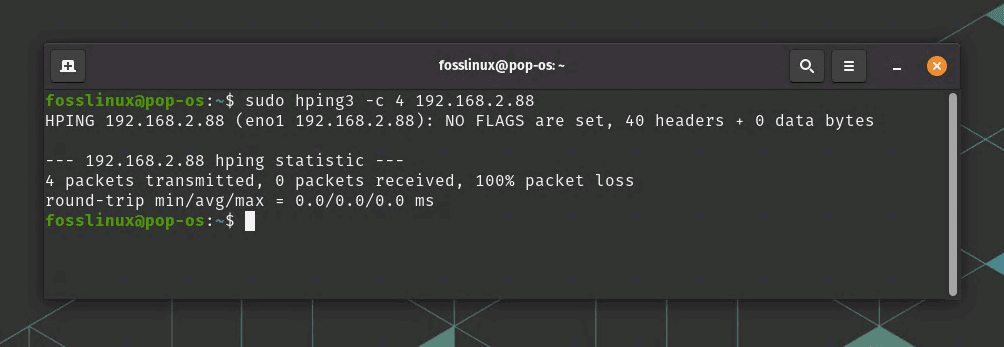
hping3 command usage
You can also use hping3 to send TCP, UDP, and ICMP packets with various options and payloads. For example, to send a TCP SYN packet to a host’s port 80 (HTTP), you can use the following command:
sudo hping3 -c 1 -S -p 80 <host_ip_address>
This command will send a single TCP SYN packet to the specified host’s port 80 and display the results, including whether the port is open or closed.
Hping3 also supports a variety of other options and features, such as IP and TCP header manipulation, traceroute functionality, and custom packet crafting.
10. Curl
Curl is a command-line tool for transferring data over various protocols, including HTTP, HTTPS, FTP, and more. It can download files, test APIs, and even send emails.
Here’s an example of how to use curl to download a file:
curl -O https://example.com/file.txt
This command will download the file.txt file from the website example.com and save it to your current directory. You can use various options to specify protocols, headers, and more.
You can also use curl to send HTTP requests and display the server’s response. For example, to send a GET request to a website and display the response headers and body, you can use the following command:
curl -O https://releases.ubuntu.com/20.04.3/ubuntu-20.04.3-desktop-amd64.iso
This command will display the HTTP response headers and body for the ubuntu.com iso request website.
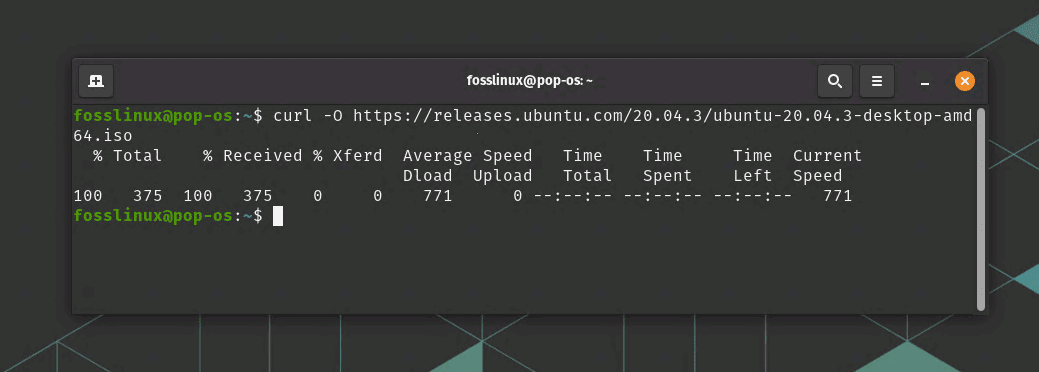
curl command usage
curl also supports a variety of other options and features, such as sending POST requests, setting headers, using authentication, and handling cookies.
11. Mtr
Mtr (My traceroute) is a network diagnostic tool that combines the functionality of ping and traceroute. It sends packets continuously and displays the results in real-time, showing both the network path and the connection quality at each hop.
Here’s an example of how to use mtr to diagnose network connectivity issues:
sudo mtr fosslinux.com
This command will start a continuous network trace to the FOSSLinux.com website and display the results in a continuously updating display. The output will show the round-trip time (RTT) for each hop along the network path, as well as the percentage of packet loss at each hop.
mtr also supports a variety of other options and features, such as the ability to specify the number of pings, the interval between pings, and the ability to resolve IP addresses to hostnames.
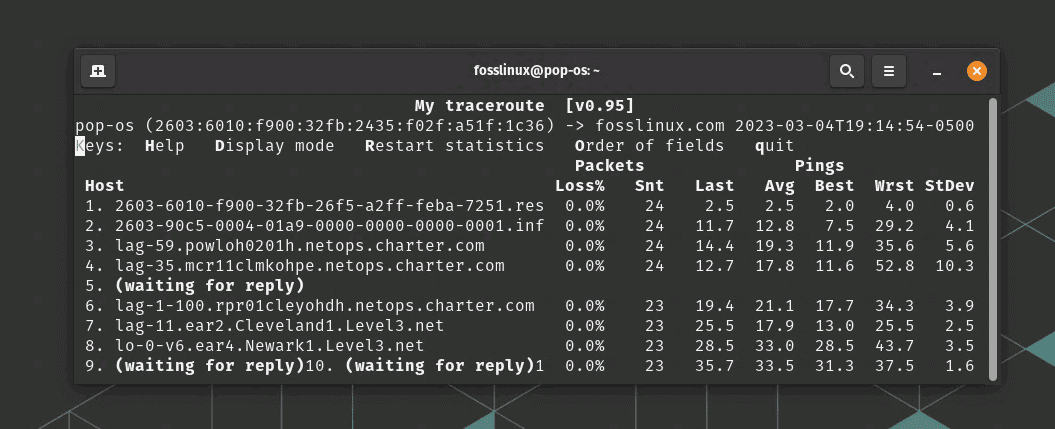
mtr command usage
12. Iftop
Iftop is a real-time network bandwidth monitoring tool that displays the bandwidth usage for each network connection on your system. It provides a graphical view of the network traffic, allowing you to quickly identify which applications or hosts are using the most bandwidth.
Iftop generally don’t come preinstalled with most Linux distributions. However, it can be installed using the following command:
sudo apt install iftop
Here’s an example of how to use iftop to monitor network traffic on the eno1 network interface:
sudo iftop -i eno1
This command will start iftop in interactive mode and display a continuously updating display of the network traffic on the eno1 interface. The display will show the total amount of data transferred, as well as the bandwidth usage for each connection in real-time.
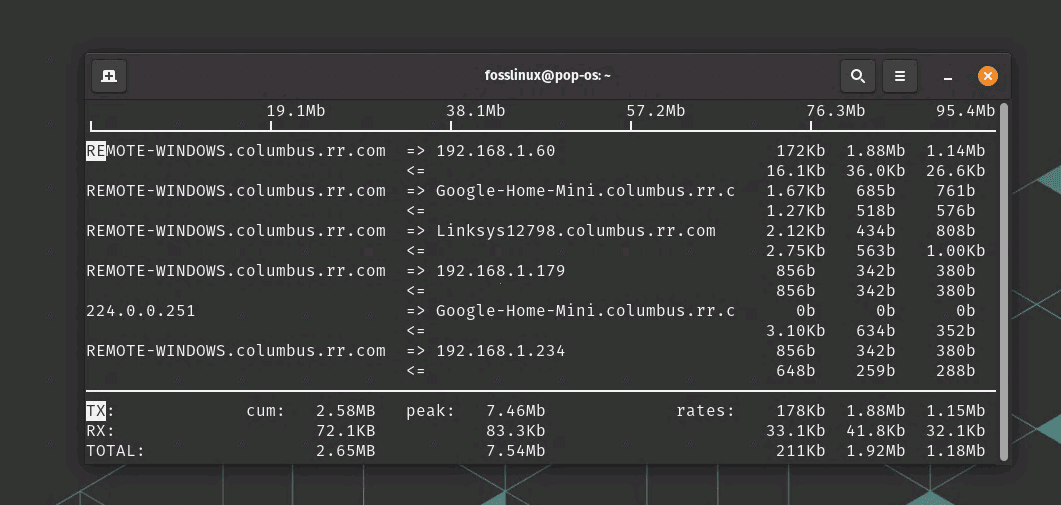
iftop command usage to monitor traffic
iftop also supports a variety of other options and features, such as the ability to filter traffic by source or destination IP address, the ability to display traffic in bytes or packets, and the ability to save the output to a file.
13. Nethogs
Nethogs is another network monitoring tool that displays the bandwidth usage for each process on your system. It provides a detailed view of the network traffic, allowing you to identify which applications or processes use the most bandwidth.
Nethogs utility generally don’t come preinstalled with most Linux distributions. However, it can be installed using the following command:
sudo apt install nethogs
Here’s an example of how to use nethogs to monitor network traffic:
sudo nethogs
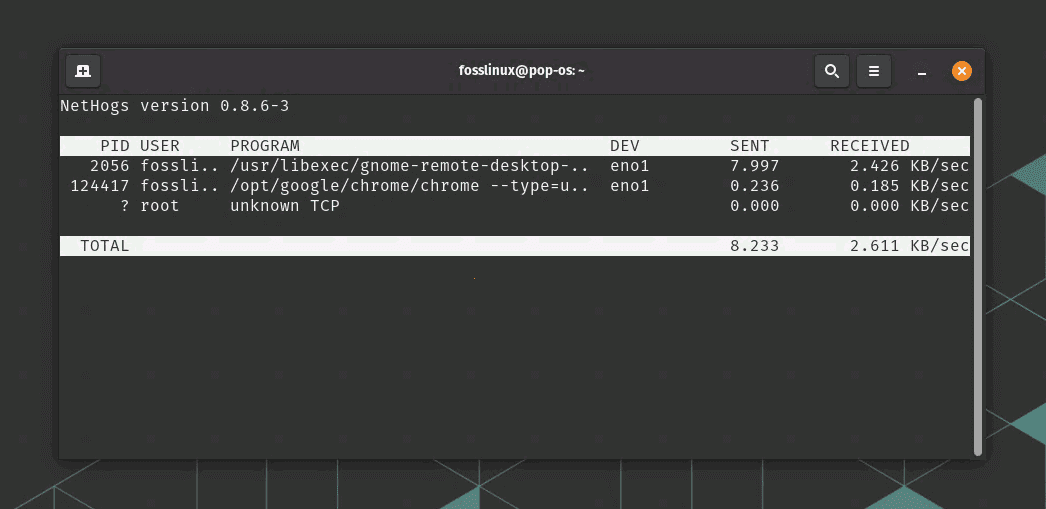
NetHogs command usage
This command will start nethogs in interactive mode and display a continuously updating display of the network traffic by process. The display will show the amount of data transferred and the bandwidth usage for each process in real-time.
nethogs also supports a variety of other options and features, such as the ability to filter traffic by network interface or IP address, the ability to display traffic in bytes or packets, and the ability to sort the output by various criteria.
14. Socat
The socat command is a versatile networking tool that allows for bidirectional data transfer between two network endpoints on Ubuntu and other Linux distributions. It can be used in a terminal window and is useful for creating custom network connections and forwarding traffic between different network protocols.
Here’s an example of how to use socat to create a simple TCP client and server:
Socat tool generally don’t come preinstalled with most Linux distributions. However, it can be installed using the following command:
sudo apt install socat
In one terminal window, start a TCP server on port 12345:
socat TCP-LISTEN:12345 -
In another terminal window, connect to the TCP server:
socat - TCP:localhost:12345
Once the connection is established, you can type text into either terminal window and it will be sent to the other window. This demonstrates how socat can be used to create a custom TCP connection between two endpoints.
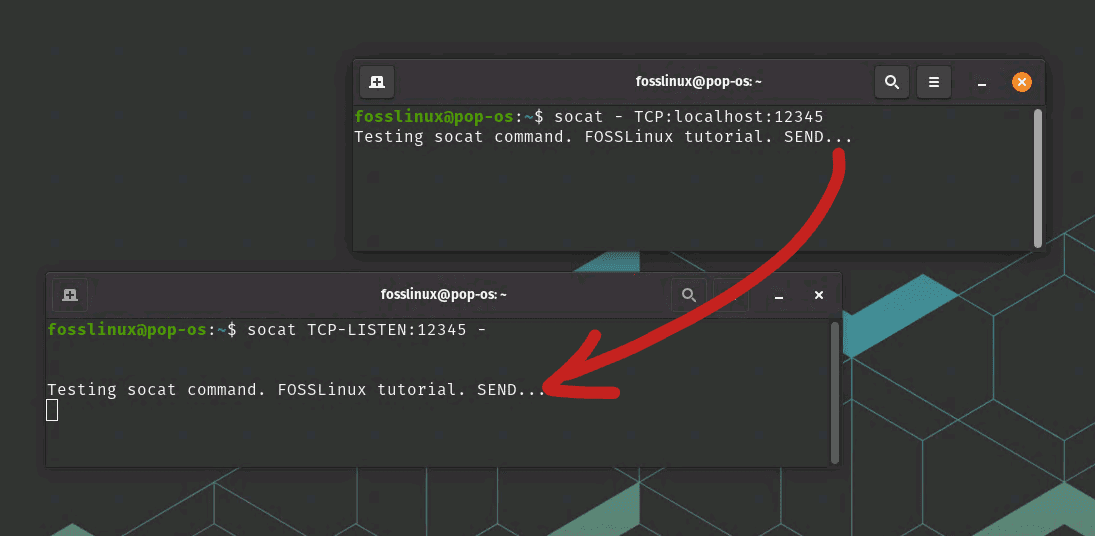
Socat command usage
socat also supports a variety of other options and features, such as the ability to create custom connections between different network protocols, the ability to encrypt or decrypt network traffic, and the ability to log network traffic.
15. Wget
Wget is a command-line tool for downloading files from the web. It supports many protocols, including HTTP, HTTPS, and FTP, and can download files in the background.
Here’s an example of how to use wget to download a file in the background:
wget -bqc https://releases.ubuntu.com/20.04.3/ubuntu-20.04.3-desktop-amd64.iso
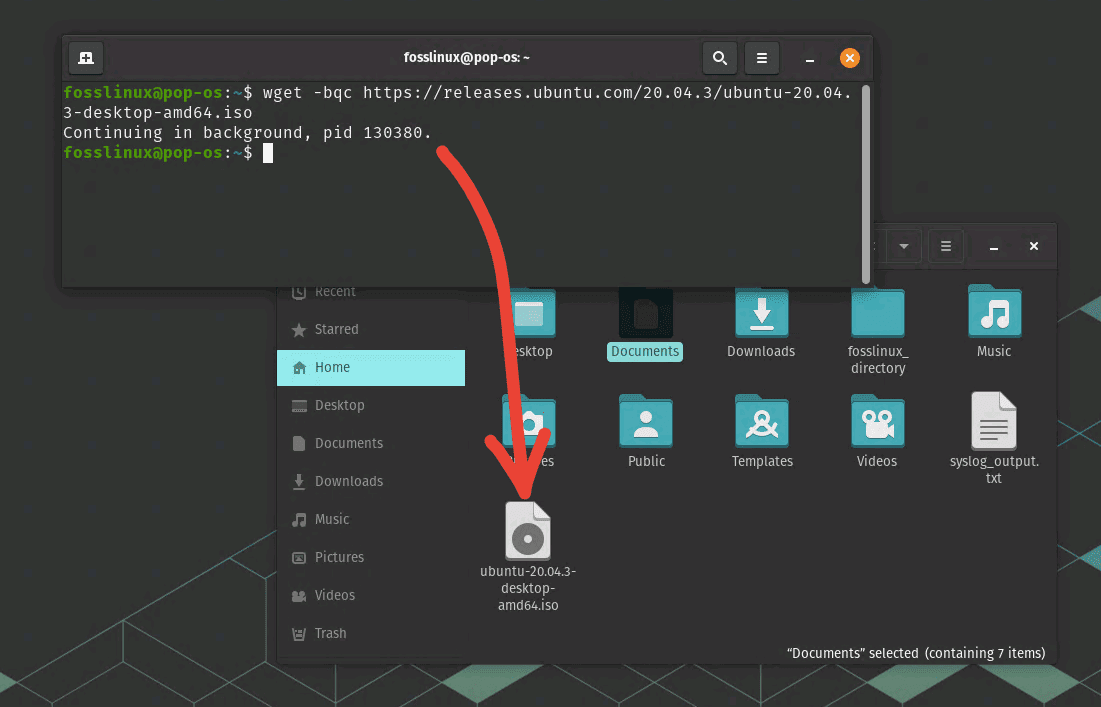
wget command usage
This command will download the file.txt file from the website example.com and save it to your current directory in the background.
These are just a few examples of the many available Bash networking tools. By learning how to use these tools effectively, you can better understand your network, troubleshoot problems more quickly, and even discover new ways to optimize your network performance.
Conclusion
The Bash networking tools mentioned in this article can be handy for network troubleshooting, monitoring, and optimization. From essential tools like ping and traceroute to more advanced tools like socat and hping3, various options are available for different use cases and skill levels.
With these tools, you can diagnose network connectivity issues, monitor network traffic and bandwidth usage, scan your local network for connected devices, and even create complex network configurations. Tools like curl and wget allow you to download files from the web and test APIs.
By learning how to use these Bash networking tools effectively, you can better understand your network and troubleshoot problems more quickly and efficiently. Whether you are a network administrator, a system administrator, or simply someone who wants to optimize their network performance, these tools can be handy.