
Ah, Java! Love it or loathe it, you cannot deny its widespread use and popularity in the development world. I’ve had my moments of both admiration and frustration with this language over the years, but one thing is certain: having multiple versions installed can save you from a lot of headaches. Today, we’ll embark on a detailed journey of how to install different versions of Java on Ubuntu. Buckle up, and let’s dive right in!
Understanding the basics
Before jumping into the installation process, let’s quickly get familiar with some key terms:
- JDK (Java Development Kit): The full Java package that contains everything you need for development. I personally find it essential for my coding endeavors.
- JRE (Java Runtime Environment): Needed to run Java applications. If you are just looking to run a Java app, this is your go-to.
- OpenJDK: An open-source version of the Java Platform, Standard Edition. I have found this one to be a robust and reliable choice for most of my projects.
Understanding the necessity of different Java versions
Before we delve into the technicalities, it’s essential to understand why one might need different versions of Java on a single system. In my experience, working on various projects has often led me to realize that not all applications are compatible with the latest versions of Java. Sometimes, you might need to switch to an older version to ensure compatibility and smooth functioning. It’s like having a toolbox with different tools; you pick the one that suits the job best.
Setting the stage
Before we embark on this journey, it is essential to ensure that your system is ready for the installation. Here’s how you can prepare your Ubuntu system:
Step 1: Updating the system
Start by updating your system to the latest version. You can do this by opening a terminal and typing the following commands:
sudo apt update
sudo apt upgrade
Step 2: Installing necessary tools
Next, install the necessary tools that will assist you in managing different Java versions. In my journey, I have found the following tools to be quite helpful:
-
- curl: A command-line tool for transferring data with URLs. Install it using the command:
sudo apt install curl
- wget: A free utility for non-interactive download of files from the web. Install it using the command:
sudo apt install wget
- curl: A command-line tool for transferring data with URLs. Install it using the command:
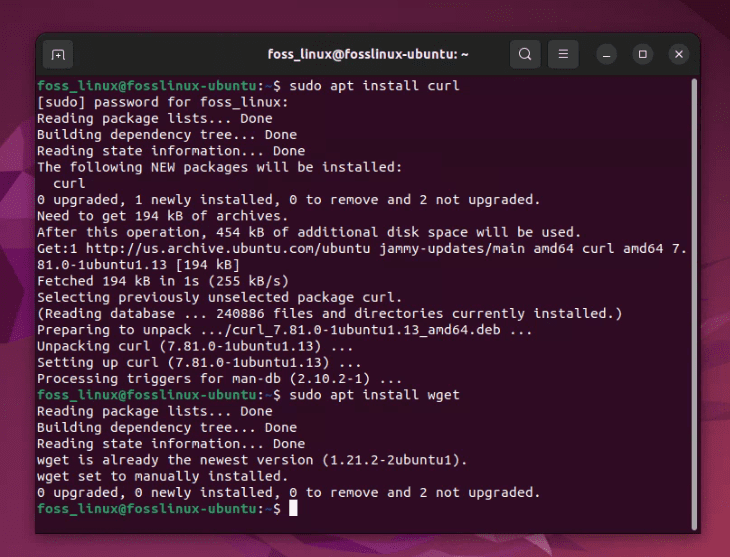
Installing curl and wget on Ubuntu
Step-by-step guide to installing multiple Java versions
Now that your system is ready, let’s move on to the exciting part – installing different versions of Java. Follow this step-by-step guide, and you’ll have multiple Java versions running on your Ubuntu system in no time.
Installing the default JDK
Ubuntu’s repositories contain a default JDK package that can be easily installed using the following command:
sudo apt install default-jdk
I must say, I appreciate the simplicity of this step, as it allows you to quickly set up a working Java environment.
Installing OpenJDK 8, 11, 17, 18, 19
OpenJDK is an open-source implementation of the Java Platform, Standard Edition. It is one of my preferred choices due to its open-source nature and active community support. Here’s how you can install different versions of OpenJDK:
OpenJDK 8:
sudo apt install openjdk-8-jdk
OpenJDK 11:
sudo apt install openjdk-11-jdk
OpenJDK 17:
sudo apt install openjdk-17-jdk
OpenJDK 18:
sudo apt install openjdk-18-jdk
OpenJDK 19:
sudo apt install openjdk-19-jdk
Installing OpenJDK 16, 20, 21
Ubuntu’s official repositories currently do not include the OpenJDK 16, 20, or 21 packages. However, downloading any OpenJDK directly from the official website lets you install it.
Step 1: Downloading the JDK
Visit the OpenJDK website to download the JDK X package. Where X is the version number you want to download.
wget <URL of the JDK X package>
As an example, for the archives for JDK 13, I would use the below command. You can use the wget command to download it directly to your system:
wget https://download.java.net/java/GA/jdk13.0.2/d4173c853231432d94f001e99d882ca7/8/GPL/openjdk-13.0.2_linux-x64_bin.tar.gz
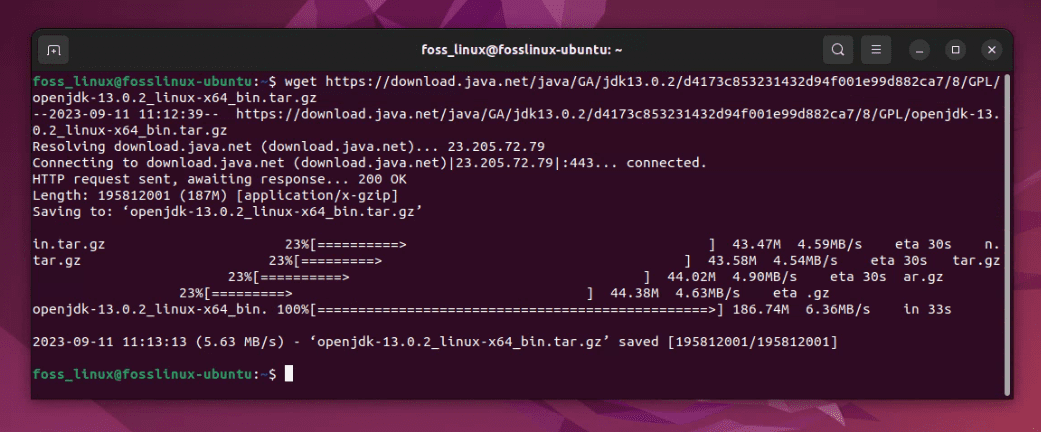
Downloading openJDK 13 tar file on Ubuntu using wget
Step 2: Extracting the package
After downloading the package, extract it using the following command:
tar -xvf <name of the downloaded file>
By default, the downloaded file resides in the home directory. Therefore, you can use the ls command to view the file name. In my case, the file name is openjdk-13.0.2_linux-x64_bin.tar.gz, hence my command is:
tar -xvf openjdk-13.0.2_linux-x64_bin.tar.gz
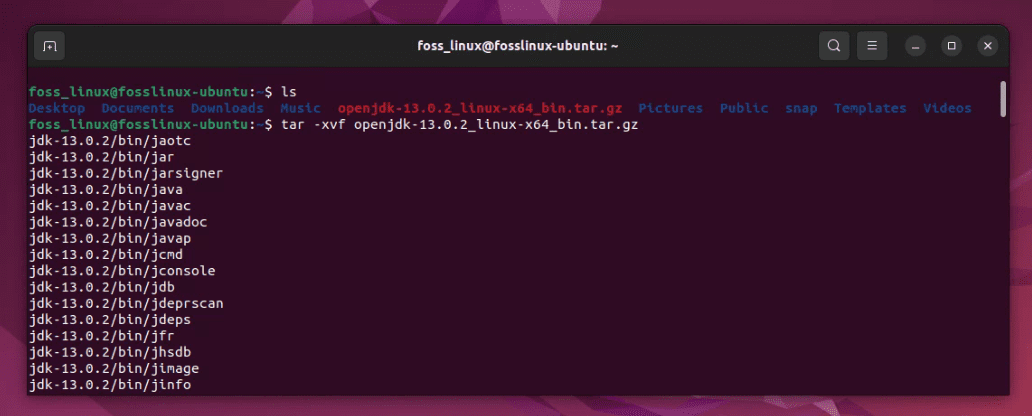
Extracting openJDK 13 tar gz file on Ubuntu
Step 3: Moving the extracted folder to /opt
When you download and extract a JDK package manually, it doesn’t have a “default” location; it will be located wherever you choose to extract it. However, a common practice is to place it in a directory like /usr/lib/jvm or /opt to keep the system organized. I prefer/opt .
Here’s how you can do it. Remember to replace the file name in the below command with that of your directory.
sudo mv ~/jdk-13.0.2 /opt/

Moving extracted openJDK folder to opt
Step 4: Setting up the environment variables
Set up the environment variables to point to the new JDK installation:
export JAVA_HOME=<path to the extracted JDK X directory>
export PATH=$JAVA_HOME/bin:$PATH
For my example case, the commands would be:
export JAVA_HOME=/opt/jdk-13.0.2
export PATH=$JAVA_HOME/bin:$PATH
Step 5: Verifying the installation
Verify that JDK 16 has been installed correctly by checking the version:
java -version
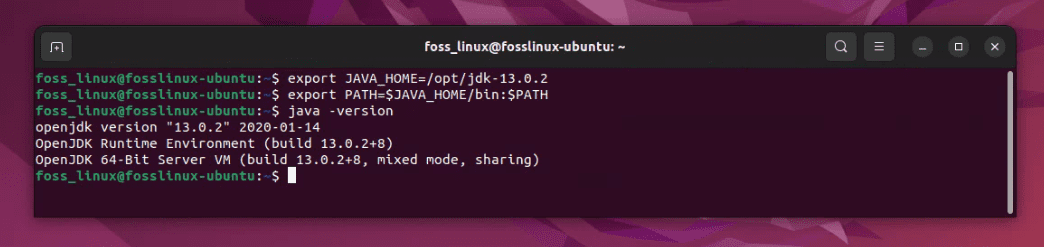
Setting environment variables and verifying the installation
Installing Oracle JDK
If you prefer using Oracle JDK, which I sometimes find to be more stable and feature-rich, you can install it using the following steps. The steps are similar to the above.
Step 1: Download Oracle JDK
First, visit the Oracle website to download the desired version. I usually use wget to download files directly to my system, like so:
wget <URL of the JDK package>
For example, I will use the following command to download JDK 17.
wget https://download.oracle.com/java/17/latest/jdk-17_linux-x64_bin.deb
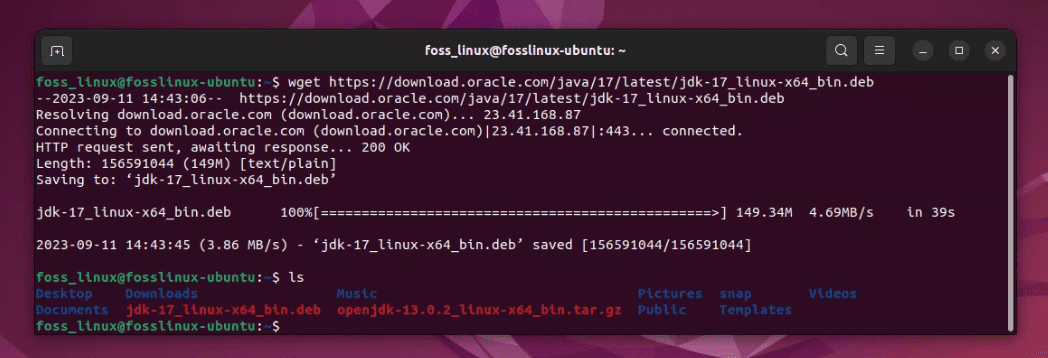
Oracle JDK 17 download using wget
Step 2: Install the .deb package
Now, install the .deb package using the dpkg command. You will need sudo privileges to install the package:
sudo dpkg -i jdk-17_linux-x64_bin.deb
Please update the command by replacing the file name with the appropriate version.
Step 3: Verify the installation
After the installation is complete, verify that the JDK has been installed correctly by checking the version:
java -version
You should see output indicating that JDK 17 is installed.
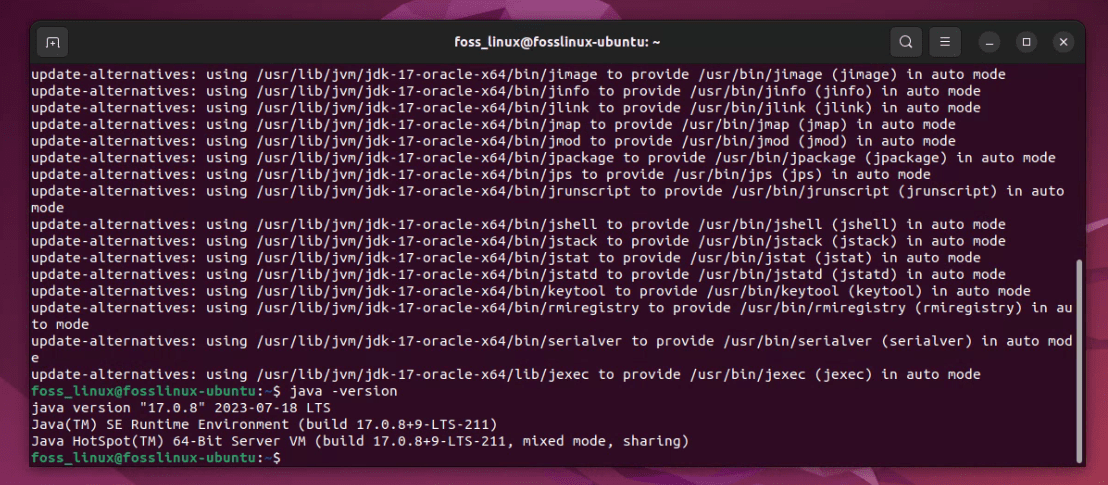
Verifying JDK installation
Step 4: Setting JAVA_HOME
Now, set the JAVA_HOME environment variable. The Oracle JDK 17 should be installed in /usr/lib/jvm/jdk-17. Set the JAVA_HOME variable like so:
export JAVA_HOME=/usr/lib/jvm/jdk-17
Please update the command by replacing the file name with the appropriate version.
Step 5: Updating the PATH
Update the PATH variable to include the bin directory of the new JDK installation:
export PATH=$JAVA_HOME/bin:$PATH
Step 6: Making the changes permanent
To make these changes permanent, add the above export commands to your ~/.bashrc or ~/.profile file:
echo "export JAVA_HOME=/usr/lib/jvm/jdk-17" >> ~/.bashrc
echo "export PATH=\$JAVA_HOME/bin:\$PATH" >> ~/.bashrc
Again, please update the command by replacing the file name with the appropriate version.
Step 7: Applying the changes
Apply the changes by sourcing the ~/.bashrc or ~/.profile file:
source ~/.bashrc
Step 8: Verifying the installation
Verify the installation by checking the Java version:
java -version
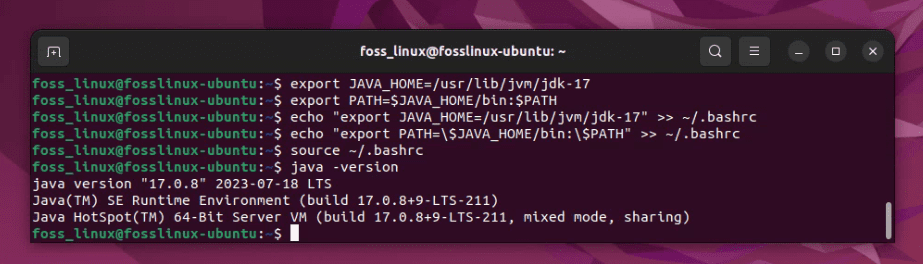
Setting environment variables and verifying the installation of Oracle JDK
Managing multiple Java versions
Now that you have installed different versions of Java, it’s time to learn how to manage them effectively. This is where I sometimes find myself a bit overwhelmed, but with the right tools, it becomes a breeze. Here are some steps to help you manage multiple Java versions:
Part 1: Using update-alternatives
This tool allows you to easily switch between different Java versions. You can use it to configure the default version of Java using the following command:
sudo update-alternatives --config java
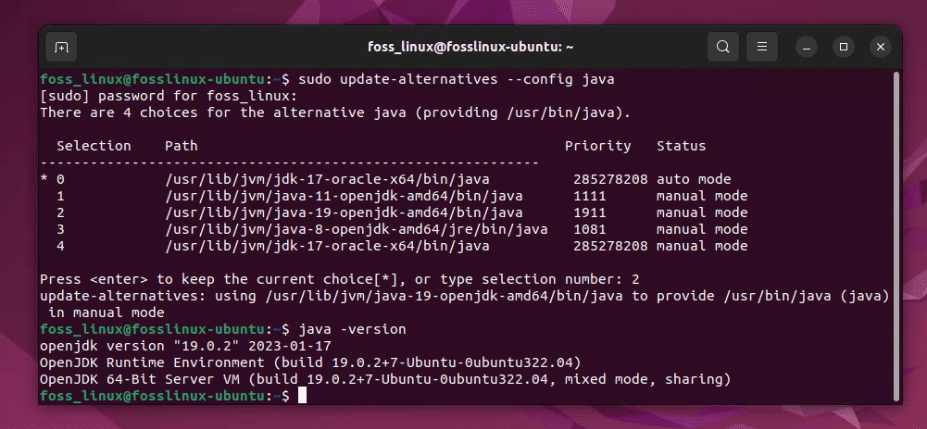
Setting a java version and verifying it
You can select the desired version by entering the corresponding number, then verify with the java -version command.
Part 2: Setting JAVA_HOME
Setting the JAVA_HOME environment variable is crucial to ensure that your system knows where to find the installed Java versions. Here’s how you can set it:
First, find out the installation path of the Java version you want to set as the default:
update-alternatives --list java
Next, set the JAVA_HOME variable by adding the following line to the ~/.bashrc file:
export JAVA_HOME=<path to your JDK>
Example for JDK 17:
export JAVA_HOME=/usr/lib/jvm/jdk-17
Finally, apply the changes by sourcing the ~/.bashrc file:
source ~/.bashrc
Tips for a smooth Java experience on Ubuntu
As we approach the end of this guide, I would like to share some tips that have helped me enjoy a smooth Java experience on Ubuntu:
- Keeping your system updated: Regularly update your system to ensure that you have the latest security patches and updates.
- Using a good IDE: A good Integrated Development Environment (IDE) can make your Java development experience much more pleasant. I personally prefer IntelliJ IDEA for its user-friendly interface and extensive feature set.
- Joining the community: Join forums and communities to stay updated with the latest developments and to seek help when you encounter issues.
Using third-party repositories (not recommended as they are not officially supported by Ubuntu)
There are times when you might need a version of Java that isn’t available in the official Ubuntu repositories. Thankfully, third-party repositories, like the Linux Uprising PPA, often have newer Java versions. Here’s how to use it:
sudo add-apt-repository ppa:linuxuprising/java
sudo apt update
sudo apt install oracle-java15-installer
Always be cautious when using third-party repositories. While they can be incredibly useful, they’re not officially supported by Ubuntu. I use them for quick research purposes only.
Setting JAVA_HOME environment variable
JAVA_HOME is an essential environment variable, especially for developers. It points to the directory where Java is installed, and many tools use it. Here’s how to set it:
- Check the installation path of your Java version:
sudo update-alternatives --config java
- Copy the path from the desired version, then open
/etc/environmentin your favorite editor. I have a soft spot fornano, but feel free to use whatever you’re comfortable with:
sudo nano /etc/environment
- At the end of the file, add the following, replacing ‘YOUR_PATH’ with the path you copied:
JAVA_HOME="YOUR_PATH"
- Save the file and load the new environment variables:
source /etc/environment
Pro tips
- Consistency is key: Once you’ve set a Java version for a project, try to stick with it. Upgrading in the middle of a project can sometimes introduce unexpected bugs.
- Documentation: Always consult the official documentation if you run into issues. I’ve found the answers to many of my Java-related questions there.
- Stay updated: While it’s essential to have stability, don’t forget to occasionally check for Java updates. They often contain important security patches and performance improvements.
Closing thoughts
While installing different versions of Java, I have often found that using PPAs can sometimes be a quicker route, especially when the package is not available in the official repositories. However, I must admit, there is a certain satisfaction in manually downloading and setting up the JDK, as it gives you a deeper understanding of the installation process.
Moreover, I would recommend keeping a close eye on the official OpenJDK website for updates and new releases. It’s always beneficial to have the latest version installed to take advantage of new features and improvements.