
Arch Linux is a major Linux distribution and is known for its flexibility and bare-bones structure. Arch Linux comes as a CLI (command line) only interface, and users can install the rest of the components of the OS as per their need. This often makes Arch Linux the choice of advanced users.
Other than that, Arch gets quick bleeding edge technology updates, and its “Pacman” package manager is much appreciated and said to be more advanced than any other package manager.
There can be two ways of creating a bootable Arch Linux USB drive:
Download ISO image
You can download the latest image of Arch from below link:
As you will be able to see, it will probably have the latest launched Kernel version, and release date will too be quite recent.

Download Arch Linux ISO
Arch also provides website installation guide. Read it as well as refer to it on another device when setting up your Arch system. If you can’t see it on another device, don’t worry, Arch will have an installation guide when booting from the USB drive.
Creating an Arch Linux Live USB drive
The result will be a LiveUSB drive that can be used for installing Arch Linux, system maintenance or recovery purposes, and will discard all changes once the computer shuts down due to the nature of SquashFS.
The bootable USB drive can be created in two ways:
1. CLI Method
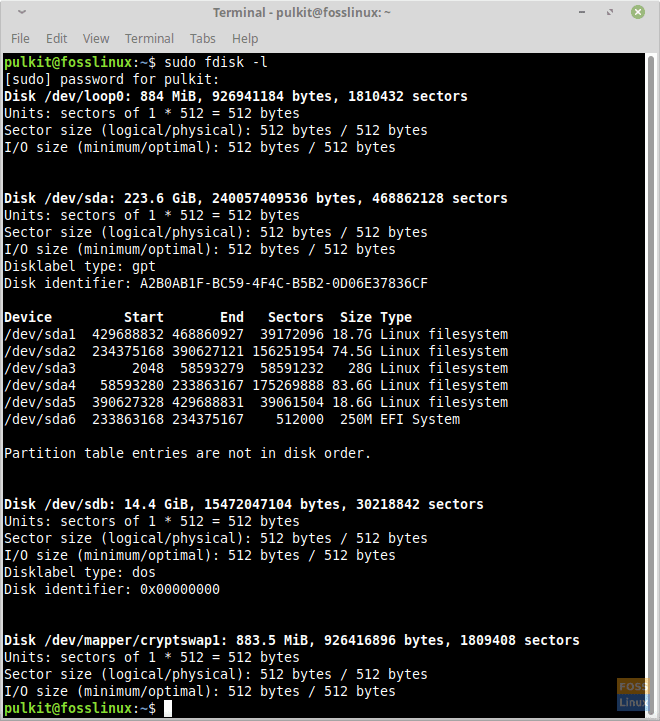
This method uses Linux’s dd utility. You will need to know the mount point of your USB drive to use this command, and the ISO file downloaded. To check the mount point of your USB drive, use the following command:
sudo fdisk -l
fdisk -l on Linux Mint
It will show a description of all the storage devices connected to your system. The mount point of the device will be written as /dev/sdX. The size of the storage device will be written next to the mount point. If you only have a hard drive/SSD and the USB drive, it will probably be /dev/sdb. But anyway, make sure and remember the name of the device that matches the description of your USB drive.
WARNING: Make sure that you have the right mount point of the USB drive. If you enter the wrong name, you may end up deleting your system.
Now to create the bootable USB drive, use the following command:
sudo dd bs=4M if=<ISO file location> of=/dev/sdX status=progress oflag=sync
In my case, the command is:
sudo dd bs=4M if=Downloads/archlinux-2019.04.01-x86_64.iso of=/dev/sdb status=progress oflag=sync
Just wait while it finishes, and you will have a bootable Arch USB drive.

dd command completed
2. GUI Method
If you want to use a safer method, that by no chance can cause damage to your system, you can use the following method.
The GUI method uses a program named Balena Etcher. Visit this link and download whatever Etcher package that is required by your system. If you do not know, we recommend going with the AppImage format. It is a universal format that is supposed to work on any Linux distribution. It is a portable application format that doesn’t need installation.
If you want to install it from the repositories (only on Debian and Ubuntu based systems), use the following commands:
echo "deb https://deb.etcher.io stable etcher" | sudo tee /etc/apt/sources.list.d/balena-etcher.list
sudo apt-key adv --keyserver keyserver.ubuntu.com --recv-keys 379CE192D401AB61
sudo apt-get update
sudo apt-get install balena-etcher-electron
Otherwise, if you download the AppImage format, you have first to extract it. You can do that by entering this command:
7z x Downloads/balena*
Let it finish, and then enter this:
./Downloads/balena<Tab>
Press the Tab key when prompted. The terminal will auto-complete the rest of the name.
Now in Etcher, and in place of ‘Select Image,’ browse and choose the Arch ISO file. In the place of ‘Select Drive,’ choose the USB drive that you want to use, and click on ‘Flash!‘ It will ask for the administrator password, which you will need to provide.
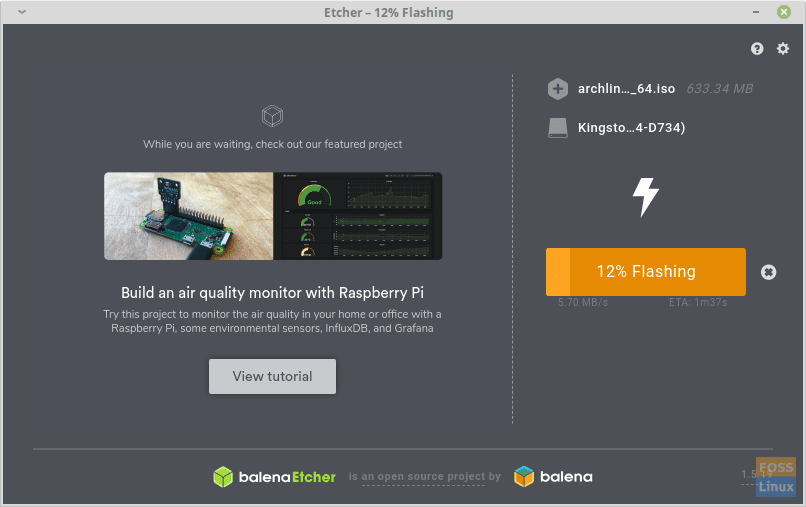
Etcher
Let Etcher finish, creating Arch Linux’s bootable USB drive perfectly. You can also use Etcher to create bootable USB drives and other distribution SD cards. It’s the simplest and cleanest program for the purpose.
Conclusion
Installing Arch Linux on a USB drive will allow users to experience its greatness, and let’s face it — complexity, without damaging their systems. Arch is the best choice to learn more about how Linux distributions work and not be afraid to take risks! Arch Linux’s image is small, and it’s fast and snappy even after installation. It’s a great experience for you and your system, knowing what you’re doing.