
What is live USB persistence?
Live USB is one of the best and safest ways of testing your Linux operating system without your computer being affected by any changes. Data persistency comes about in a live session where one can make changes and save their files on a USB drive. The data stored in the USB drive persists even after ending the live session and shutting down the computer. Once the testing of the live session is complete, the distro is stored in your USB drive and not the computer’s internal hard drive.
This is a suitable method because it allows you to boot Linux from the USB drive and store data.
Having a live session with data persistency:
Using the ‘startup Disk Creator Tool’ in your Linux creates Live USB and allocates it the desired space you will need to store data. Doing this is necessary as it enables you to boot up from the USB to the live session. Then, when making changes such as downloading, the downloaded file is automatically saved in the space you reserved in the USB drive (The persistent partition).
The data stored here does not become deleted even when you shut down the live session. When you boot into the Live session on your next live session, you will still be able to retrieve your data.
Advantages of data persistency in a live session:
Live USB does not need too much storage space. For example, creating a 2GB storage data persistency space in a USB drive is easy when installing requires at least an 8 GB storage space.
Live USBs are configured to run on almost all desktops and are compatible with almost all hardware. Therefore, one would prefer using a Live USB with data persistency method in various computers to test the Linux distro as it offers the best compatibility range.
Disadvantages of data persistency in a live session:
Boot Time:
It has a relatively slower boot time as the Live USB runs a series of compatibility tests to ascertain that it can run efficiently on the computer. This process slows down the amount of time required for booting.
Security issues:
Booting a Live USB boot the desktop directly. Since there is no other login or mechanism for security that one can use to prevent anyone from accessing your data, it makes it vulnerable. The Live USB is not supposed to be used for production but instead is supposed to be used to test the distro, and if you find it likable enough, you can proceed and install it in your internal hard drive.
Compatibility Conflicts:
The Linux distro used in the Live USB may be outdated as it is always in its release version. Not to say that it cannot be updated. However, updating it will cause more harm than good as the system might break due to conflicts between the kernel and the bootloader, where the latter is not fully configured to use the new updated kernel.
Kali Linux live USB drive persistence
The default boot menu for Kali Linux has two Live boot options that both enable persistence; one that provides data preservation on the Kali Live USB drive and the other that offers a reboot of the Kali Live. Using the options mentioned above enables one to obtain collected testing results, retain configurations and documents, etcetera.
When running Kali Linux directly from the USB drive on any platform, it is crucial to have the persistent data stored on its partition within the USB drive. However, it would be better to use LUKS- encryption, a unified key setup for disk encryption usually intended for Linux.
To perform the USB persistence option during boot time, you will essentially need to have an additional setup step in your Kali Linux Live USB drive. This article will give you a step-by-step procedural guide on how to accomplish the task.
Before starting, it is important to make sure that you are using a ‘Linux-based system’ and have the root privileges to perform this task. If not, use the command below to escalate your concession.
sudo su
Downloading the live version of Kali
Click this link to download the Kali Linux ISO. Remember to download the (Kali Linux 64-bit (Live)) version, which has an equivalence of approximately 3.7GB in size.
After the download is complete, you will download additional software that will assist in writing the downloaded Kali Linux ISO into your USB drive. For this tutorial’s sake, we shall use the Rufus software. Click here to download Rufus.
Note: if Windows prompts you that the software is not from a trusted source, choose the ‘install anyway’ option and click on ‘yes’ to allow the software to make changes to your device.
Once the Rufus 3.15.1812 software installation is complete, plug in the USB drive into your PC, then launch the recently installed Rufus software to write the Live Kali Linux ISO to your USB
Writing the software onto the USB drive
After launching the writing software, you first select the “Device” to write the Kali Linux Live ISO.
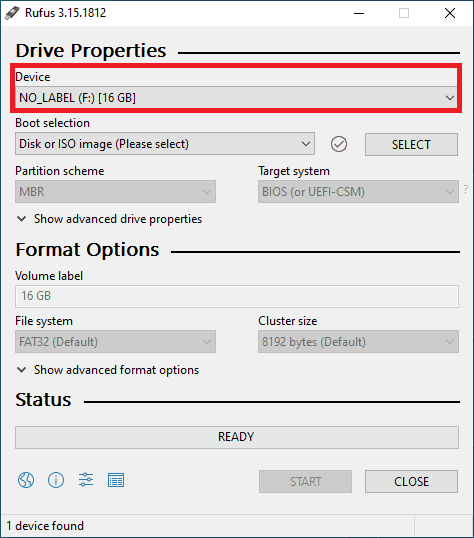
Rufus select device
Next, select the Kali Linux Live ISO we downloaded in the previous step and click “Open.”
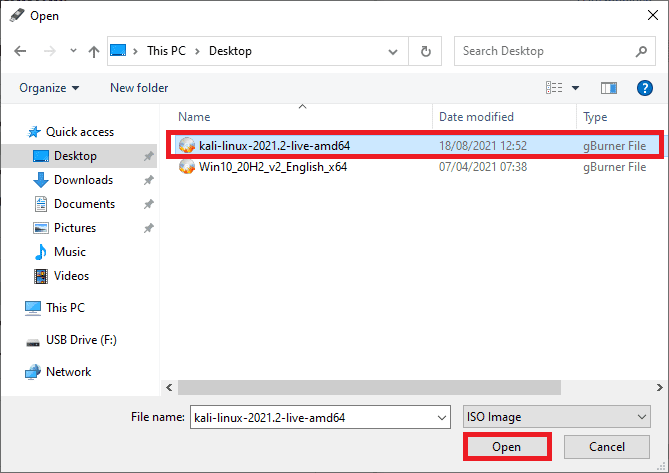
Rufus select kali image
Select the partition size and then drag the slider to allocate persistent size to your USB Drive. For instance, I am using a 16GB flash drive. Therefore I will allocate 10GB to the persistent partition.
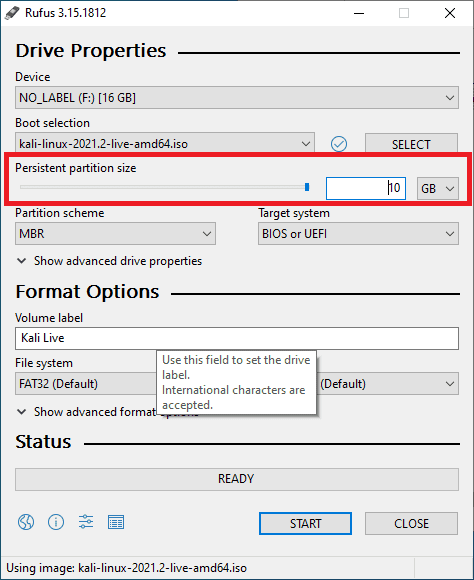
Rufus selects persistent size.
Next, click on start to write the Kali Linux ISO onto your USB drive.

Rufus click start
Note: The Rufus software will prompt you to download additional software. Don’t freak out. Click “Yes” and let the installer do its thing.
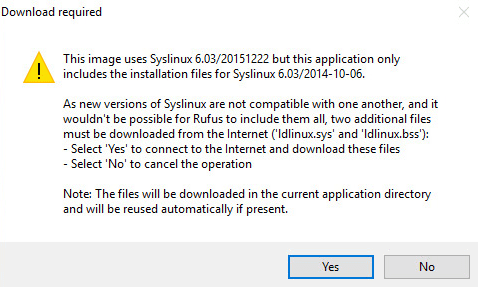
additional download required
Next, another popup notification will display asking you if you are comfortable wiping out all your USB drive data. Click ‘Ok’ to proceed with the next step.
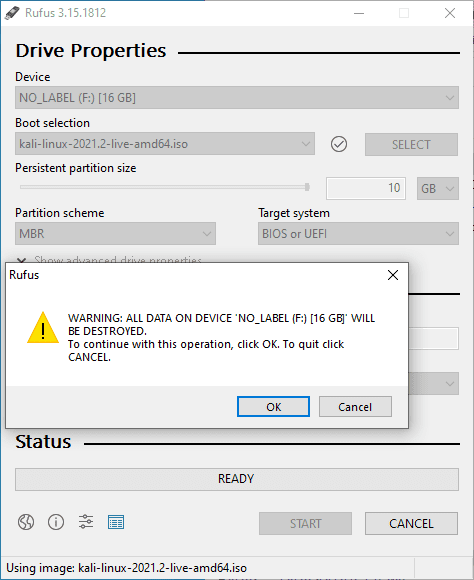
Rufus warning
Once the download process is complete, the writing process will commence.
Wait for the USB drive to be formatted by the software and the new software to be written. The process takes approximately 15-20 minutes. Once done, click ‘close’ and then ‘reboot’ your computer.
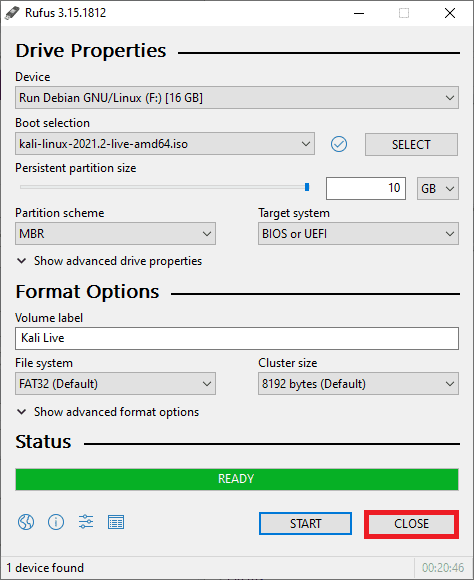
Rufus click close
Booting your PC
Power on your PC, click F12 to get to the boot menu (This might change depending on your computer model. Therefore, refer to your official PC providers whenever in doubt). Make the USB boot option to be the first.
Note: You should turn off the ‘secure boot option’ under the BIOS, then save changes and exit.
Your PC will reboot into a blue Kali Linux start screen. Once at this stage, you will select the fourth option, ‘Live system (persistence, check kali.org/prst,’ and then press “Enter” to live boot Kali Linux into your PC.
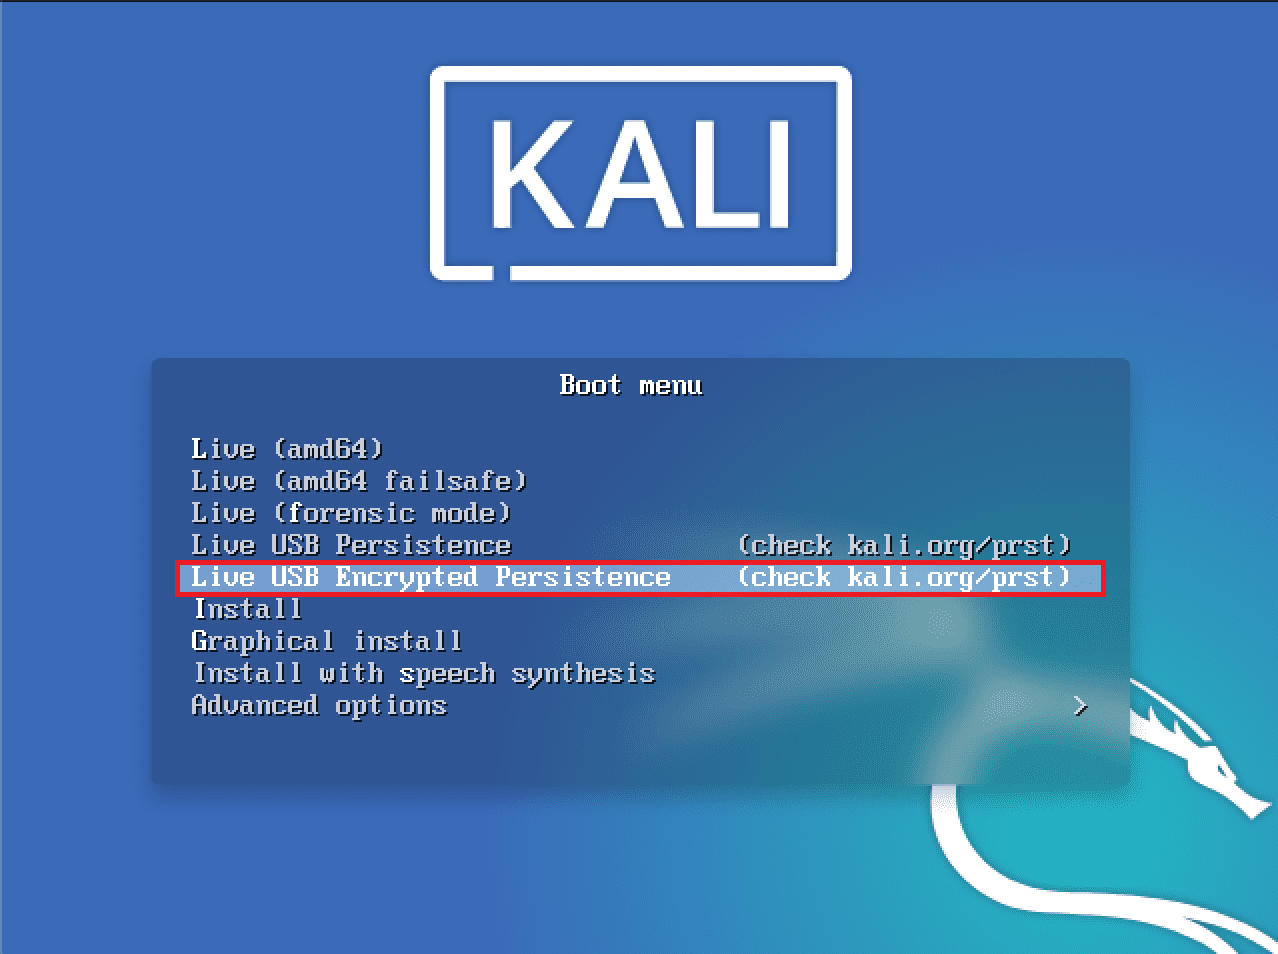
kali live USB persistence
Proving persistence in Kali Linux
To prove Kali Linux live USB persistence, we shall log in to our wireless network then reboot to confirm if the password will be saved. After rebooting our Kali Linux live environment, you will realize that the network connects, meaning the live USB persistence is working.
Also, another way to prove persistence is to create a document, then reboot your PC. Once you boot back to your live USB environment and find the document, that means the Live USB persistence is in use. This method is efficient if you don’t plan on installing the OS on your internal drive as the persistent partition acts as your internal hard drive. That is how persistency is created in the kali Linux Live USB drive.
To use the persistent data features, you will plug your USB drive into the computer that you want to boot Kali Live onto and then make sure you have its BIOS set to enable booting from the USB drive. When the Kali Linux screen is shown on the computer, choose the ‘persistent’ option, set it up from your USB drive, and decide whether you want a standard or encrypted option.
Conclusion
This article has comprehensively covered all the aspects you need to acquaint yourself with regarding Kali Linux USB persistence. Remember, if you have never created a Kali Linux USB drive, you can refer to this article ‘How to create Kali Linux USB drive.’ Also, for additional info about Kali Linux, check out this guide, “How to use Kali Linux.” We hope this article helped you learn about Kali Linux USB persistence.