
Creating a bootable USB drive for Pop!_OS is required when installing or upgrading OS on your computer. A bootable USB can conveniently and efficiently install Pop!_OS on multiple computers or troubleshoot system issues. In this article, we will provide a comprehensive guide on creating a bootable USB drive for Pop!_OS, covering system requirements, downloading Pop!_OS, formatting the drive itself, using etching tools, and booting from the USB.
Creating a bootable USB for Pop!_OS
System requirements
Before creating a bootable USB for Pop!_OS, ensuring your computer meets the necessary hardware and software requirements to run Pop!_OS is essential. These requirements guarantee that the installation process runs smoothly and that Pop!_OS is compatible with your system. The following are the key elements to consider:
Minimum hardware requirements:
- Processor: Intel Pentium IV or higher, AMD Athlon 64 or higher
- Memory: 4 GB RAM or higher
- Storage: 16 GB of free disk space or higher
- USB Drive: USB 2.0 or higher with a minimum capacity of 2 GB
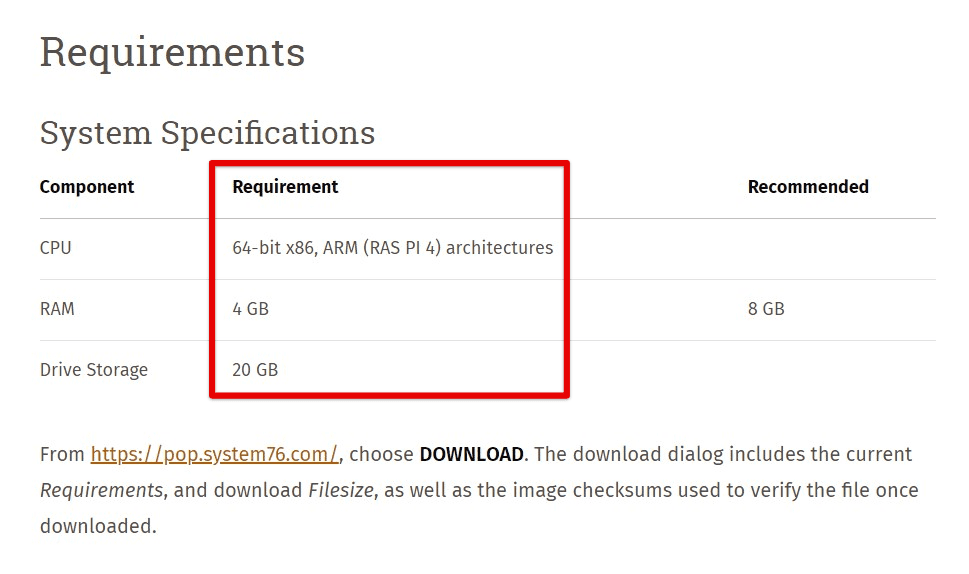
Minimum hardware requirements
Note: These are the minimum requirements, but it’s recommended to have higher specifications for better performance, especially if you plan to use Pop!_OS for resource-intensive tasks like gaming or video editing.
Recommended hardware requirements:
- Processor: Intel Core i3 or higher, AMD Ryzen 3 or higher
- Memory: 8 GB RAM or higher
- Storage: 64 GB of free disk space or higher
- USB Drive: USB 3.0 or higher with a minimum capacity of 8 GB
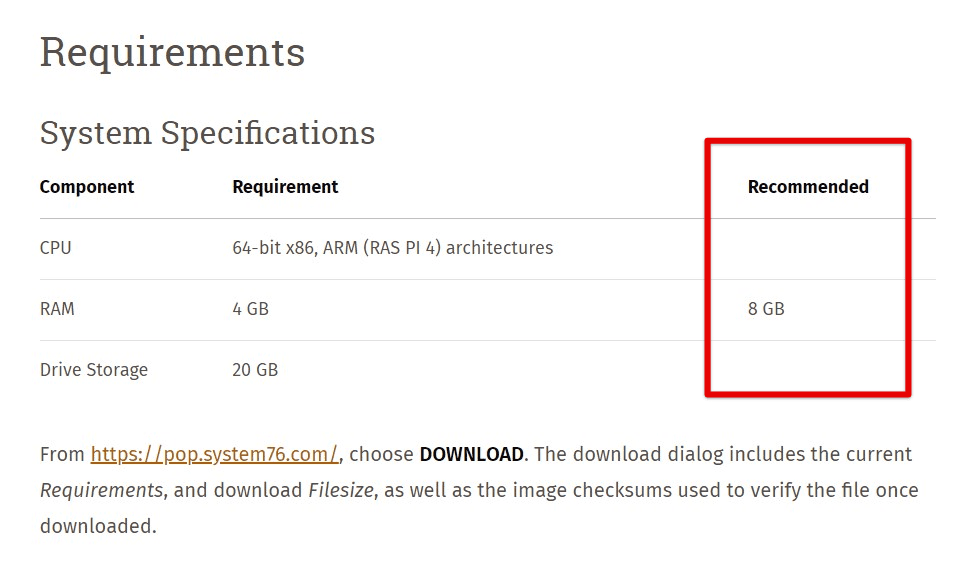
Recommended hardware requirements
Operating system version: Make sure to download the latest version of Pop!_OS from the official website. Creating a bootable USB process may vary depending on the specific version of Pop!_OS you will be using.
Other considerations: A stable internet connection is not required for creating a bootable USB, but it may be necessary for downloading Pop!_OS or additional software/drivers in the first place. Ensure your computer’s BIOS/UEFI settings allow booting from a USB drive. You may need to make changes to the boot order or disable secure boot.

Other considerations
It’s vital that your computer meets the minimum and recommended requirements to avoid compatibility issues during the entire installation process. If your system does not meet these requirements, Pop!_OS may not function optimally or install at all. Therefore, verify your hardware and software specifications before proceeding with anything else. Are you still unsure about the ideal hardware setup for Pop!_OS? Here is a review of Pop!_OS on different hardware configurations.
Downloading Pop!_OS
To create a bootable USB for Pop!_OS, you will have to download the latest version of Pop!_OS from the official website. First, open your web browser and visit the official Pop!_OS website. You will find different editions on the site, such as LTS (Long Term Support) and the latest version. Choose the edition that best suits your needs, and click the “Download” button next to it.
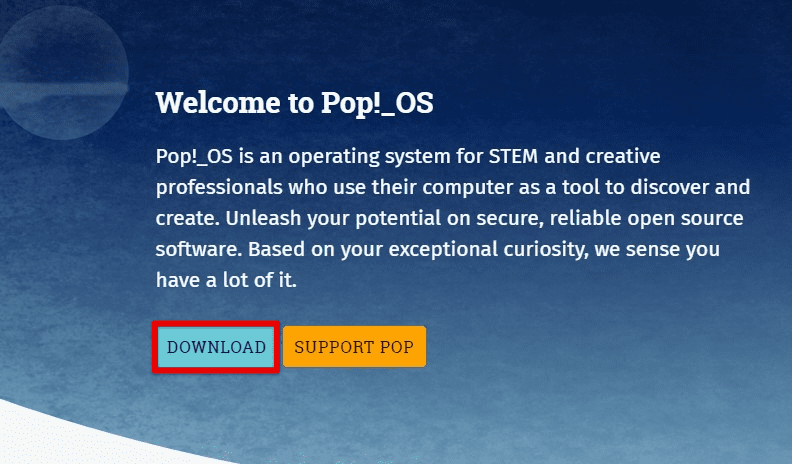
Downloading Pop!_OS
Depending on your system’s hardware, you may be prompted to select between the NVIDIA and AMD/Intel graphics versions on the download page. Decide on an appropriate version for your system and click on the “Download” button. Then, pop!_OS will download as an ISO image file. The file size may vary depending on the edition and version you selected.
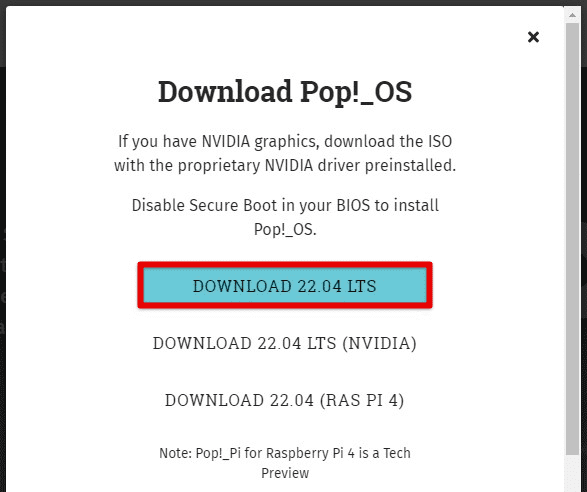
Selecting an ISO file to download
While the download is in progress, you may also want to download any additional software or drivers needed for the system. For example, if you have specific hardware components requiring proprietary drivers, download them from the official manufacturer’s website. Once the download is complete, verify the integrity of the downloaded ISO file by checking its checksum against the one provided on the Pop!_OS website. This makes sure that the file is downloaded correctly and is not corrupted in any way.
Note: Always download Pop!_OS from the official website to get the operating system’s latest and most secure version.
Optional Step: Formatting the USB drive
Typically, if you have a USB drive with no more than one partition, you don’t need to format it, as the next section involving Etcher will format the USB drive. The intent of using a dedicated Disk Management tool is to delete any partitions manually created in the USB drive and restore the USB to the factory state.
Formatting a USB drive erases all data on the drive. Therefore, make sure to back up any critical data before proceeding.
Insert the USB drive into an available port on your computer. Depending on your operating system, open Disk Utility on macOS or Disk Management on Windows, or GParted on Linux. These tools allow you to manage disk partitions and format drives.
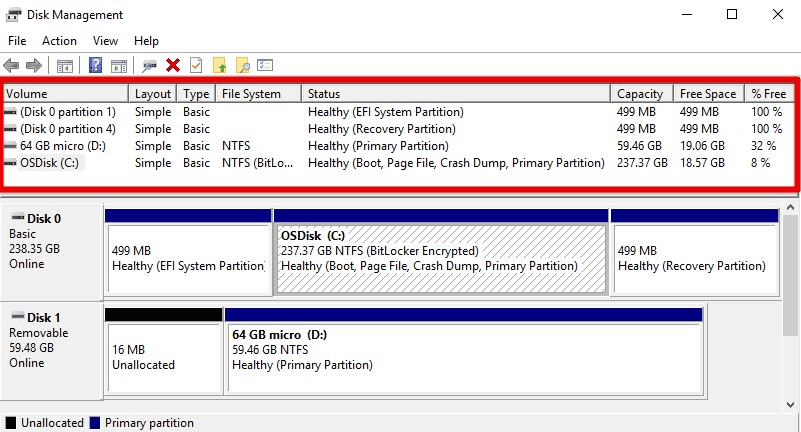
Disk management on Windows
Select the USB drive you want to format in Disk Utility or Disk Management. If you have multiple partitions within the USB drive, delete them to create one partition. Be cautious and select the correct drive to avoid formatting the wrong drive and losing data. Right-click on the drive and choose “Format”. Select the desired file system. Pop!_OS supports multiple file systems, including FAT32, NTFS, and ext4. It’s recommended to select ext4, as it is the native system for Linux-based operating systems.
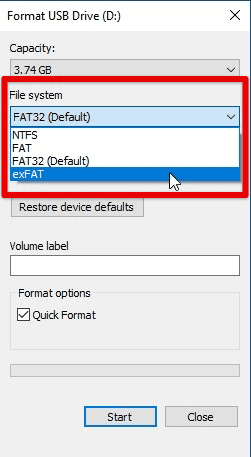
Formatting a USB drive
Confirm the formatting process and wait for it to complete. This may take a few minutes, depending on the size of the USB drive. Once the formatting finishes, safely eject the drive from your computer.
Note: Creating a bootable USB drive requires special consideration. Some tools, like the Rufus or Etcher, automatically format and create a bootable USB drive in a single step. However, if you format it manually, you must configure the bootable flag or mark the partition as active.
Creating a bootable Pop!_OS USB drive with Etcher
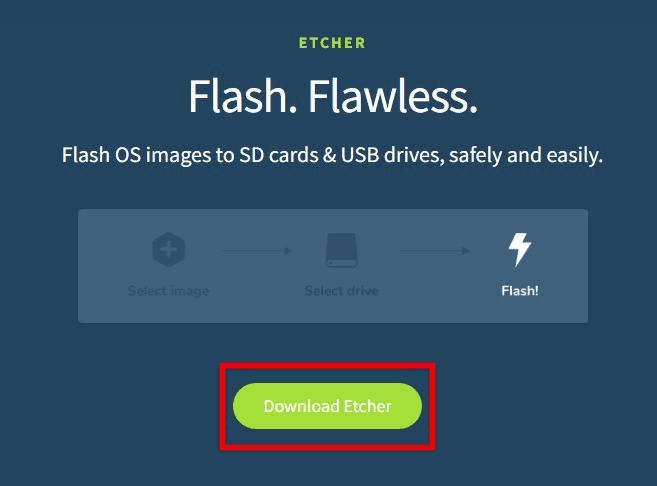
Etcher is a popular open-source tool that makes it easy to create bootable USB drives for various operating systems, including Pop!_OS. Follow the steps below to create a bootable USB for Pop!_OS using Etcher:
Go to the Etcher website and download the appropriate version of Etcher for your operating system (Windows, macOS, or Linux). After the download finishes, install Etcher by following the installation instructions provided on the website. Launch Etcher after installation.
Downloading Etcher
In the program, click the “Select image” button and browse to the location where you downloaded the Pop!_OS ISO file. Select the file and click on the “Open” button to proceed. Next, insert the USB drive that you formatted in the previous step into an available USB port on your computer. In Etcher, click the “Select drive” button and choose the drive you want to use as a target.
Double-check that you have selected the correct ISO file and the respective drive. Once sure, click the “Flash!” button to start flashing. Etcher will write the Pop!_OS ISO file to the USB drive, which may take a few minutes, depending on the size of the file and the speed of your host system.
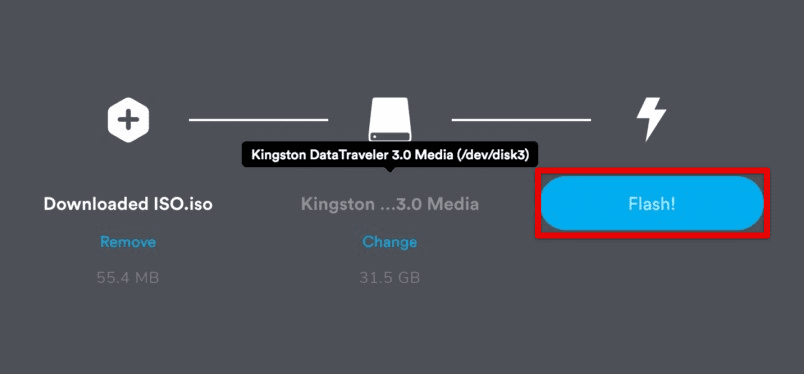
Flashing a USB drive with Etcher
Wait for the flashing process to complete. Once finished, Etcher will display a success message indicating that the bootable drive has been created. Safely eject the USB drive from your computer using the appropriate method for your host operating system.
Note: Follow the instructions carefully and ensure you have selected the correct ISO file and USB drive to avoid data loss or other issues during this critical process.
Creating a bootable USB with Rufus
Rufus is another widely used program for creating bootable USB drives, and it can also be used to install Pop!_OS. Follow the detailed steps below to create a bootable USB for Pop!_OS with Rufus:
Go to the Rufus website and download its latest version for your operating system (Windows only). Once the download finishes, run the Rufus installer and follow the instructions. Launch Rufus after installation.
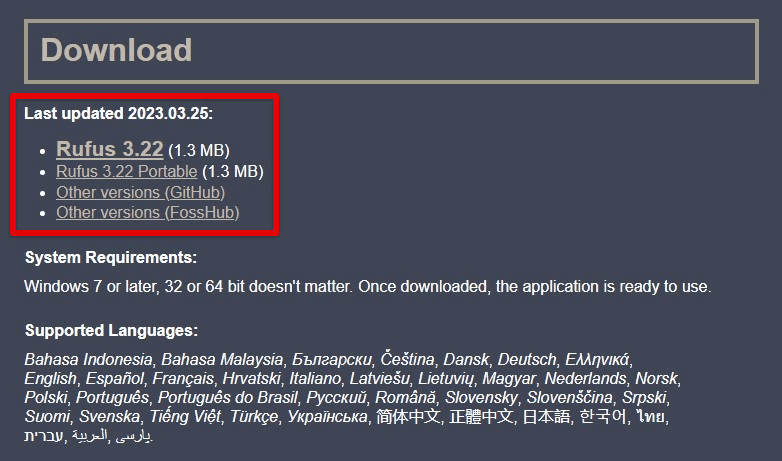
Downloading Rufus
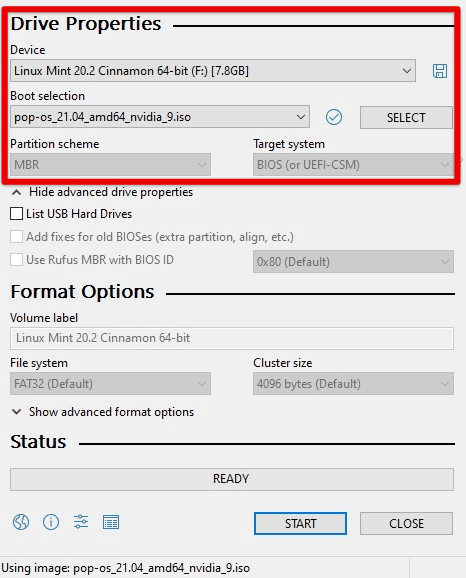
Inside the application, click ” Select ” next to the “Boot selection” field and browse the location where that ISO file is present. Select the file and click on “Open” to proceed. Insert the USB drive that you formatted in the previous step into an available port on your computer. Ensure that the correct USB drive is selected in the “Device” field, which should match the drive you want to use as a target.
Rufus provides several optional settings that can be configured based on your preferences and requirements. You may choose the partition scheme (MBR or GPT), file system (FAT32, NTFS, etc.), and cluster size. It is recommended to leave these settings as the default unless you have specific needs.
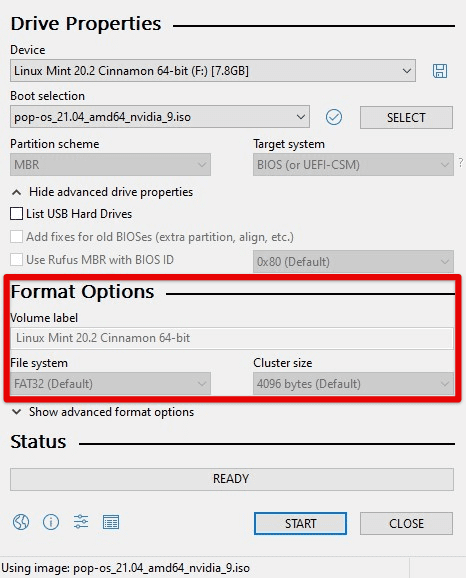
Configuring Rufus settings
Double-check that you selected the correct ISO file, USB drive, and additional settings. Once you are sure about this, click “Start” to begin the flashing process. Rufus will write the Pop!_OS ISO file to the USB drive, which may take a few minutes, depending on the file size or the speed of your drive.
Flashing a USB drive with Rufus
Wait for the flashing process to complete. Once finished, Rufus will display a success message indicating that the bootable USB has been created. Safely eject the drive from your computer using the appropriate method for your host operating system.
Note: Follow the instructions carefully and ensure you have selected the correct ISO file, USB drive, and any additional settings in Rufus to avoid data loss or other issues during this critical process.
Booting from the Pop!_OS USB drive
After creating a bootable USB for Pop!_OS using either Etcher or Rufus, the next step is configuring your computer’s BIOS or UEFI settings to boot from the USB drive. To do so, follow the detailed steps mentioned below:
Insert the bootable USB drive into an available port on your computer. Make sure that the drive is inserted correctly and securely. Then, restart your computer. When booting, your device may display a message indicating the key or combination of keys for accessing the BIOS or UEFI settings. This key may vary depending on your computer’s manufacturer and model, but common ones include F2, F12, Del, or Esc. Press the appropriate key repeatedly until the respective settings appear on your screen.
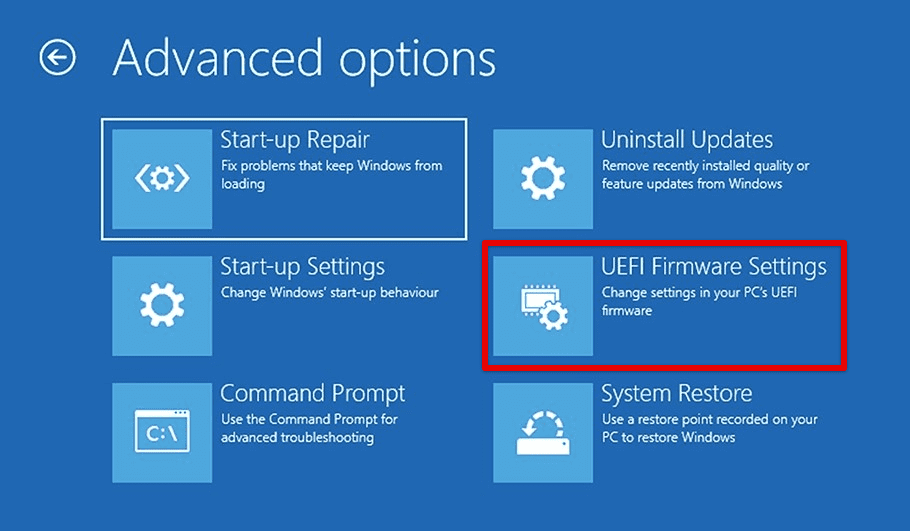
Accessing UEFI settings
In settings, navigate to the Boot or Boot Order section. Depending on your computer’s BIOS or UEFI interface, this may be located under different tabs or menus. In the Boot Order section, move the USB drive to the top of the boot order list so that the computer will first attempt to boot from the USB drive. Follow the on-screen instructions or refer to the appropriate documentation for modifying the boot order.
Some devices may have Secure Boot enabled by default, which can prevent booting from a USB drive with an unsigned operating system. If you encounter issues booting from the drive, you may have to disable Secure Boot in the BIOS first. Look for an option related to Secure Boot and set it to “Disabled”.
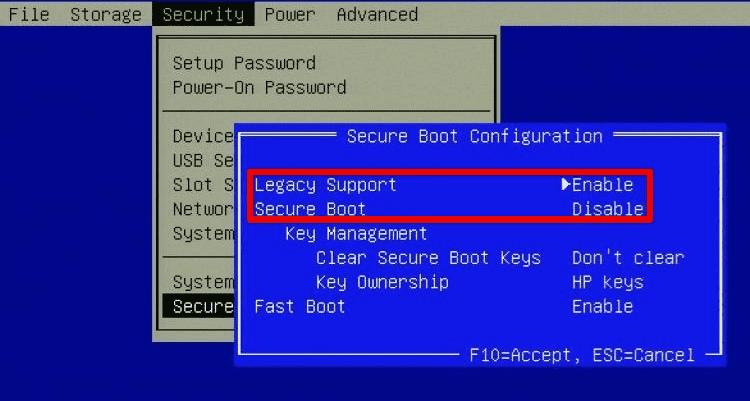
Disabling secure boot
Now that you have made the necessary changes to the boot order or secure boot settings save the modifications and exit the BIOS. This is typically done by pressing a key like F10 or Esc or selecting respective options from the menu. Confirm that you want to save the changes and exit.
Your computer will now restart with the bootable USB drive connected. The device should boot from the drive and initiate installation at once. If the process succeeds, you will see the Pop!_OS installation screen and can proceed with the steps outlined in the Pop!_OS installation guide.
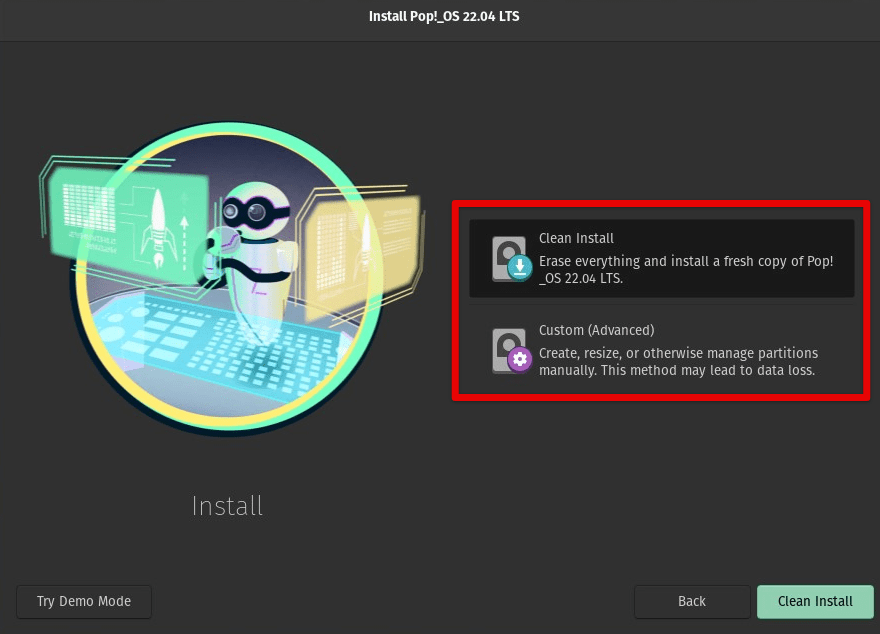
Pop!_OS installation screen
Note: If your computer does not boot from the USB drive and instead boots into the regular operating system, repeat the steps above and make sure that the boot order and secure boot settings are correctly configured. Are you still encountering issues? Consult your computer’s documentation or manufacturer’s support resources for further guidance.
Additional considerations
Creating a bootable USB for Pop!_OS using standard methods outlined in the previous sections is more often than not sufficient for most users. However, there are additional considerations and advanced options that you may want to explore for a more customized installation experience. Let us briefly discuss these considerations one by one.
Persistent USB drive: By default, the bootable USB drives created using Etcher or Rufus are not constant, which means that any changes made during the Pop!_OS session will not be saved after a reboot. Although, if you want to create a persistent USB drive that allows you to save data and settings between sessions, you can use tools like UNetbootin or mkusb. These provide additional options to create persistent USB drives with customizable storage space for data and settings. Want to learn about this topic in more detail? Here is a comprehensive comparison between Persistent Live USB and Full Linux install.
Persistent USB drive
Customizing installation options: During the Pop!_OS installation process, you can customize various settings, including disk partitioning, bootloader, and software packages. If you have specific requirements or preferences, explore these options during the process to tailor the installation to your needs. Be cautious when customizing installation options, as it may affect the stability or functionality of the installed system.

Customizing installation options
Alternative tools or methods: While Etcher and Rufus are popular and user-friendly, plenty of alternatives can also be employed. You can use the “dd” command on Linux or Windows’s “diskpart” utility to create a bootable drive. These methods may require advanced technical knowledge and caution, involving working with low-level disk operations. Always refer to official documentation or reliable sources for directions when using third-party tools or alternate methods.
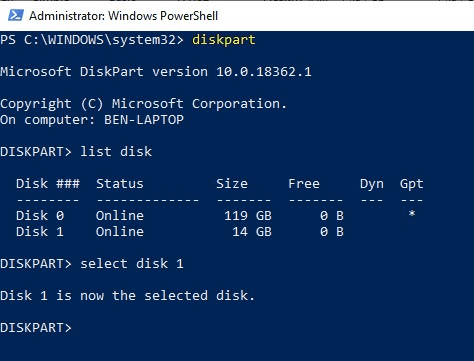
Diskpart utility
Troubleshooting: If you encounter issues or errors during this process, refer to forums, community resources, documentation, or customer support for troubleshooting assistance. Typical issues may include incomplete or corrupted downloads, incompatible hardware or drivers, or inappropriate BIOS settings. Resolving these issues involves verifying each process step, double-checking hardware and software requirements, and seeking help from experienced Linux or Pop!_OS users.
Troubleshooting
Backing up data: Creating a bootable USB drive and installing a new operating system can potentially result in data loss on the target computer’s hard drive. This is specifically particular if your host system has already been infected in the past. Therefore, it is essential to back up any critical data on the computer before proceeding with the installation process. This involves creating backups of crucial files, folders, and settings to an external storage device or cloud storage service. Be sure to follow proper backup procedures such that the safety and integrity of your data are never compromised.
Conclusion
One option for installing or trying out this popular Linux distribution, Pop!_OS, is getting it through a bootable USB drive. In this detailed article, we covered the system requirements, downloading Pop!_OS, formatting the USB, and using tools like Etcher and Rufus to create a bootable drive. We also discussed additional considerations, such as creating a persistent USB, customizing installation options, using alternative tools, and backing up your data before initiating this process.
Following the provided step-by-step instructions and considering the additional options, you can now create a bootable USB for Pop!_OS that suits your requirements. It is crucial to refer to official documentation and reliable sources and seek help from experienced users if you encounter any issues or errors. Are you interested in installing other Linux distributions employing the same method? Learn how to install an updatable Fedora on a USB flash drive.