
While working on Linux, we may need to deal with tons of files, especially when troubleshooting a problem. Working with files includes checking logs in log files, checking the configuration in config files, and checking system error files.
In most cases, we know the file name, but we don’t know the file path. In some scenarios, the file path depends on the directory. Installing any software (the location) is purely user-dependent. The user can select the installation path as required and handle the system easily.
Considering the ‘Tomcat’ installation, this can be installed in any of the below directories:
1. /opt
2. /etc
3. /usr
4. /home
5. /tmp
6. /var
So, the config file of tomcat ‘httpd.conf’ can be located in any of the above directories if a user installs it using the RPM package.
For a new user, it’s a waste of time to get the required config file. To overcome it, one can use the ‘locate’ command in Linux. Using the ‘locate’ command, one can find any files within the system in any of the directories.
Advanced uses of LOCATE command
Going forward in this article, we are going to discuss the clear idea of how exactly the ‘locate’ command is used in Linux, its benefits, and limitation.
1. How to search for files using the ‘locate’ command
One can find his/her required files in the system using the below command:
Command:
locate sysctl.conf
Output:
/etc/sysctl.conf
/etc/sysctl.d/99-sysctl.conf
/usr/share/man/man5/sysctl.conf.5.gz
/usr/share/man/overrides/de/man5/sysctl.conf.5
/usr/share/man/overrides/fr/man5/sysctl.conf.5
/usr/share/man/overrides/uk/man5/sysctl.conf.5
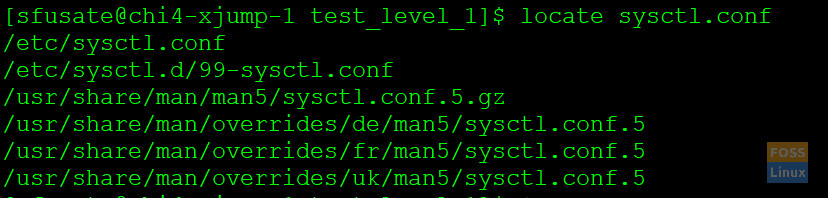
how to use the locate command to find any file in the Linux system
The image shows the list of all ‘ sysctl.conf ‘ in the current system where a ‘ locate ‘ command is fired. We can see, the ‘ locate ‘ command retrieves the 5 different matching lines, indicating that on the current system we have 5 files with matching words as ‘ sysctl.conf. ‘
One can display all these words in 1 line, rather than printing it in 5 separate lines. Below is the command for printing the result of ‘locate’ command in 1 line.
Command:
locate -0 sysctl.conf
Output:
/etc/sysctl.conf/etc/sysctl.d/99-sysctl.conf/usr/share/man/man5/sysctl.conf.5.gz/usr/share/man/overrides/de/man5/sysctl.conf.5/usr/share/man/overrides/fr/man5/sysctl.conf.5/usr/share/man/overrides/uk/man5/sysctl.conf

How to display the result of the ‘locate’ command in one line
The output shown in the given image proves, we can merge or display the matching data of ‘locate’ command in one line. To make it possible, one has to pass 0(zero) an argument while firing the locate command.
There are cases where user-searched files are not listed using the ‘ locate ‘ command. The reason behind this is that the database used by the ‘ locate ‘ command is not updated and shows the wrong(file is not listed in the result set). To solve this problem, use the command below to update the database used by the ‘ locate ‘ command.
2. How to refresh the database used by ‘locate’ command?
Command:
updatedb
Output:
updatedb: cannot open a temporary file for `/var/lib/mlocate/mlocate.db'
Please take note that this command works only when you are a system admin or has root privileges. In other words, you have to use a ‘sudo’ while using ‘updatedb’ command.
3. How to list only existing files?
Let us suppose, the file ‘sysctl.conf’ is deleted from the system and we are trying to search the file using the locate command. If we try to hit the ‘locate’ command shown in point 1, it should list the file which is deleted. The resulted out is not the correct; it is purely misleading.
No doubt, one can opt to go for the ‘updatedb’ command. The other way to achieve the same result is to use the argument ‘-e’ while hitting the ‘locate’ command.
Command:
locate SmartIT.log.7
Output:
/home/sfusate@onbc.com/SmartIT.log.7

The correct result of locate command with -e parameter
We have located the file named ‘SmartIT.log.7’, we got the location of the file, and further, we deleted the file. This time we tried to locate the file ‘SmartIT.log.7’, it should not display any results. However, the screenshot clearly shows the Database is not yet updated, and it still retrieving the result from an old database. The use of ‘-e’ argument shows how efficiently it is displaying the result and not showing the files which do not exist in the system anymore.
Command:
locate -e SmartIT.log.7
4. How to do a case insensitive search using the locate command?
The default behavior of locate command take the parameter as a case sensitive. For example, if a user fire a command, ‘locate new.txt’ it should not display the result for an existing file ‘New.txt’ as it has a first letter ‘N’ in caps. To get rid of this problem, one can use the argument ‘-i.’ The ‘-i’ stand for ignore case.
If one tries to search the same ‘New.txt’ with the command ‘locate -i new.txt’ it should list the file with first latter N in caps.
Command:
locate -i Tika-config0.log
Output:
/opt/TU_Smart/tika-config0.log
/opt/TU_Smart/tika-config0.log.lck
/opt/TU_Smart/User/tika-config0.log
/opt/TU_Smart/User/tika-config0.log.lck
/opt/app_team/admindb/tika-config0.log
/opt/app_team/admindb/tika-config0.log.lck
/opt/app_team/ftsdb/tika-config0.log
/opt/app_team/ftsdb/tika-config0.log.lck
/opt/ukha/db/tika-config0.log
/opt/ukha/db/tika-config0.log.lck
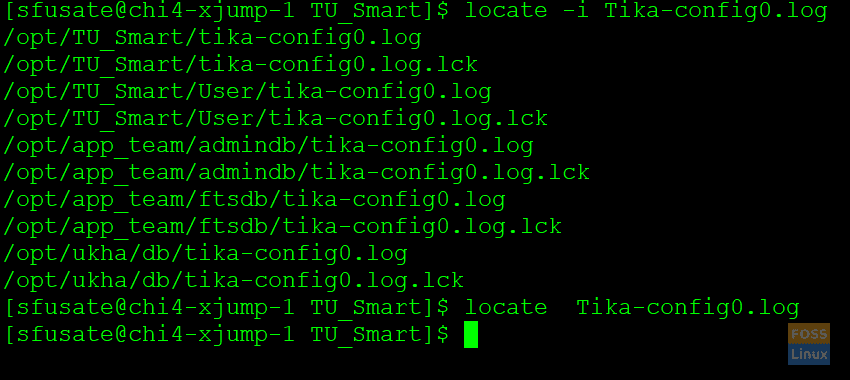
Case sensitive locate
The given image shows when we are trying to use ‘locate Tika-config0.log’ without ‘-I’ it is not listing the result as the T is in caps for the filename.
5. How to limit the ‘locate’ command output?
By default, locate command will display all the listed files in the system which matches to the search query.
Command:
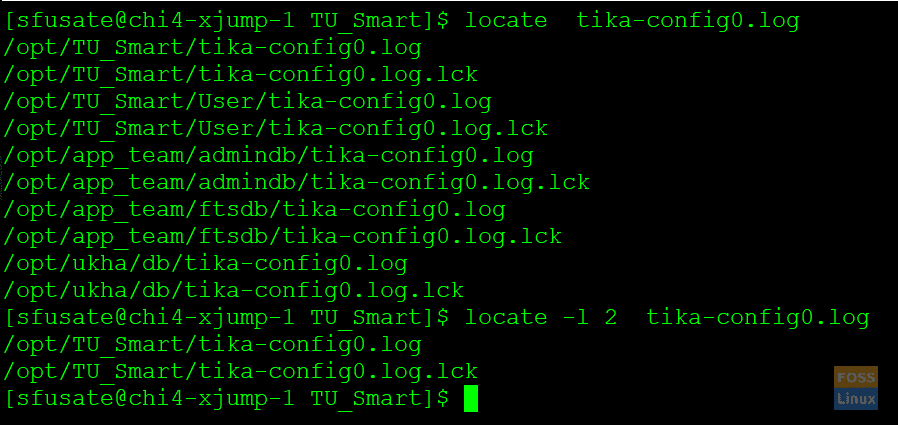
locate tika-config0.log
Output:
/opt/TU_Smart/tika-config0.log
/opt/TU_Smart/tika-config0.log.lck
/opt/TU_Smart/User/tika-config0.log
/opt/TU_Smart/User/tika-config0.log.lck
/opt/app_team/admindb/tika-config0.log
/opt/app_team/admindb/tika-config0.log.lck
/opt/app_team/ftsdb/tika-config0.log
/opt/app_team/ftsdb/tika-config0.log.lck
/opt/ukha/db/tika-config0.log
/opt/ukha/db/tika-config0.log.lck
Command:
locate -l 2 tika-config0.log
Output:
/opt/TU_Smart/tika-config0.log
/opt/TU_Smart/tika-config0.log.lck
How to limit the result in locate command
The use of -l argument helps to limit the result return by the locate command.
The above image proves, when we are trying to list the result of the ‘locate’ command without any argument, it was showing the result for more than 5 lines. However, the time when we limit it using the ‘-l’ it limits the result to 2.
Hope you have enjoyed the usefulness of ‘locate’ command and learned tons of new thing in this article.