
Redmine is an open-source free to use web-based tool for project management and issue tracking. Built on top of the Ruby on Rails framework, it offers a cross-platform and cross-database solution that comes with support for multiple projects, wikis, forums, calendars, email notification, and much more.
Here is a detailed guide on how to install and configure Redmine on CentOS 7 server.
Prerequisites
First of all, you need a domain name pointed at your public server IP. For this tutorial, we will be referring to example.com. Also, you will need to be logged in as a user with sudo privileges.
Other than this, you will also need a database backend. In our case, we will be using MariaDB. However, you can also use Microsoft SQL Server, SQLite 3, and PostgreSQL, as Redmine supports all of them.
Finally, you will need a Ruby application server for which we will be using Passenger with Nginx. In case you don’t have any of these installed on your system, there is no need to worry. We will also show you how to install and configure them as well.
Preparing Your System Before Installing Redmine
As we discussed, there are several things you need on your CentOS system before you can install and run Redmine. In case you don’t have them installed, here is a step by step walkthrough showing you how to set things up.
Note: It goes without saying that if you already have a database backend or a Ruby application server installed, then you can skip those steps and move to the next one.
Step 1: Installing the Necessary Packages
Before installing Redmine, you need to prepare your system by installing the necessary Redmine and Ruby packages from the source.
To do this, type in the following commands in your terminal:
$ sudo yum install curl gpg gcc gcc-c++ make patch autoconf automake bison libffi-devel libtool
$ sudo yum install readline-devel sqlite-devel zlib-devel openssl-develh readline glibc-headers glibc-devel
$ sudo yum install mariadb-devel zlib libyaml-devel bzip2 iconv-devel ImageMagick ImageMagick-devel
Once that’s done, it’s time to create a MySQL database.
Step 2: Install MariaDB on CentOS 7
You are free to use any database backend you like. However, for this tutorial, since we will be using MariaDB/MySQL, here is a quick tutorial showing you how to install it on your system.
Since MariaDB version 5.5 is provided with the CentOS repository, we will be installing that solely because of convenience. It is not the latest version, but it is exceptionally stable, and you shouldn’t run into any issues.
Type in the following command in your terminal to install the MariaDB packages:
$ sudo yum install mariadb-server
Once it completes installing, type in the following command to enable it to start during system boot-up.
$ sudo systemctl start mariadb
$ sudo systemctl enable mariadb
Next, check whether the installation was successful or not by entering the following command:
$ sudo systemctl status mariadb
The output should tell you that the service is active and running. Once that is taken care of, run the following script to perform several security-related tasks to make sure everything is working correctly and as intended.
$ sudo mysql_secure_installation
This is going to bring up the following prompts:
Do you want to set up the root user password?
Do you want to remove anonymous user accounts?
Do you want to restrict root user access to the local machine?
Do you want to remove the test database?
Answer with Y (yes) to all these questions.
And voila, you have successfully installed MariaDB on your CentOS system. Now its time to move on to the next step.
Step 3: Create a MySQL Database
With MariaDB installed on your CentOS system, follow these steps to create a MySQL Database. First, you will need to login to your MySQL shell. To do this, enter the following command in the terminal:
$ sudo mysql
Next, you will need to create a new database. To do this, enter the following command from inside your MySQL shell:
mysql> CREATE DATABASE redmine CHARACTER SET utf8;
Once that’s done, you will need to create a MySQL user account and provide it access to the newly created database. This is done using the following command:
mysql> GRANT ALL ON redmine.* TO 'redmine'@'localhost' IDENTIFIED BY 'EnterPasswordHere';
Replace EnterPasswordHere with a strong password of your choice.
You have successfully created a MySQL database. Now exit the shell using the following command and move on to the next step:
mysql> EXIT;
Step 4: Install Passenger and Nginx
Passenger is a web-application server designed for Ruby, Node.js, and Python. It is super-fast, lightweight and can be integrated with Apache and Nginx. For this tutorial, we will be installing the Passenger module for Nginx.
To do this, we will first need to install some necessary packages, including the EPEL repository. To do this, enter the following command in your terminal:
$ sudo yum install epel-release yum-utils pygpgme
$ sudo yum-config-manager --enable epel
Next, you will need to enable the Phusionpassenger repository. This can be done using this command:
$ sudo yum-config-manager --add-repo https://oss-binaries.phusionpassenger.com/yum/definitions/el-passenger.repo
Finally, update the packages list and install both Nginx and Passenger using this command:
$ sudo yum install nginx passenger passenger-devel
Step 5: Create a New System User
We are almost done setting up everything to install Redmine. The next thing we need to do is creating a new system user and group that will run the Redmine instance. We first create a new user by entering the following command in the terminal:
$ sudo useradd -m -U -r -d /opt/redmine redmine
For the sake of simplicity, we have kept the user name as redmine; however, you are free to use any user name you like.
Next, add the ngnix user to the new user group using this command:
$ sudo usermod -a -G redmine nginx
And finally, change the /opt/redmine directory permissions such that it can be accessible by Nginx. To do this, enter this command:
$ sudo chmod 750 /opt/redmine
Step 6: Install Ruby
And now, for the final step to getting everything ready, we will need to install Ruby on our CentOS system.
Now, the tricky part is that the Ruby version that comes with the CentOS repository is outdated and isn’t supported by Redmine. This is why we will need to install it by using RVM.
First, switch to the Redmine user by typing the following command:
$ sudo su - redmine
You will need to import the GPG key using this command:
$ gpg --keyserver hkp://pool.sks-keyservers.net --recv-keys 409B6B1796C275462A1703113804BB82D39DC0E3 7D2BAF1CF37B13E2069D6956105BD0E739499BDB
Once that’s done, install RVM with this command:
$ curl -sSL https://get.rvm.io | bash -s stable
Now, to use RVM, you will need to source the RVM file using this command:
$ source /opt/redmine/.rvm/scripts/rvm
Finally, it’s time to install Ruby on our system. To do this, enter the following command in your terminal.
$ rvm install 2.7
$ rvm --default use 2.7
Note: Here, 2.7 refers to Ruby version 2.7, which is the latest version of Ruby at the time of writing. If there is an updated version of Ruby when you are reading this, then download it instead. You can always use version 2.7 as long as Redmine supports it.
And that’s it! You have successfully configured your CentOS system, and it is now ready to install Redmine.
Install Redmine on CentOS 7
When installing Redmine, you should always check the Redmine Download Page to see the latest version and download that. For the sake of this tutorial, we will be installing Redmine version 4.1.1 since it is the current stable release at the time of writing.
Now with that out of the way, here is a step-by-step guide on installing Redmine 4.1.1 on CentOS 7.
Step 1: Download Redmine
Before getting started, make sure that you are running all the commands by logging in as the Redmine user.
Once you have done that, download the Redmine archive on to your system. You can do that using the following curl command:
$ curl -L http://www.redmine.org/releases/redmine-4.1.1.tar.gz -o redmine.tar.gz
After downloading the archive, extract it using the following command:
$ tar -xvf redmine.tar.gz
Step 2: Configure the Redmine Database
Next, you will need to configure the Redmine database. Start by copying the Redmine example database configuration file using the following command:
$ cp /opt/redmine/redmine-4.1.1/config/database.yml.example /opt/redmine/redmine-4.1.1/config/database.yml
Next, open the file using the text editor of your choice. We will be using nano editor.
nano /opt/redmine/redmine-4.1.1/config/database.yml
Now, search under the production section and enter the previously created MySQL database information, including username and password, as shown below.
production:
adapter: mysql2
database: redmine
host: localhost
username: redmine
password: "EnterPasswordHere"
encoding: utf8
Replace EnterPasswordHere with a strong password of your choice.
Once done, save and exit the file to move on to the next step.
Step 3: Install Ruby Dependencies
Next, you will need to install all the ruby dependencies and bundler.
To do this, head on over to the redmine-4.1.1 directory, open the terminal, and enter the following commands:
$ cd ~/redmine-4.1.1
$ gem install bundler --no-rdoc --no-ri
$ bundle install --without development test postgresql sqlite
Step 4: Generating Keys and Migrating Database
Enter the following commands in your terminal to generate keys and migrate the database:
$ bundle exec rake generate_secret_token
$ RAILS_ENV=production bundle exec rake db:migrate
Step 5: Configure Nginx
Now, before we can access Redmine, you will need to set up Nginx. To do this, first switch back to your sudo user by entering the following command:
$ exit
Now, open the text editor and create the Nginx server block file. To do this, enter the following command:
$ sudo nano /etc/nginx/conf.d/example.com.conf
Next, copy and paste the following content inside the file:
Note: Remember to switch example.com with your Redmine domain.
passenger_root /usr/share/ruby/vendor_ruby/phusion_passenger/locations.ini;
passenger_ruby /opt/redmine/.rvm/gems/default/wrappers/ruby;
passenger_instance_registry_dir /var/run/passenger-instreg;

server {
listen 80;
server_name example.com www.example.com;

root /opt/redmine/redmine-4.1.1/public;

# log files
access_log /var/log/nginx/example.com.access.log;
error_log /var/log/nginx/example.com.error.log;

passenger_enabled on;
passenger_min_instances 1;

client_max_body_size 10m;
}
Once that’s done, run a test to make sure there are no system errors by entering the following command:
$ sudo nginx -t
A clean output with no errors should look like this:
nginx: the configuration file /etc/nginx/nginx.conf syntax is ok
nginx: configuration file /etc/nginx/nginx.conf test is successful
Once you get the green light, you can restart the Nginx server by entering this command:
sudo systemctl restart nginx
Step 6: Encrypt Nginx with SSL
You will need to configure Nginx with an SSL certification. In case your domain isn’t already protected by a trusted SSL certificate, you can generate a free one using Let’s Encrypt.
Once you have the certificate in hand, you will again need to edit the Nginx configuration file. To do this, first, you need to open it in your text editor using the following command:
$ sudo nano /etc/nginx/conf.d/example.com.conf
Now edit the file, as shown below:
passenger_root /usr/share/ruby/vendor_ruby/phusion_passenger/locations.ini;
passenger_ruby /opt/redmine/.rvm/gems/default/wrappers/ruby;
passenger_instance_registry_dir /var/run/passenger-instreg;

# Redirect HTTP -> HTTPS
server {
listen 80;
server_name www.example.com example.com;

include snippets/letsencrypt.conf;
return 301 https://example.com$request_uri;
}

# Redirect WWW -> NON WWW
server {
listen 443 ssl http2;
server_name www.example.com;

ssl_certificate /etc/letsencrypt/live/example.com/fullchain.pem;
ssl_certificate_key /etc/letsencrypt/live/example.com/privkey.pem;
ssl_trusted_certificate /etc/letsencrypt/live/example.com/chain.pem;
include snippets/ssl.conf;

return 301 https://example.com$request_uri;
}

server {
listen 443 ssl http2;
server_name example.com;

root /opt/redmine/redmine-4.1.1/public;

# SSL parameters
ssl_certificate /etc/letsencrypt/live/example.com/fullchain.pem;
ssl_certificate_key /etc/letsencrypt/live/example.com/privkey.pem;
ssl_trusted_certificate /etc/letsencrypt/live/example.com/chain.pem;
include snippets/ssl.conf;
include snippets/letsencrypt.conf;

# log files
access_log /var/log/nginx/example.com.access.log;
error_log /var/log/nginx/example.com.error.log;

passenger_enabled on;
passenger_min_instances 1;
client_max_body_size 10m;
}
Note: Remember to switch example.com with your Redmine domain.
And that’s it! You are now ready to access Redmine.
Accessing Redmine
You have now successfully installed and configured Redmine on CentOS. It’s finally time to access it and see if everything is working correctly.
To access Redmine, first, you need to open your browser and type in your domain. If the installation was successful, you should see the following screen asking you for your username and password.

Accessing Redmine
By default, the login credentials are as follows:
Username: admin
Password: admin
After logging in for the first time, you will be prompted by the system to change your password to a more secure one.
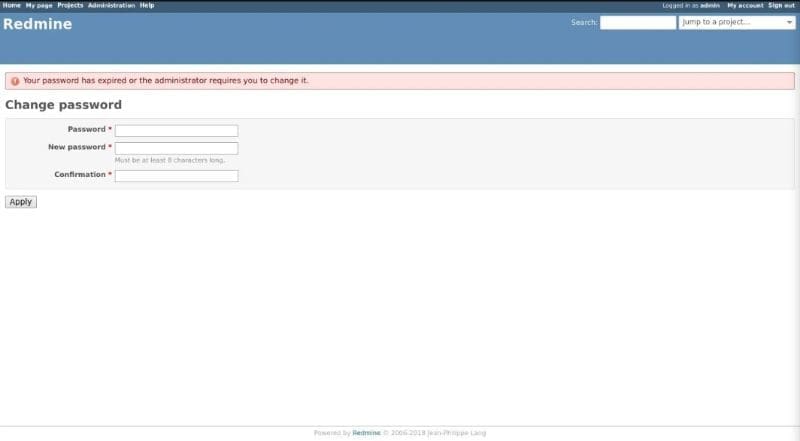
change Redmine password
After changing your password, you will be redirected to your main user account page from where you can start using Redmine.
7 comments
Hi,
It’s the best step by step manual for Redmine Installation that i find in the web. All steps and components are successfully installed configured till “Step 5: Configure Nginx”. I have one problem with configuring Nginx virtual hosts. it’s not starting after adding parameters in the “/etc/nginx/conf.d/example.com.conf”. Could you pls give me the author’s contact information of this Article? or could you pls send him this issue
I have a problem.
nginx: [emerg] unknown directive “passenger_root” in /etc/nginx/conf.d/example.com.conf:1
nginx: configuration file /etc/nginx/nginx.conf test failed
check your nginx version: nginx -V
get the source code of your version to build (my is 1.19.4, please use another number)
wget https://nginx.org/download/nginx-1.19.4.tar.gz
tar zxf nginx-1.19.4.tar.gz
cd nginx-1.19.4
./configure –with-compat –prefix=/etc/nginx \
–add-dynamic-module=$(passenger-config –nginx-addon-dir)
make
sudo make install
the ngx_http_passenger_module.so should be make in the directory: /etc/nginx/modules
then edit nginx.conf to load this module
vi /etc/nginx/nginx.conf
in the first line, add
load_module modules/ngx_http_passenger_module.so;
save
test the config again
nginx -t
the command
./configure –with-compat –prefix=/etc/nginx \
–add-dynamic-module=$(passenger-config –nginx-addon-dir)
the double hyphen “–” is replaced by “–” after post the comment, please replace it accordingly
remote me please 🙁
Can you write an article on how to install ZenTao on Centos? It is also a bug tracking tool and free.
Hi Max, you may refer to their official manual here, https://www.zentao.pm/book/zentaomanual/free-open-source-alm-tool-source-code-15.html.