
Proxmox virtual environment, popularly known as Proxmox VE, is an open-source server virtualization software based on Debian Linux in conjunction with RHEL kernel, which is modified to permit you to generate and set up new virtual machines for private servers and containers with unified storage for improved efficiency.
This software offers two versions of virtualizations. The first is containers with LXC, and full virtualization with KVM comes as the second. Virtualization is the basis of cloud computing as it allows for more proficient usage of physical PC hardware.
Proxmox offers command-line tools and REST Application Programming Interface (API) for third-party apps. It also provides a simple method to install and run configurations on virtual machines from a web browser.
When it comes to features, it has a web-based administration interface, supports containers, has pre-installed apps that take a short while to be up and running; it also has full virtualization. Furthermore, Proxmox has live migration that moves running VM from one physical host to another without downtime. It also uses OVMF (Open Virtual Machine Firmware), a port of intel’s open-source TianoCore UEFI enactment to allow UEFI support for virtual machines.
Installing Proxmox VE on Linux
In this review, we will cover how to install the Proxmox VE server on a running instance of a Linux PC, and we will also stretch the article further to installing Proxmox on bare metal. So let’s get going.
Method 1: How to install Proxmox on a running instance of a Linux PC
This section will run down through a step-by-step installation of Proxmox VE software on your running Linux system. Typically, it is suggested to deploy a Proxmox VE server from a bare-metal_ISO_Installer, but it is sometimes unavoidable to set it up on a running instance of a Linux server.
Prerequisites:
For the installation of this software on Linux, you will need the following:
- Sufficient hardware resources to be utilized in virtualizing other OSs.
- The server requires internet access.
- A running instance of Linux.
- A 64-bit processor that supports Intel 64 or AMD64CPU extensions.
- Access to Linux server terminal as root or standard user with sudo.
Having met all the requirements, let us proceed with the installation process in the next section.
Step 1: Update your OS
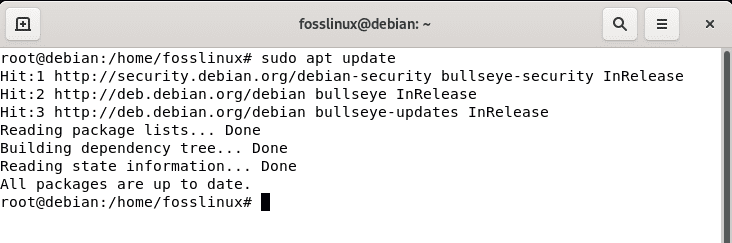
As usual, the first step is to check if your machine is up to date. To do this, copy the following command:
sudo apt -y update
update system
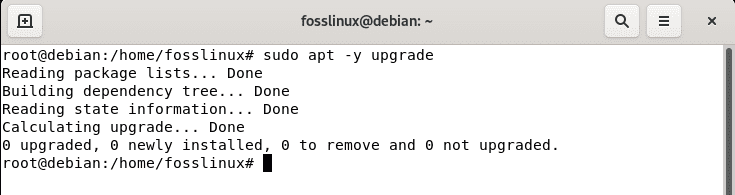
If there are updates, proceed with this step to help upgrade packages. If that is not the case, skip this step:
sudo apt -y upgrade
upgrade system
Once the update and upgrade processes are over, go ahead and reboot your server using the following command:
sudo systemctl reboot
Step 2: Set Proxmox Server hostname
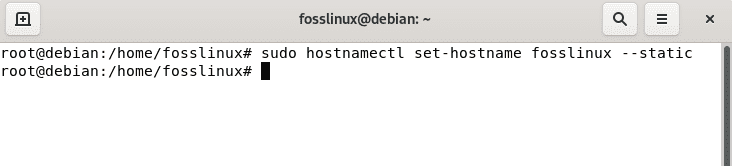
in this step, we will set a hostname on the server using the following syntax:
sudo hostnamectl set-hostname fosslinux –static
create hostname
Note: Ensure you replace “fosslinux” with the correct hostname you set up on your system.
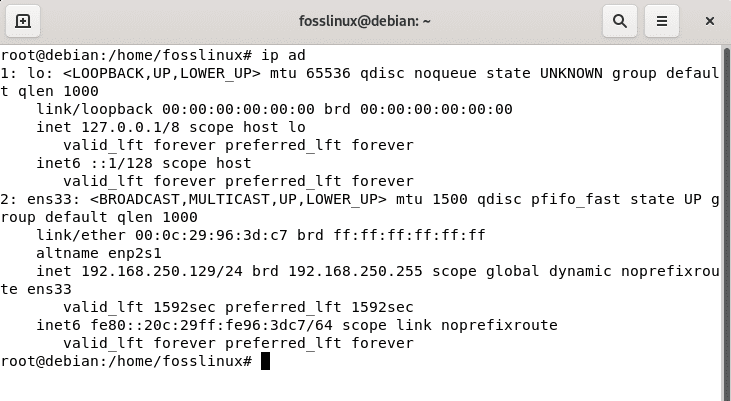
After that, get the Ip address of the primary interface using the following command:
ip ad
IP address
After that, update the data on /etc/hosts file with hostname and matching IP address for local resolution without DNS server.
sudo vim /etc/hosts

192.168.250.129 fosslinux.example.com fosslinux
Next, log out and back in to use your newly created hostname. To logout, use the following command:
logout
After logging out and back, we will test if the configured hostname is OK using the following hostname command:
hostname –ip-address

hostname IP address
Step 3: Adding the Proxmox VE repo
Here, we will be appending the Proxmox server packages distributed in an APT repository. To do this, paste the following command in your terminal:
echo "deb http://download.proxmox.com/debian/pve bullseye pve-no-subscription" | sudo tee /etc/apt/sources.list.d/pve-install-repo.list
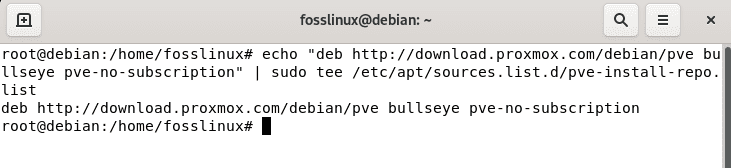
add the proxmox ve repo
Then go ahead and import the GPG signing key:
wget http://download.proxmox.com/debian/proxmox-release-bullseye.gpg

sudo mv proxmox-release-bullseye.gpg /etc/apt/trusted.gpg.d/proxmox-release-bullseye.gpg

chmod +r /etc/apt/trusted.gpg.d/proxmox-release-bullseye.gpg
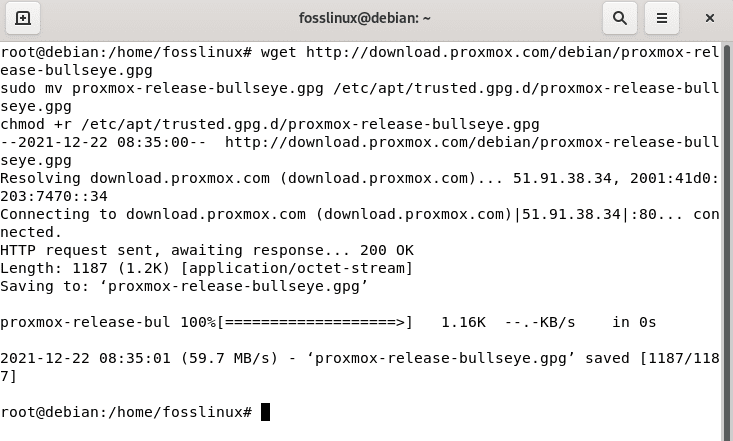
import GPG key
Upon importing the GPG key, run the following command to update your APT sources list
sudo apt update
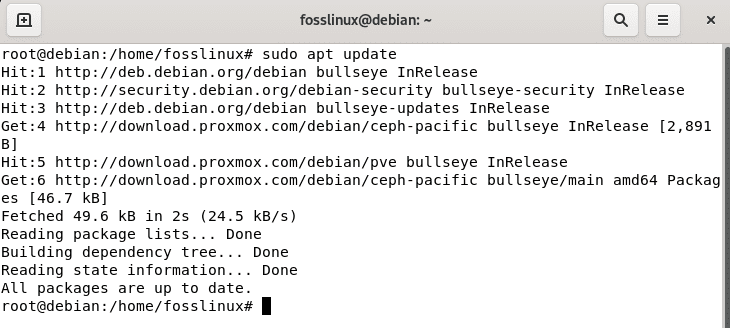
update
After that, it is recommended to check whether packages need an upgrade or not. If there are, run the following command to upgrade the named packages:
sudo apt full-upgrade

upgrade machine
Add Proxmox VE ceph Repository
We will install the Proxmox VE’s key Ceph repo that possesses the ceph packages for production use. To add on, you can use this repo only to update the Ceph client:
echo "deb http://download.proxmox.com/debian/ceph-pacific bullseye main" | sudo tee /etc/apt/sources.list.d/ceph.list
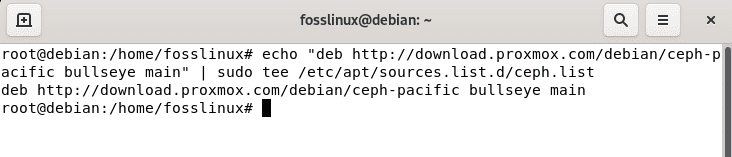
add ceph repo
Step 4: Install Proxmox VE packages
We can now set up Proxmox VE packages with the repo already added to our Linux system. To attain this, copy the following commands to your PC:
sudo apt update

sudo apt install proxmox-ve postfix open-iscsi

install proxmox
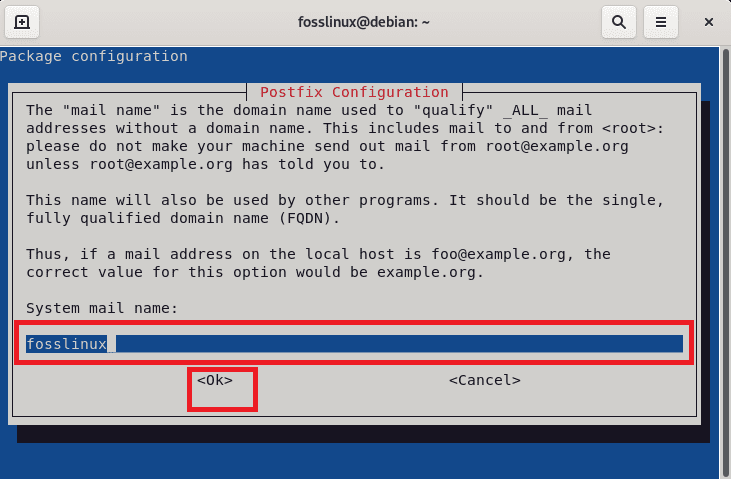
The installation process will be faster or slower depending on several variables such as the internet connectivity and hard disk write speed. You should receive a postfix configuration window that asks the configuration method you want in your Proxmox ve while installing these packages.
Note: If you own a mail server on your web, you should consider configuring postfix as a “satellite system,” and your current mail server will be the “relay host,” which will route emails sent by the proxmox server to the end-user recipient. But if you are unaware of what to select here, select “local only.”

select local only
Next, confirm the system mail name/update appropriately:
confirm system name
Upon clicking “OK,” the installation will proceed. So, ensure that the installation carries on to the end without encountering any issues
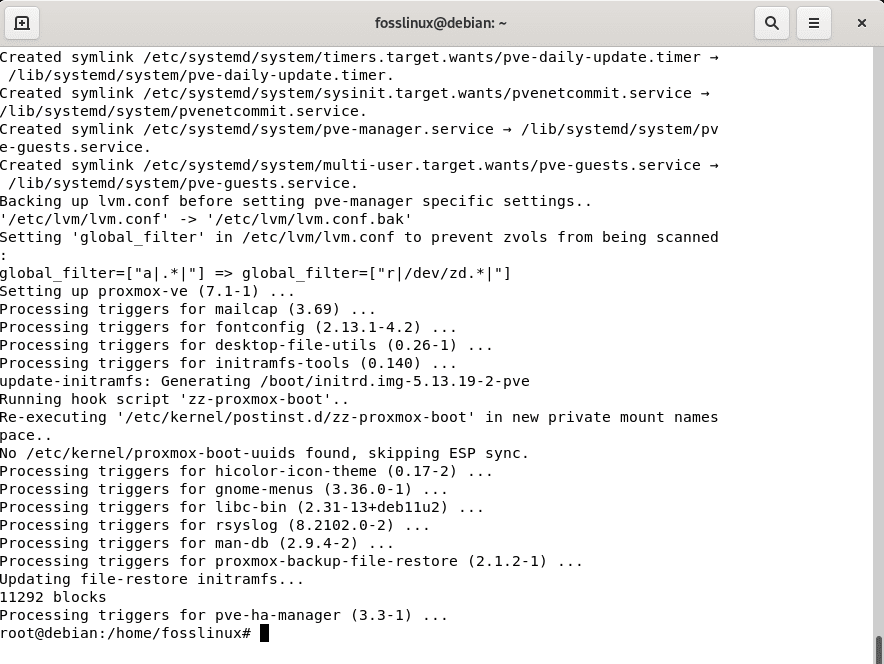
ensure the installation completes without any issue
After installation, restart your Linux system to boot with the Proxmox VE kernel. you can alternatively use the following command to restart your machine:
sudo reboot
Next, you will check if port 8006 is bound to the Proxmox Proxy service using the following command:
ss -tunelp | grep 8006

check port
Step 5: Web interface access of Proxmox VE
From your workspace, connect to the Proxmox VE admin web console using the following syntax:
https://youripaddress:8006
Next, select “PAM standard authentication” after that, use “root” as the username and the root user password you earlier created to log in.
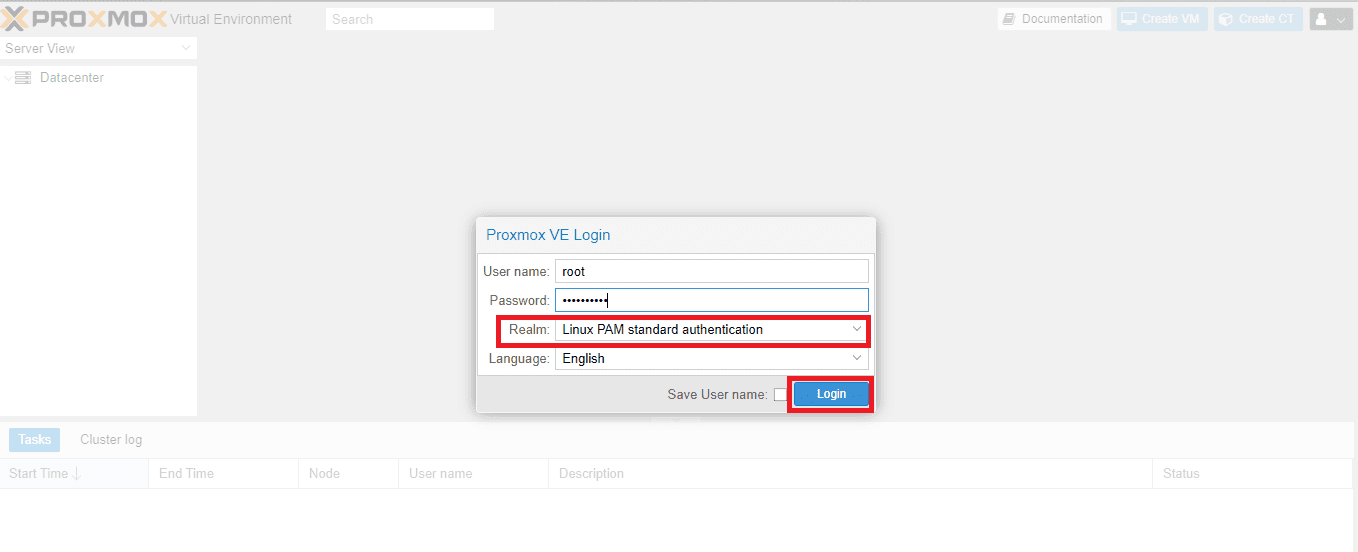
select pam auth
After authorizing with the server’s root user password, you should be able to access the Proxmox VE dashboard as shown in the snapshot below:
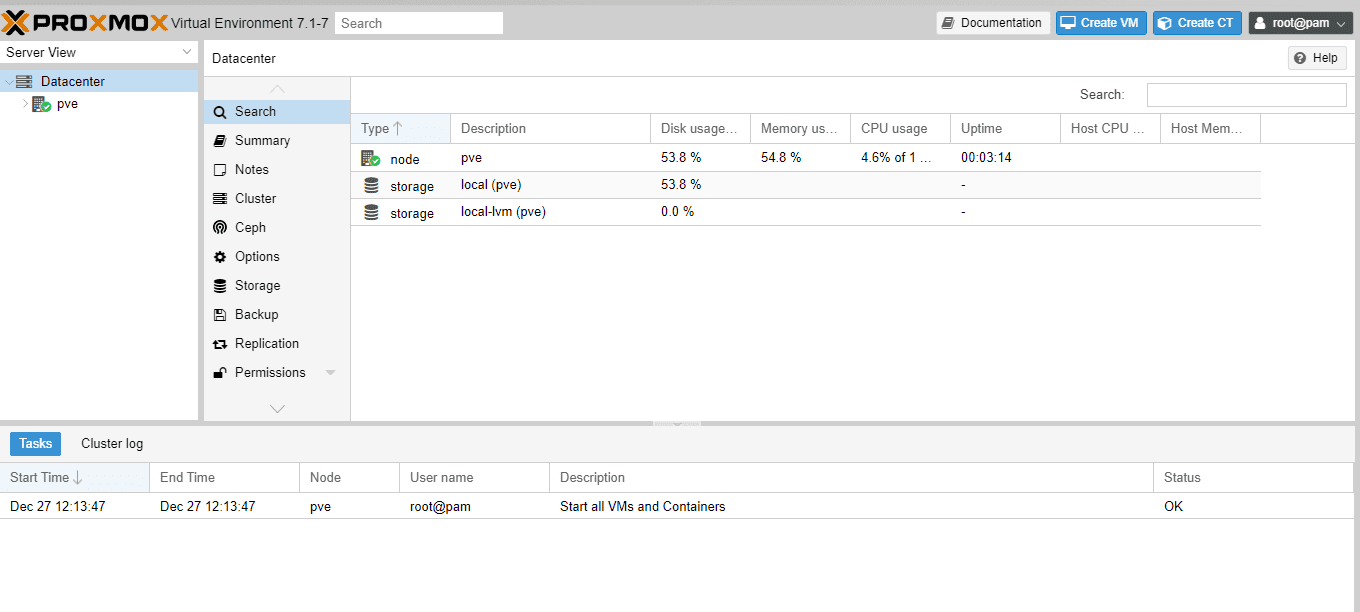
dashboard
Once you are logged in, create a Linux Bridge called vmbr0,
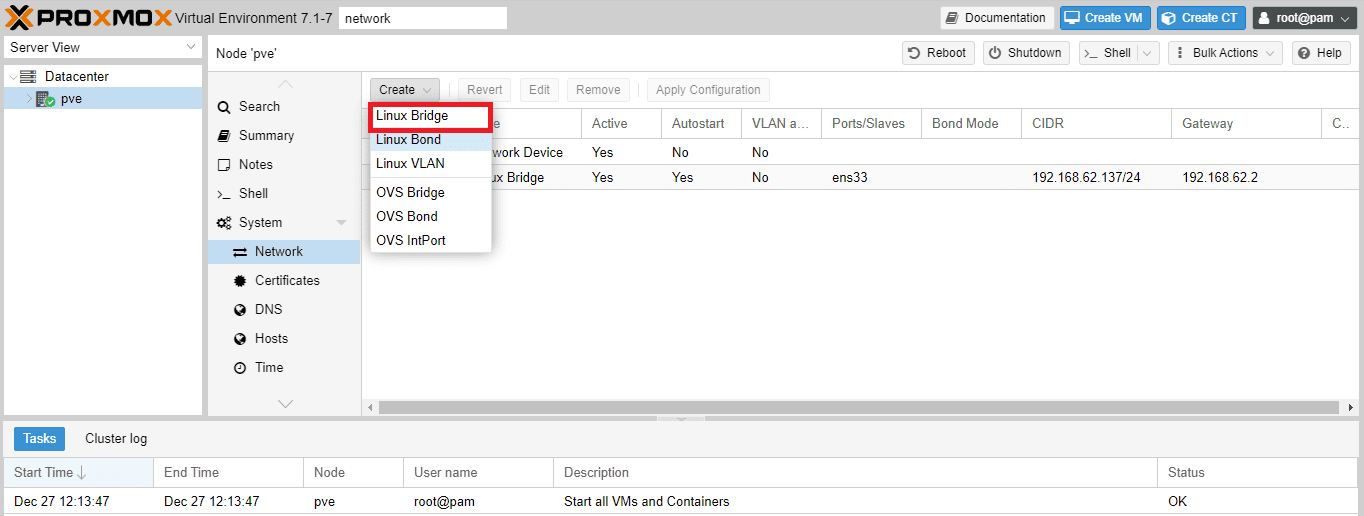
select bridge
After that, add the first network interface created using the bridge.
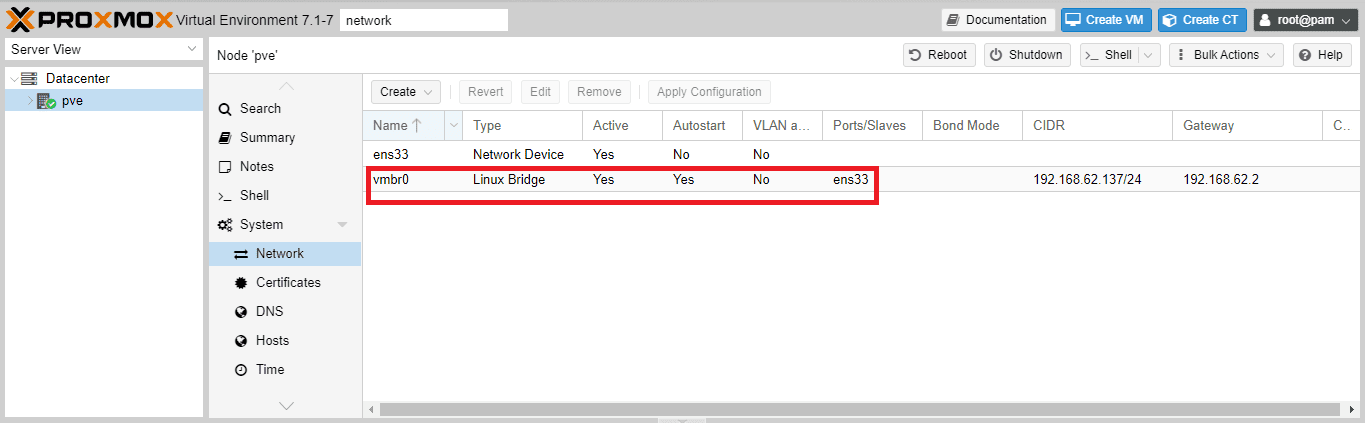
vmbr0 selected
Method 2: How to install Proxmox on bare metal
Prerequisites:
- You must have a clean or empty hard disk to perform this process. This is so because Proxmox will wipe all the data present on the hard disk.
- You may also need a dedicated server.
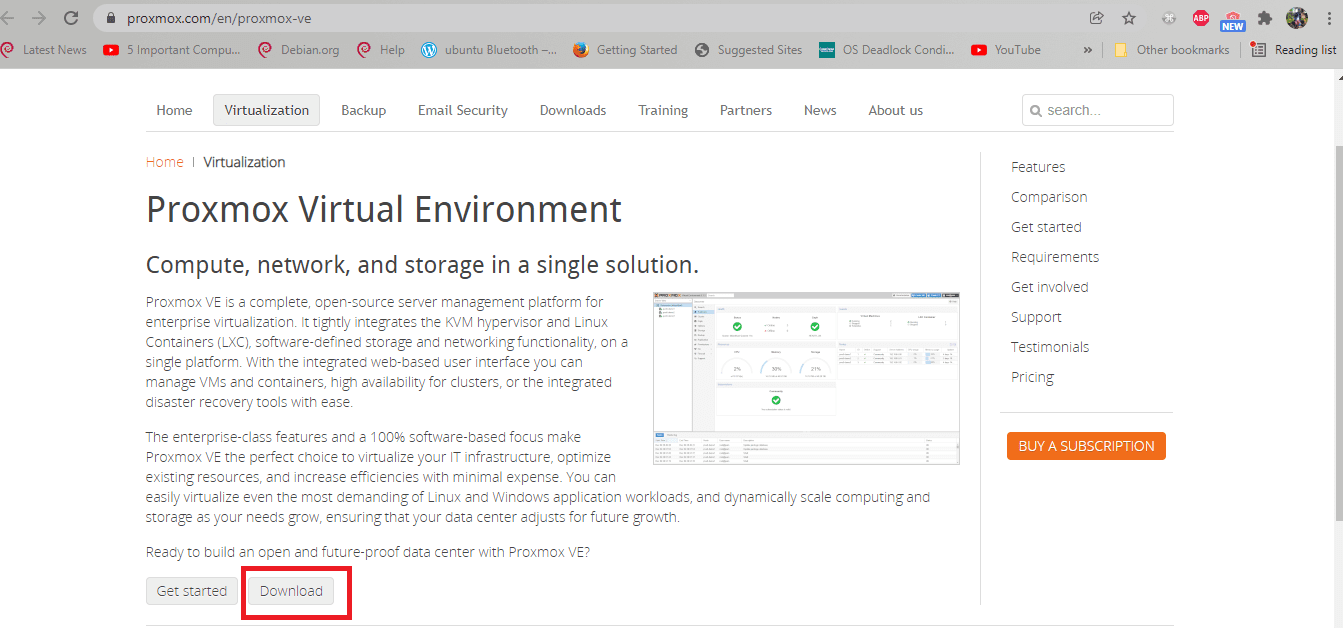
Step 1: Download Proxmox VE
First, visit Promox VE’s official website and download the latest ISO file. Immediately the page loads, click on the Download option as shown in the snapshot below:
select download
Immediately you click on download, you should be redirected to the page containing the versions of the software to be downloaded. We suggest you go with the latest version for efficiency purposes. At the time of this writing, Promox VE 7.1 is the latest. So, to download this ISO version, click on the download button as marked in the snapshot below:
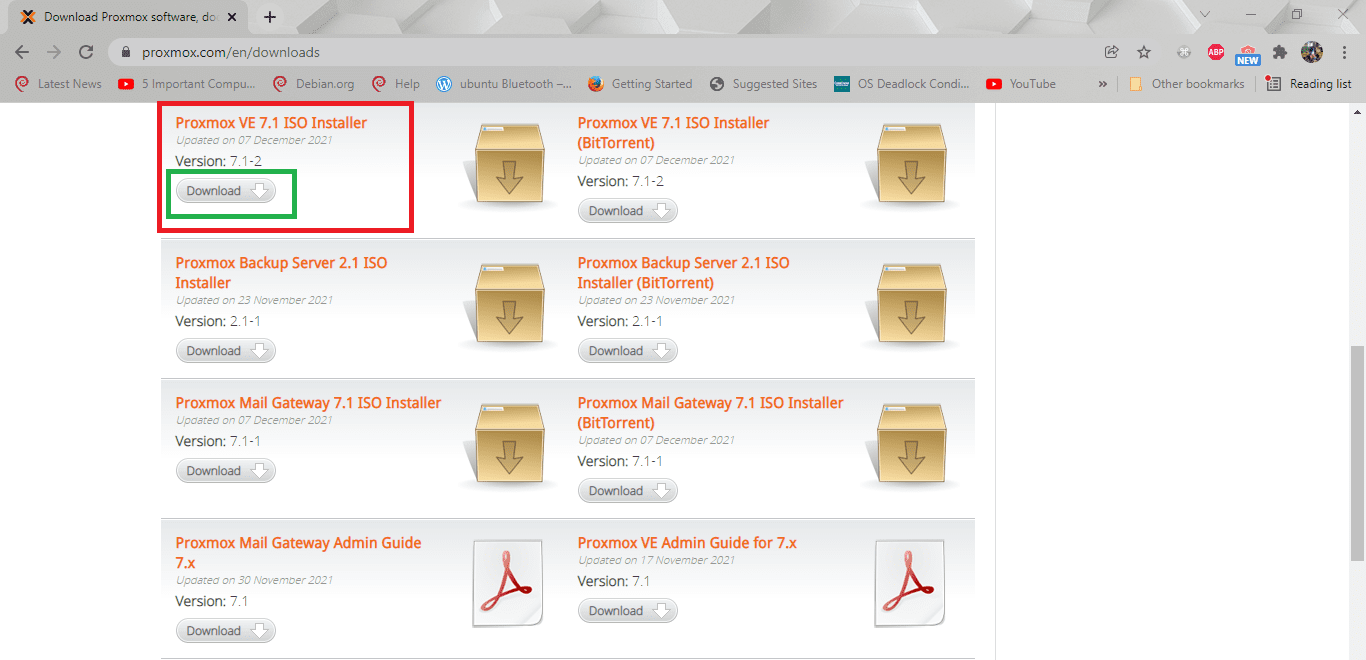
select iso installer
Upon clicking the button, your download should be underway, and it may take some time to complete depending on your internet speed.

download progress
When you are done downloading, go ahead and create a bootable USB using software like Etcher or Rufus. However, in cases where your dedicated server possesses a remote web-based management interface, the likes of IPMI, log in and insert the ISO file to the virtual drive.
Step 2: Creating Bootable USB of Proxmox VE
In this phase, you will create a bootable USB drive of Proxmox VE to facilitate the installation on your PC. Since we are using Linux, we will use the dd command to create a bootable USB drive easily. But if you are on Windows, kindly use Rufus.
To create the bootable drive, make use of the following syntax:
sudo dd if=~/Downloads/proxmox-ve_7.1-2.iso of=/dev/sdX bs=1M
Note: Ensure you replace the proxmox version “_7.1-2” with the one you downloaded. You should also note “sdX” almost at the end of the command, and you may wonder what its purpose is. sdX only refers to your USB drive. Alternatively, you can make use of the “lsblk” command to check out what it is in your case.
Step 3: Launch the Proxmox VE installer
We will restart our PC and use the Basic Input Output System (BIOS) interface to boot it from the Proxmox ISO. Once the ISO installer displays, press “Enter” to select the “Install Proxmox VE” option to initiate the installation process.
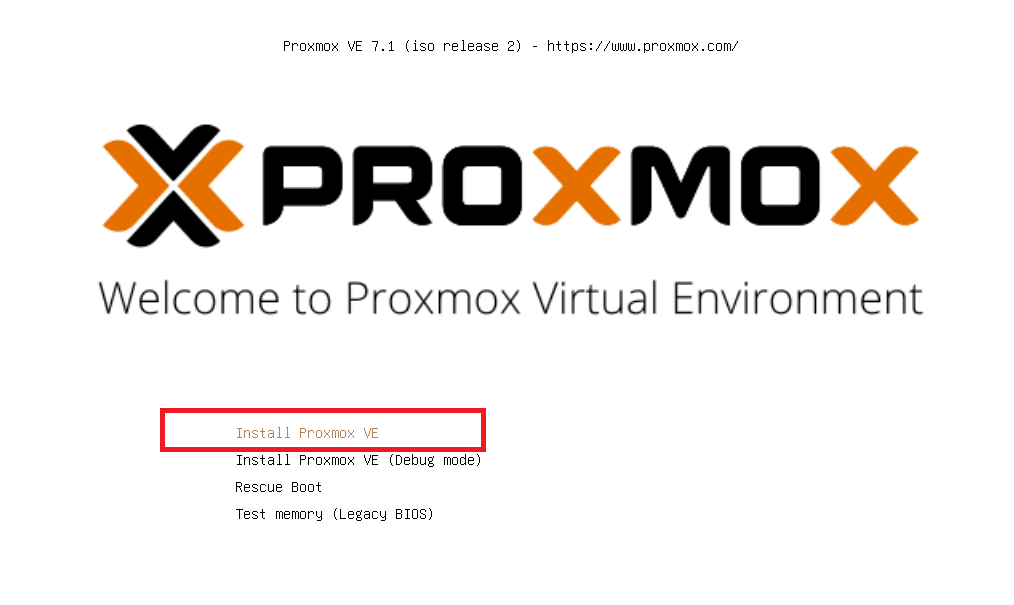
select install proxmox ve
Step 4: License Agreement
In the next step, you will agree to the software’s license agreement
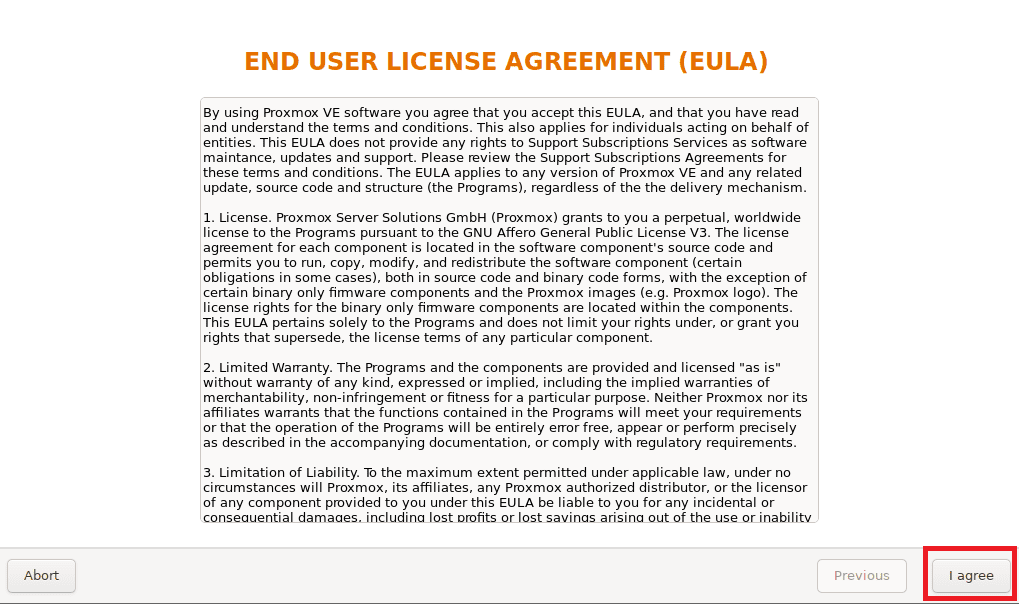
select agree
Step 5: Select Storage Location
Next, you will have to select the intended hard disk drive (HDD) or solid-state drive (SSD) where you want Proxmox VE installed and click on “Next” to proceed.
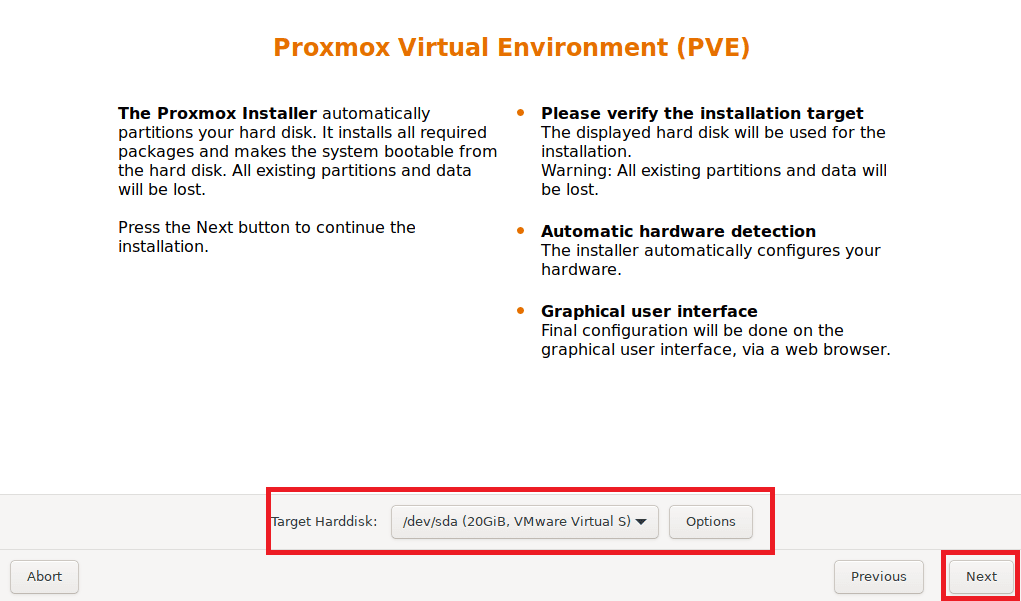
target harddisk
Step 6: Location and Time Zone Selection
Then in this section, select your country, timezone, and keyboard, respectively, before hitting the “Next” button to continue.
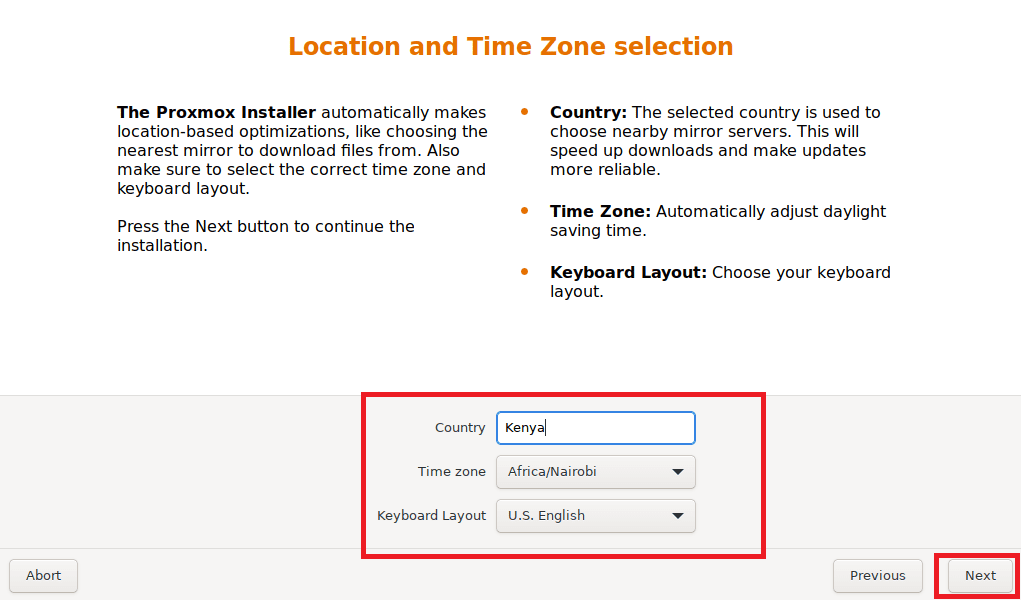
select location
Step 7: Credentials
Here, type in your Proxmox VE password and email address. Once you are done, click on “Next.”
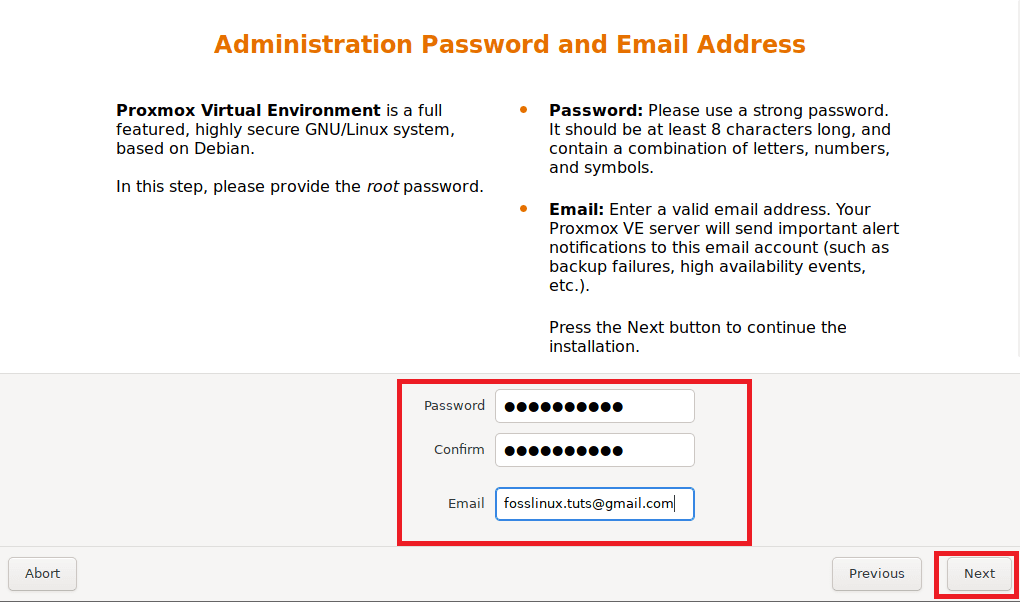
credentials
Step 8: Network settings configuration
Next, go ahead and configure the management network interface for the software. Once you are through, click “Next.”
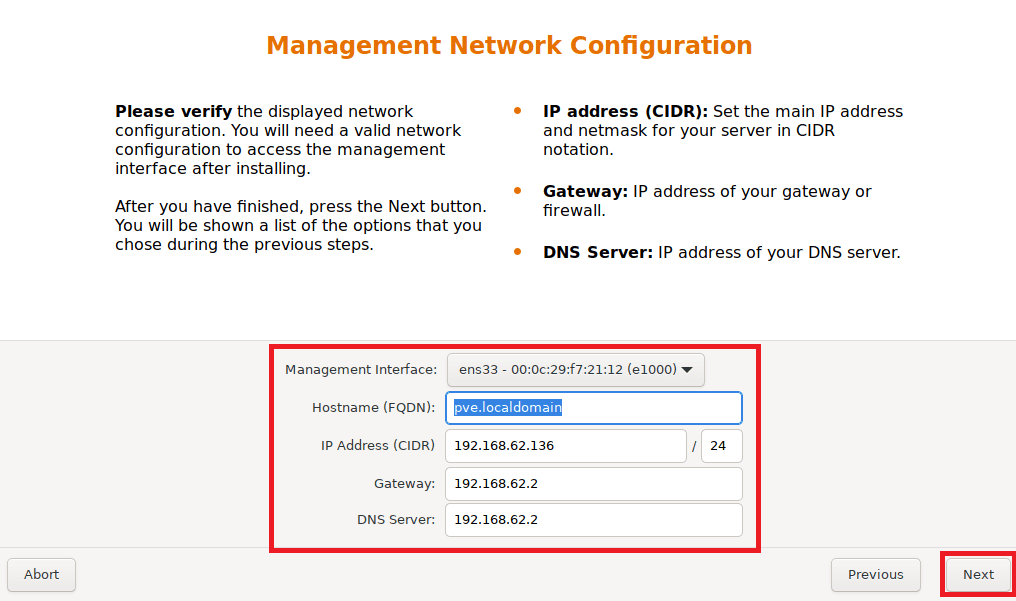
network configurations
After that, you will be given an overview of the Proxmox to review before installing it. If you feel all is well, click the “Install” button, and the installation process should begin.
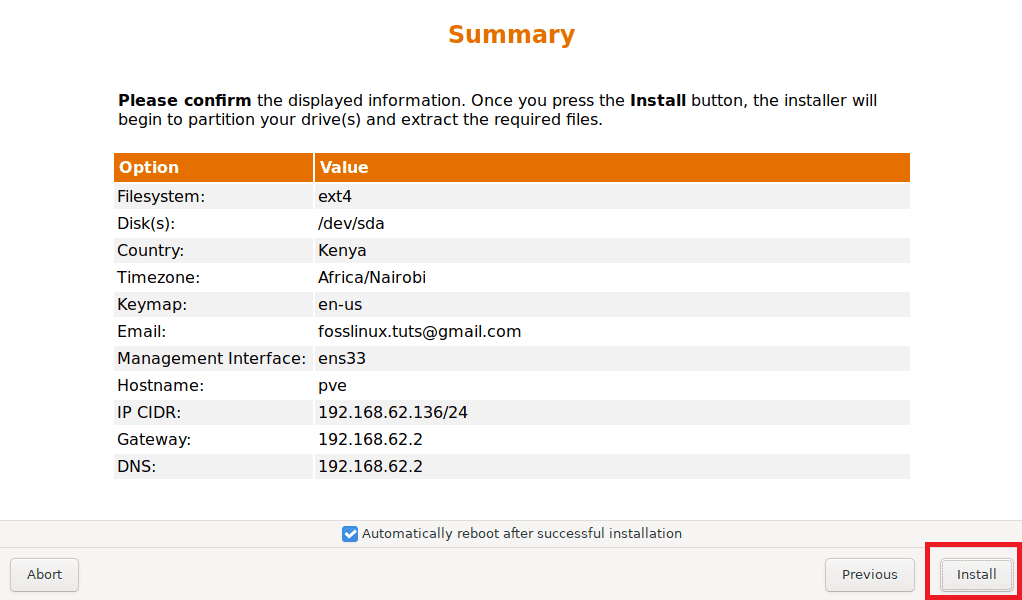
summary window
The installation process window:
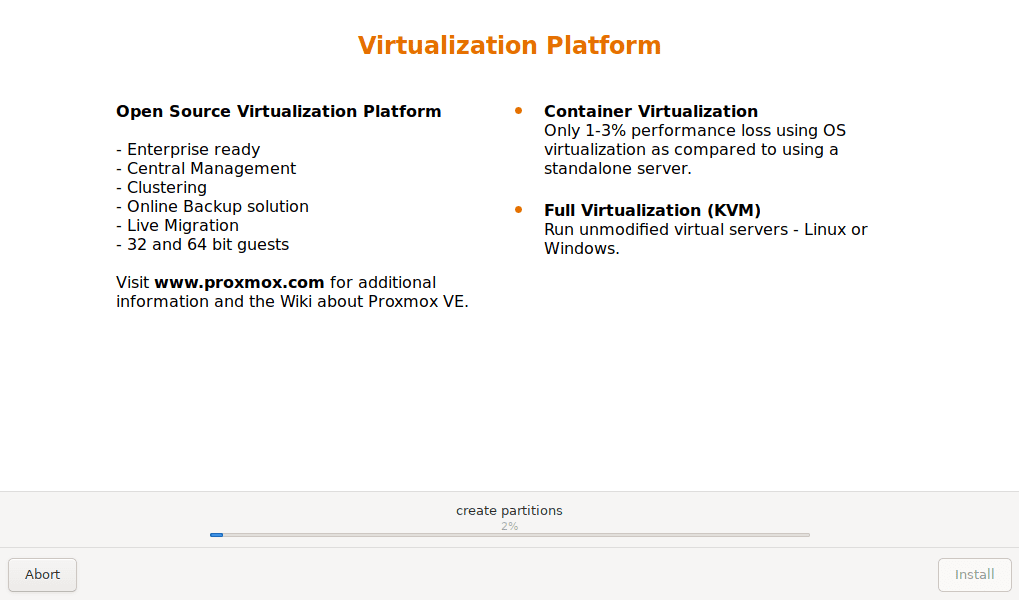
installation underway
Immediately the installation process is over, restart your PC.
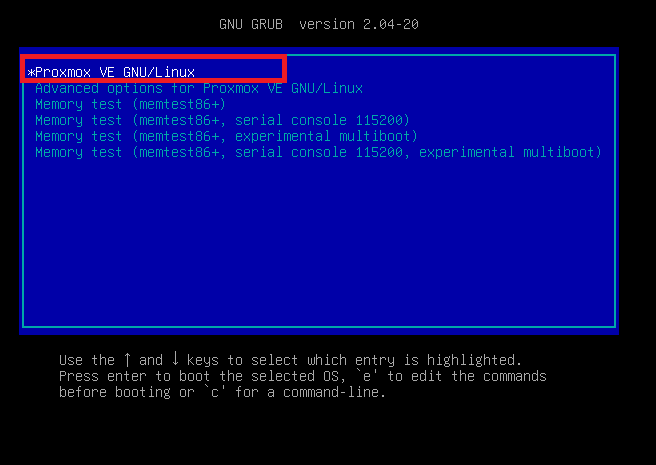
Step 9: The Grub Menu
Once it restarts, a GRUB menu from the Proxmox will be displayed. Select the one written “Proxmox Virtual Environment GNU/Linux” and press “Enter.”
GNU, LINUX window
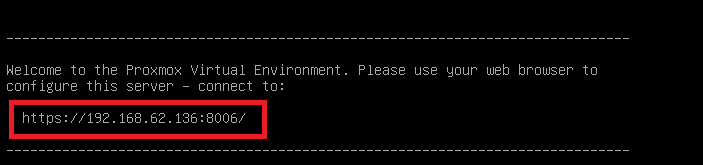
Step 10: Startup
At this point, the Proxmox VE should be up and running. What you do here is visit the management IP as marked in the snapshot below on any given browser.
IP address
Step 11: The Web-based Admin Interface
Since Proxmox VE uses self-signed SSL certificates by default, you may encounter the following cautionary message when visiting the management web User Interface from your browser. So, accept the SSL certificate. In case you are using Chrome, click on “Advanced,” then on the link at the bottom of the page written “Proceed to 192.168.x.x (unsafe)” as highlighted by this snapshot.
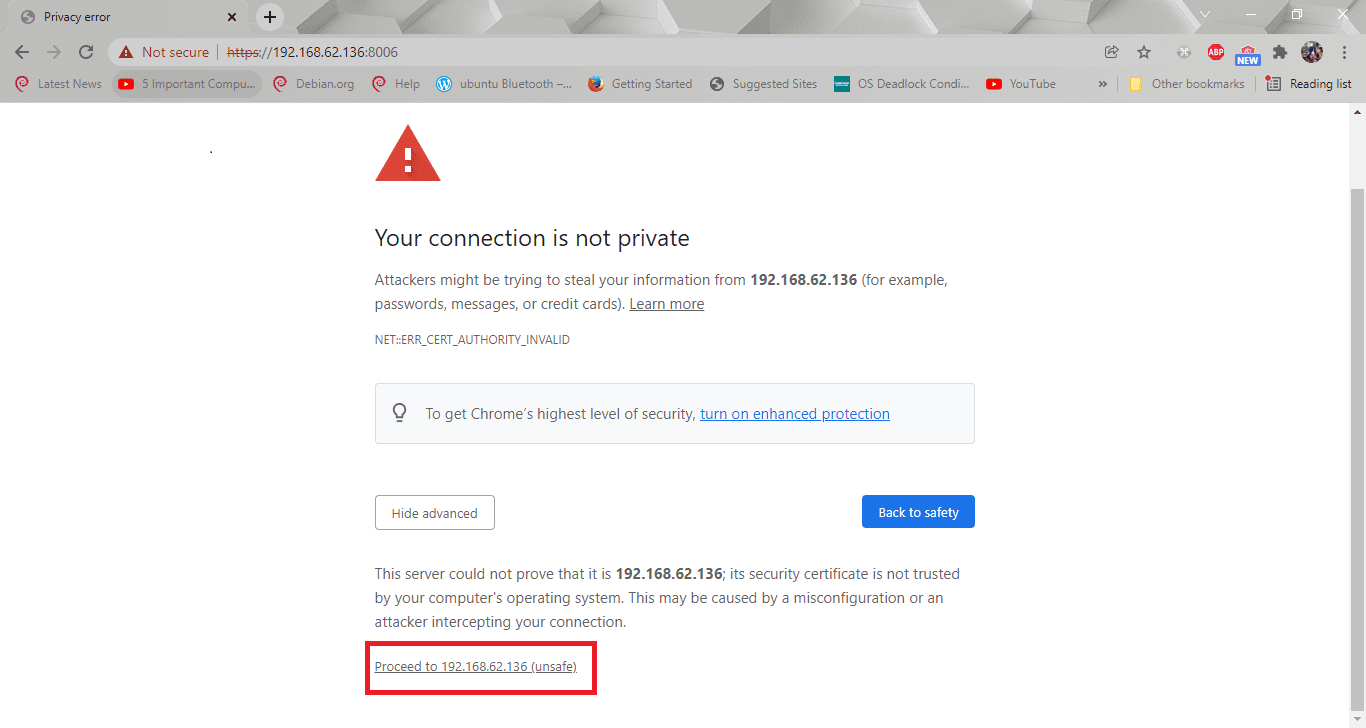
select proceed to unsafe
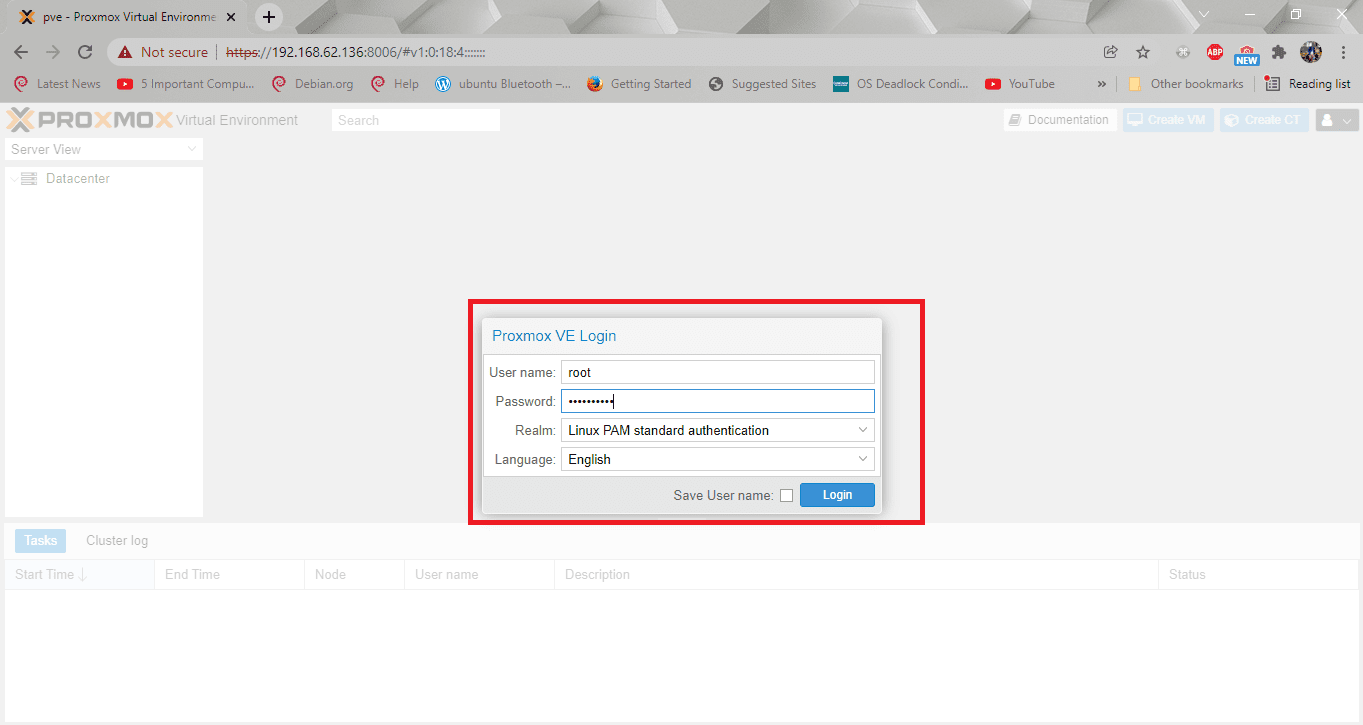
Step 12: Displayed interface
At this juncture, you should see the Proxmox VE web management interface. So, you will log in with the user as “root” and the password you generated when setting up the software.
login
Also, note that you can use this username and password for SSH login.
After that, you should see the next dialogue that will tell you that you don’t have a valid subscription. If you need a paid version, click on the blue highlighted “www.proxmox.com” link to get a list of available options; otherwise, click on “OK” to ignore this message.
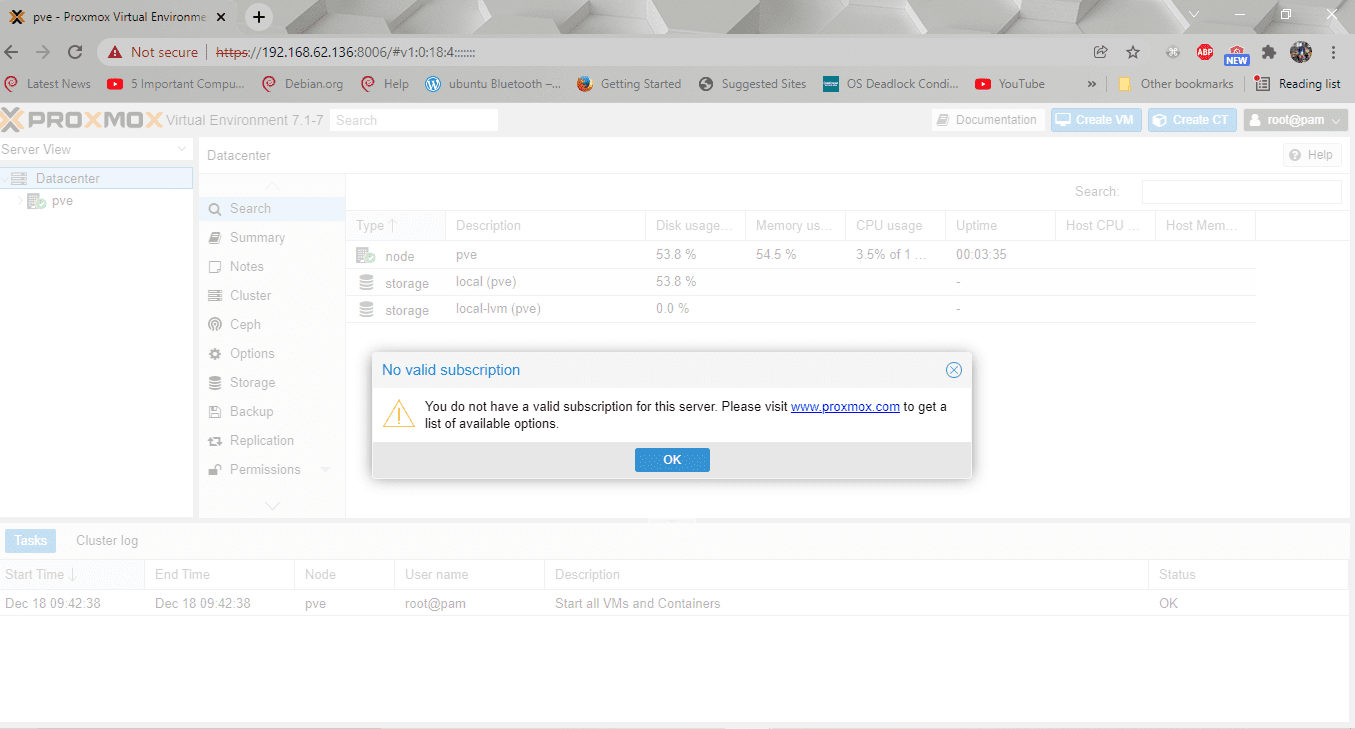
no valid subscription alert
At this point, you can use the Promox VE web-based management interface to create, delete, and a lot more functionalities on your KVM virtual machines and LXC containers.
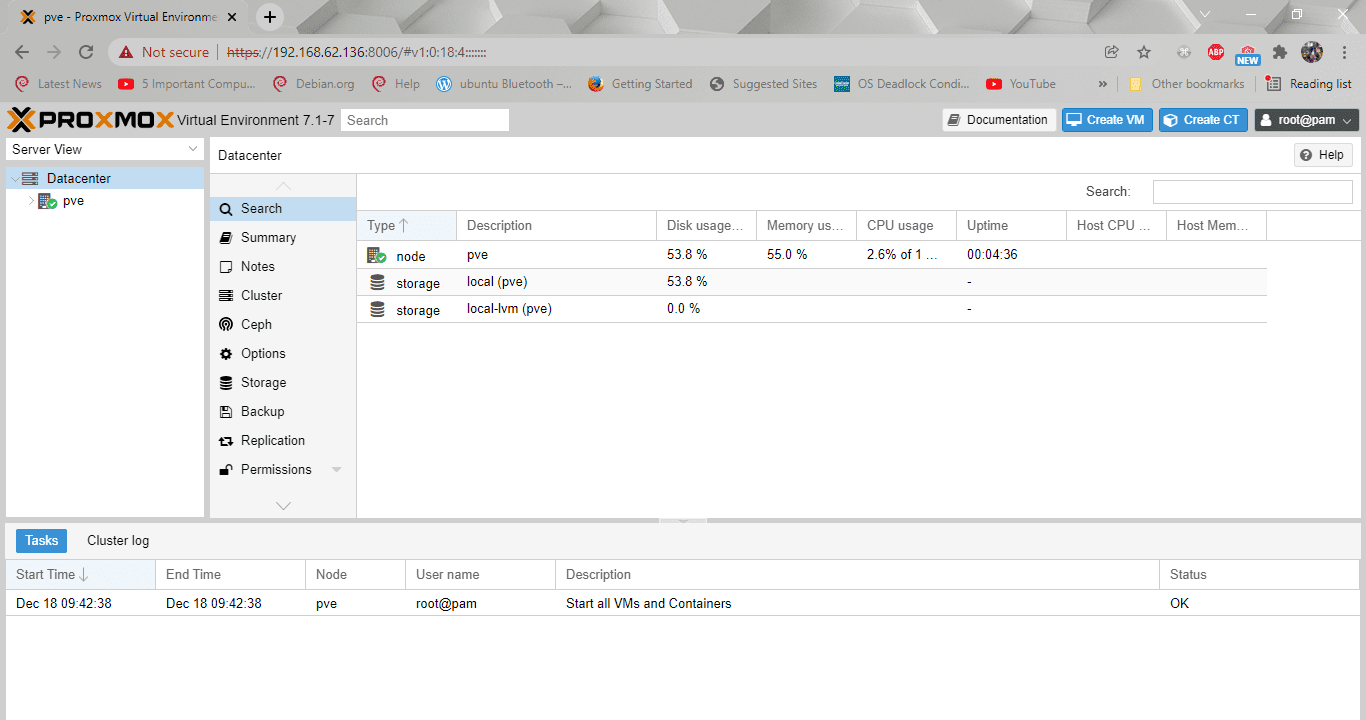
use the web interface to create virtual machines
Alternatively, you can also have a glimpse of the summary of your total system usage from the Summary tab, as seen in the snapshot below.
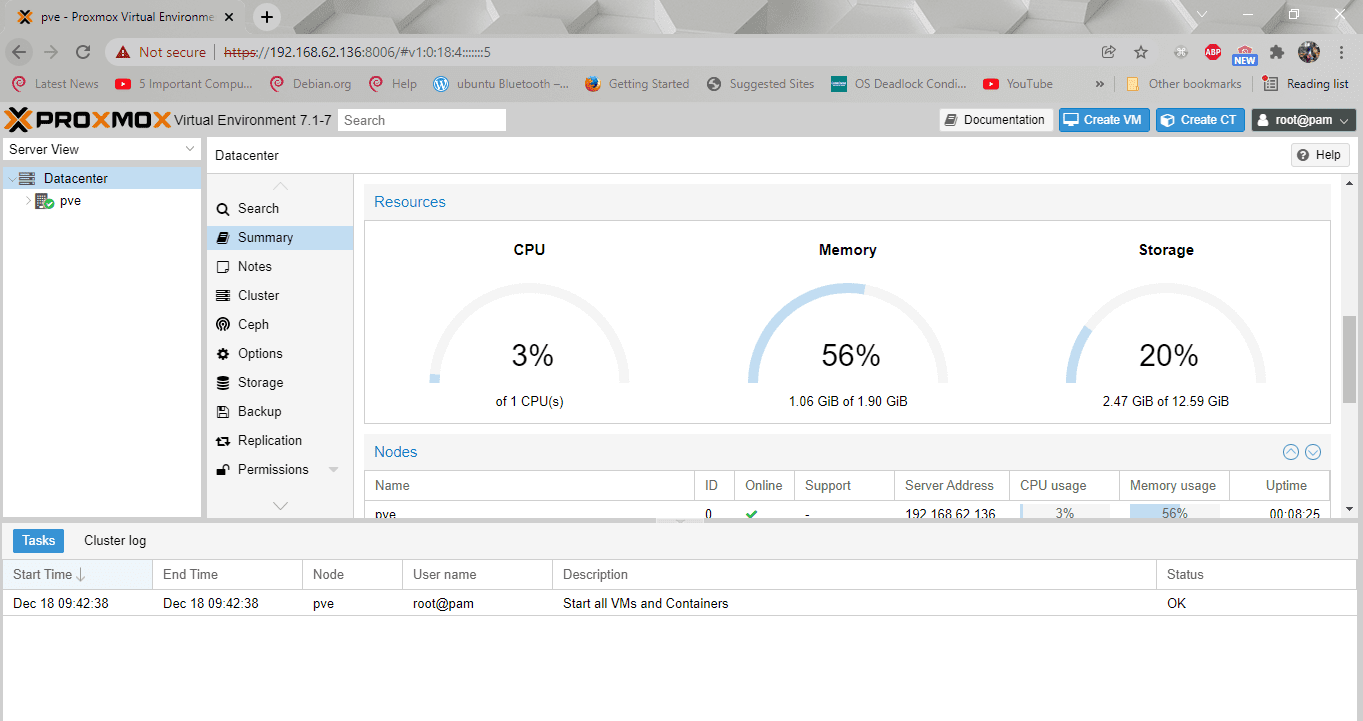
the summary window
Conclusion
Proxmox server is a virtualization fix based on Debian Linux with a modified LTS kernel. Ideally, this software allows you to carry out the deployment and management of containers and virtual machines with unified storage for enhanced efficiency.
To this end, this article has diversely gone through the installation of a Proxmox server on a running instance of a Linux PC, where we configured the software successfully without any issue. After that, we went further to installing it on bare metal, which you should be well versed with as of now. Thanks for reading, and don’t fear to ask in case of anything.
3 comments
Hi, my name is Stanislao (Rome – Italy), I’m quite incompetent, and I would like to ask: if I install the Proxmox server on an instance running on my Linux PC, can I continue to use the PC (or the PC becomes a server). Sorry for my stupid question but I only have one PC. Thank you, Stanislao
for sure you can do that. You may encounter particulars with your flavor of Debian. Such as with adding the repository(different process than standard Debian). I got it going just fine on an MX Linux bookworm distro.
You may also need to make sure you are running systemd as your init.