Zabbix is an open-source monitoring software used for collecting metrics from various devices and systems such as networks devices, VM systems, Linux/Windows systems, and cloud services. Zabbix can send notification alerts of issues in any monitored system.
In this tutorial, we shall provide you a guide on installing and configuring Zabbix on CentOS system. Before that let’s take a look at the prerequisites.
Prerequisites
- Apache web server
- PHP with required extensions
- MySQL/ MariaDB server
Installing Zabbix on CentOS
Login to Terminal as root and start firing up the commands below.
Step 1 – Disable SELinux
Open SELinux configuration and edit the file:
vim /etc/sysconfig/selinux
Change “SELINUX=enforcing” to “SELINUX=disabled”
Save and exit the file. Then reboot the system.
reboot
Step 2 – Install and Configure Apache
Use the following commands:
yum -y install httpd
check service status.
systemctl status httpd.service
If Apache service is not running, start it manually.
systemctl start httpd.service
Enable httpd service on system boot.
systemctl enable httpd
Step 3 – Configure Needed Repositories
Install epel and remi repos.
yum -y install epel-release
yum install http://rpms.remirepo.net/enterprise/remi-release-7.rpm
Disable PHP 5 repositories and enable PHP 7.2 repo.
yum-config-manager --disable remi-php54
yum-config-manager --enable remi-php72
Step 4 – Install PHP
yum install php php-pear php-cgi php-common php-mbstring php-snmp php-gd php-pecl-mysql php-xml php-mysql php-gettext php-bcmath
Modify the PHP time Zone by editing the php.ini file.
vim /etc/php.ini
Uncomment the following line and add your time zone.
date.timezone = Australia/Sydney
Step 5 – Install MariaDB
yum --enablerepo=remi install mariadb-server
Start the MariaDB service.
systemctl start mariadb.service
Enable MariaDB on system boot.
systemctl enable mariadb
Run the following command to secure MariaDB.
mysql_secure_installation
Add a new root password and continue. Then it will ask a few questions. Type “Y” to agree to that.
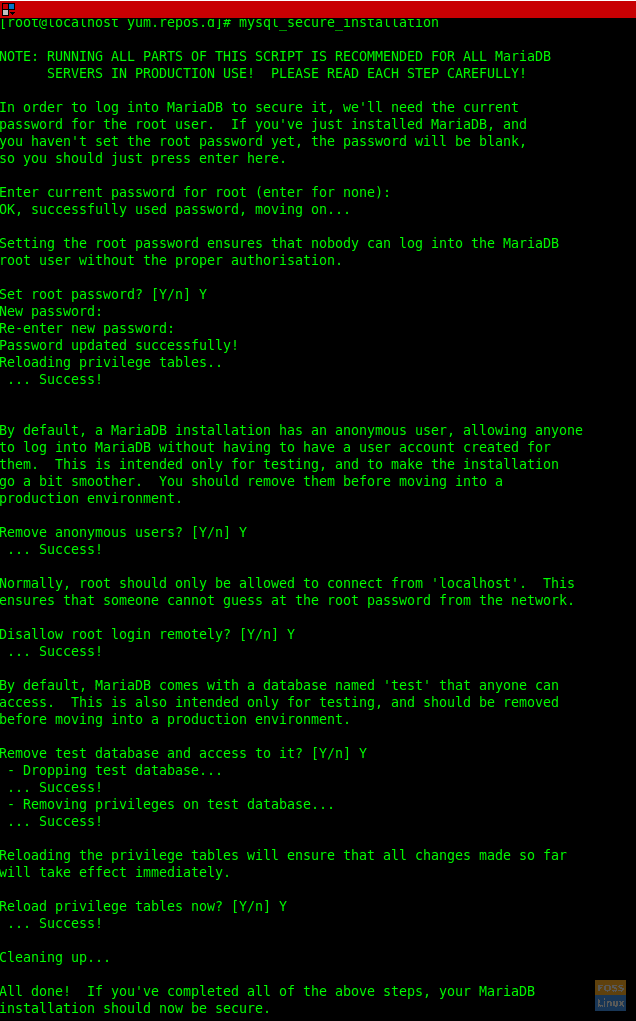
MariaDB Secure Installation
Login to DB server and verify.
mysql -u root -p
Step 6 – Create a Database for Zabbix
You can choose any name for the database in place of fosslinuxzabbix in the below command:
Create database fosslinuxzabbix;
Create a DB user and grant privileges.
create user 'zabbixuser'@'localhost' identified BY '@dfEr234KliT90';
grant all privileges on fosslinuxzabbix.* to zabbixuser@localhost ;
Flush privileges.
flush privileges;
Step 7 – Install Zabbix and needed dependencies
Adding Zabbix repository. Copy the latest download URL from the official website. Paste it in the below command appropriately.
rpm -ivh https://repo.zabbix.com/zabbix/4.0/rhel/7/x86_64/zabbix-release-4.0-1.el7.noarch.rpm
Install Zabbix.
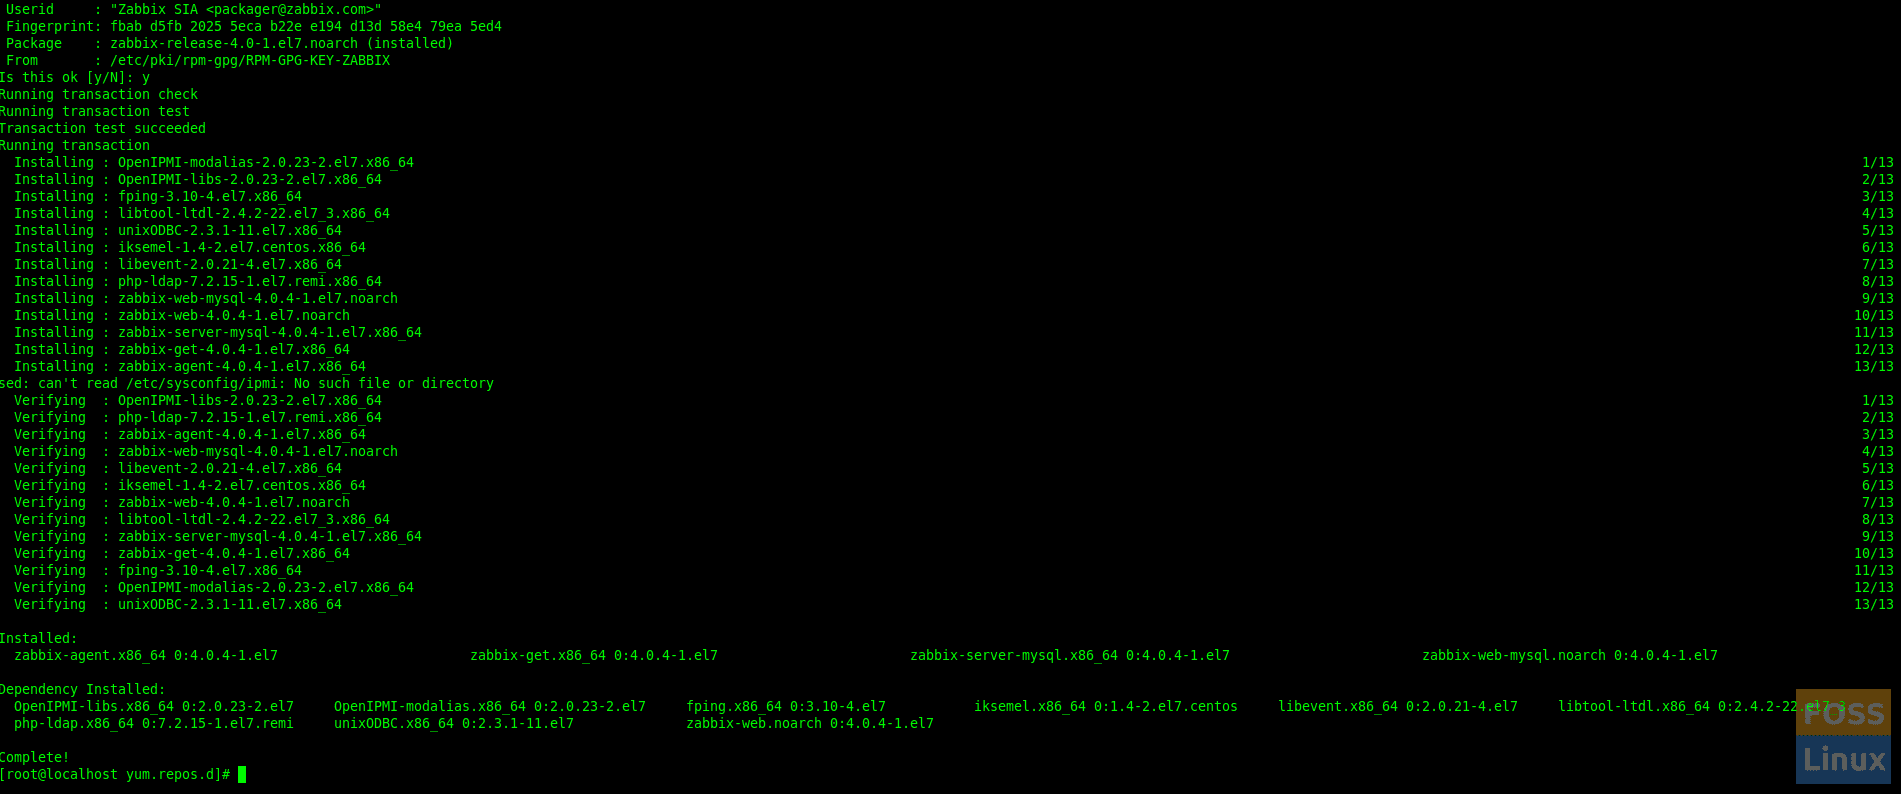
yum install zabbix-server-mysql zabbix-web-mysql zabbix-agent zabbix-get
Step 8 – Configure Zabbix
Change Time Zone by editing the Zabbix Apache configuration file.
vim /etc/httpd/conf.d/zabbix.conf
Uncomment the following line and add your Time Zone.
php_value date.timezone Australia/Sydney
PHP Parameters should look like as follows:
php_value max_execution_time 300
php_value memory_limit 128M
php_value post_max_size 16M
php_value upload_max_filesize 2M
php_value max_input_time 300
php_value max_input_vars 10000
php_value always_populate_raw_post_data -1
php_value date.timezone Australia/Sydney
Restart HTTPD service.
systemctl restart httpd.service
Generally, Zabbix installation package gives SQL file which includes an initial schema and data for the Zabbix server with MySQL.
Change directory and go the Zabbix directory.
cd /usr/share/doc/zabbix-server-mysql-4.0.4/
Import the MySQL dump file.
zcat create.sql.gz | mysql -u zabbixuser -p fosslinuxzabbix

Import SQL Dump
Now modify the Zabbix configuration file with Database details.
vim /etc/zabbix/zabbix_server.conf
Modify the following parameters
DBHost=localhost
DBName=fosslinuxzabbix
DBUser=zabbixuser
DBPassword=@dfEr234KliT90
Then save and exit the file. Restart Zabbix service.
systemctl status zabbix-server.service
Enable Zabbix on system boot.
systemctl enable zabbix-server.service
Modify firewall rules.
firewall-cmd --add-service={http,https} --permanent
firewall-cmd --add-port={10051/tcp,10050/tcp} --permanent
firewall-cmd --reload
Now restart httpd service.
systemctl restart httpd
Step 9 – Setup Zabbix
You can access Zabbix using following URL:
http://Server-Host-Name Or IP /zabbix/
You should see the welcome page.
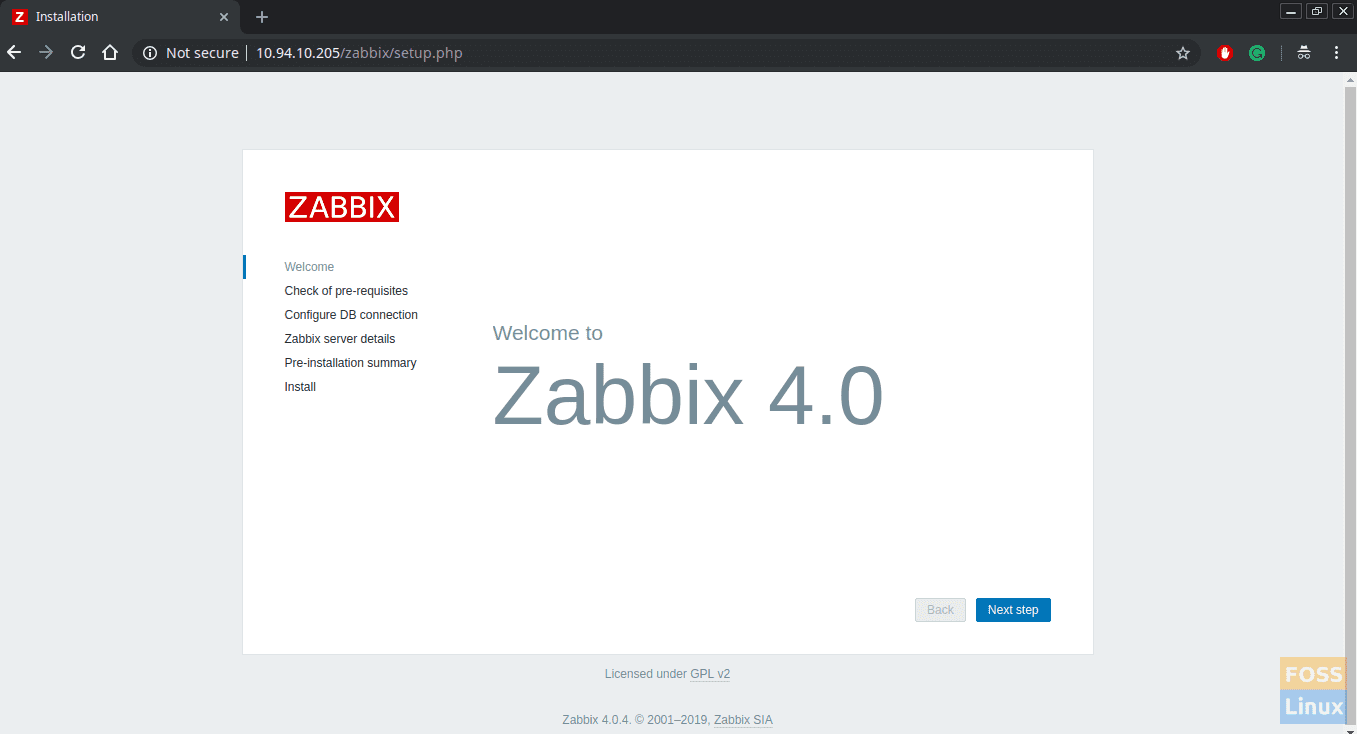
Zabbix Welcome Page
Click Next.
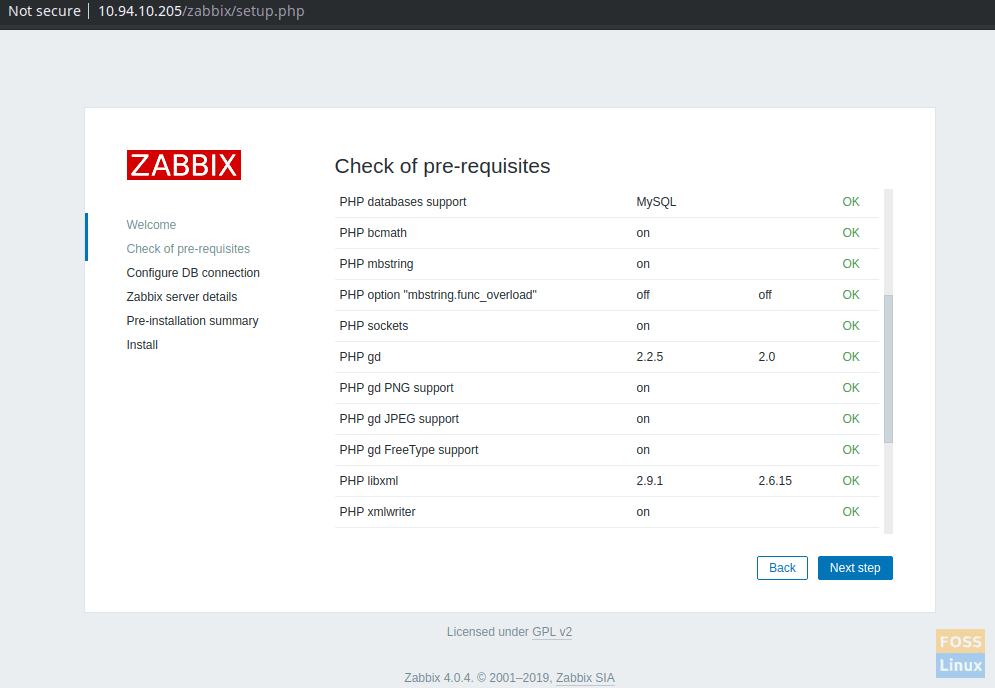
Check Of Pre-Requisites
Here you Zabbix will check installed PHP, MySQL/MariaDB versions and parameters, etc.
If you see any parameter failing, you have to modify it and refresh the page.
E.g.:- for PHP parameter you have to modify (/etc/php.ini) file. Click Next.
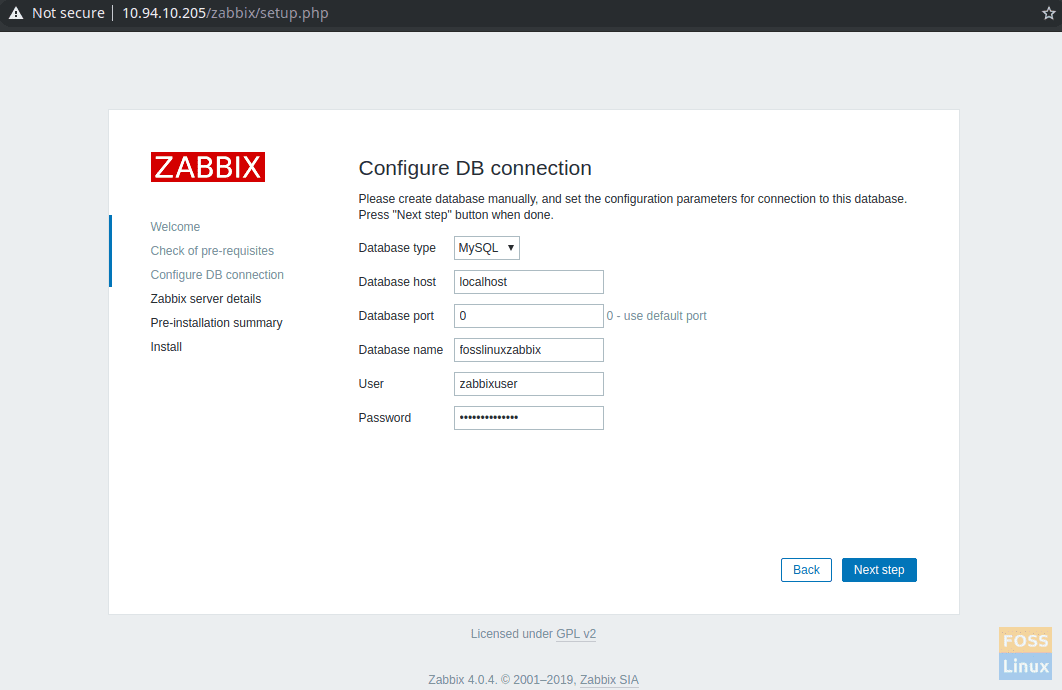
Configure DB Connection
Add database details and click Next. Then you will see server details, and you can add any name for “Name”.
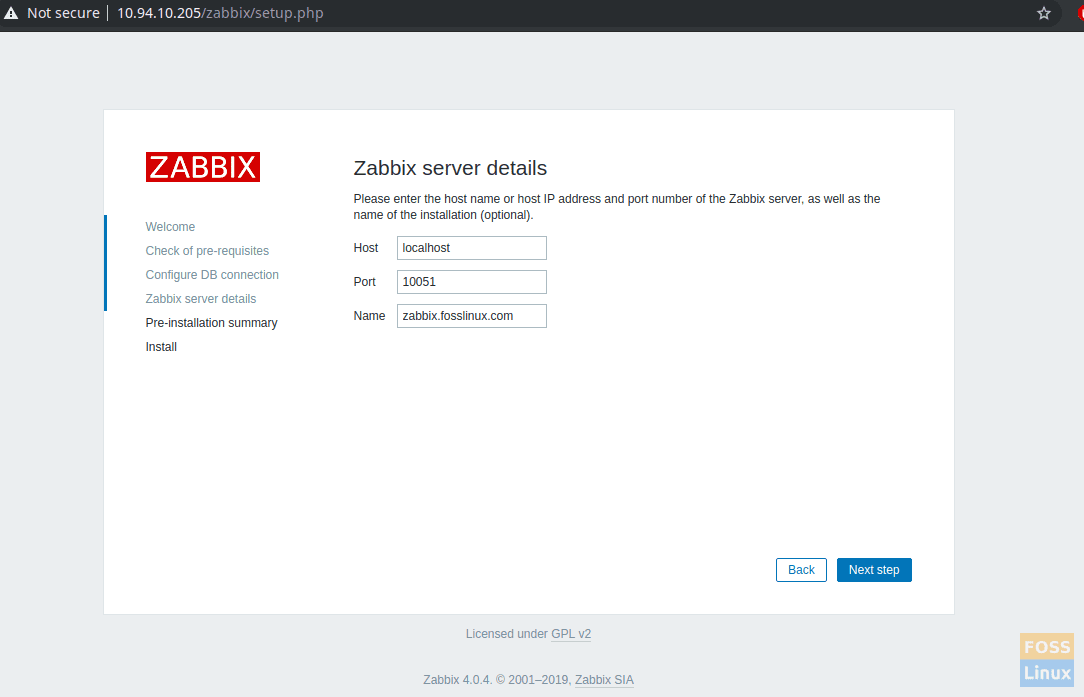
Zabbix Server Details
Click Next. You should see the Database details and server details.
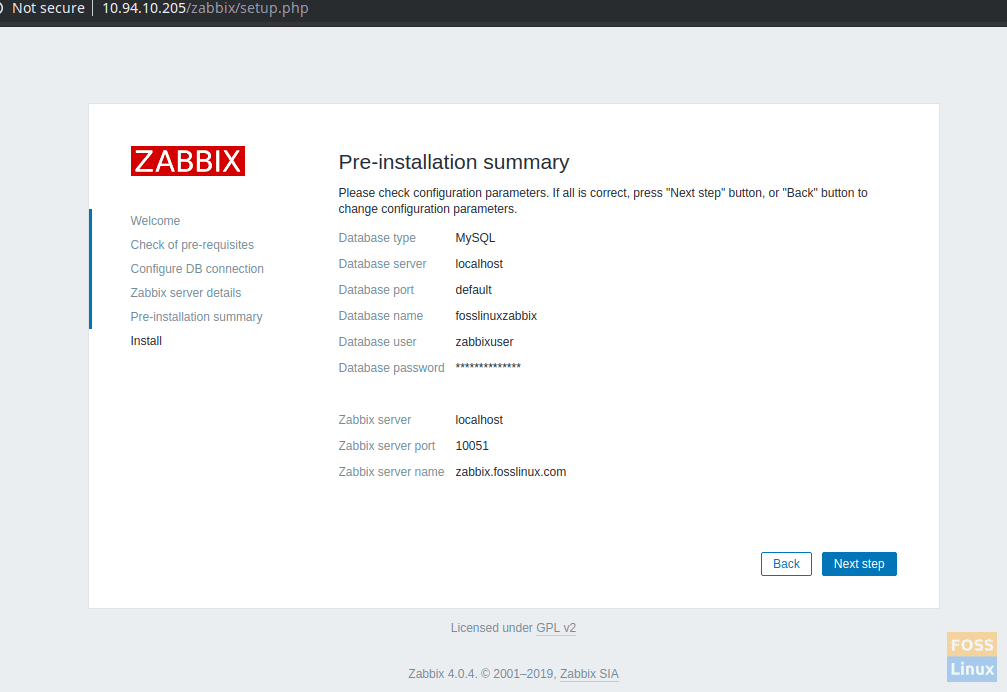
Pre-installation Summary
Click Next to complete the installation.
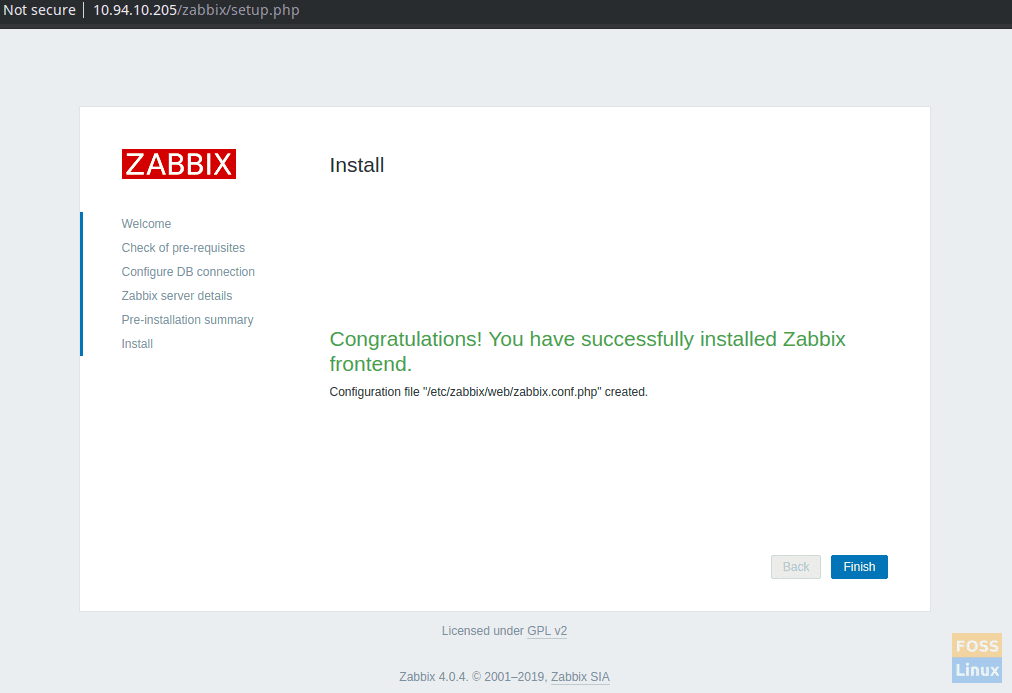
Successfully Installed
Click finish to access the login page.
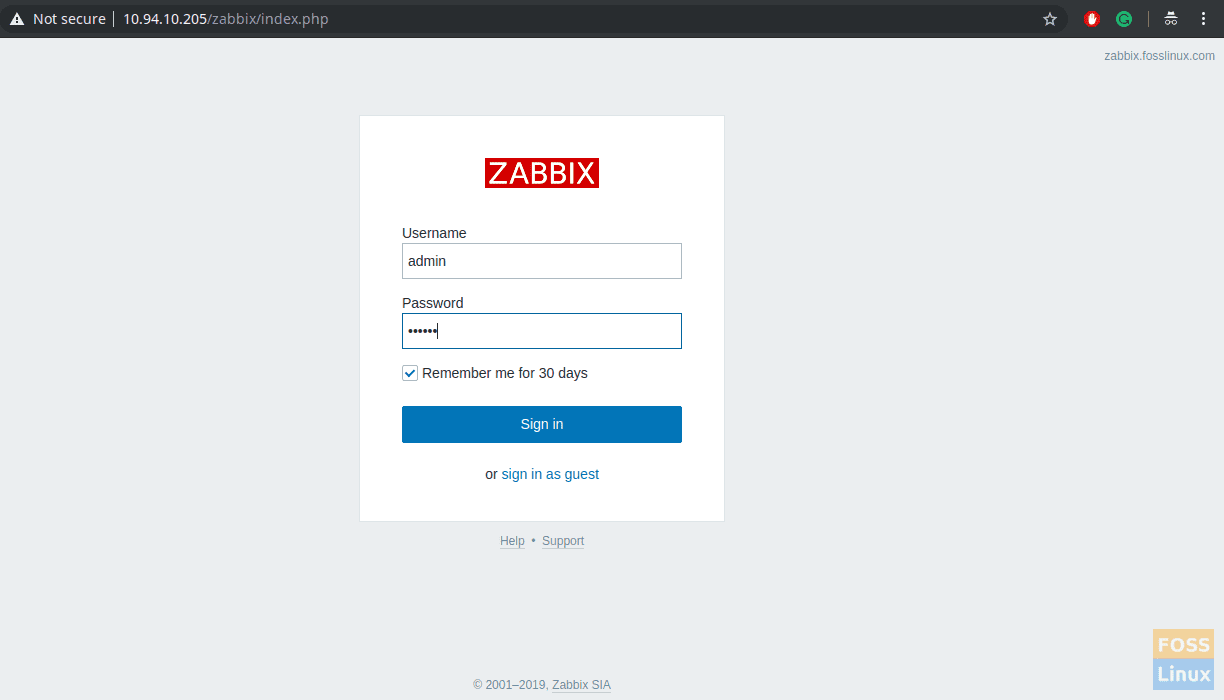
Login Page
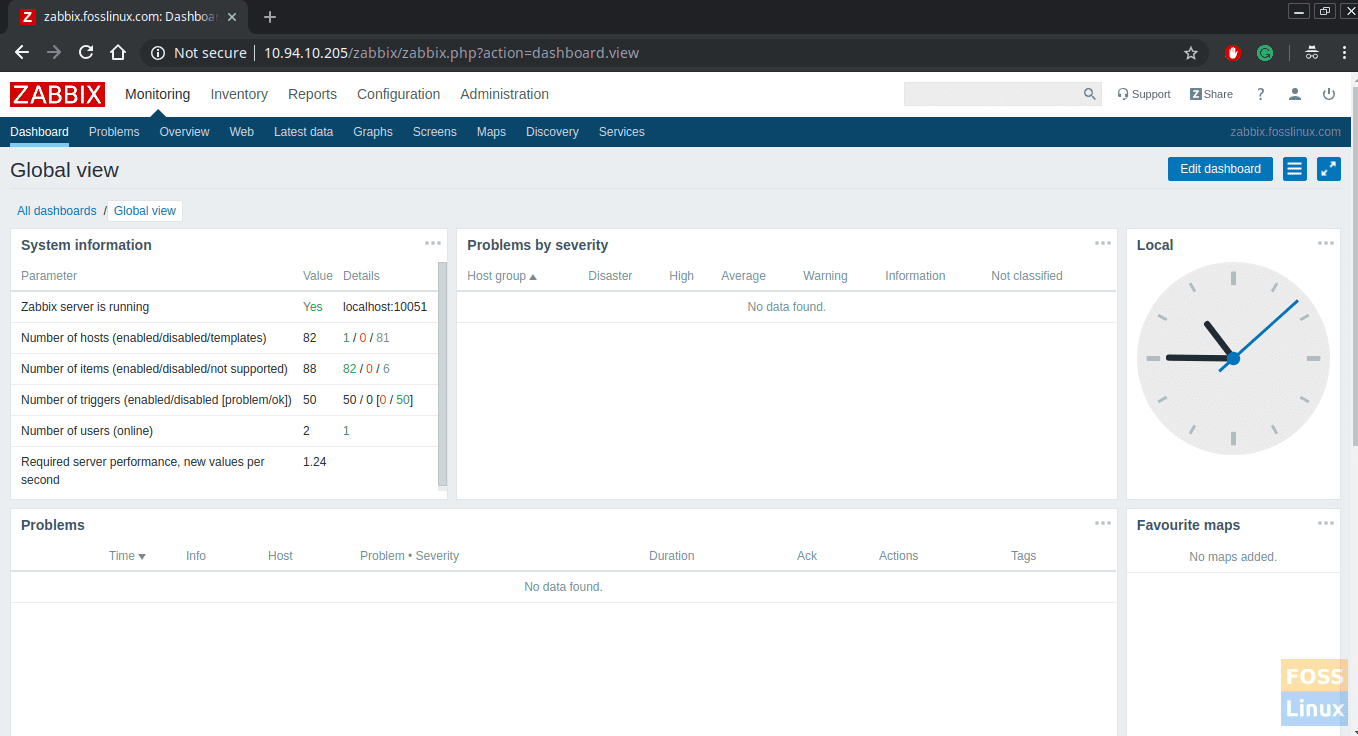
The default login name is “admin” and password is “zabbix”. You will go to the Zabbix Dashboard.
Step 10 – Monitor Servers with Zabbix Agent
Zabbix Agent collects the data from the client machine and sends them to the Zabbix Server. We will install the Zabbix agent on the Ubuntu machine to monitor it.
Execute following commands to install the agent on Ubuntu 18.04 LTS. As usual, replace the URL with the latest from the official website.
wget https://repo.zabbix.com/zabbix/4.0/ubuntu/pool/main/z/zabbix-release/zabbix-release_4.0-2+bionic_all.deb
dpkg -i zabbix-release_4.0-2+bionic_all.deb
apt update
Install agent.
apt-get install -y zabbix-agent
Now modify the agent configuration file.
vim /etc/zabbix/zabbix_agentd.conf
Modify the following parameters. Replace IP and hostname with yours in the below command:
Server=10.94.10.205
ServerActive=10.94.10.205
Hostname=UbuntuFosslinux
Save and exit the file.
Restart Zabbix agent.
systemctl restart zabbix-agent
Enable on system boot.
systemctl enable zabbix-agent
Step 11 – Add host to monitor on Zabbix server
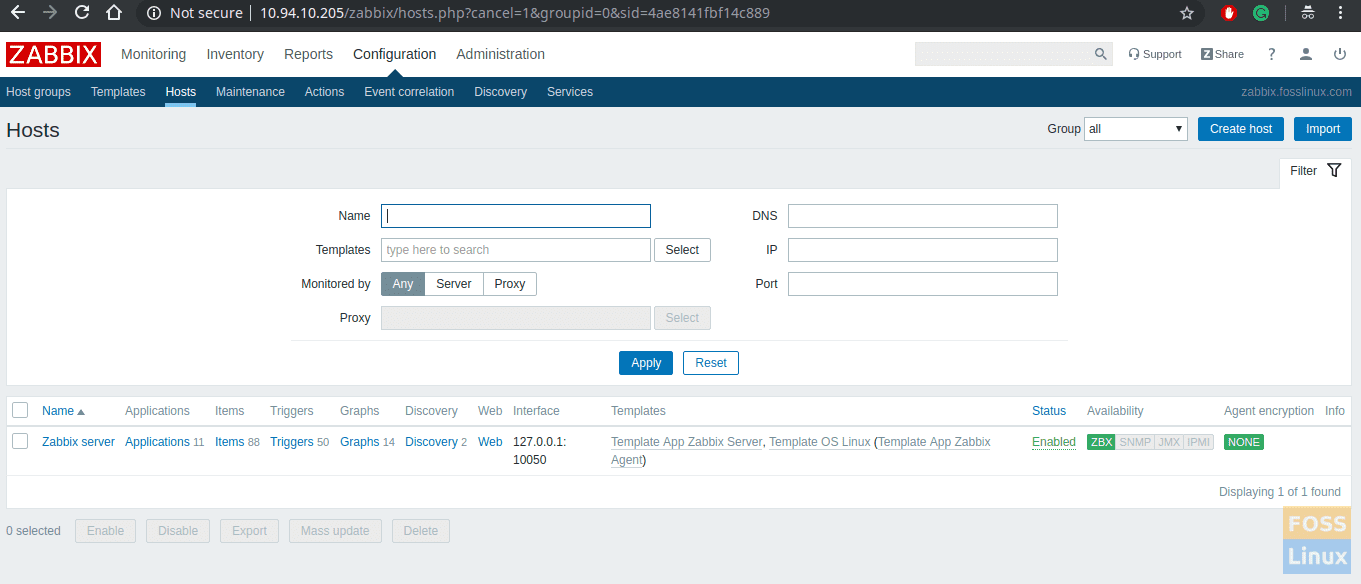
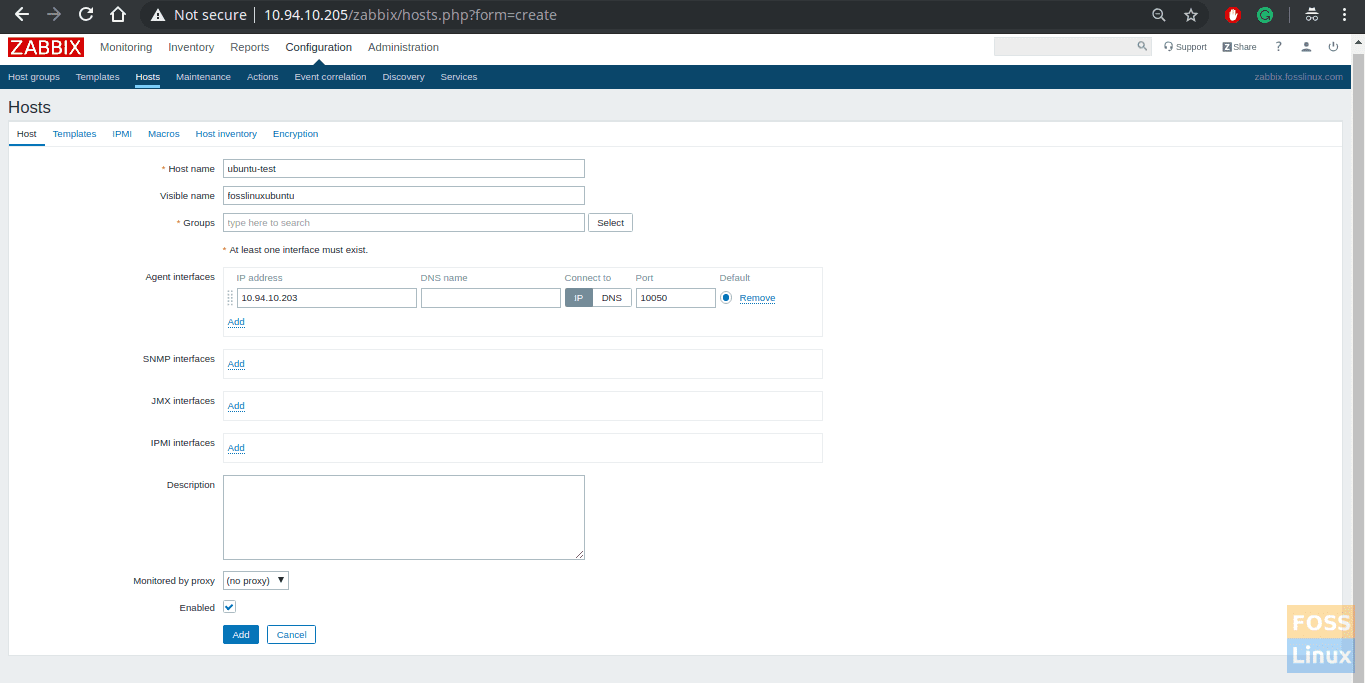
Go to Configuration > Hosts > Create host.
Then you will get the interface as follows:
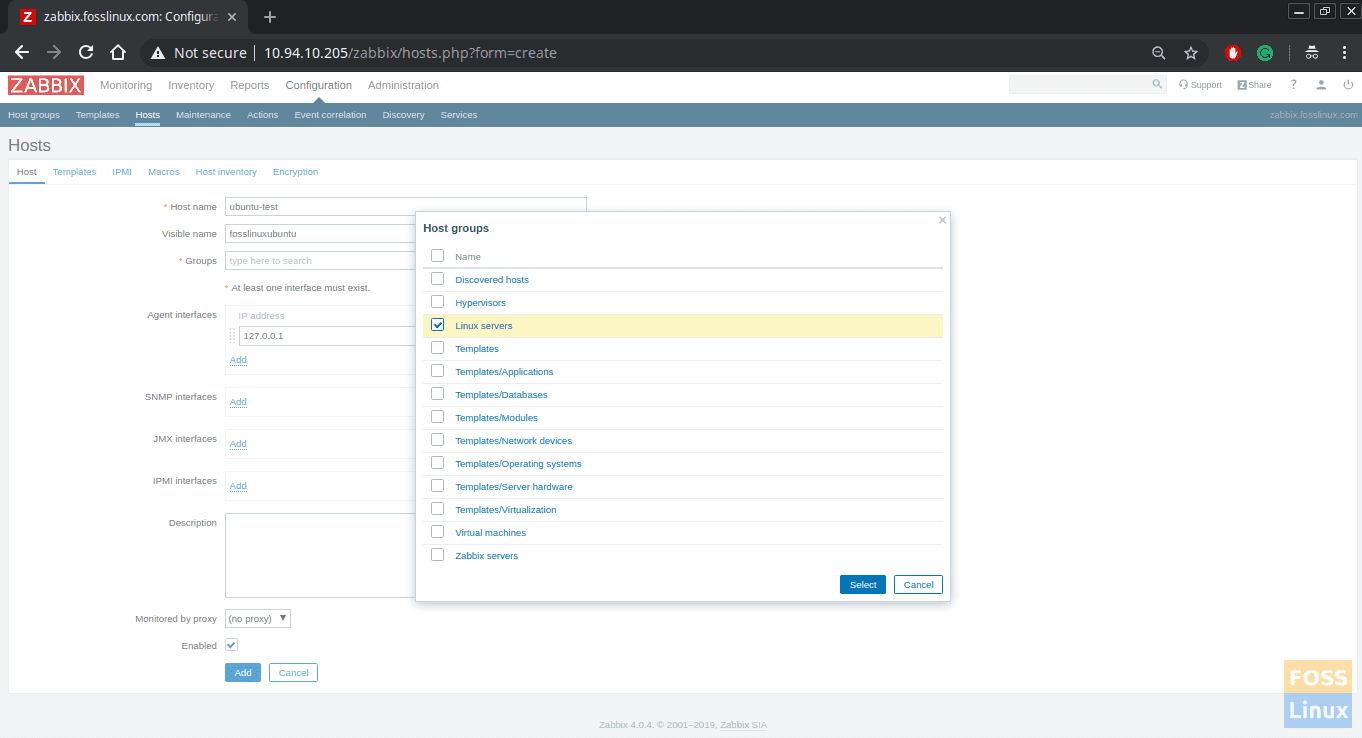
Add Hostname, Visible Name and agent interface IP. Select a group from the list. In our scenario, we are going to monitor the Ubuntu server. So we will select Linux servers from the list.
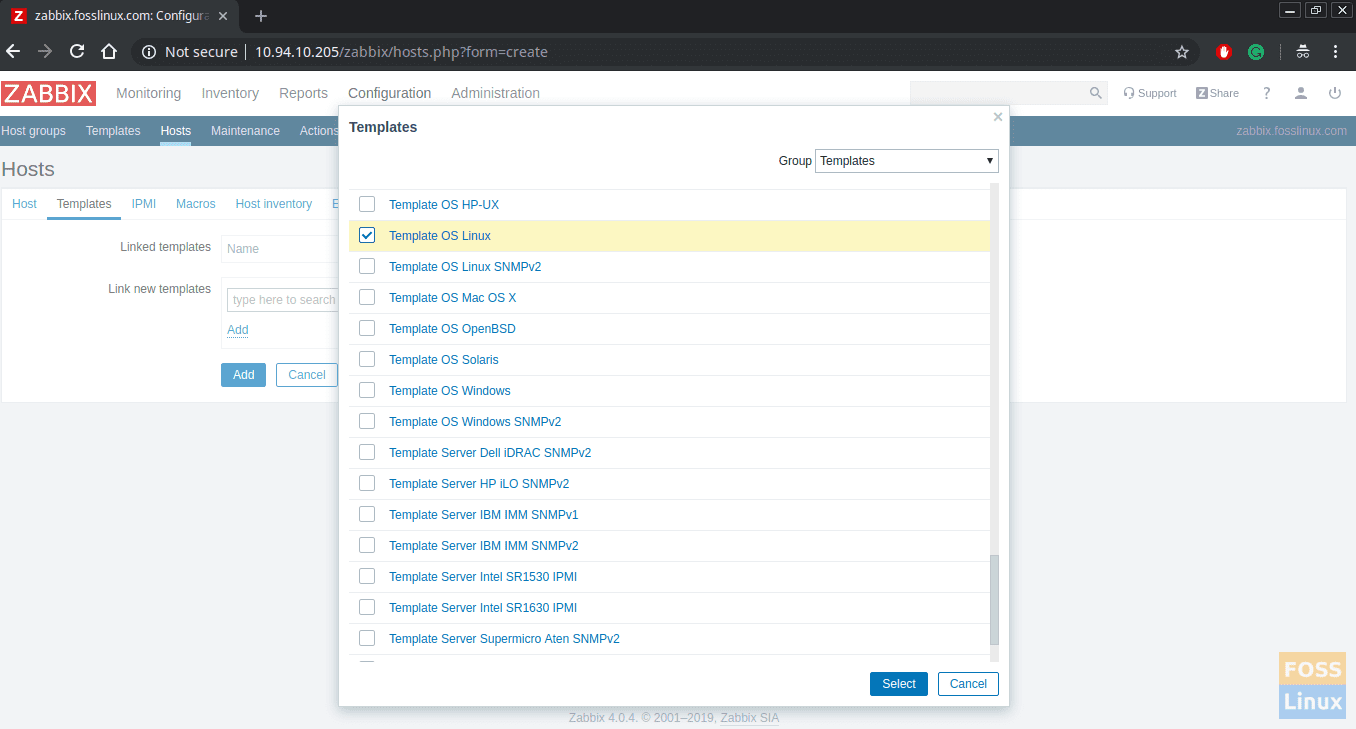
Select and go to Template Tab. Then click on the select button and select “Template OS Linux” from the list.
Click “add,” and it will list linked templates.
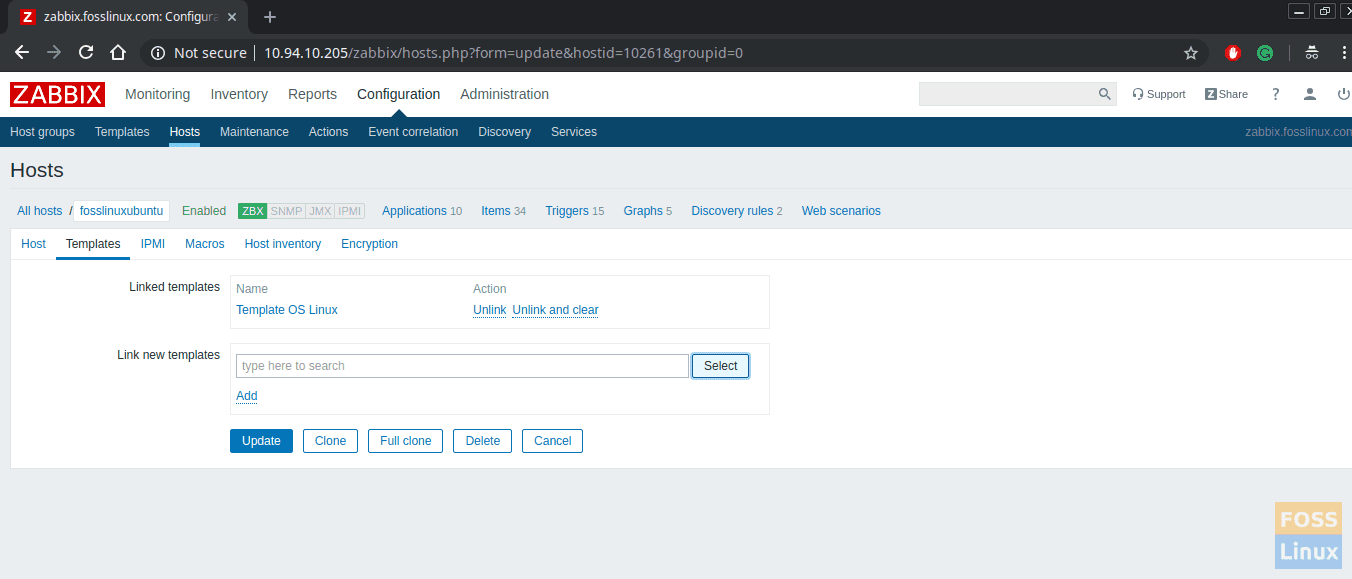
Add Template
Click on the update button to update.
Step 12 – View Graphs
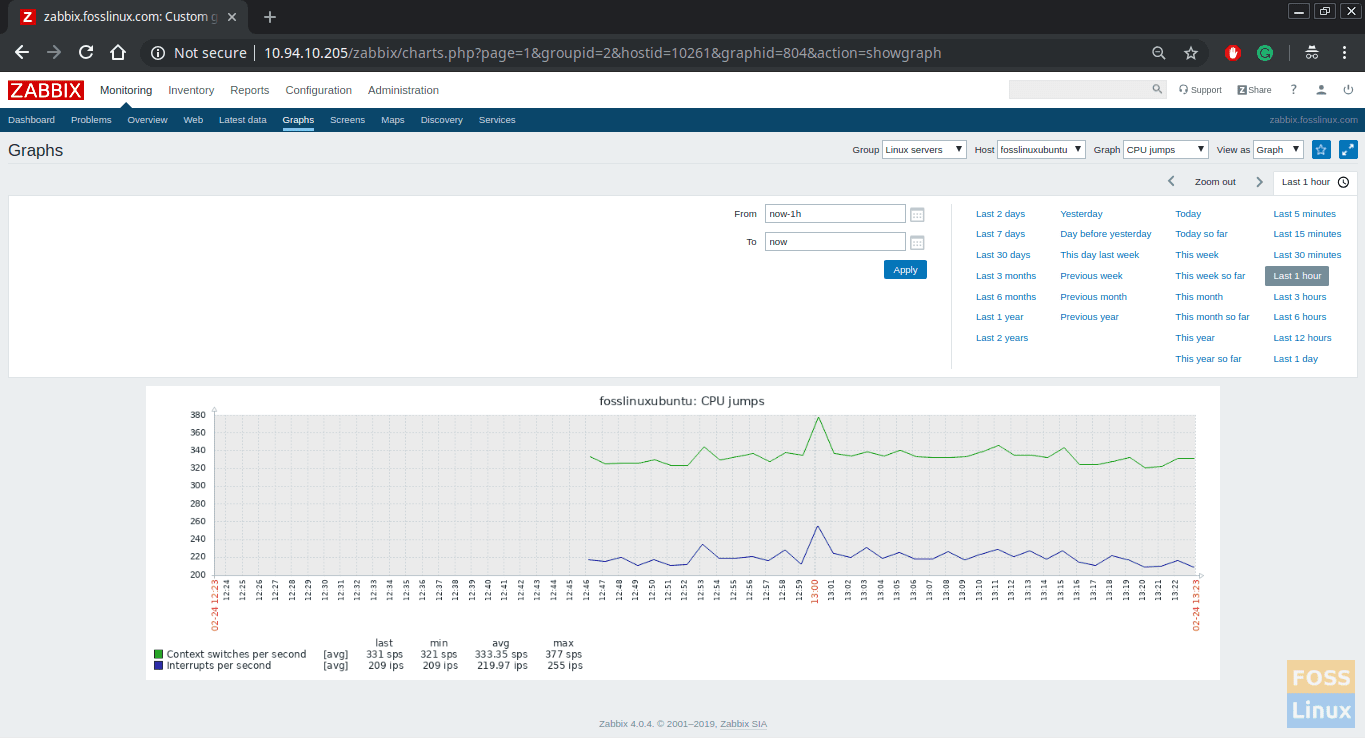
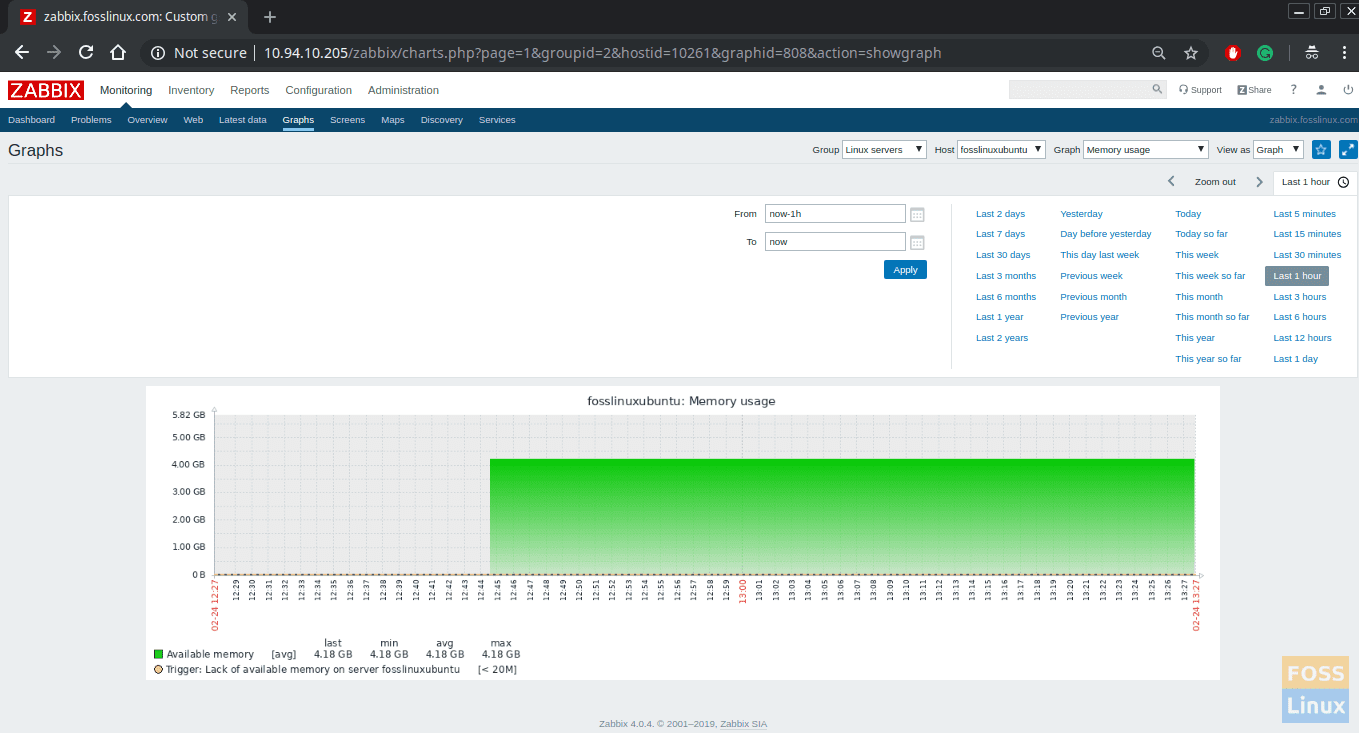
Go to Monitoring > Graphs. You can select needed group, host and graph to display the graphs.
Congratulations! You have successfully configured Zabbix server and added hosts to monitor. Let us know your feedback in the comments below.


24 comments
Install fails! even when disabling php5.4, it can’t get past dependencies:
–> Processing Conflict: php-mysql-5.4.16-46.el7.x86_64 conflicts php-mysqlnd
–> Finished Dependency Resolution
Error: Package: php-pecl-mysql-1.0.0-0.17.20160812git230a828.el7.remi.7.2.x86_64 (remi-php72)
Requires: php(api) = 20170718-64
Installing: php-common-5.4.16-46.el7.x86_64 (base)
php(api) = 20100412-64
Error: php-mysql conflicts with php-mysqlnd-5.4.16-46.el7.x86_64
Error: Package: php-pecl-mysql-1.0.0-0.17.20160812git230a828.el7.remi.7.2.x86_64 (remi-php72)
Requires: php(zend-abi) = 20170718-64
Installing: php-common-5.4.16-46.el7.x86_64 (base)
php(zend-abi) = 20100525-64
You could try using –skip-broken to work around the problem
You could try running: rpm -Va –nofiles –nodigest
yeah, as per testing I encounter the same errors as you mentioned
I think you install php-mysqlnd instead php-mysql
very nice article.
Thanks, the best tutorial that works for me than on the official website.
this article guided the installation completely with php 5.4 errors. the remi repo helped to install php72 flawlessly and setup got successful.
hi guys, there is always issues with php. As I change /etc/httpd/conf.d/zabbix.conf settings, it shows post_max_size, “max_execution_time”, “max_input_time” failed. As I change to any value and restarted httpd, it does not affect to config file and shows the old values. Could u pls help.
Is there any /etc/php/php.ini or /etc/php.ini file ?
EDIT : to check which php.ini file is used, create a .php file with in it, browse it and look for Loaded configuration file, that should give you the right php.ini file to modify
Thank you so much.
Wish you best
Logging in with “admin” | “zabbix” does not work for me.
upper case “A”
need to update Admin password in database…
hi there
at the very first i appreciate all your effort on preparing this very useful article.
i got an issue with timezone part. since i changed the default value meaninng ‘Australia/Sydney’ to ‘Iran/Tehran’ and while i was loading zabbix UI it gave back the timezone erro and when i intend to change the timezone value by /etc/php.ini directory i no longer can change this value like whem i set it to ‘Iran/Tehran’ consequently i can’t access to my VM zabbix UI.
can anybody help me?
The article is straight forward, thanks.
This works great, thank you.
Hello all,
I’m getting the below issue while trying to access Zabbix in the browser. Kindly help me to fix it.
Forbidden
You don’t have permission to access /zabbix/ on this server.
Hello, my db connection stuck.
incorrect default charset for zabbix database” “utf8mb4” instead “UTF8,UTF8MB3”.
Please help me.
Incorrect default charset for Zabbix database: “latin1” instead “UTF8,UTF8MB3”.
create database zabbixdb character set utf8 collate utf8_bin;
The “character set” is important to improve the fail
Please show me haw to do it. many thanks.
work well bruhh
while connecting to DB Connection. I am facing the below error. I have tried to change the variables, tried different solution but issue is still persisting. can u please provide solution
“Details Cannot connect to the database.Incorrect default charset for Zabbix database: “utf8mb4” instead “UTF8,UTF8MB3″..”
It appears you’re having a problem connecting to the Zabbix database due to a character set mismatch. The default character set for your database is “utf8mb4”, while Zabbix expects “UTF8” or “UTF8MB3”.
The utf8mb4 character set is capable of storing any unicode character, which is useful for certain applications that need full unicode support. However, Zabbix until version 5.0 does not support utf8mb4.
The solution depends on your MySQL/MariaDB version and your Zabbix version. If your Zabbix version supports utf8mb4 (Zabbix 5.2 and onwards), you should update your Zabbix configuration to use utf8mb4.
If your Zabbix version does not support utf8mb4, you have to change the default character set for your Zabbix database to “UTF8”.
If you stuck at error “Details Cannot connect to the database.Incorrect default charset for Zabbix database: “utf8mb4” instead “UTF8,UTF8MB3″..”, I have a blog to fix this with script
https://viblo.asia/p/zabbix-incorrect-characterset-for-zabbix-database-latin1-instead-utf8-utf8mb3-EoW4oRZXVml