
Creating a Wi-Fi Hotspot is the easiest way of sharing internet connection via your computer’s Ethernet connection to wireless devices, including smartphones and tablets. To enable that, you need to first turn your laptop’s wireless network into a Wi-Fi Hotspot and then connect your devices to the Wi-Fi hotspot you created.
Creating Wi-Fi Hotspot in Ubuntu 17.10
Step 1) Make sure your computer is connected to an Ethernet connection or a data card internet.
Step 2) Check Wireless device is turned ON in your computer.
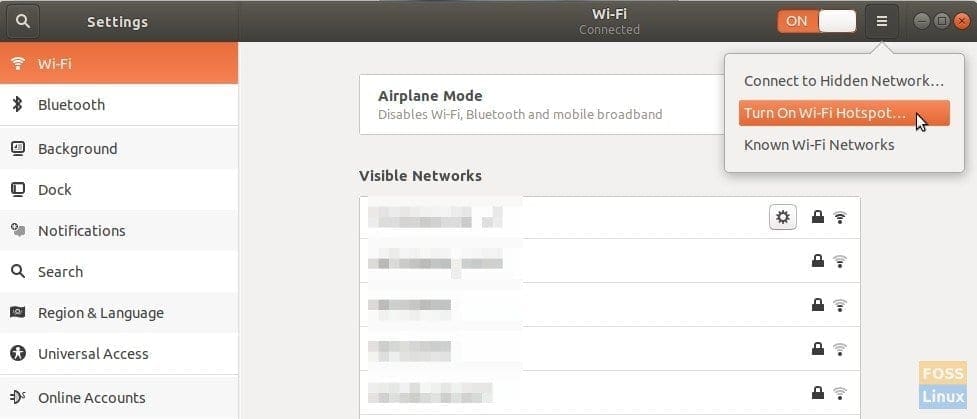
Step 3) Go to “Activities” > “Settings”.
Step 4) Click the “Wi-Fi” tab in the left pane.
Step 5) Click on the tribar icon located on the top right corner of the ‘Settings’ app and select “Turn ON Wi-Fi Hotspot…”.
Turn ON Wi-Fi Hotspot in Ubuntu 17.10
Step 6) Click “Turn On”.
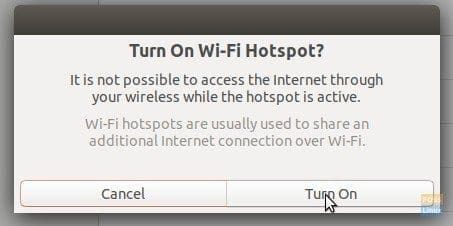
Confirm Turning On Wi-Fi Hotspot
Step 7) You should see the Wireless SSD name, Security type, and password details.
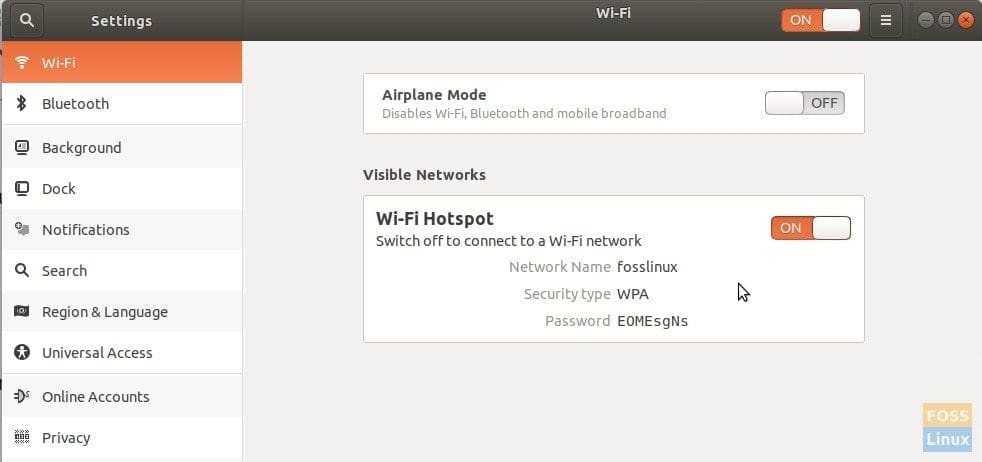
Created Wi-Fi Hotspot details
Step 8) Congrats! You can go ahead and connect your mobile devices to the just created wireless network. You can quickly see the status from the quick settings menu.
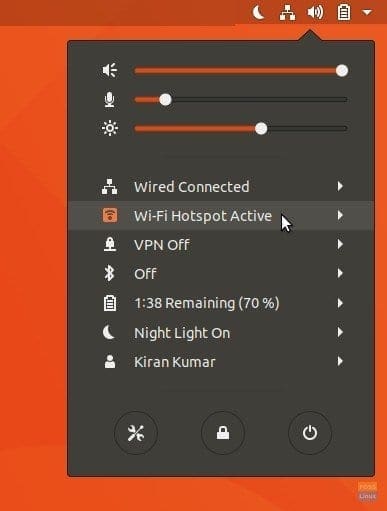
Ubuntu 17.10 Quick Settings
Configuring the Wi-Fi Hotspot in Ubuntu 17.10
In Step (7), we noticed that the system automatically names the Hotspot name as PC name, but not everybody may want precisely that. Here is how you can change the SSID and password.
Step 1) With the Wireless Hotspot active, launch ‘Terminal’ and enter the following command:
nm-connection-editor
Step 2) In the “Network Connections,” select the Wi-Fi name and click on the gear icon at the bottom.
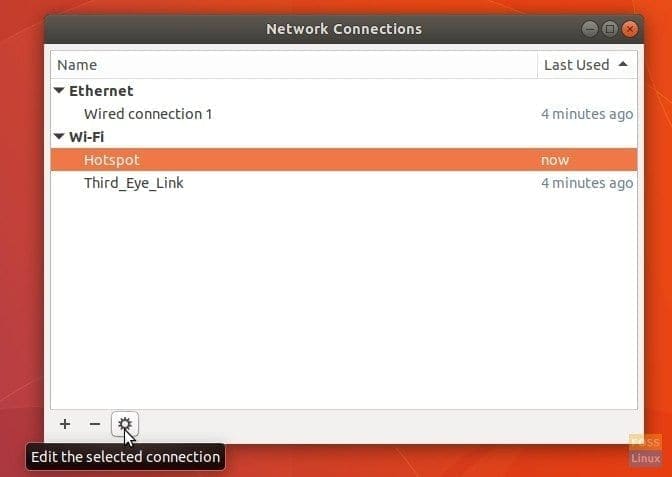
Configuring the Connection
Step 3) Go ahead and change the Hotspot connection parameters, including SSID, Password, etc. as desired.
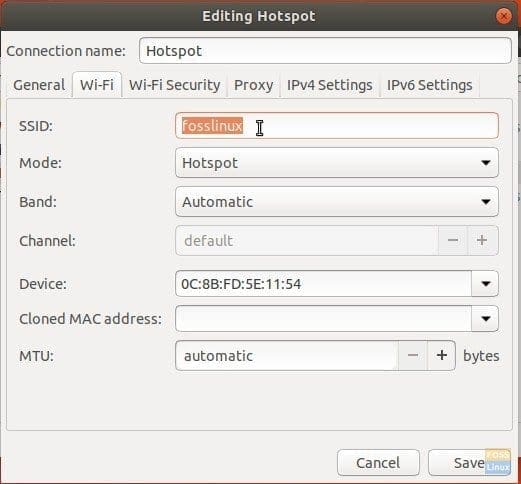
Changing Wi-Fi Hotspot Name, Password, and Other Parameters
6 comments
Fund this very useful thanks
My windows 10 can create an hotspot from wireless connection. I don’t understand why ubuntu don’t have this option and always ask for ethernet connection
Thank you. That was very helpful. I didn’t know how to change the name of my hotspot earlier. Cheers!
Thanks, this changes the password however, the SSID / hotspot name always reverts back to the computer name.
Is there any way to change the hotspot name?
Thank you!
I have setup a wifi hotspot (Ubuntu 20.10) but when I want to connect with my Samsung s6 smartphone or an other device i get ‘can not verify’ or ‘verificatie fout’ in dutch (verification fault).
I know the wifi dongle can use as an access point. It works on Windows 10 and my debian server.