
After dual-booting Kali Linux with Ubuntu, I found that the wireless connection was not working when I booted into my Ubuntu system. The system would not detect or connect to any WiFi network. I have faced such an issue before, mainly with HP laptops, but today it was another laptop model.
For HP, the main point was that Ubuntu does not support the RTL8723de WiFi driver. However, Linux Kernel 5.4 release seemed to solve this problem as Ubuntu worked seamlessly with the driver. But we still have some users complaining about this problem.
Even though we can’t use the wireless connection, we need internet access to solve this problem. A quick fix would be to connect your PC to a wired connection using the ethernet port. If that is not possible, you could opt for Tethering using your phone (Android or IOS).
Fix No WiFi Adapter Found Error on Ubuntu
This post will show you how to fix this error and get your wireless connection up and working. We will need to run a couple of commands in the Terminal, which might be quite overwhelming for a beginner. However, please don’t panic; copy every command and paste it on your Terminal. You could look at our post on Ten basic Linux commands to learn for every Beginner.
Method 1: Get the newest Realtek rtlwifi codes
That is one of the methods I highly recommend for HP users facing this problem.
Step 1: Restart your PC and get into the BIOS. Ensure that the wireless network option is enabled. To access BIOS, you might need to press specific function keys depending on the laptop brand. You can check some of these keys for popular laptop brands in our post How to Boot your PC from a USB Drive.
Step 2. Log into your Ubuntu System and Launch the Terminal. You can easily do that with the combination of Ctrl + Alt + T.

Ctrl Alt T to open Terminal
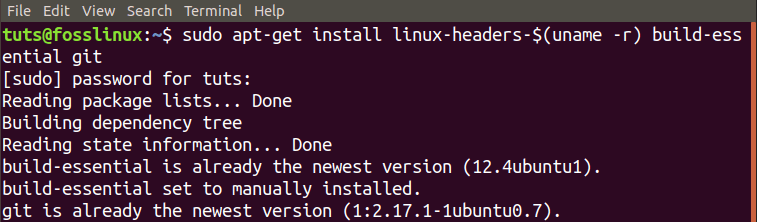
Step 3. Next, we will need to install building tools to automate the source code’s execution that we will download. Run the command below on the command-line.
sudo apt-get install linux-headers-$(uname -r) build-essential git
Install Build Tools
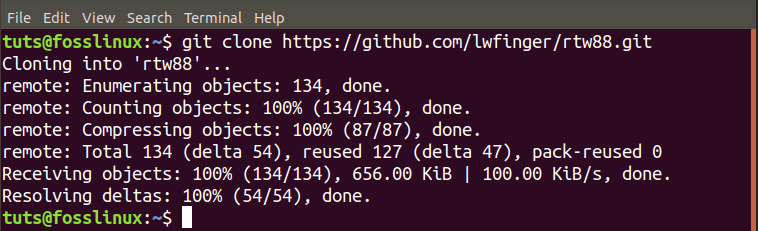
Step 4. Now, we will need to download the git repository for the newest Realtek rtlwifi codes. If you don’t have Git installed in your system, first run the command below. Also, take a look at our Top 20 Git Commands with Practical Examples.
$ sudo apt install git
Then clone the source code into your system.
git clone https://github.com/lwfinger/rtw88.git
Clone rtw88 repository
Step 5. Navigate into the now created rtw88 folder with the cd command.
$ cd rtw88/

Navigate to the rtw88 directory
Step 6. Proceed to install the drivers with the commands below.
$ make

Make command
If you get an error like “make command not found,” run the commands below to install Make.
sudo apt-get install make
sudo apt-get install make-guile
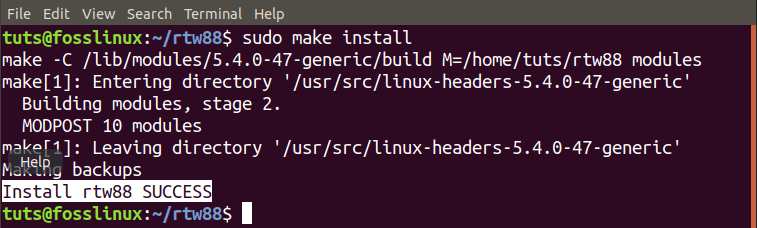
Proceed to execute the command below:
$ sudo make install
Install Drivers
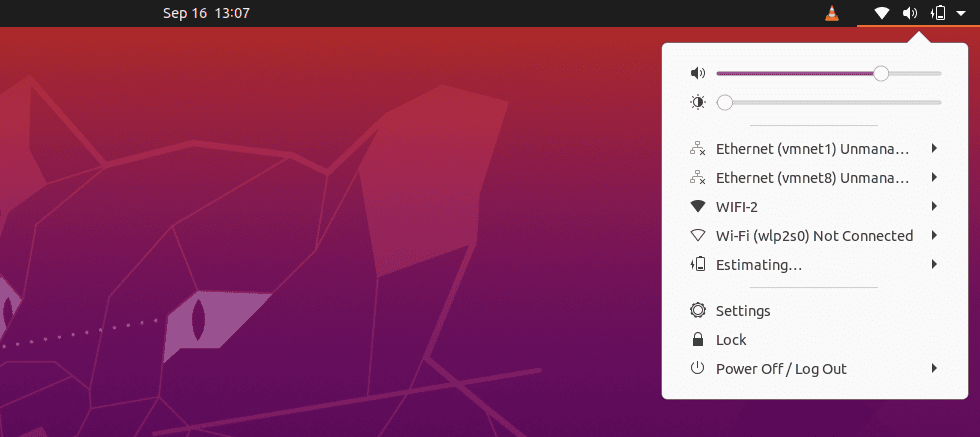
Step 7. Once the process is complete, and the installation was a success, load the new drivers with the following commands:
$ sudo modprobe -r rtl8723de
$ sudo modprobe rtl8723dehould
Your wireless network should now start working immediately.
Wireless connection
If the wireless connection is still not working, you might consider blacklisting the Broadcom driver and using these installed modules. Follow the steps below:
Step 8. Remove and blacklist the Broadcom drivers.
sudo apt purge bcmwl-kernel-source

Remove Broadcom drivers
sudo sed -i '/blacklist bcma/ d' /etc/modprobe.d/blacklist.conf
sudo sed -i '/blacklist brcmsmac/ d' /etc/modprobe.d/blacklist.conf

Blacklist Broadcom driver
Reboot your PC.
If you notice a weak signal, run the command below:
sudo modprobe -r rtl8723de && sleep 5 && sudo modprobe rtl8723de ant_sel=1
If you still can’t see any effect and the wireless is still not working, or you are experiencing a weak signal, execute the command below:
sudo modprobe -r rtl8723de && sleep 5 && sudo modprobe rtl8723de ant_sel=2
Now, to ensure you won’t be performing the last two commands every time you reboot your Ubuntu system, write the rule into the configurations file with the command below:
sudo modprobe -r rtl8723de && sleep 5 && sudo modprobe rtl8723de ant_sel=2
Method 2: Use the Ubuntu ISO image to install drivers
A remarkable fact is that this method doesn’t require you to have an internet connection.
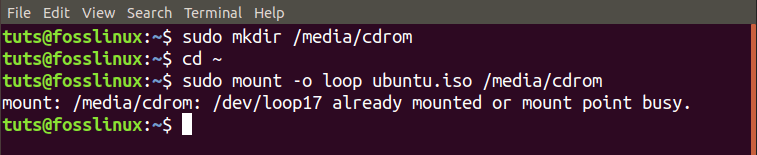
Step 1: Copy the Ubuntu ISO image in your home directory. Rename it to a simple name like ‘ubuntu.iso.’
Step 2: Launch the Terminal and mount the ISO image on the system like a CD/DVD.
sudo mkdir /media/cdrom
cd ~
sudo mount -o loop ubuntu.iso /media/cdrom
Mount Ubuntu ISO
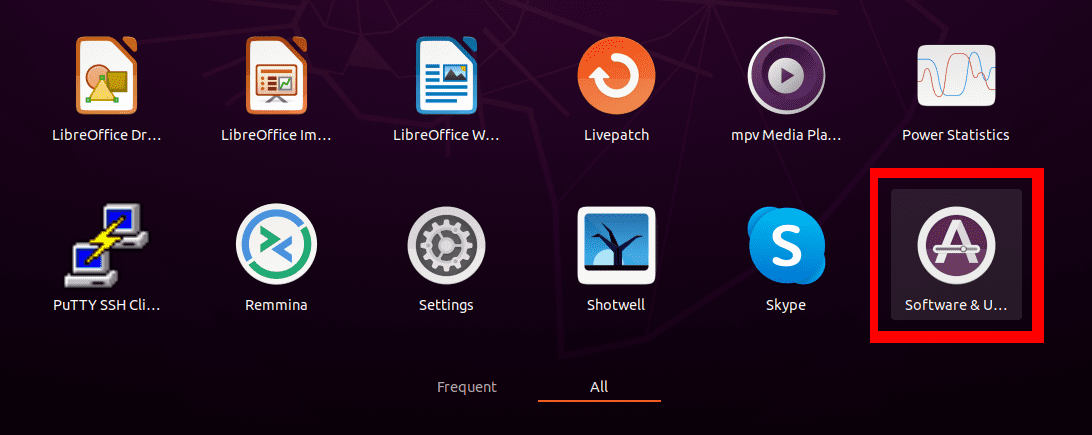
Step 3. Now, launch the Software & Updates app from the applications menu.
Update & Software
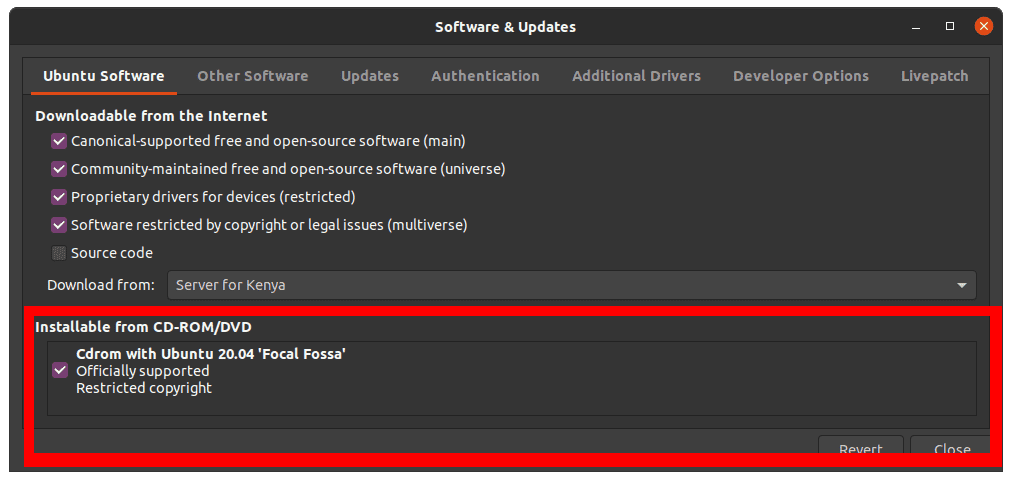
Step 4. Click on the Ubuntu Software tab and check the box ‘Installable from CD-Rom/DVD.’ A window will pop-up, and you will be required to enter the root password.
Install Drivers from CD-Rom
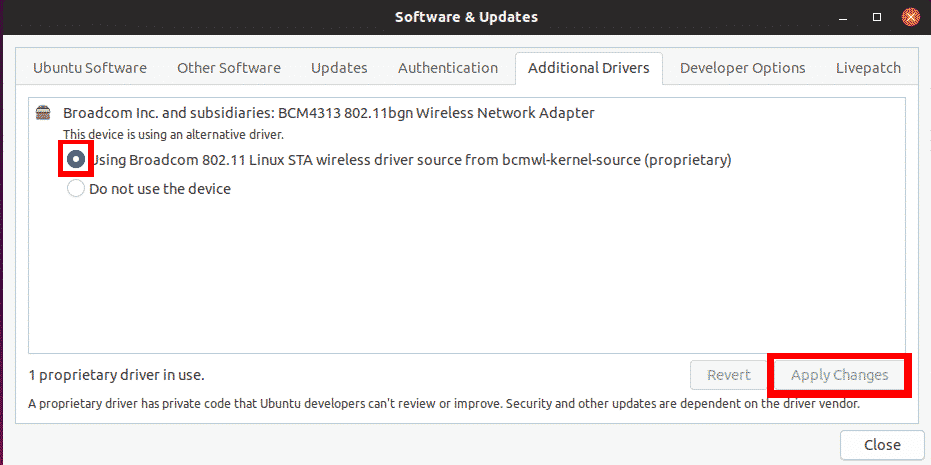
Step 5. Click on the Additional Drivers tab. If you see the statement “No additional drivers available,” this Method won’t work for you. If you see the proprietary drivers listed, then you can go ahead.
Select the proprietary drivers and click the Apply Changes button. In my case, my system supports Broadcom drivers.
Use Broadcom Drivers
Once done, your wireless connection problem should be solved, and you can see your WiFi networks.
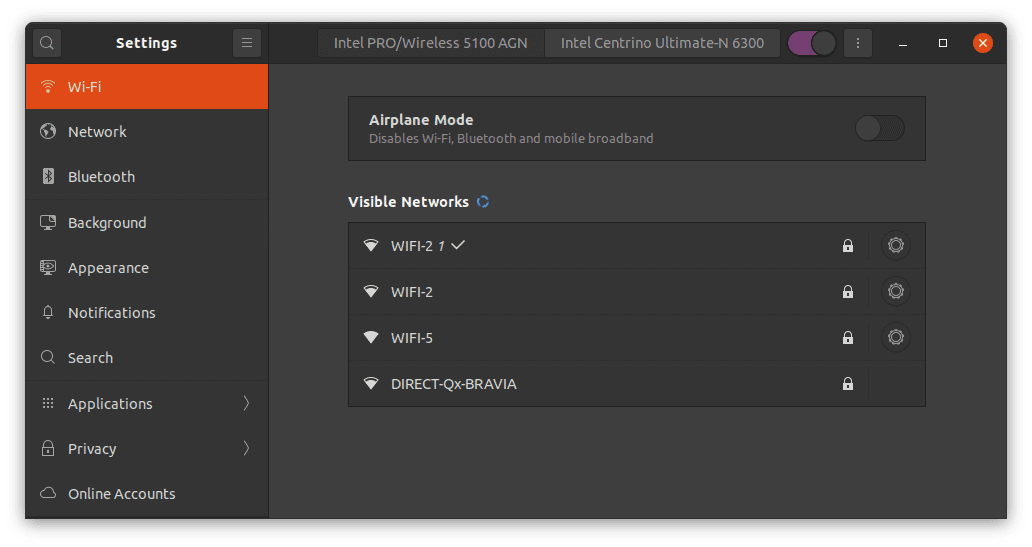
WiFi Networks
In case this method didn’t work for you, or the additional proprietary driver couldn’t install, use the third method below. However, this is exclusively for systems that support Broadcom drivers.
Method 3: Fix No WiFi Adapter Found Error for Ubuntu with Broadcom wireless adapters
Note: This Method is for a system that supports Broadcom 43 series drivers.
Step 1. Ensure your system supports Broadcom 43 series adapter with the command below:
sudo lshw -C network
If you see an adapter with the label starting with BCM43, as in the image below, you are good to go.
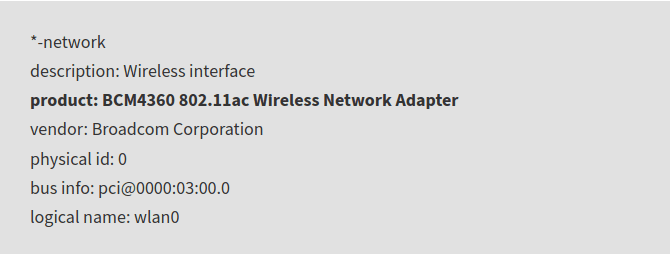
B43 adapter Series
Step 2. Uninstall any Broadcom drivers installed with the command below:
sudo apt remove broadcom-sta-dkms bcmwl-kernel-source
Uninstall Broadcom drivers
Step 3. Install BCM43 Series drivers with the command below:
sudo apt install firmware-b43-installer
Install BCM43 Drivers
Now, check your wireless connection. The problem should be solved.
Conclusion
At times, troubleshooting network issues in Linux can be quite overwhelming. I have faced such a problem before, but Method one always works. For users in the Penetration testing field, the latest Kali Linux (2020) had this issue but solved with the subsequent releases. However, If you are still experiencing the problem, the above methods work like a charm.
19 comments
in step 7 i found message “modprobe: FATAL: Module rtl8723de not found.” when executing sudo modprobe -r rtl8723de
Me too 🙁
Same
me too
same
Rebooted today, and suddenly the WiFi works again. I made no other changes but these, so thanks!
me to
Me too
I have the same probem, could solve it with this post information : https://askubuntu.com/a/152167/1407868
there are many opción, but restart default bios setup works to me
I have BCM43142 802.11b/g/n driver, tried method 3. But still facing the issue of no Wifi adaptor found. I’m using Ubuntu 20
Just remove the drivers u installed and type this in terminal:
sudo apt install bcmwl-kernel-source
I too have the same network adapter and this worked for me hope it works for you too.
Thank you, it works for me !!
tnx a lot, method #3 worked for me
Method #3 worked – thanks for that.
I’m pulling my hair out. I have a rtl8823ce will not show up. Works fine in windows 10 . Dual boot for ubuntu 20.04. I bought a new HP laptop not working but works on an older HP laptop.
I used method 2 and it works. Great, thanks!
After “Now, to ensure you won’t be performing the last two commands every time you reboot your Ubuntu system, write the rule into the configurations file with the command below:” it’s just the exact previous command, so there’s probably something missing, or you might want to reword with a mention of where to manually add the commands to run during the boot.
i have tried method 3 and error message as “you may have broken package” found
did not help need method 4