This post will give you a step-by-step guide on mounting your external USB Drive to your Linux system via the Terminal or command-line. If you are using an up-to-date Linux system with a modern Desktop Environment, your USB drive will show on the File Manager, and you can easily mount it by just clicking on it. This way, you don’t have to use the Terminal or the shell command-line.
However, if you are using an older Linux system or a system without GUI (Graphical User Interface), you will have to mount the USB drive by executing several Terminal commands. Lucky for you, that’s precisely what we will handle in this post. Let’s dive in.
Mounting USB drive in Linux via command-line
Step 1. Plugin your USB Drive
This step is relatively straightforward. Just plug in the USB to any of the ports available on your PC.
Plug USB to PC
Step 2. Detecting USB hard drive
Once plugged, if you are using a GUI system, you might get a pop-up notification that a USB drive has been inserted into the PC. However, for our case (assuming we don’t have a GUI system), we will have to use shell commands to know whether the system has detected the USB drive.
Once an external USB storage has been plugged into the PC, the Linux system automatically adds a new block device to the /dev/ directory. However, the USB drive isn’t mounted yet, and you can’t access any data stored on it. To mount the USB drive, we first need to know the name of our block device. Execute the command below on the Terminal.
sudo fdisk -l
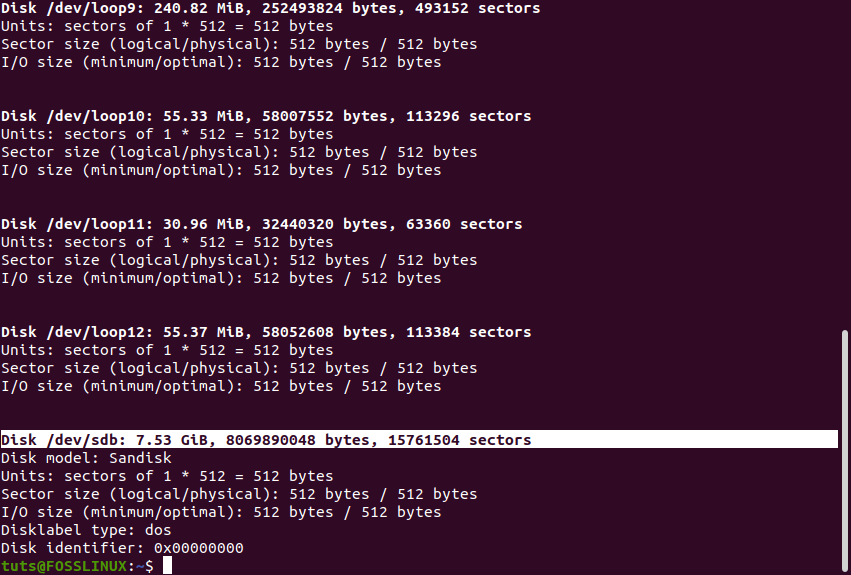
Upon execution of the command, you will get an output similar to this below. Now you need to identify your USB drive.
fdisk result
Tip: The,fdisk -l the command might give a large output, including names like /dev/loop1, /dev/loop2, etc. These are regular files or devices mounted as file systems. To quickly find your connected USB drive, look for device names like /dev/sdb, /dev/sdc, etc. Your internal HDD or SSD will mostly be /dev/sda.
In my case, I have plugged in an 8 GB Sandisk USB drive. From the fdisk command output, we can see it is listed as /dev/sdb.
Step 3. Create a mount point
Before we mount our USB Drive, we need to create a mount point. A mount point is a directory created as part of the root filesystem. In our case, we will create a mount point called USB-Drive on the /media directory that already exists on Linux systems. Execute the command below:
sudo mkdir /media/USB-Drive

Create a mount point
By executing the ls command, we see that we have a directory named ‘USB-Drive’ in the /media directory. That is our mount point.
Step 4. Mount the USB Drive
With our mount point created, we can now proceed to mount the USB Drive. From the fdisk -l command, we saw our device name was /dev/sdb. Execute the command below to mount it:
sudo mount /dev/sdb/ /media/USB-Drive

mount drive
To confirm whether the USB Drive is mounted, execute the grep command below:
mount | grep sdb

mount Drive
From the output, we see that our USB drive (/dev/sdb) is mounted on /media/USB-Drive. If you don’t get any output with the grep command, there is a high probability chance your USB drive is not mounted. Please double check your mount command or whether you used the correct block device file name.
Step 5. Access USB drive data
With your USB storage device mounted, you can get easy access to it like any other directory—Navigate to it using the cd command.
cd /media/USB-Drive
Once inside, you can execute the ls command to view its contents.
ls

Access USB data
At this point, you can perform any operation you want. That includes tasks like creating and deleting directories and files, copying data, and much more.
Step 6. Permanently mount your USB Drive
Up to this point, I believe you now have a clear understanding of how to mount your USB drive to a Linux system. However, there is one challenge to this method. If you eject the USB drive or reboot your PC, you will have to repeat the same procedure described above. To avoid such, we can permanently mount the USB drive to automatically mounted once plugged into the PC.
To do so, you will need to add your block device file name and the mount point to the /etc/fstab configuration file. Execute the command below to open /etc/fstab config file with nano editor.
sudo nano /etc/fstab
Add the line below and save the changes. Remember to replace the block device file name and mount point with yours.
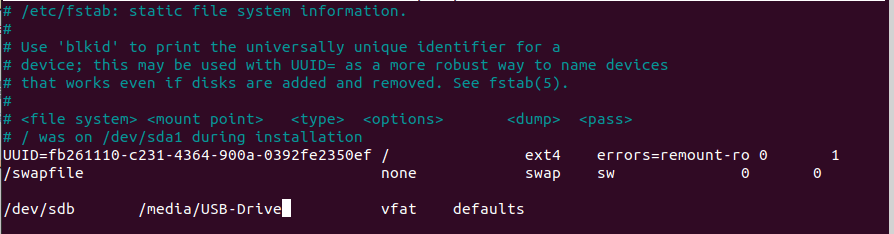
Permanent mount
Even though this will work well, you might consider using the UUID instead of the block device file name in situations where you are using multiple USB drives. To get the UUID of your USB storage device, execute the command below.
ls -l /dev/disk/by-uuid/*

UUID
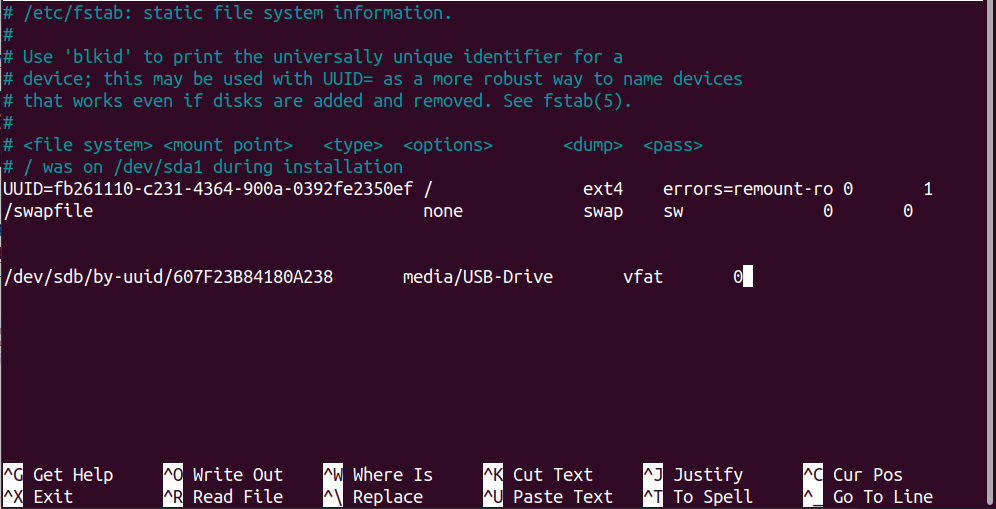
From the output of the ls command above, we can see the UUID number of our USB Drive (/dev/sdb) is 607F23B84180A238. Therefore, our mount line in the /etc/fstab config file will be as follows:
/dev/sdb/by-uuid/607F23B84180A238 media/USB-Drive vfat 0
Permanent Mount
Please save the file and close it. Now anytime you plug-in that particular USB drive, it will automatically mount to the specified mount point.
Step 7. Unmount USB Drive
To unmount the USB drive is relatively straightforward. First, ensure there are no open USB files. Once you have closed all of them, launch the Terminal and execute the commands below.
cd
sudo umount /dev/sdb /media/USB-Drive
umount command
If you get an error like “umount: /media/USB-Drive: target is busy,” then you still have open USB files. We are executing the cd command above to ensure that we are out of the mount point directory before running the umount command.
Conclusion
Congratulations! You now have a good understanding of how to mount and unmount USB drives on your Linux systems. Even though most of the Desktop Environments available support auto-mount, this method can help manage drives connected to GUI-less systems like a server. If you face any challenges during the whole process, please feel free to leave a comment below.