
B-Tree Filesystem (Btrfs) is a copy on write (CoW) filesystem for Linux operating systems. Fedora users got introduced to Btrfs when the Fedora project team made it the default filesystem for Fedora Workstation 33. I hadn’t given Btrfs too much thought despite it being available for Linux for several years. This article will get you up to speed with the Btrfs filesystem and its features like snapshots, subvolumes, and quotas.

B-Tree Filesystem (Btrfs) is both a filesystem and a volume manager. It has been under development since 2007, and since then, it has been a part of the Linux kernel. Its developers aim at creating a modern filesystem that can solve the challenges associated with scaling to large storage subsystems. From the Btrfs Manpage, its main features focus on fault tolerance, easy administration, and repair.
Btrfs filesystem in Fedora Linux
Its main features are:
- Snapshots – writable and read-only snapshots.
- RAID.
- Self-healing – checksums for data and metadata.
- Automatic detection of data corruption.
- Subvolumes.
- SSD awareness.
- Efficient incremental backups
You can learn more about its advanced features and benefits from the official Btrfs Man Page.
Prerequisite
If you are already running Fedora Workstation 33, then you are set for the next steps. If not, you can download the official Fedora Workstation ISO and install it or run it in a new virtual machine from any Linux distro you are using.
When writing this article, I have not come across a graphical tool to work with Btrfs ( suggestions are welcome!). Therefore, we will work with the command line for most of the demonstrations in this article. You have to work with Btrfs as the superuser for the next steps.
~]$ sudo su # change into super user mode
You can examine the Btrfs format by running the following command.
Getting a closer look at the Btrfs filesystem
Show Fedora Btrfs filesystem:
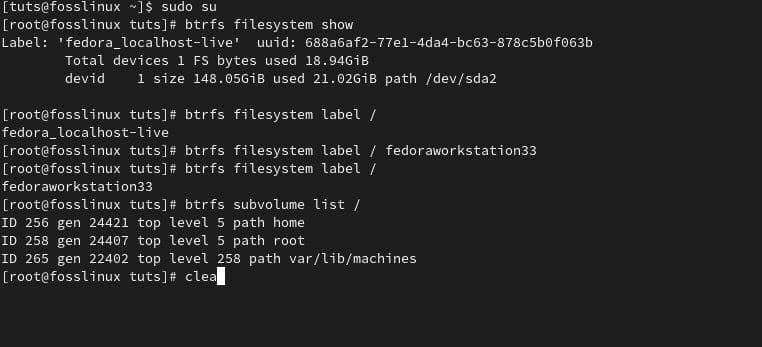
[root@fosslinux tuts]# btrfs filesystem show
Label: 'fedora_localhost-live' uuid: 688a6af2-77e1-4da4-bc63-878c5b0f063b
Total devices 1 FS bytes used 18.94GiB
devid 1 size 148.05GiB used 21.02GiB path /dev/sda2
You can notice that the filesystem label is ‘fedora_localhost-live.’ You can change the label to represent a more accurate representation of your system since we are not running the live USB version of Fedora.
Changing Btrfs labels:
You can change the label using the btrfs filesystem label command.
[root@fosslinux tuts]# btrfs filesystem label /
fedora_localhost-live
[root@fosslinux tuts]# btrfs filesystem label / fedoraworkstation33
[root@fosslinux tuts]# btrfs filesystem label /
fedoraworkstation33
[root@fosslinux tuts]#
Btrfs Fedora filesystem label
Btrfs subvolumes
Subvolumes are not the same as partitions but can be compared to partitions and are used in a similar way to how partitions are used. A subvolume is the standard directory that Btrfs can manage.
You can use a subvolume to take snapshots, set a quota, and replicate it to other locations and other host operating systems as long as they are running under the Btrfs filesystem.
List Btrfs subvolumes:
[root@fosslinux tuts]# btrfs subvolume list /
ID 256 gen 24421 top level 5 path home
ID 258 gen 24407 top level 5 path root
ID 265 gen 22402 top level 258 path var/lib/machines
Btrfs Fedora filesystem label
Create subvolume:
You can create a new subvolume by running the btrfs subvolume create command.
[root@fosslinux tuts]# btrfs subvolume create /opt/foo
Create subvolume '/opt/foo'
[root@fosslinux tuts]# btrfs subvolume list /
ID 256 gen 24469 top level 5 path home
ID 258 gen 24469 top level 5 path root
ID 265 gen 22402 top level 258 path var/lib/machines
ID 279 gen 24469 top level 258 path opt/foo
Delete subvolume:
You can delete a subvolume by running the btrfs subvolume delete command.
[root@fosslinux tuts]# btrfs subvolume delete /opt/foo
Delete subvolume (no-commit): '/opt/foo'
[root@fosslinux tuts]# btrfs subvolume list /
ID 256 gen 24495 top level 5 path home
ID 258 gen 24493 top level 5 path root
ID 265 gen 22402 top level 258 path var/lib/machines
Subvolumes can come in handy for system administrators, especially when adding users.
Adding a user
Before Fedora Linux 33, creating a new user account would create a home directory for the account. Essentially, the user directory created is a subdirectory of /home. It meant that the ownership and privileges were tailored to the owner of the /home directory. It also meant that there were no special functions for managing the subdirectory. With Btrfs, you have more control to manage and apply constraints to created user directories.
The traditional way of adding a new user.
Add a new user, ‘fedoran1’, using the useradd command:
[root@fosslinux tuts]# useradd fedoran1
[root@fosslinux tuts]# getent passwd fedoran1
fedoran1:x:1001:1001::/home/fedoran1:/bin/bash
[root@fosslinux tuts]# ls -l /home
total 0
drwx------. 1 fedoran1 fedoran1 80 Apr 7 19:00 fedoran1
drwx------. 1 tuts tuts 308 Apr 6 08:33 tuts
Using Btrfs subvolumes as user homes
You can accommodate Btrfs subvolumes as user homes by adding the –btrfs-subvolume-home to the useradd command. The command will create a new Btrfs subvolume for the user.
[root@fosslinux tuts]# useradd --btrfs-subvolume-home fedoran2
Create subvolume '/home/fedoran2'
[root@fosslinux tuts]# getent passwd fedoran2
fedoran2:x:1002:1002::/home/fedoran2:/bin/bash
If you run the btrfs subvolume list / command, you will notice a new subvolume for the new user’s home directory.
[root@fosslinux tuts]# btrfs subvolume list /
ID 256 gen 24732 top level 5 path home
ID 258 gen 24731 top level 5 path root
ID 265 gen 22402 top level 258 path var/lib/machines
ID 280 gen 24728 top level 256 path home/fedoran2
Delete a user:
Sometimes you want to delete a user with all the user’s files and their home directory simultaneously. You can use the userdel command with the -r option, which will also delete the user’s Btrfs subvolume.
[root@fosslinux tuts]# userdel -r fedoran2
Delete subvolume (commit): '/home/fedoran2'
Btrfs quotas
Ever had a program that ran out of control and wrote to your disk until your entire /home directory was filled up? These problems do arise, especially with applications or servers that store content and log files. You can prevent your system or server from grinding to a halt because the disk is filled up by setting and implementing Btrfs quotas.
The first step is to enable quotas on your Btrfs filesystem:
[root@fosslinux tuts]# btrfs quota enable /
Next, note down each subvolume’s quota group (qgroup) ID number using the btrfs subvolume list command. It would be best to associate each subvolume with a qgroup based on its ID number using the btrfs qgroup create command. You can do this on an individual basis, but you can also use the following command to expedite creating qgroups for subvolumes.
>btrfs subvolume list \<path> | cut -d' ' -f2 | xargs -I{} -n1 btrfs qgroup destroy 0/{} \<path>
In your Fedora 33, replace the \<path> with the root path ( / ) of your filesystem.
# btrfs subvolume list / | cut -d' ' -f2 | xargs -I{} -n1 btrfs qgroup create 0/{} /
Run the btrfs quota rescan command to view the qgroups you have created.
[root@fosslinux tuts]# btrfs qgroup show /
WARNING: rescan is running, qgroup data may be incorrect
qgroupid rfer excl
-------- ---- ----
0/5 16.00KiB 16.00KiB
0/256 23.70MiB 23.70MiB
0/258 449.61MiB 449.61MiB
0/265 16.00KiB 16.00KiB
0/279 16.00KiB 16.00KiB
You can now assign a quota to a qgroup which will apply the changes to the associated subvolume.
Now we can use the btrfs qgroup limit command to limit the home directory usage of the user fedoran2 to 2GB.
[root@fosslinux tuts]# btrfs qgroup limit 2G /home/fedoran2
Confirm the quota limit changes for the user fedoran2.
[root@fosslinux tuts]# btrfs qgroup show -reF /home/fedoran2
qgroupid rfer excl max_rfer max_excl
-------- ---- ---- -------- --------
0/279 16.00KiB 16.00KiB 2.00GiB none
Show all qgroups and quota limits assigned, if any, using the btrfs qgroup show -re /
[root@fosslinux tuts]# btrfs qgroup show -reF /home/fedoran2
qgroupid rfer excl max_rfer max_excl
-------- ---- ---- -------- --------
0/279 16.00KiB 16.00KiB 2.00GiB none
Btrfs snapshots
A snapshot in Btrfs filesystem is simply a copy of a subvolume. Therefore, a snapshot is a subvolume that can share its data and metadata with other subvolumes using the copy on write (CoW) capabilities. Taking a snapshot is immediate, but it does not occupy a space as soon as it is created.
When you take a snapshot, the snapshot’s space will increase with changes in the original subvolume or in the snapshot if it is writable. Moreover, any added, modified, or deleted files in the subvolume will still reside in the snapshot. These features offer a way to create backups in your system conveniently.
Create backups using snapshots
By default, a snapshot will reside on the same disk as the subvolume, and you can browse or even recover a copy of a file in its original state as when the snapshot was taken. An interesting feature of snapshots is that you can send them to an external hard drive or a remote system using SSH. The catch is that the destination should have a Btrfs file system. To take advantage of this feature in snapshots, you will use the btrfs send and btrfs receive commands.
Note: Storing a snapshot on the same disk as the subvolume is not an ideal backup strategy. If your disk becomes corrupted, you will lose both the subvolume and the snapshots.
Follow these steps to create a backup of a subvolume.
1: Create a subvolume for your project
For demonstration purposes, we will create a Btrfs subvolume (myproject) inside the $HOME/Desktop/myproject. The Btrfs subvolume will look and work like a standard directory.
Create a subvolume using the following command:
[tuts@fosslinux ~]$ btrfs subvolume create $HOME/Desktop/myproject
Create subvolume '/home/tuts/Desktop/myproject'
Create a hidden directory to store your snapshots:
[tuts@fosslinux ~]$ mkdir $HOME/.myprojectsnapshots
Create a text file inside the $HOME/Desktop/myproject subvolume:
[tuts@fosslinux ~]$ cd /home/tuts/Desktop/myproject
[tuts@fosslinux myproject]$ ls
[tuts@fosslinux myproject]$ vi day0.txt
[tuts@fosslinux myproject]$ ls
day0.txt
2: Take a snapshot
By default, snapshots are writable, but you will have to create a read-only snapshot to use the btrfs send and btrfs receive commands. ‘
Snapshots can be taken each day, each hour, or even each minute.
Take a read-only snapshot of the $HOME/Desktop/myproject subvolume and arrange it in the $HOME/.myprojectsnapshots using the following command.
[tuts@fosslinux ~]$ btrfs subvolume snapshot -r $HOME/Desktop/myproject $HOME/.myprojectsnapshots/myproject-day0
Create a readonly snapshot of '/home/tuts/Desktop/myproject' in '/home/tuts/.myprojectsnapshots/myproject-day0'
Note:
- Use -r flag to create a read-only snapshot. The -r flag will offer better consistency and security and enable you to send and receive to an external hard drive.
- Snapshots will not take recursive snapshots of themselves. A snapshot of the /home subvolume will not snapshot the $HOME/Desktop/myproject subvolume.
Using btrfs send and btrfs receive to backup snapshots.
In the demonstration below, the snapshot of the Btrfs volume (/.myprojectsnapshots/myproject-day0) will be send to a USB drive mounted as /run/media/tuts/bk.
[tuts@fosslinux ~]$ sudo btrfs send $HOME/.myprojectsnapshots/myproject-day0 | sudo btrfs receive /run/media/tuts/bk
At subvol /home/tuts/.myprojectsnapshots/myproject-day0
ERROR: /run/media/tuts/bk doesn't belong to btrfs mount point
Depending on how you formatted your USB drive, you might get the following error message:
ERROR: /run/media/tuts/bk doesn't belong to btrfs mount point.’
The error is an indication that your USB drive is not of the btrfs filesystem format. The btrfs send command cannot work on a filesystem other than btrfs.
If you get such an error message, format your USB drive to btrfs using the following command.
Format USB drive to btrfs filesystem format:
[tuts@fosslinux ~]$ sudo mkfs.btrfs /dev/sdb -L 'bk' -f
Now run the btrfs send and btrfs receive command:
[tuts@fosslinux ~]$ sudo btrfs send $HOME/.myprojectsnapshots/myproject-day0 | sudo btrfs receive /run/media/tuts/bk
[sudo] password for tuts:
At subvol /home/tuts/.myprojectsnapshots/myproject-day0
At subvol myproject-day0
The btrfs send command has been completed successfully, and you can view and browse your snapshot ‘myproject-day0’ on your USB drive.
The command might take some time depending on your subvolume’s size ($HOME/.myprojectsnapshots/myproject-day0). Subsequent incremental btrfs sends will take a shorter time.
Incremental backups using btrfs send
To use btrfs send incrementally, you will have to take another snapshot of your subvolume.
Create snapshots:
[tuts@fosslinux ~]$ btrfs subvolume snapshot -r $HOME/Desktop/myproject $HOME/.myprojectsnapshots/myproject-day1
Create a readonly snapshot of '/home/tuts/Desktop/myproject' in '/home/tuts/.myprojectsnapshots/myproject-day1'
Incremental btrfs send:
[tuts@fosslinux ~]$ sudo btrfs send -p $HOME/.myprojectsnapshots/myproject-day0 $HOME/.myprojectsnapshots/myproject-day1 | sudo btrfs receive /run/media/tuts/bk
At subvol /home/tuts/.myprojectsnapshots/myproject-day1
At snapshot myproject-day1
The next incremental backup(the day after).
Create a snapshot:
[tuts@fosslinux ~]$ btrfs subvolume snapshot -r $HOME/Desktop/myproject $HOME/.myprojectsnapshots/myproject-day2
Create a readonly snapshot of '/home/tuts/Desktop/myproject' in '/home/tuts/.myprojectsnapshots/myproject-day2'
Incremental btrfs send (the day after):
[tuts@fosslinux ~]$ sudo btrfs send -p $HOME/.myprojectsnapshots/myproject-day1 $HOME/.myprojectsnapshots/myproject-day2 | sudo btrfs receive /run/media/tuts/bk
At subvol /home/tuts/.myprojectsnapshots/myproject-day2
At snapshot myproject-day2
Cleanup
Note: You need at least the last snapshot to perform incremental btrfs send. Make sure the snapshot is present in the source and destination.
Delete snapshots in the source location
You can delete unnecessary snapshots using the following command:
[tuts@fosslinux ~]$ sudo btrfs subvolume delete $HOME/.myprojectsnapshots/myproject-day0
[sudo] password for tuts:
Delete subvolume (no-commit): '/home/tuts/.myprojectsnapshots/myproject-day0'
[tuts@fosslinux ~]$ sudo btrfs subvolume delete $HOME/.myprojectsnapshots/myproject-day1
[sudo] password for tuts:
Delete subvolume (no-commit): '/home/tuts/.myprojectsnapshots/myproject-day1'
Delete snapshots in the destination location:
[tuts@fosslinux ~]$ sudo btrfs subvolume delete /run/media/tuts/bk/myproject-day0
Delete subvolume (no-commit): '/run/media/tuts/bk/myproject-day0'
[tuts@fosslinux ~]$ sudo btrfs subvolume delete /run/media/tuts/bk/myproject-day1
Delete subvolume (no-commit): '/run/media/tuts/bk/myproject-day1'
Note: It would be best if you kept the last snapshot in the source and destination locations so that you can perform a new incremental btrfs send.
Recover a file or directory from a btrfs snapshot
Errors like deleting a directory or file by mistake are inevitable. When such errors occur, you can recover files or directories from the recent snapshot. You can also recover an older version of the directory or file from an older snapshot.
Since snapshots work like directories, you can use the cp command to restore a file using the following command.
Using the cp command
Restore a deleted file using the cp command:
[tuts@fosslinux ~]$ cp $HOME/.myprojectsnapshots/myproject-day1/day0.txt $HOME/Desktop/myproject
Restore a deleted directory using the cp command:
[tuts@fosslinux ~]$ cp -r $HOME/.myprojectsnapshots/myproject-day1/directory $HOME/Desktop/myproject
If you delete the entire $HOME/Desktop/myproject directory (subvolume), you can recreate the subvolume and use the cp command to restore the entire content from a snapshot.
Restore a deleted subvolume:
[tuts@fosslinux ~]$ btrfs subvolume create $HOME/Desktop/myproject
Create subvolume '/home/tuts/Desktop/myproject'
[tuts@fosslinux ~]$ cp -rT $HOME/.myprojectsnapshots/myproject-day1 $HOME/Desktop/myproject
Using btrfs snapshot command
You can restore a deleted subvolume by taking a snapshot of snapshots.
Restore a subvolume using the btrfs snapshot command:
[tuts@fosslinux ~]$ btrfs subvolume snapshot $HOME/.myprojectsnapshots/myproject-day1 $HOME/Desktop/myproject
Create a snapshot of '/home/tuts/.myprojectsnapshots/myproject-day1' in '/home/tuts/Desktop/myproject'
Recover btrfs snapshots from an external drive
You can use the cp command to restore a snapshot from a USB drive or an external drive.
Recover a file:
[tuts@fosslinux ~]$ cp /run/media/tuts/bk/myproject-day1/day0.txt $HOME/Desktop/myproject
You can use the btrfs send and btrfs receive commands to recover an entire snapshot. You need to set the read-only option to false to restore a writable subvolume.
Recover an entire snapshot:
[tuts@fosslinux ~]$ sudo btrfs send /run/media/tuts/bk/myproject-day1 | sudo btrfs receive $HOME/Desktop/
[sudo] password for tuts:
At subvol /run/media/tuts/bk/myproject-day1
At subvol myproject-day1
Recap
The article has highlighted some Btrfs features that are worth learning. Btrfs was created as an alternative to the ZFS filesystem, and it is offering a lot of advanced filesystem features for Fedora and Linux operating systems.
You can learn more about Btrfs using the btrfs – – help command or online documentation, which you can access using man btrfs-subvolume, man btrfs-send, or man btrfs-receive. I also find the official Btrfs Wiki handy.
We could all do with a graphical tool to interact with Btrfs! To you, Fedora project team.