
In 2014, Microsoft declared the .NET development platform open source under the MIT license. It culminated in the release of .NET Core that .NET developers can use to develop applications in Linux using languages like C#. Mono has been the open-source development platform for the .NET framework.
You can use either .NET or Mono to develop applications using languages such as C#, F#, Visual Basic, and Vala. The apps can be delivered to Linux, BSD, Windows, macOS, Samsung’s Tizen (television OS), Android, iOS, and some gaming consoles.
Setting up .NET environment on Fedora 35
This article is for .NET developers wanting to use Fedora Linux as their primary workstation. First, I will highlight setting up a complete development environment for .NET on Fedora Linux, including an IDE/Text Editor, Azure Functions, and an SSL certificate for a secure HTTPS site.
Install .NET SDK
Fedora has added the dotnet packages to their repositories, making the installation of the .NET SDK quite simple. Previously, you were required to add Microsoft repositories to the list of sources to install dotnet through the DNF package manager.
Open your terminal and run the following command to install the latest dotnet packages.
sudo dnf install dotnet
The .NET SDK includes the Runtime and allows you to develop apps using the .NET platform. However, if you only need to run apps, install the Runtime. If you’re only installing the Runtime, it’s recommended you install the ASP.NET Core Runtime as it includes both ASP.NET Core and .NET runtimes.
Install .NET 5
The latest .NET version available in the default Fedora package repositories is .NET 5.
Install the SDK
If you install the .NET SDK, you don’t need to install the corresponding Runtime.
Run the following command to install the .NET SDK.
$ sudo dnf install dotnet-sdk-5.0
Install the Runtime
Install ASP.NET Core Runtime
The ASP.NET Core Runtime allows you to run apps that didn’t provide the Runtime during development. It is the most compatible Runtime for .NET and is widely used by .NET developers.
Run the following command to install the ASP.NET Core Runtime.
$ sudo dnf install aspnetcore-runtime-5.0
Install .NET Runtime
You can install the .NET Runtime as an alternative to the ASP.NET Core Runtime. Open your terminal and run the following command:
$ sudo dnf install aspnetcore-runtime-5.0
Note that .NET Runtime does not include ASP.NET Core support.
Install NodeJS
You need NodeJS on Fedora Linux to develop Azure Functions or use Azurite to emulate storage.
Install Node.js via nvm
The method requires you first to install nvm to allow the installation of Node.js in a Linux userspace. This means you may then install global packages as a regular user without sudo privileges. Nvm is a node.js version manager to manage multiple Node.js versions on a single system. It is invoked per-shell and works on several shells such as sh, ksh, dash, zsh, and bash.
To install or update nvm, you should run its installation script. Then, you can either download and run the script manually or run the following Wget or cURL commands to get the latest version (0.39.1).
wget -qO- https://raw.githubusercontent.com/nvm-sh/nvm/v0.39.1/install.sh | bash
curl -o- https://raw.githubusercontent.com/nvm-sh/nvm/v0.39.1/install.sh | bash
Once you have nvm installed and running in your system, run nvm install lts/* to install the latest LTS version of Node.js.
nvm install lts/*
Note that you can still install any Node.js version along with the latest version. Run nvm install with the version number of Node.js required for your project.
nvm install v15
You can also install multiple Node.js versions by running the command multiple times.
nvm install v16
Install Node.js from the default Fedora package repository
The Fedora default package repositories contain a stable version of Node.js. To install both npm and Node.js, open a terminal on your system and run the following command.
$ sudo dnf install nodejs
It will install a stable release but not necessarily the latest version. This will install V8 Javascript Engine, Node.js runtime, and npm package manager and dependencies.
Alternative versions
You can also get alternative versions as Fedora modules. Before installing the desired module, you can first list all available modules with the following command.
List all available versions.
$ dnf module list
Install an alternative version with the following command.
$ sudo dnf module install nodejs:15
Check the installed Node.js version
$node -v
Install Node.js from Node.js official repository
Node.js official development team provides a repository for installing the latest packages for Fedora. You can choose to install either the latest or stable version of Node.js.
Open your terminal and run the following command to install the stable release:
$ sudo dnf install -y gcc-c++ make
$ curl -sL https://rpm.nodesource.com/setup_14.x | sudo -E bash -
With the following command, you can now install NPM, Node.js, and other dependencies.
$ sudo dnf install nodejs
Open your terminal and run the following command to add the required repository and install the latest release:
$ sudo dnf install -y gcc-c++ make
$ curl -sL https://rpm.nodesource.com/setup_16.x | sudo -E bash -
Next, install Node.js, NPM, and dependencies with the following command.
$ sudo dnf install nodejs
Install a .NET IDE
Visual Studio Code
To install a stable Visual Studio Code, you must import the Microsoft key and add the repository before installing the corresponding packages.
Import Microsoft key.
sudo rpm --import https://packages.microsoft.com/keys/microsoft.asc
Add vscode repository.
sudo sh -c 'echo -e "[code]\nname=Visual Studio Code\nbaseurl=https://packages.microsoft.com/yumrepos/vscode\nenabled=1\ngpgcheck=1\ngpgkey=https://packages.microsoft.com/keys/microsoft.asc" > /etc/yum.repos.d/vscode.repo'
Update your Fedora package cache and install a stable 64-bit VS Code.
$ dnf check-update
$ sudo dnf install code
Install VS Code using as a snap package
First, make sure you have snap installed in your Linux system. If not, install it by running the following command:
Enable snapd and Enable classic snap support by creating a symbolic link between /var/lib/snapd/snap and /snap.
$ sudo dnf install snapd
$ sudo ln -s /var/lib/snapd/snap /snap
Now run the following command to install VS Code:
$ sudo snap install --classic code # or code-insiders
After the installation is complete, the Snap daemon will automatically update VS Code.
Install VS Code as an rpm package
You can manually download and install VS Code .rpm package. Run the following commands to download and install the .rpm file using the DNF package manager:
$ wget https://go.microsoft.com/fwlink/?LinkID=760867
$ sudo dnf install <vscodefilename>.rpm
Install C# extension
To install c# extensions, launch VS Code, click (Ctrl+P), paste the following command, and press Enter.
ext install ms-dotnettools.csharp
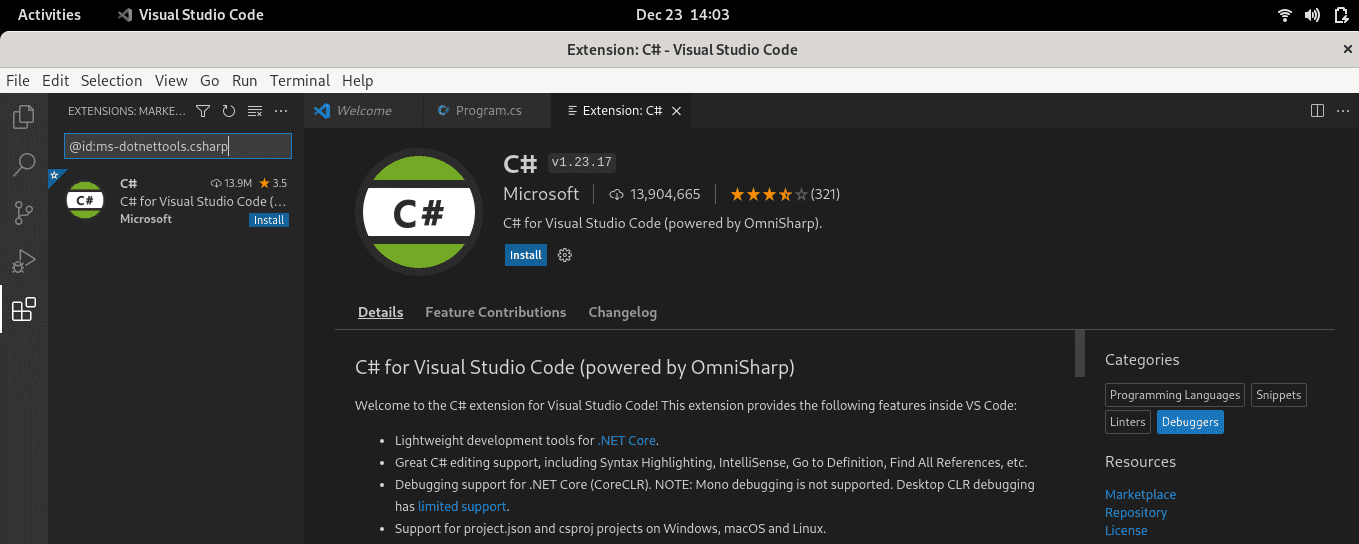
C# Extension
The C# extension is convenient for .NET developers. It provides the following additional features in VS Code.
- Support for C# editing includes syntax highlighting, finding all references, IntelliSense, Go to Definition, and many more.
- It provides debugging support for .NET Core (CoreCLR).
- Features lightweight development tools for .NET Core.
- Support for project.json and csproj projects on Linux, Windows, and macOS.
Setting VS Code as the default text editor
xdg-open
You can set the default text editor for text files (text/plain) that is used by xdg-open with the following command:
xdg-mime default code.desktop text/plain
JetBrains Rider
The easiest way to install Rider is to install the JetBrains Toolbox and manage the installation process.
Install JetBrains Toolbox
Step1: Download the Jetbrain Toolbox .tar.gz file for Linux installation from the Toolbox download page.
Step 2: Extract the jetbrains-toolbox-xxxx.tar.gz file.
Open your terminal and change the directory to where you downloaded the .tar.gz file. Then extract the content of the file with the following commands:
cd /jetbrains/download/directory/
tar -xzvf jetbrains-toolbox-1.22.10970.tar.gz
Step 3: Add execution permissions to the AppImage
Change your current working directory to the folder you extracted your files and add execution permissions to the AppImage with the following commands:
cd jetbrains-toolbox-1.22.10970
chmod +x jetbrains-toolbox
Step 4: Execute the AppImage.
./jetbrains-toolbox
Note that the version numbers I am using might differ from yours. It would help if you changed them accordingly.
Wait for a few minutes until a small Toolbox window opens. After which, you can delete the downloaded files. Now, you can open the JetBrains Toolbox from your app menu. By default, the AppImage installs applications under ~/.local/share/JetBrains.
Install Rider
In the JetBrains Toolbox, search for the Rider app and click Install. You can change where to install and other options from the settings menu in the top right corner.
When the installation finishes, open Rider and choose the preferences you desire until the configuration process is complete. You now have Rider installed. Note that you can always change the configuration options by going to Configure -> Settings on the initial screen or File -> Settings on the editor.
Visual Studio extensions
VS Code is an excellent code editor. However, you can enhance its functionality with extensions. You can include several programming language extensions that you require for your projects. The following examples include some extensions I use for C# development.
VS Code ESLint extension
If you are a seasoned programmer, you probably have heard about ESLint. It is an essential tool that analyzes your code to find problems quickly. ESLint is built into most text editors, and you can also include it into VS Code as an extension. The extension uses the ESLint library installed in the current workspace directory. The extension looks for a global install version if the directory doesn’t provide one.
You can install ESLint either locally or globally by running the following commands:
For a local installation in your working directory:
npm install eslint
For a global install:
npm install -g eslint
To install the VS Code ESLint extension, launch VS Code, click (Ctrl+P), paste the command below, and press enter.
ext install dbaeumer.vscode-eslint
PowerShell
The PowerShell language extension in VS Code provides rich PowerShell language support. You can write and debug PowerShell scripts using the excellent IDE-like interface that Visual Studio Code provides. It features PowerShell ISE them, syntax highlighting, code snippets, IntelliSense for cmdlets, Go to Definition of variables and cmdlets, local script debugging, and many more.
To install the PowerShell extension, launch VS Code, click (Ctrl+P), paste the command below, and press enter.
ext install ms-vscode.PowerShell
Sublime Text Keymap and Settings Importer
The Sublime Importer extension imports keybindings and settings from the Sublime text editor to Visual Studio Code. This extension can come in handy as it ports popular Sublime Text keyboard shortcuts to VS Code.
Launch VS Code, click (Ctrl+P), paste the command below, and press enter to install the extension.
ext install ms-vscode.sublime-keybindings
Azurite and Azure Functions
Azurite is an open-source Azure Storage API compatible server. It is based on Node.js and provides cross-platform experiences for users who want to implement Azure Storage in a local system. A vital feature of the Azurite package is that it simulates most Azure Storage commands.
Install Azurite node package
You need the azurite node package to develop Azure Functions. You can install it with the following command:
npm install -g azurite
Visual Studio Code
If you are developing Azure Functions with VSCode, you need to install the azure-functions-core-tools package. At the time of writing this article, the latest version is v3.
Run the following command if you want to install v3.
npm i -g azure-functions-core-tools@3 –unsafe-perm true
Run the following command to install v2.
npm i -g azure-functions-core-tools@2 –unsafe-perm true
The next step is to install the Azure Functions extension from the Microsoft Visual Studio marketplace. Launch VS Code, click (Ctrl+P), paste the command below, and press enter to install the extension.
ext install Azurite.azurite
Once the installation is complete, locate the Azure icon on the left panel to create a new Azure Function from available templates.
JetBrains Rider
If you are developing Azure Functions on Rider, you first need to install the Azure Toolkit for the Rider plugin. Once the plugin is installed, restart the IDE then go to Settings -> Tools -> Azure -> Functions.
If you want Rider to manage package updates automatically, click on Download the latest version. Also, make sure that the option ‘Check updates for Azure Function Core tools on startup’ is checked.
Then navigate to Tools -> Azure -> Azurite and on the Azurite package path dropdown, select your installation of Azurite. My example looks like the command below.
~/.nvm/versions/node/v14.18.2/lib/node_modules/azurite.
Finally, click Save. You are now ready to create Azure Functions on Rider.
Create an SSL Certificate for your .NET apps
Developing .NET with HTTPS on your Fedora system requires creating your SSL certificates. For that, you need to make your certificate authority (CA), set your Fedora system to trust it, sign the certificate, and set .NET to use the certificate.
Note that we are creating our SSL certificates because you won’t be able to trust the .NET certificate generated by dotnet dev-certs https –trust. The command does not affect a Fedora system.
Install easy-rsa tool
The first step is to install the easy-rsa tool.
sudo dnf install easy-rsa
Set up a working directory (fossrsa) with the following commands:
cd ~
mkdir .fossrsa
chmod 700 .fossrsa
cd .fossrsa
cp -r /usr/share/easy-rsa/3/* ./
./fossrsa init-pki
Create a new file named vars to edit your CA details. You can change the details according to your requirements.
cat << EOF > vars
set_var EASYRSA_REQ_COUNTRY "US"
set_var EASYRSA_REQ_CITY "NewYork"
set_var EASYRSA_REQ_ORG "FOSS"
set_var EASYRSA_REQ_EMAIL "foss@localhost.localdomain"
set_var EASYRSA_REQ_OU "LocalDevEnvironment"
set_var EASYRSA_ALGO "ec"
set_var EASYRSA_DIGEST "sha512"
EOF
The next step is to build the CA and trust it.
./fossrsa build-ca nopass
When you run the command above, it will prompt for the CA name. Press enter to use the default value.
sudo cp ./pki/ca.crt /etc/pki/ca-trust/source/anchors/easyrsaca.crt
sudo update-ca-trust
The next step is to create the request for our CA and sign it. After executing the last command, type yes and press enter.
mkdir req
cd req
openssl genrsa -out localhost.key
openssl req -new -key localhost.key -out localhost.req -subj /C=US/L=NewYork/O=FOSS/OU=LocalDevEnvironment/CN=localhost
cd ..
./fossrsa import-req ./req/localhost.req localhost
./fossrsa sign-req server localhost
Next, place all the required files in a common directory and create the pfx cert. After the final command, you will be prompted for a password. Type a strong password, and be sure to remember and keep it secret.
cd ~
mkdir .certs
cp .fossrsa/pki/issued/localhost.crt .certs/localhost.crt
cp .fossrsa/req/localhost.key .certs/localhost.key
cd .certs
openssl pkcs12 -export -out localhost.pfx -inkey localhost.key -in localhost.crt
To complete your setup, edit the ~/.bashrc file and add environment variables as follows.
cat << EOF >> ~/.bashrc
# .NET
export ASPNETCORE_Kestrel__Certificates__Default__Password="YOUR_PASSWORD"
export ASPNETCORE_Kestrel__Certificates__Default__Path="/home/USERNAME/.certs/localhost.pfx"
EOF
Note: Replace YOUR_PASSWORD with your existing password and USERNAME with your actual username.
Now reboot your system for the changes to take effect.
Create a Hello World .NET console application
Now that you have .NET Core installed, it’s only fair to create a simple “Hello World” console application. The dotnet command provides the sample application as a “hello world” application.
Create a project directory and the required code infrastructure. Then, use the following dotnet command with new and console options to create a new console-only application. The -o flag option specifies your project name.
$ dotnet new console -o helloFOSS
The command above will create a working directory called ‘helloFOSS.’
Change into your working directory and look at the generated files.
$ cd helloFOSS
$ ls
helloFOSS.csproj obj Program.cs
The file Program.cs is a C# console app code containing a simple Hello World application. Open it in a VS Code or any favorite text editor to view and edit it. It’s all straightforward.
The Helloworld.csproj file is the MSBuild-compatible project file. In our case, the file has nothing much to it. However, the file is significant when developing a website or web service.
The boilerplate code of a new .NET console app.
using System;
namespace helloFOSS
{
class Program
{
static void Main(string[] args)
{
Console.WriteLine("Hello World!");
}
}
}
You can edit the boilerplate code according to your app requirements.
using System;
namespace helloFOSS
{
class Program
{
static void Main(string[] args)
{
Console.WriteLine("Hello World! Its FOSSLINUX.COM");
Console.WriteLine("FOSSLINUX.COM:Get all information on Free Open Source software!!");
}
}
}
To run the program, use the dotnet run command:
$ dotnet run
Hello World! Its FOSSLINUX.COM
FOSSLINUX.COM::Get all information on Free Open Source software!!
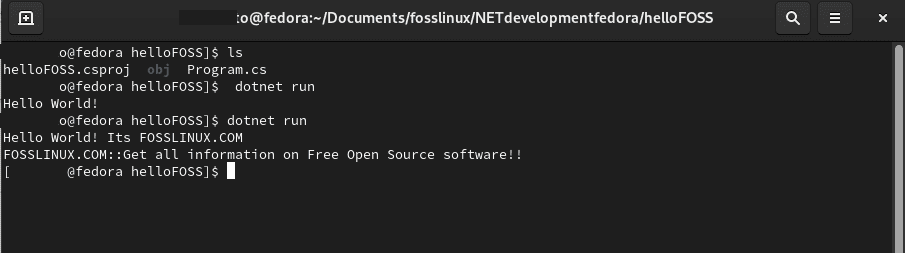
dotnet run
Notes: dotnet run command
- The dotnet run command built the code and ran the newly built code.
- Whenever you invoke dotnet run, it checks if the *.csproj file has been altered before running the dotnet restore command.
- It checks to see if any source code has been altered. If there are new changes, it runs the dotnet build command to build the executable.
- Finally, it will run the executable.
When you create a dotnet application, you create an assembly, a library, and, yes, a DLL file. As such, when you invoke the dotnet run command, the dotnet process invokes your DLL file, and it becomes your application. The DLL you just created is portable and will run on any system with .NET Core installed, whether Linux, macOS, or Windows.
.NET Core templates for websites and web services
The .NET Core templates are essential for C# developers and include C#, F#, and Visual Basic support. You can get a list of templates built into .NET Core using the command dotnet new –list.
Some .NET Core templates are created by third parties and are available with the dotnet new command. You can check out some of these templates to make your development life a little bit easier.
Additional .NET development components
Since you are using Visual Studio Code for C# development, you might have explored some extensions to supercharge your development. A complete development environment requires additional tools for build automation, testing, deployment, and containerization. The list below includes tools you can explore further and have in your arsenal of C# development tools.
Build automation tools: Cake Build
Cake (C# Make) is a cross-platform, C# version of the open-source Make build automation tool. It uses a C# DSL for compiling code, running unit tests, compressing files, copying files, and building packages.
Its key features include support for build tools such as MSBuild, xUnit, MSTest, ILMerge, NUnit, NuGet, WiX, and SignTool. Check out the Cake Build home page for complete documentation and instructions.
Deployment automation
OctopusDocker.DotNet
Octopus is a leader in a deployment automation tool for C#. It makes it possible to automate complex application deployments. Some of its key features include:
- You can quickly provision and configure new machines to deploy your app.
- It integrates with CI servers to extend build automation and CI processes.
- It ensures repeatable, reliable deployments that encourage releases between different environments.
Jenkins
Jenkins is one of the most popular CI server, deployment, and delivery tools. Some of its key features include:
- An extensive collection of extensions to suit most development stacks.
- It provides an end-to-end solution from build to deployment.
- It offers plugins to support building, deployment, and automation.
Containerization: Docker.DotNet
Docker.DotNet is a C# client library for the Docker API. You can use it to interact with the Docker Remote API programmatically. Its key features include:
- You can install it via the NuGet library manager for Visual Studio.
- It enables fully asynchronous, non-blocking, object-oriented code in .NET
Wrapping up
The article is an extensive illustration of setting up a .NET development environment and tools in Fedora 35. Developers use C#, F#, and ASP.NET to create web services, websites, desktop apps, and games. I have also included some essential VS Code extensions and other tools to create a robust .NET development environment.
For C# beginners, you can check the Hello World console app to get you started.
1 comment
Hi there,
thx for your article. I tried it on Fedora 39 and .net 8.0 but it doesn’t work on my machines. If i try to run an asp.net core application under rider it stoppes launching with error => No certificate found. Under VS Code/terminal => dotnet run the asp.net app just uses http. Any hints or suggestions?
Thx in advance and greetings from bavaria!
Tobi