
NodeJS is an open-source JavaScript runtime created on Chrome’s V8 JS engine. It uses a non-blocking lightweight event-driven input-output model that makes it possible for asynchronous programming. It can be referred to as a serverless environment that runs JS-based scripts to build scalable apps.
NodeJS is primarily known for building scalable and fast network apps. Developers know it as a programming language used for websites, event-driven servers, and active backend APIs. Therefore, NodeJS has been termed a “JavaScript everywhere” regime due to its ability to integrate app and web development around a single Programming language.
MongoDB is widely known for its ease of use, scalability, reliability features that give them an edge when varying fields (known as columns in RDBMS).
We shall need the following components to install and connect NodeJS with MongoDB for the guide.
- Ubuntu
- MongoDB
- NodeJS
- MongoDB NodeJS driver
Note: MongoDB supports all NodeJS stable versions. Therefore, we shall be using the latest stable release for this guide.
Installing NodeJS on Ubuntu
NodeJS can be easily installed on Ubuntu by adding the PPA provided by the NodeJS official website. As earlier stated, the NodeJS application is available in several formats, such as the LTS and Current release. It is the developer’s choice to select which version of NodeJS to install. However, for the sake of this tutorial guide, we shall be using the stable (LTS) release. Add the PPA to our Ubuntu system using the command lines below:
sudo apt-get install curl python-software-properties
curl -sL https://deb.nodesource.com/setup_12.x | sudo -E bash –
Alternatively, you can use the apt-get command and see if it works out for you. To do so, run the commands below:
sudo apt update
sudo apt install nodejs
Output: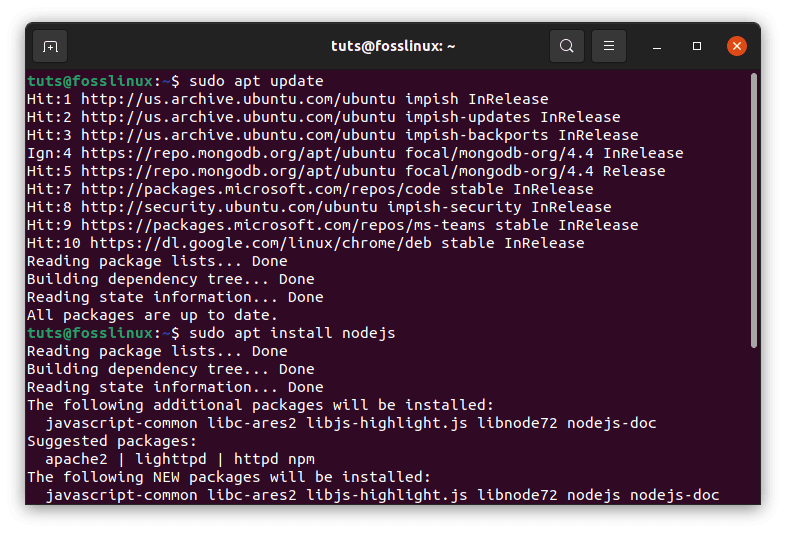
Note: The apt-get command will install NPM alongside NodeJS.This is the default package manager for NodeJS. NPM is an abbreviation for Node Package Manager. It contains an npm registry, an online DB for public and paid-for packages, and a command-line client referred to as npm.
Also, if you don’t have the curl application installed on your Ubuntu OS, execute the command line below:
sudo apt-get install curl
Output: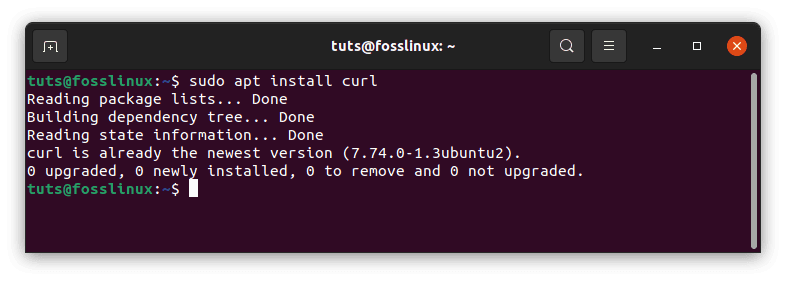
After successfully adding the NodeJS PPA to your system, proceed and execute the commands below to install NodeJS on Ubuntu.
sudo apt-get install nodejs
Be patient until the command above fully executes, then check if the command has been installed by running the command below:
node -v
Output: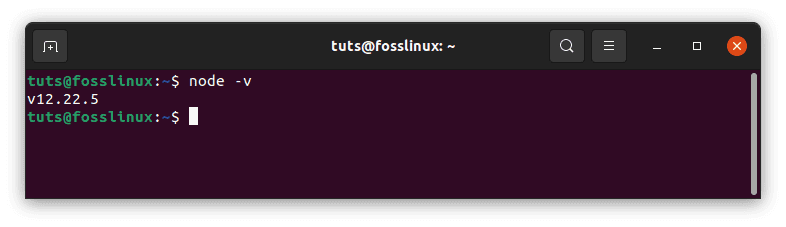
Check the npm version by executing the command below:
npm -v
Output: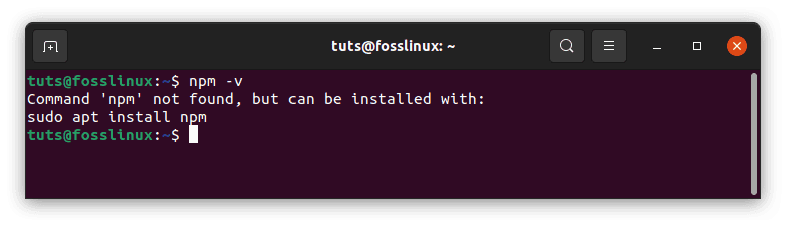
If you found an output similar to mine, it means npm has not been installed on your Ubuntu OS. Therefore, to install it run the command below:
sudo apt install npm
Output: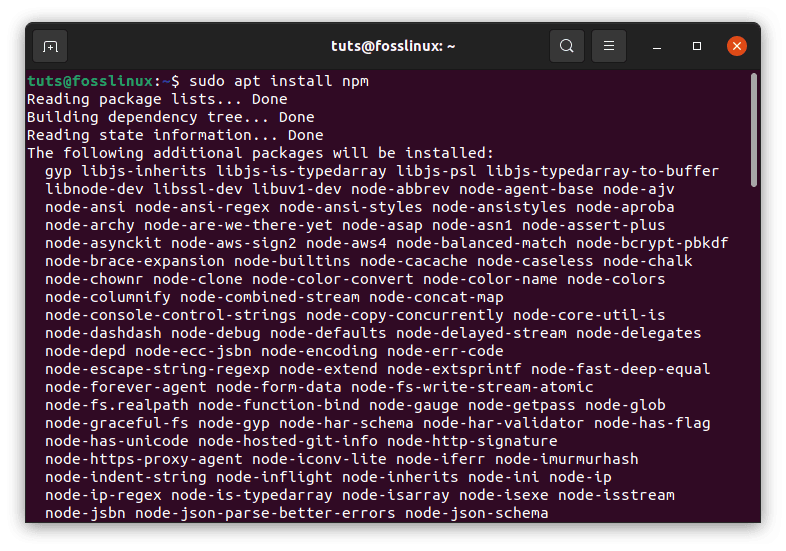
After installing npm, check its version by running the command-line below:
npm -v
Output: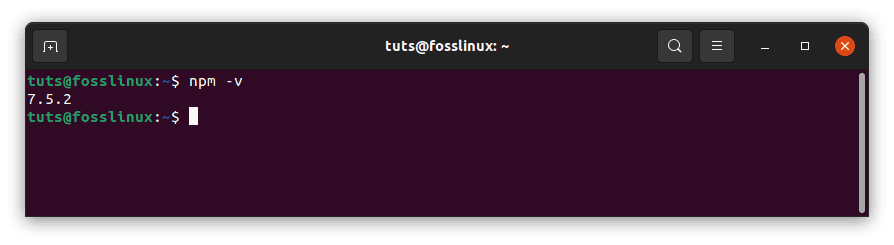
Let us test the NodeJS application we recently installed by creating a test “Hello Foss” text. Create a file and name it “fosslinux.js” and input the code below in it: You can use your favorite text editor. For instance, I am using Sublime text editor for this guide. To install sublime text editor on Ubuntu, run the commands below:
wget -qO - https://download.sublimetext.com/sublimehq-pub.gpg | sudo apt-key add -

sudo apt-get install apt-transport-https echo "deb https://download.sublimetext.com/ apt/stable/" | sudo tee /etc/apt/sources.list.d/sublime-text.list

sudo apt-get update

sudo apt-get install sublime-text
Output: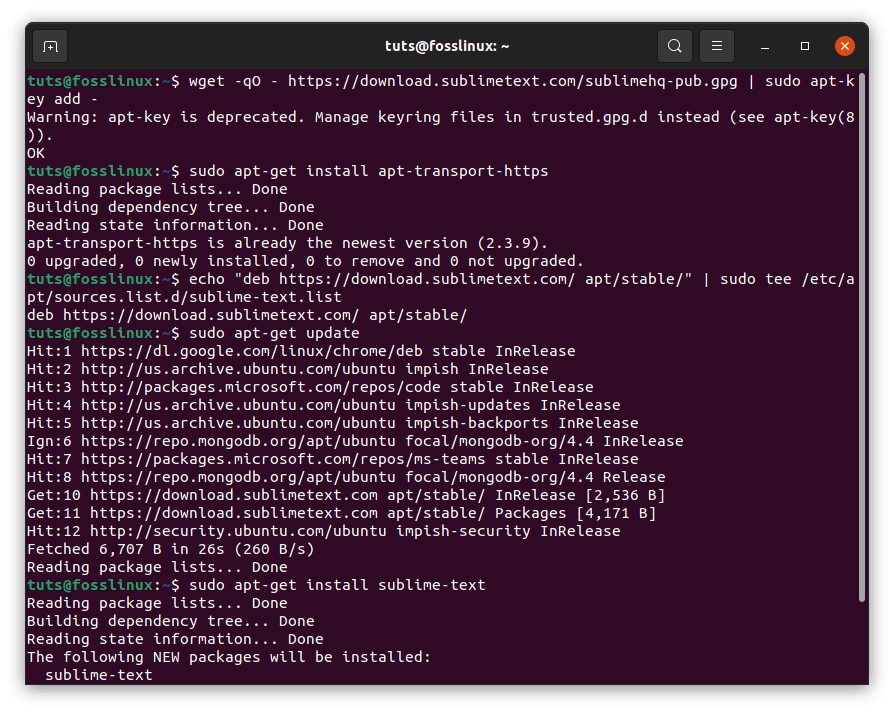
Install Sublime Text:
var http = require(‘http’);
http.createServer(function (req, res) {
res.writeHead(200, {‘Content-Type’: ‘text/plain’});
res.end(‘Hello Foss\n’);
}).listen(4000, “127.0.0.1”);
console.log(‘Server running at ‘)
Output: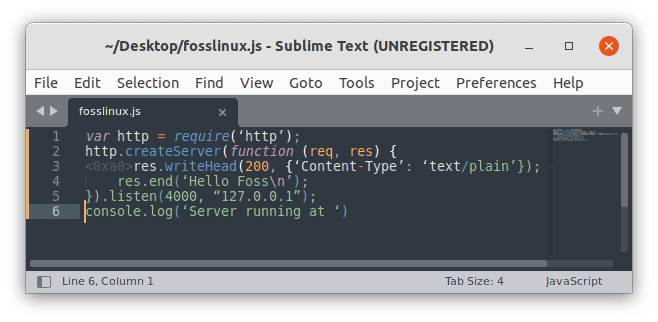
The code above will create a Hello Foss text. That shows us that NodeJS has been successfully installed on our Ubuntu OS. Now let us learn how to install MongoDB on Ubuntu.
Installing MongoDB on Ubuntu
MongoDB is a NoSQL DB that offers high availability, automatic scaling, and scalability of high-level enterprise databases. To connect NodeJS with MongoDB, we need to install MongoDB on our Ubuntu OS. Refer to our detailed guide on installing and configuring MongoDB on Ubuntu.
First, to ensure consistency and authenticity of the package we are yet to install on our Ubuntu OS, we must use the GPG keys.
Run the command below to import the GPG keys to your server:
sudo apt-key adv –keyserver hkp://keyserver.ubuntu.com:80 –recv 68818C72E52529D4
Output: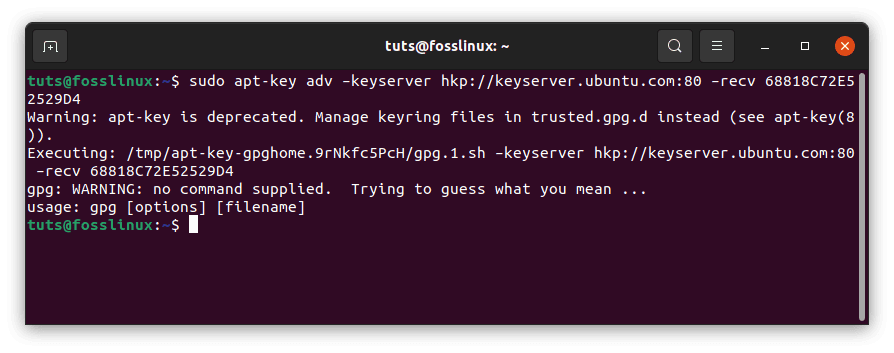
Now create a sources list for the MongoDB package using the code below:
sudo echo “deb http://repo.mongodb.org/apt/ubuntu bionic/mongodb-org/4.0 multiverse” | sudo tee /etc/apt/sources.list.d/mongodb-org-4.0.list
Output: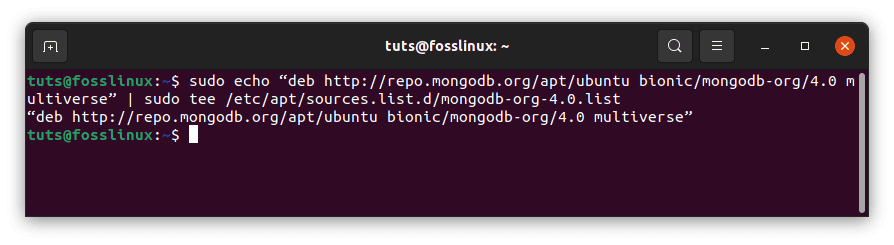
Update the repos using the apt-get command as illustrated below:
sudo apt-get update
Output: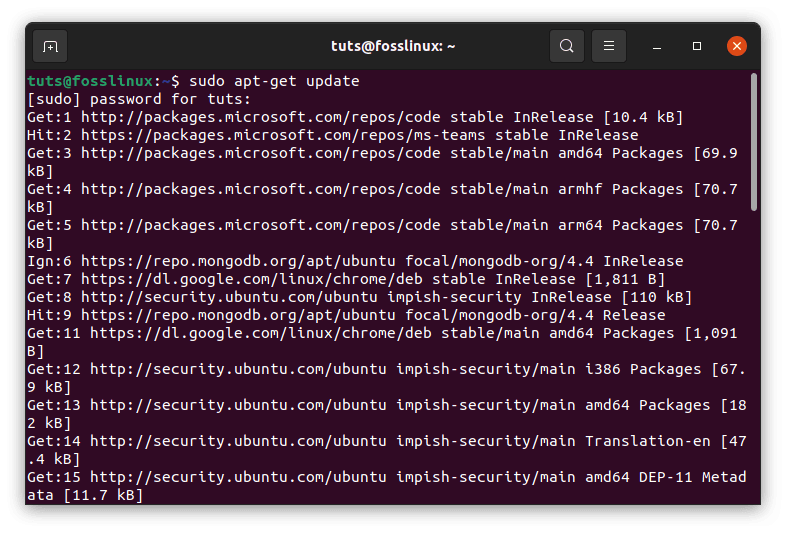
Install MongoDB on your Ubuntu OS by executing this command:
sudo apt-get install -y mongodb-org
Output: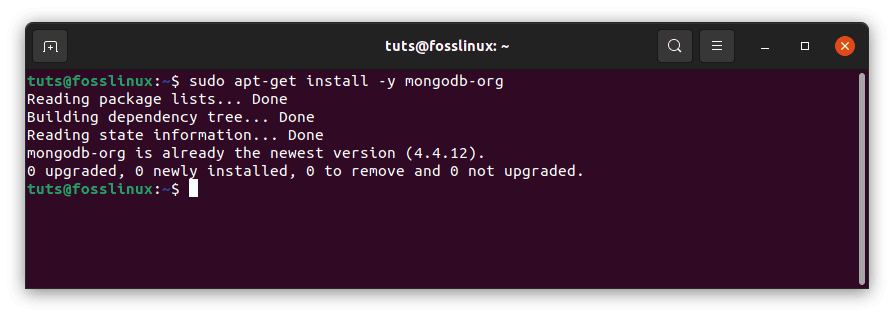
Start MongoDB and enable it as a service so that whenever you boot your Ubuntu OS, the MongoDB server opens:
sudo systemctl start mongod
sudo systemctl enable mongod
sudo systemctl stop mongod
Output: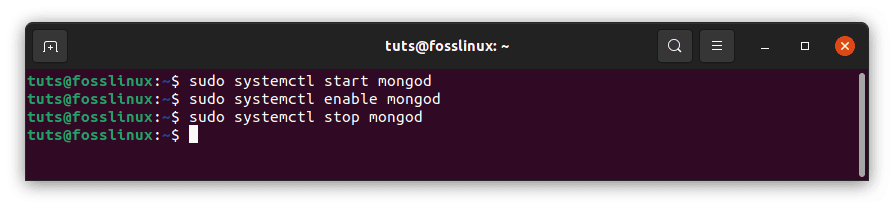
Start, enable and stop MongoDBNote: If you find output similar to the one shown here: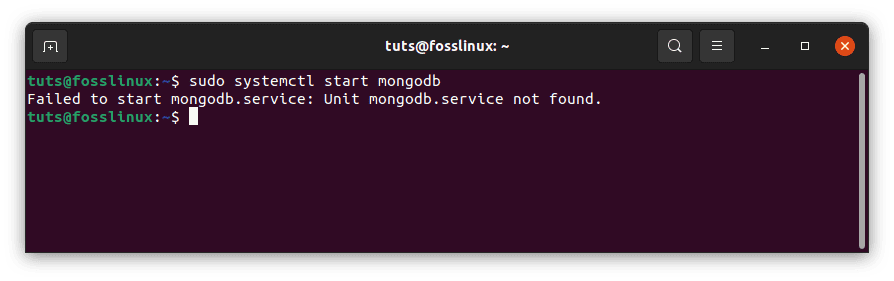
It is an indicator that MongoDB is masked, and you need to unmask it by running the command line below:
sudo systemctl unmask mongod
Output: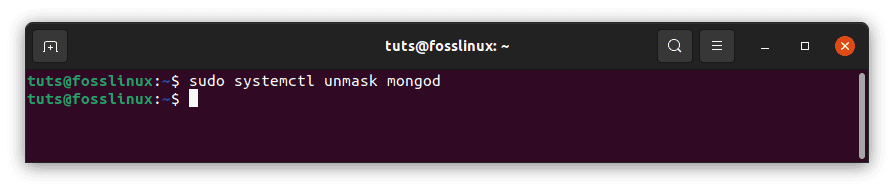
After unmasking MongoDB, you can rerun the start MongoDB command as illustrated herein:
sudo service mongod start
Output: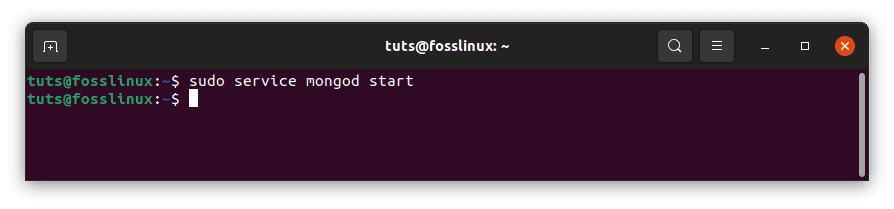
Check if the MongoDB application has been successfully installed into your OS:
mongod --version
Output: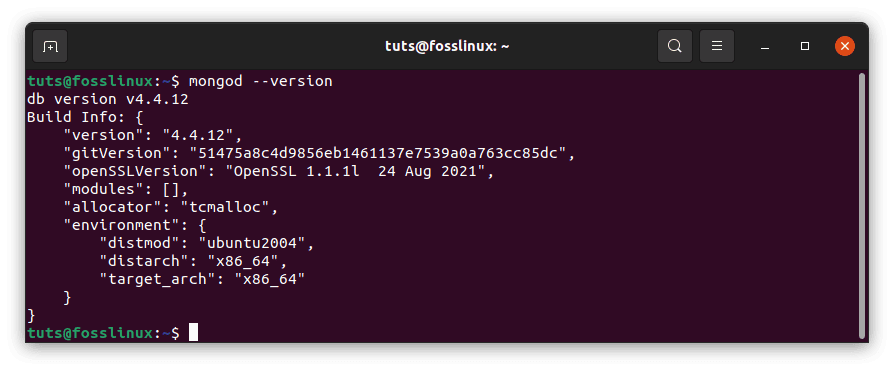
Note: If you cannot follow the guides provided in this article guide, check out the linked article as it contains in-depth guides and insights on the said subject matter. Once you have MongoDB installed on your PC, continue reading this article guide to learn how to connect NodeJS with MongoDB.
Connecting NodeJS with MongoDB
To connect MongoDB with NodeJS, we will require the MongoDB driver for NodeJS. Install the official driver for npm using the code syntax below. Ensure you run this command inside your application:
npm install -P mongodb
Output:
Once the driver has been successfully installed in your application directory, we are ready to connect MongoDB to NodeJS. To start, we need to create a file that contains the connection logic. We shall name the file “foss.js” and add the following code:
var MongoClient = require('mongodb').MongoClient;

var database = undefined;

var dbUrl = 'mongodb://127.0.0.1:27017/security';

MongoClient.connect(dbUrl, function(err, db) {

  if (err) {

    throw err;

  } else {

    database = db;

    console.log('MongoDB connection successful');

}

});
Output: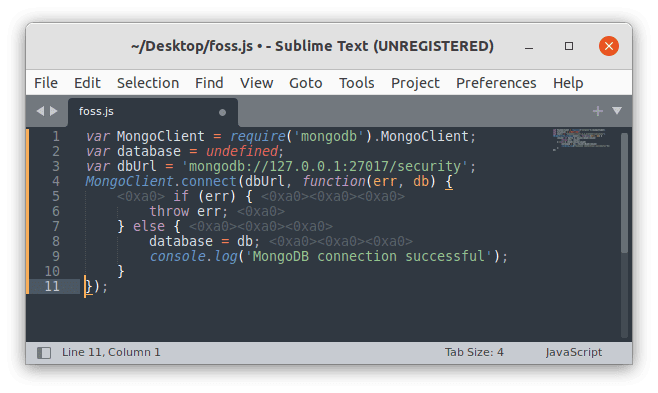
A “connect” method exposes the MongoClient object that returns the database object in a callback. The code syntax is as shown below:
connect(url, options, callback)
Note: The first argument contains a URL string with the syntax below:
mongodb://[username:password@]host1[:port1][,host2[:port2],...[,hostN[:portN]]][/[database][?options]]
The second argument includes an object literal which specifies settings such as poolSize and autoReconnect.
The third argument contains a callback function that provides connection failures and database objects errors in case of successful responses.
Enter and execute the command below on your application directory:
node db_connect.js
The console will resemble the one shown in the output whenever the connection is successful:
MongoDB Connection Successful
Once you get that output, it indicates that the security database has been successfully connected. Insert the data below into a new collection known as users. Modify the db_connect.js as illustrated herein:
var MongoClient = require('mongodb').MongoClient;

var database = undefined;

var dbUrl = 'mongodb://127.0.0.1:27017/security';

MongoClient.connect(dbUrl, function(err, db) {

  if (err) {

    throw err;

  } else {

    database = db;

    console.log('MongoDB connection successful');

    var testUser = {

      name: 'Suraj Poddar'

    };

    var users = db.collection('users'); \

    users.insert(testUser, function(err, docs) {

      if (err) {

        throw err;

      } else {

        console.log(docs);

      }

    });

  }

});
If the NodeJS with MongoDB has been connected, the output will be similar to the one shown below:
MongoDB connection successful

{ result: { ok: 1, n: 1 },

  ops: [ { name: 'Suraj Poddar', _id: 59ad4719eb794f64c84e7ba6 } ],

  insertedCount: 1,

  insertedIds: [ 59ad4719eb794f64c84e7ba6 ] }
The output above indicates that we have connected the NodeJS with MongoDB successfully.