
When installing any operating system, it is always set to receive network configuration from the DHCP (Dynamic Host Configuration Protocol) server. That includes IP address, routing, subnet, Gateway address, DNS information, and other network configurations. While that is always ok and enough to give you access to the internet, there are situations where a static IP address would be much more preferred. The main challenge with using the DHCP to assign IP addresses is that the IP is dynamic and might change.
To better understand the difference between Static and dynamic examples, let’s use a simple example. You have WiFi at your house, but you decide to go to a coffee shop with your laptop and use the internet there. When you come back to your home, there is a high probability that the DHCP will assign you a different IP address.
Why use a static IP
Some of the advantages of using a static IP include;
- It’s much easier to set up and manage DNS
- Reliable hosting services: Let’s say you are hosting a web server, game server, email server, or file server. Using a static IP will make it easier for clients to find you on a local network.
- Reliable Remote access: A static IP address would be more reliable if you connect to your system via SSH or a VPN.
- Reliable communication: Static Ip addressing ake it easier to configure VoIP (Voice Over Internet Protocol) and any other Video or Voice communication over IP.
- Reliable geo-location services: With static IPs, you will get much more accurate geo-location services than a dynamic IP. For example, if you want to know the weather status in your location, you are sure you won’t get weather information from another city.
Setting up a static IP on Debian 11
This post will guide you on setting up a static IP on Debian 11. There are two main methods that we can utilize.
- Set up static IP via the Terminal
- Set up static IP from the GUI
We will look at both methods. Let’s get started.
(Method 1) Set up static IP via the terminal
Before configuring our static IP address, we need to know the network interfaces we are connected to. There are several commands that we can use to achieve that. One of the most popular commands to list network interfaces on Linux is the ifconfig command. Unfortunately, this command is now deprecated and doesn’t come pre-installed on most systems.
The other command to list network interfaces is the IP command. Execute the command below on your Terminal.
ip a s
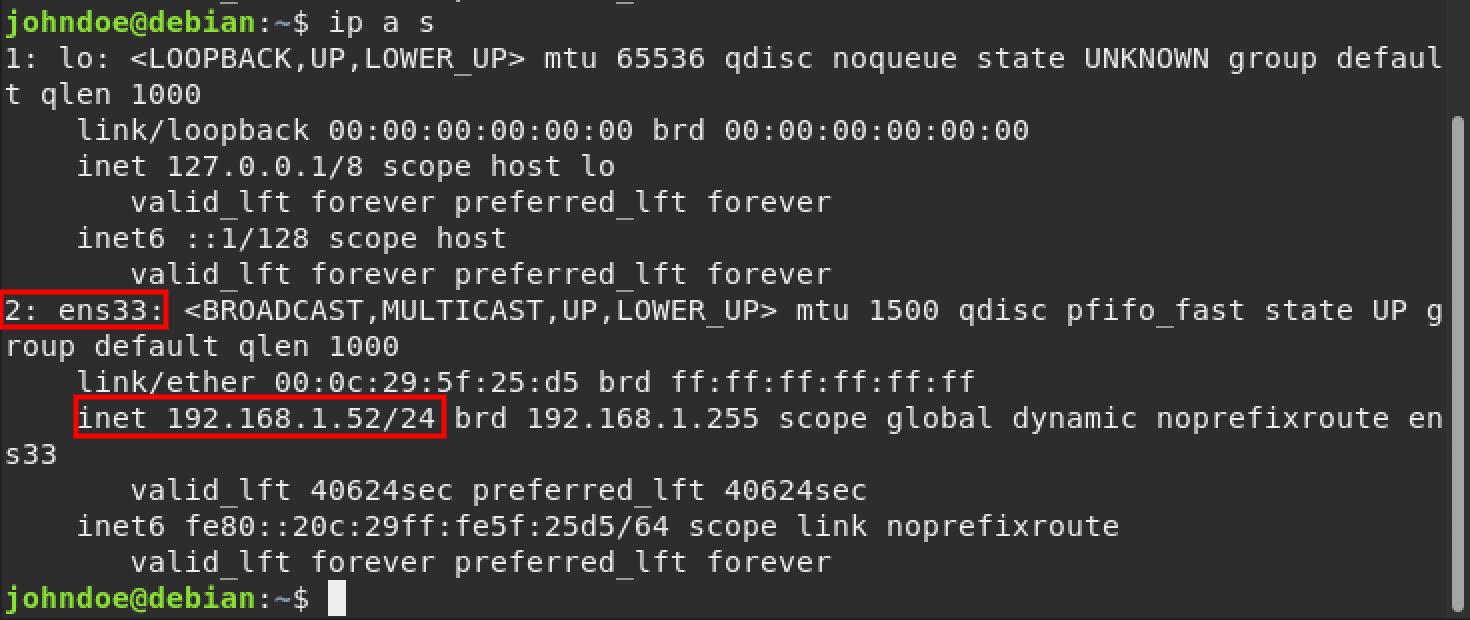
List network interfaces
From the image above, you can see we are connected to the network interface ens33 and the currently assigned IP address is 192.168.1.52.
With that information, we can now set our static IP address. Execute the command below to open the /etc/network/interfaces configuration file with nano editor.
sudo nano /etc/network/interfaces
If you have not done any configurations before, the file will look as shown below.
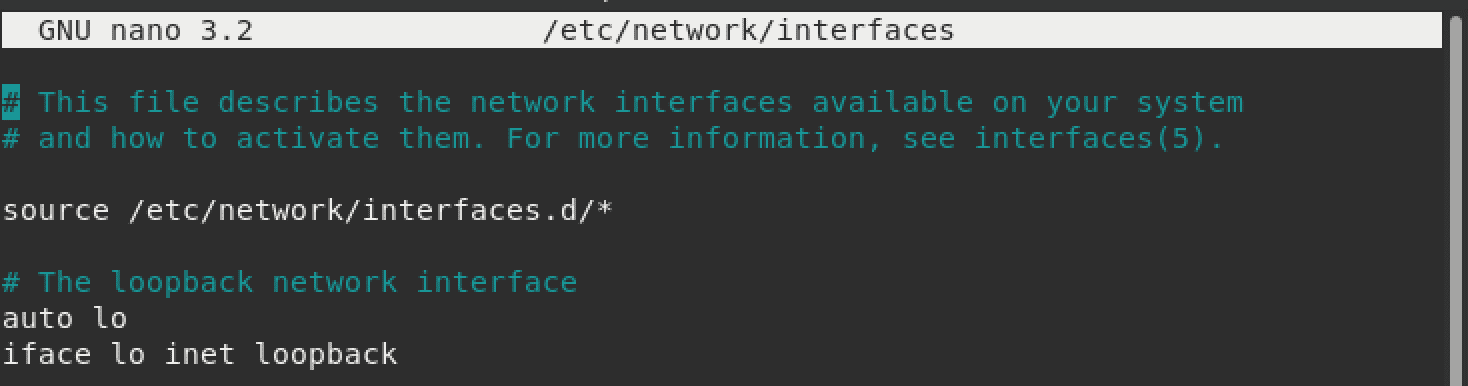
configure interfaces
To set a static IP, add lines below at the end of the file.
auto ens33
iface ens33 inet static
address 192.168.1.52
netmask 255.255.255.0
gateway 192.168.1.21
dns-nameservers 8.8.4.4 8.8.8.8
Now let’s go through the line above:
auto ens33: Here, we specify that we want to use the ens33 network interface.iface ens33 inet static: This line specifies that we want to set a static IP address for our network interface.address: Here, we set the static IP address that we want to assign to our network interface.netmask: Here, enter the subnet maskgateway: Here, type the gateway address. If you are unsure, use the IP route command to list the gateway address.dns-nameservers: Enter your name servers here. For this post, we will use the default Google name servers.
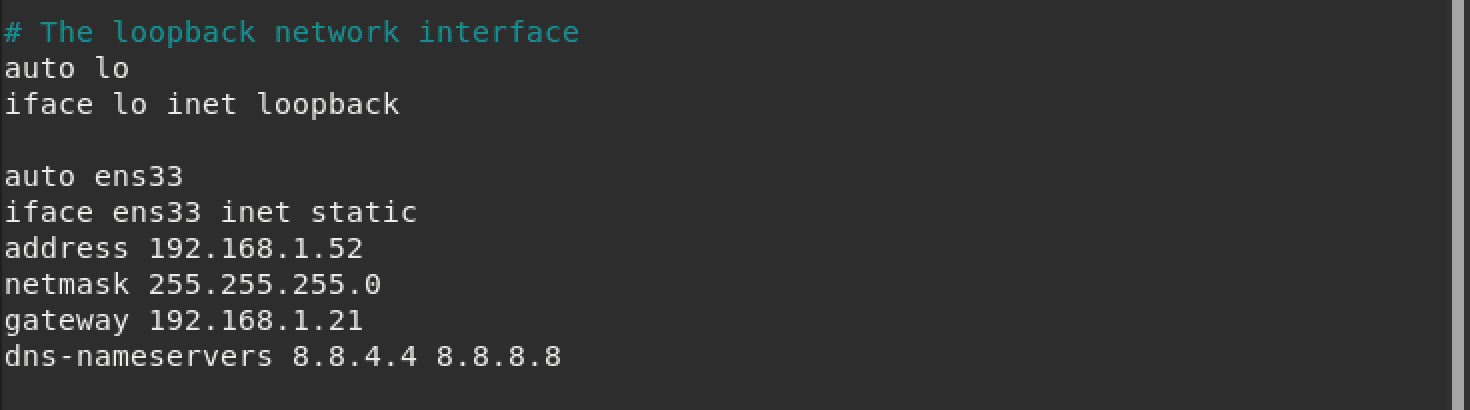
Static IP configuration
Save the file (Ctrl + S) and Exit (Ctrl + X) when done.
To apply the configurations, we will need to restart the networking service. Execute the command below.
sudo systemctl restart NetworkManager
That’s it! You have successfully set a static IP address for your Debian 11 system. Now, when you reboot your system or travel and come back and connect to your WiFi network, the IP address will not change dynamically.
(Method 2) Set up static IP from the GUI
If you are not a command-line person, GNOME (the default Desktop Environment for the Debian system) has provided you with a simple and intuitive interface to configure a static IP address.
First, launch the Settings app from the applications menu and select the ‘Network’ option from the left-hand side panel.
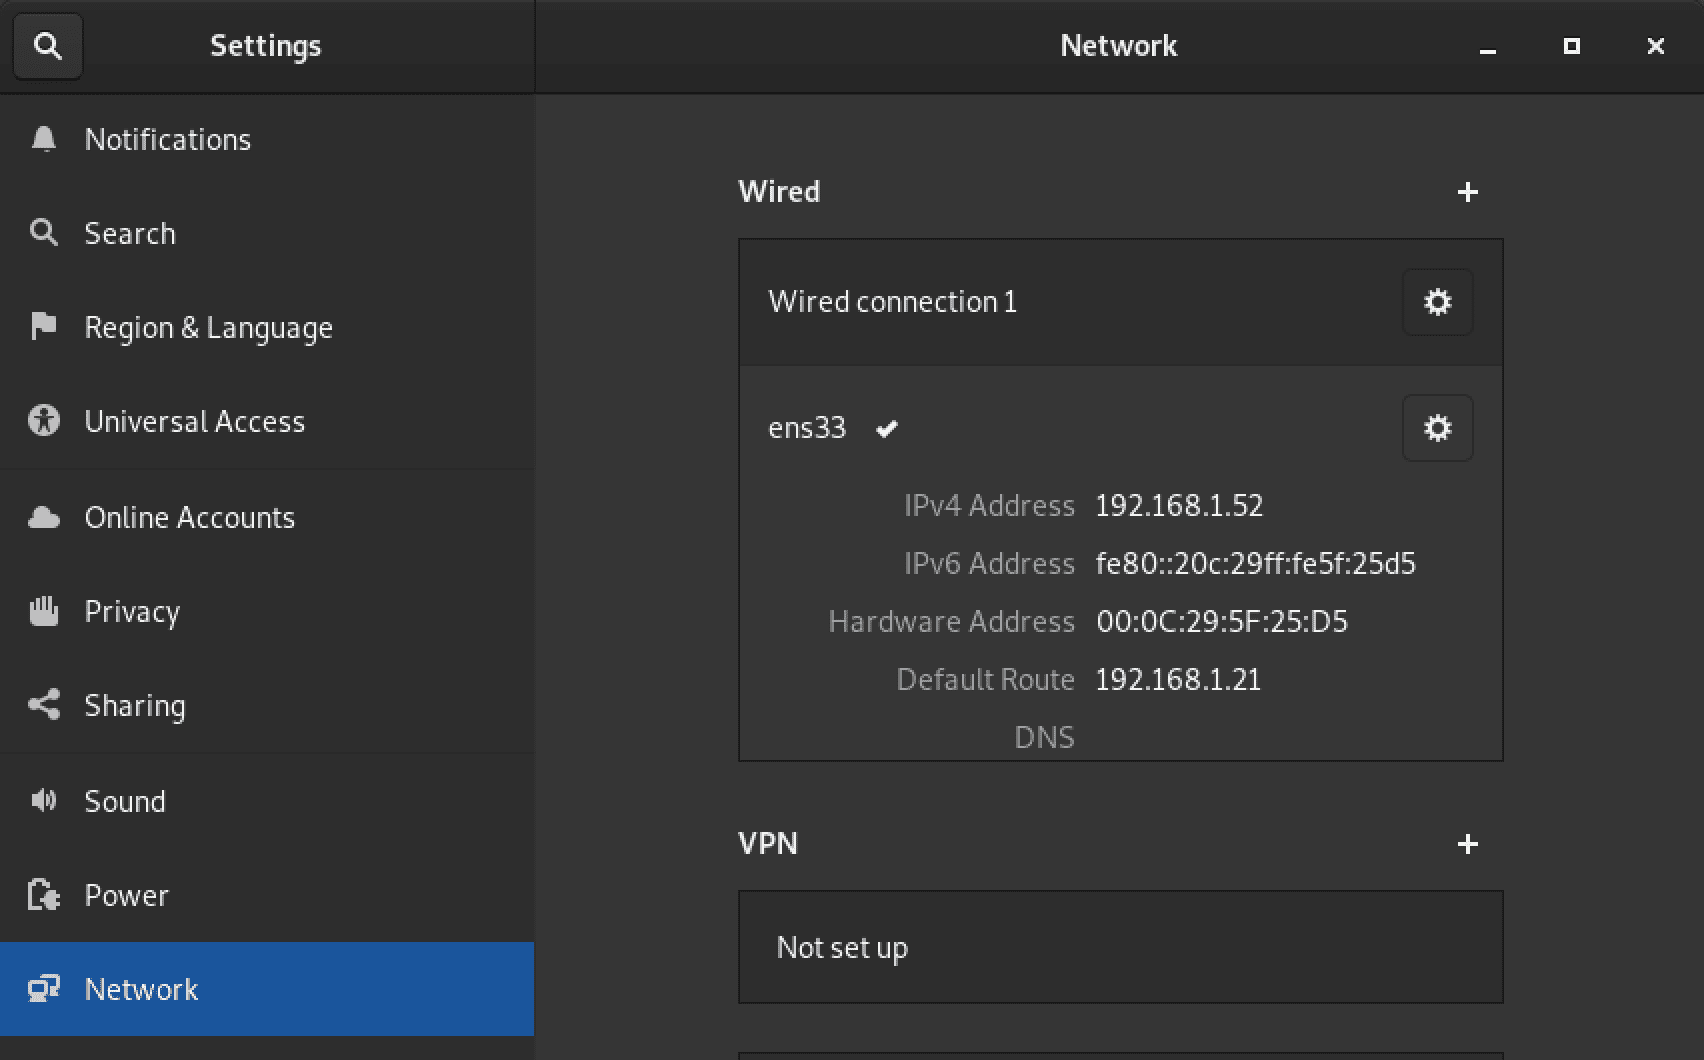
Network Settings
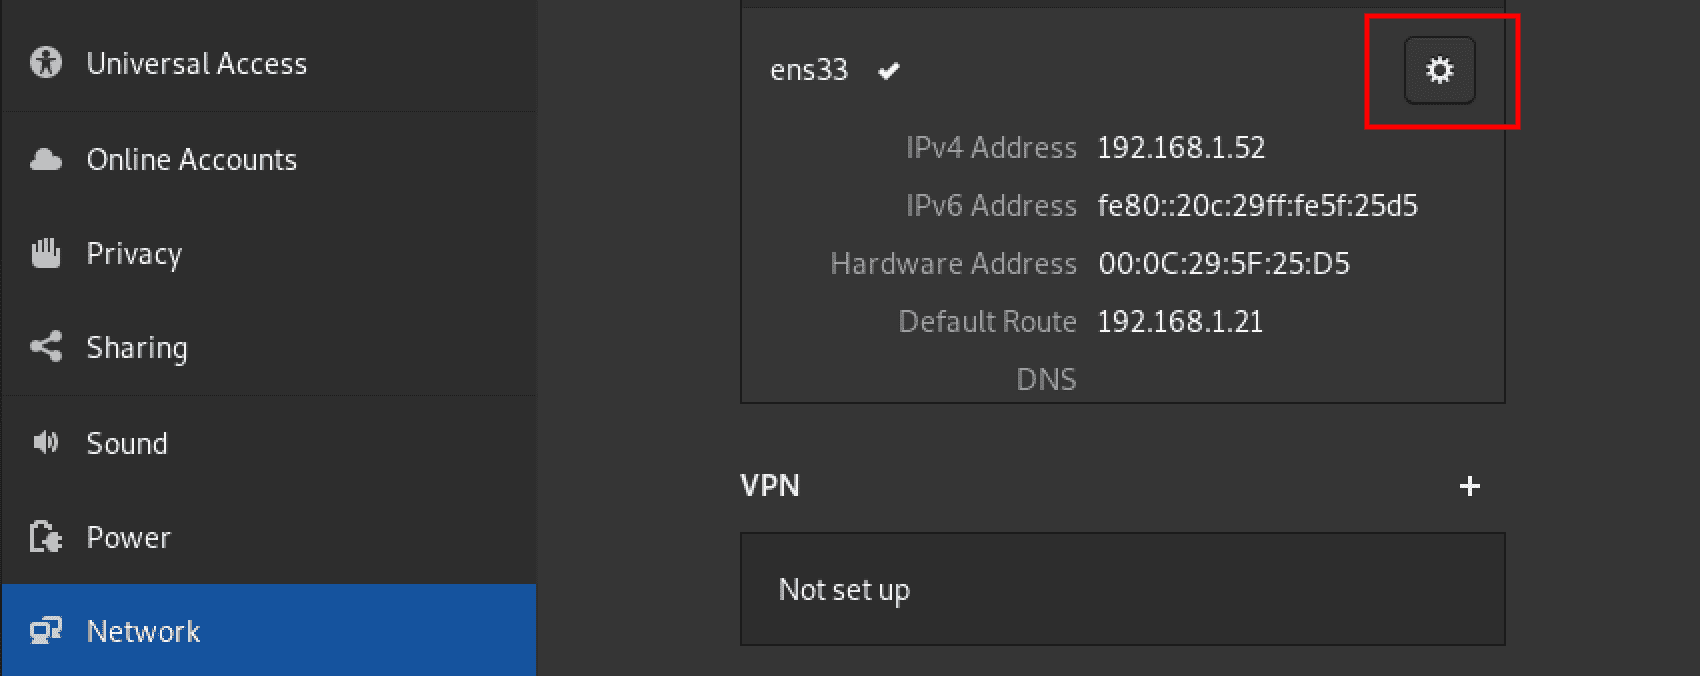
You can see the network interface you are connected to and the necessary network information from this screen. In our case, we are connected to the ens33 network interface.
To set a static IP address, click on the Settings icon (gear icon) next to the network interface you want to set the static IP address.
Network interface settings
That will open a configuration window where you can perform several network settings. Select the IPv4 tab and in the IPv4 method section, enable the “manual” radio button. A section will appear below where you must fill in the IP address, subnet mask, and Gateway address.
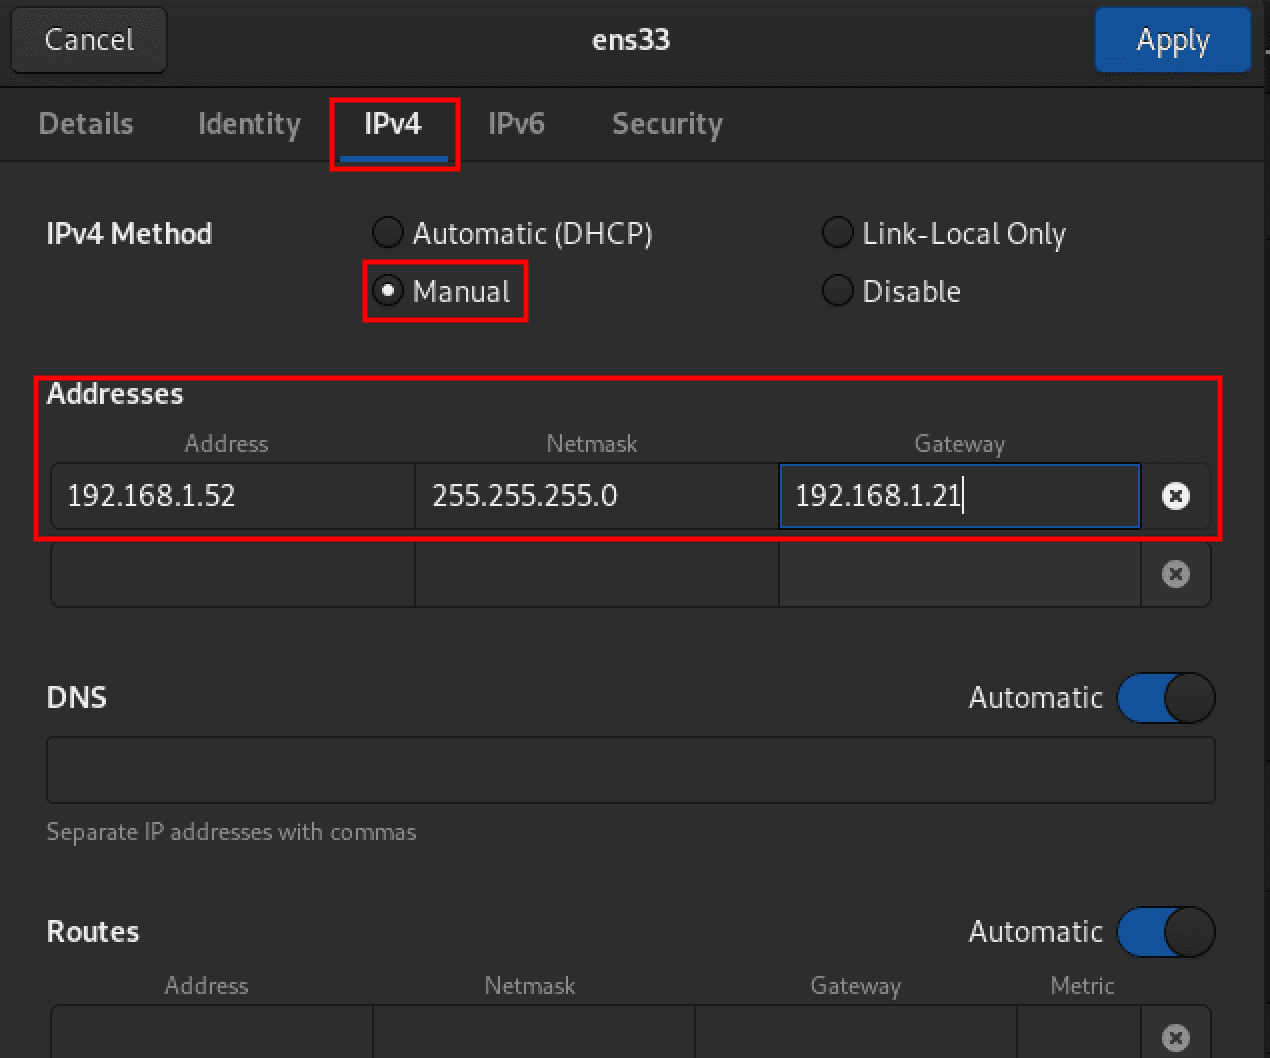
Network configurations
Leave the DNS and Routes set as automatic. But if you still want to use your DNS settings and Routes, click on the button next to the ‘Automatic’ tag to enable ‘manual’ mode.
Click the ‘Apply’ button at the top to save the new configurations. To confirm that your static IP address was set successfully, click on the Settings icon next to the network interface and check the ‘details’ section.
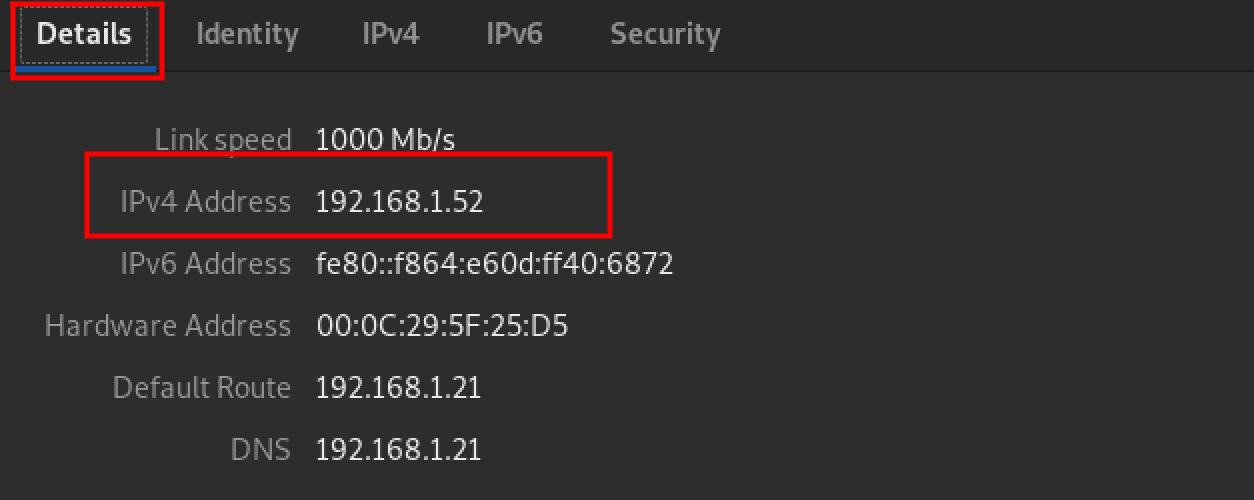
Confirm configurations
That’s it! You have successfully enabled a static IP address from the Graphical User Interface.
Conclusion
This post has given you a step-by-step guide on setting up a static IP address on the Debian 11. We have looked at two methods – setting a static IP via the command line and setting a static IP from the Graphical User Interface. We have also looked at the advantages of using a static IP address and the various scenarios best if you used a static IP. We hope you found this article helpful. If you have any queries or comments, please don’t hesitate to leave a comment below.
1 comment
Thanks. On Raspberry Pi this can be done by adding:
ip=192.168.x.xxx
to a file in the boot directory that you name:
cmdline.txt
Are you aware of any similar method that can do this on Debian?