
SSH is an abbreviation for Secure Shell or sometimes its called Secure Socket Shell which is a network protocol that is used to establish a secure connection between client and server. It can allow users especially system administrators to access computers remotely through a secure channel on the top of an unsecured network.
The tool supplies users with powerful encryption and authentication methods to communicate data between computers that are connecting over an unsecured network.
SSH is commonly used by system administrators for connecting to remote machines, execute commands/scripts, handle the administrative tasks, securely transfer files from one machine to another and overall manage systems and applications remotely.
Also, you can use it function as or act as a proxy server and redirect your browsing traffic to an encrypted SSH tunnel. This will prevent users on public networks from seeing your browsing history.
In this article, we will help you installing SSH on Ubuntu and show you how to use it to connect remotely to other computers.
Enable SSH in Ubuntu
By default, the tool is not installed in Ubuntu but you can easily install it from the primary Ubuntu repositories.
Step 1. First, open Terminal and ensure your system is updated using the following command.
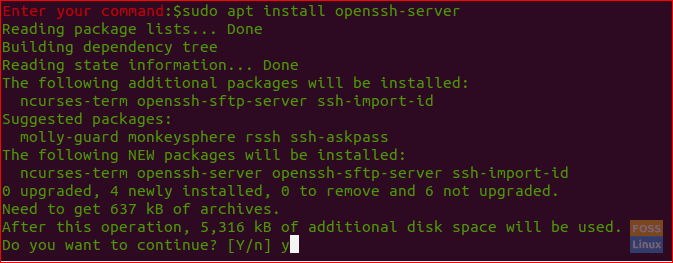
sudo apt updateStep 2. Enter the following command.
sudo apt install openssh-serverYou will be asked to enter the sudo password. After entering the password, press Y to continue downloading and installing the SSH package.
Step 3. Check the SSH service status using the following command.
sudo systemctl status sshUsually, when the installation completes successfully you will find the SSH service will be started automatically. The output of the previous command will be something like that:

For now, we have installed SSH and its service is up and running on your machine. You can connect to it from any other remote machine that has SSH client installed. For Windows machines, you can use Putty. By default, the client is installed on Linux and macOS machines.
Connect to SSH via LAN
Now you can connect to your Ubuntu machine through LAN by following the below steps.
Step 1. First, you need to know your Ubuntu machine IP.
ip aThe output of the previous command will be something like that:
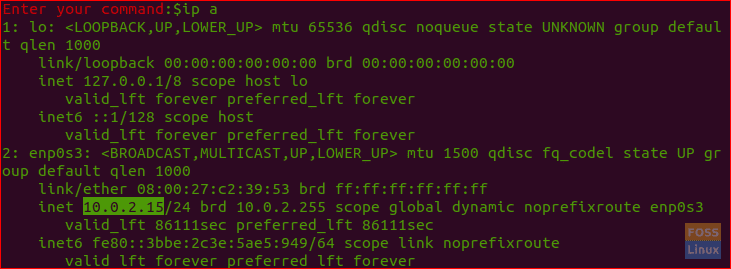
As you can see the IP is 10.0.2.15.
Step 2. From the remote machine use the following command to connect to your machine.
ssh username@ip-addressWhere theusername is the username and theip-address is the IP of your machine.
So in our example, it will be :
ssh hendadel@10.0.2.15For the first time when you are trying to connect to SSH, you will get a warning message like below:

Simply you can enter “yes” to continue, you will be asked to enter your password.
Once you have entered the password you will find a welcome screen like below:
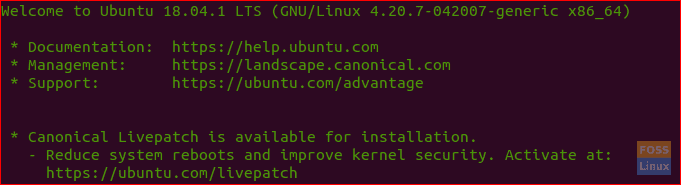
And voila you are now logged in to your Ubuntu machine!
Step 3. To close the the session you can use the following command:
exitConnect to SSH via the Internet
Before connecting to your machine via the internet, you will need to know the machine’s public IP. You can use the following URL “https://ifconfig.co/ip” to get your machine public IP which is the machine you are trying to connect to it through SSH.
Next, you need to configure your router to accept requests on port 22. Be cautious while setting this option as you may set your machine to a high-security risk. So, it’s highly recommended not to use the default port 22. Instead, you can make a simple turn around by configuring your router to accept SSH requests on a non-default port and to send or forward those requests to port 22 on the machine that has the service enabled. You should check your router’s documentation to enable port forwarding as each router has his own style for implementation.
Finally, you can use the below command to connect to your machine:
ssh username@public-ip-addressWhereusername is the username andpublic-ip-address is the IP of the machine you need to SSH it.
Disable SSH Service
In case you need to stop the SSH service on your Ubuntu machine you can use the following command.
sudo systemctl stop sshAlternatively to start the service again.
sudo systemctl start sshOr if you need to disable the service from starting during system boot you can use the next command.
sudo systemctl disable sshAlso to enable it again use the next command.
sudo systemctl enable sshFinally, I hope you will find this tutorial helpful to you and for any further questions leave a comment below.